(Lime Forensics: Lesson 1)
{ Capture Image From Metasploitable VM (Ubuntu 8.04) }
| Section 0. Background Information |
- Lime Forensics
- LiME (formerly DMD) is a Loadable Kernel Module (LKM), which allows the acquisition of volatile memory from Linux and Linux-based devices, such as those powered by Android. The tool supports acquiring memory either to the file system of the device or over the network. LiME is unique in that it is the first tool that allows full memory captures from Android devices. It also minimizes its interaction between user and kernel space processes during acquisition, which allows it to produce memory captures that are more forensically sound than those of other tools designed for Linux memory acquisition.
- http://code.google.com/p/lime-forensics/
- Metasploitable
- Metasploitable is an intentionally vulnerable Linux virtual machine.
- This VM can be used to conduct security training, test security tools, and practice common penetration testing techniques.
- http://www.offensive-security.com/metasploit-unleashed/Metasploitable
- Pre-Requisite Lab
- Caveats?
- ADB is android tool, which allows a person to dump a line image through a TCP connection.
- Unfortunately, I have not figured out how to use the "path=tcp:4444" option with Netcat for the Linux environment.
-
Lab Notes
- In this lab we will do the following:
- Prepare build the kernel source for the Ubuntu 8.04 VM.
- Download Lime Forensics.
- Compile Lime Forensics.
- Capture an Ubuntu 8.04 image using Lime Forensics
- In this lab we will do the following:
- Legal Disclaimer
- As a condition of your use of this Web site, you warrant to computersecuritystudent.com that you will not use this Web site for any purpose that is unlawful or that is prohibited by these terms, conditions, and notices.
- In accordance with UCC § 2-316, this product is provided with "no warranties, either express or implied." The information contained is provided "as-is", with "no guarantee of merchantability."
- In addition, this is a teaching website that does not condone malicious behavior of any kind.
- Your are on notice, that continuing and/or using this lab outside your "own" test environment is considered malicious and is against the law.
- © 2013 No content replication of any kind is allowed without express written permission.
| Section 1. Start Up the Metasploitable VM |
- Start Up VMWare Player
- Instructions:
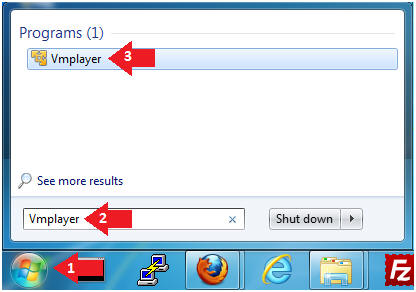
- Click the Start Button
- Type Vmplayer in the search box
- Click on Vmplayer
- Instructions:
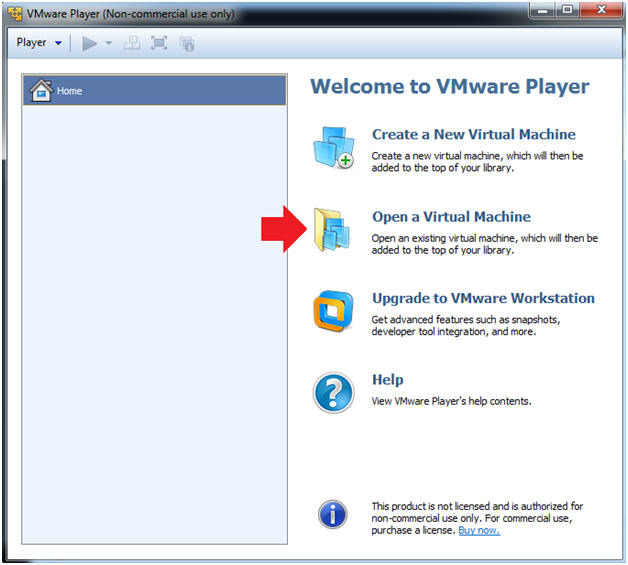
- Open a Virtual Machine
- Instructions:
- Click on Open a Virtual Machine
- Instructions:
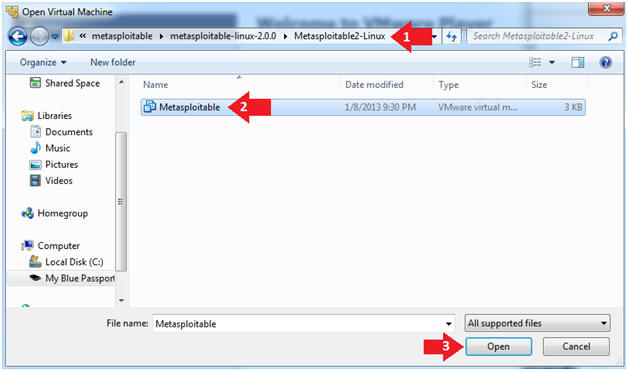
- Open the Metasploitable VM
- Instructions:
- Navigate to where the Metasploitable VM is located
- Click on on the Metasploitable VM
- Click on the Open Button
- Instructions:
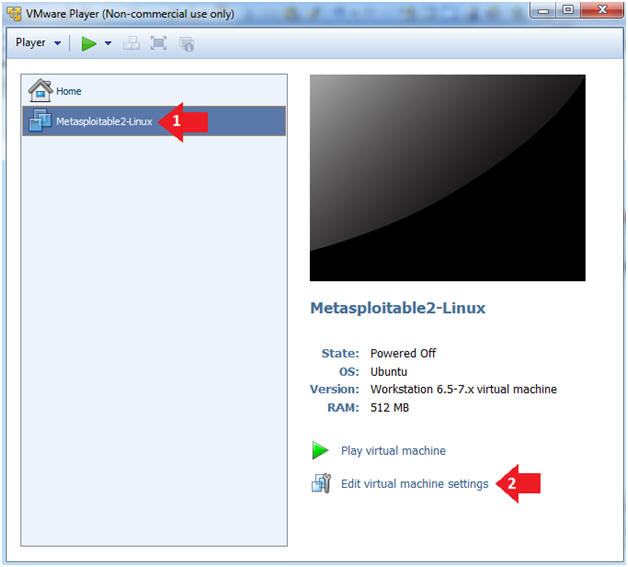
- Edit the Metasploitable VM
- Instructions:
- Select Metasploitable2-Linux VM
- Click Edit virtual machine settings
- Instructions:
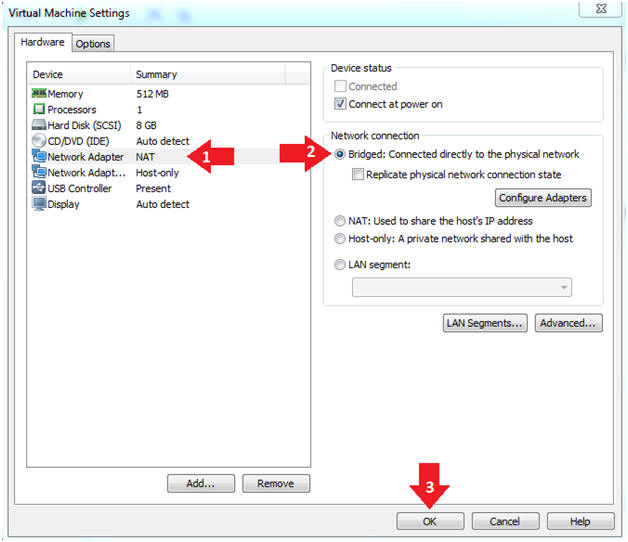
- Edit the Metasploitable VM
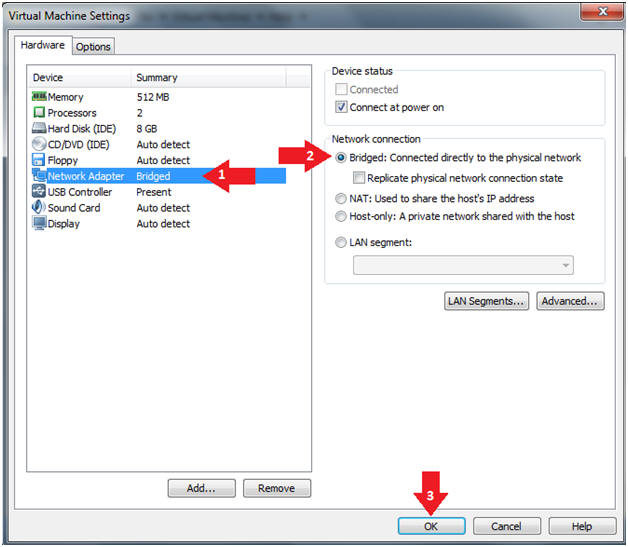
- Instructions:
- Click on "Network Adapter NAT"
- Select the radio button "Bridged: Connected directly to the physical network"
- Click on the OK button
- Warning:
- By changing from NAT to Bridged opens the VM and network up to potential attacks.
- To maintain a safe network, you could (1) skip this section and only use the host-only network, (2) unplug your router from the internet, (3) use an ACL to not allow traffic into your network, etc.
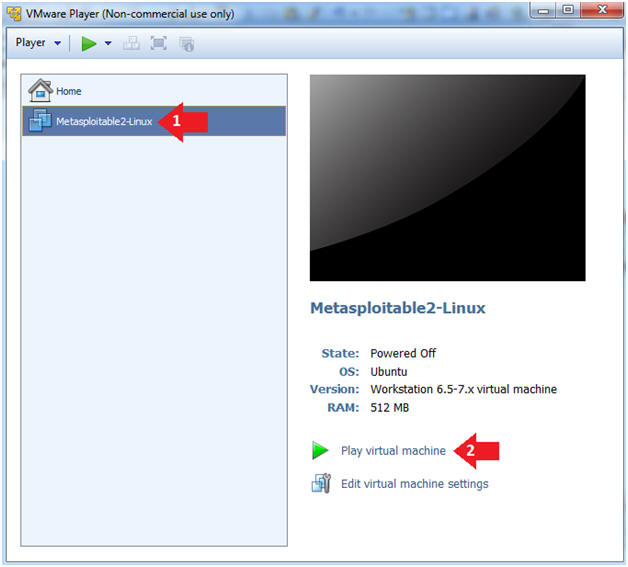
- Instructions:
- Play the Metasploitable VM
- Instructions:
- Click on the Metasploitable VM
- Click on Play virtual machine
- Instructions:
| Section 2. Determine Metasploitable IP Address |
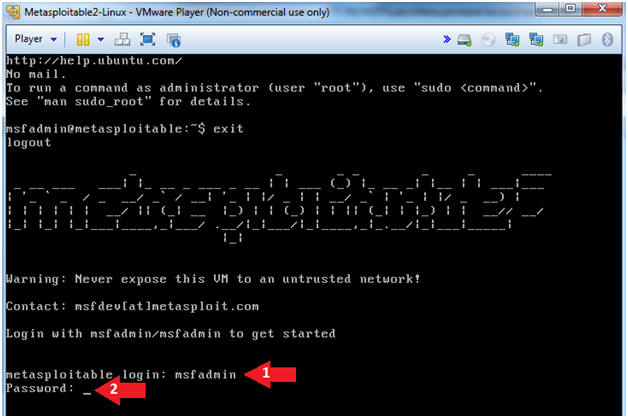
- Logging into Metasploitable
- Instructions
- Username: msfadmin
- Password: msfadmin or whatever you changed it to in lesson 1.
- Instructions
- Change the msfadmin password
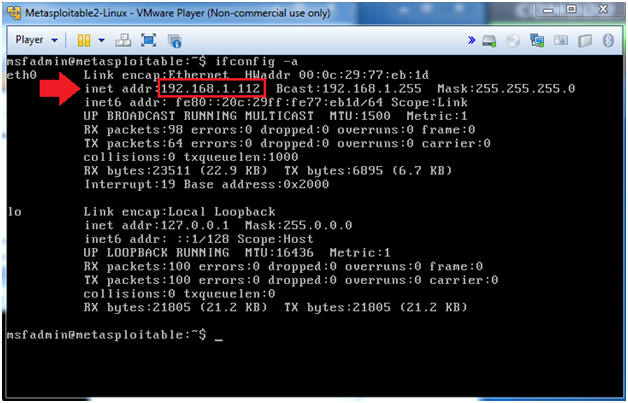
- Instructions:
- ifconfig -a
- Note(FYI):
- This is the IP Address of the Victim Machine.
- My IP Address is 192.168.1.112.
- Record your IP Address.
- Instructions:
- Become Root
- Instructions:
- sudo su -
- Supply The Password
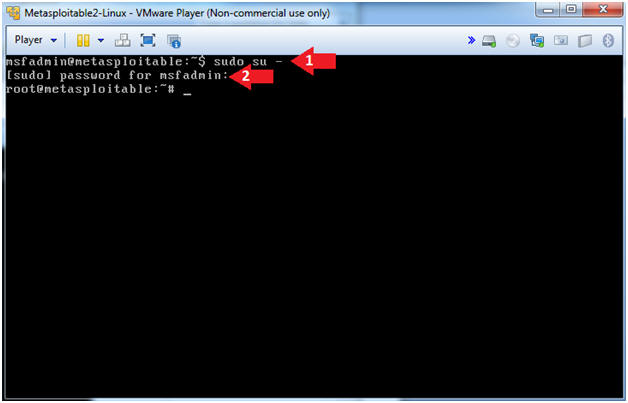
- Instructions:
| Section 3. Prepare Environment |
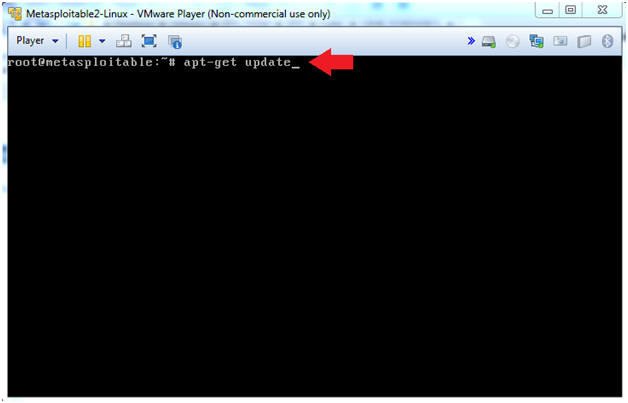
- Update apt-get's repository
- Note(FYI):
- Before we install any packages it is always a good idea to update Ubuntu's package repository.
- Instructions:
- apt-get update
- Note(FYI):
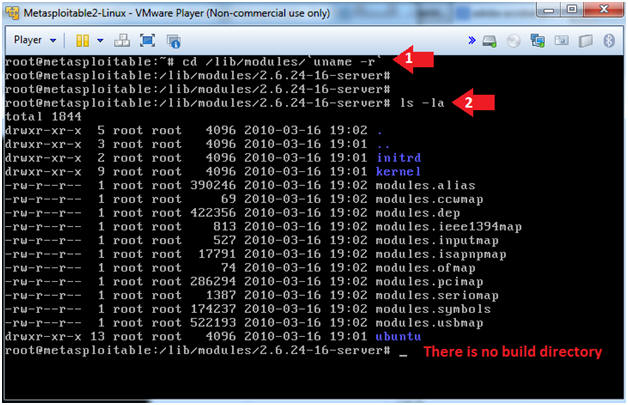
- Looking for kernel build directory
- Instructions:
- cd /lib/modules/`uname -r`
- ls -la
- Note(FYI):
- Notice there is no build directory.
- Most programs that need to be compiled
will require special kernel files, libraries, and utilities which is
located in the following directory:
- /lib/modules/`uname -r`/build
- Instructions:
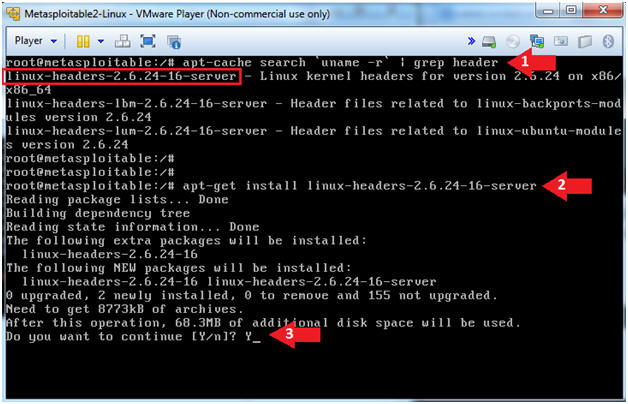
- Installing kernel headers
- Instructions:
- apt-cache search `uname -r` | grep header
- apt-get install linux-headers-2.6.24-16-server
- Do you want to continue [Y/n]? Y
- Instructions:
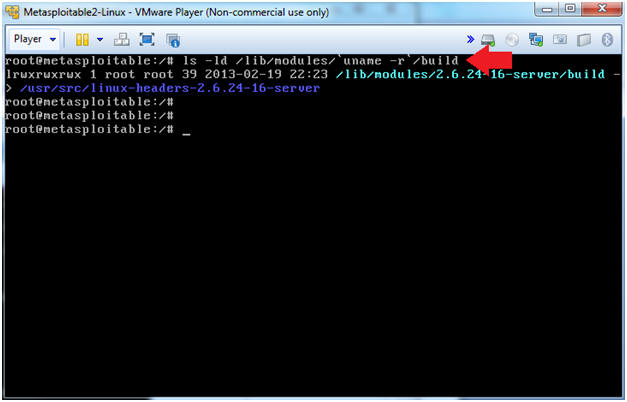
- Verifying the build directory exists
- Instructions:
- ls -ld /lib/modules/`uname -r`/build
- Note(FYI):
- Notice the build directory is really a symbolic link.
- Instructions:
| Section 4. Download and Compile Lime Forensics |
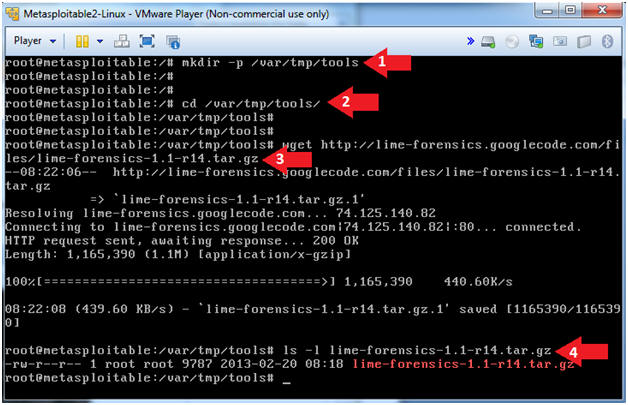
- Download Lime Forensics
- Instructions:
- mkdir -p /var/tmp/tools
- cd /var/tmp/tools
- wget http://lime-forensics.googlecode.com/files/lime-forensics-1.1-r14.tar.gz
- ls -l lime-forensics-1.1-r14.tar.gz
- Instructions:
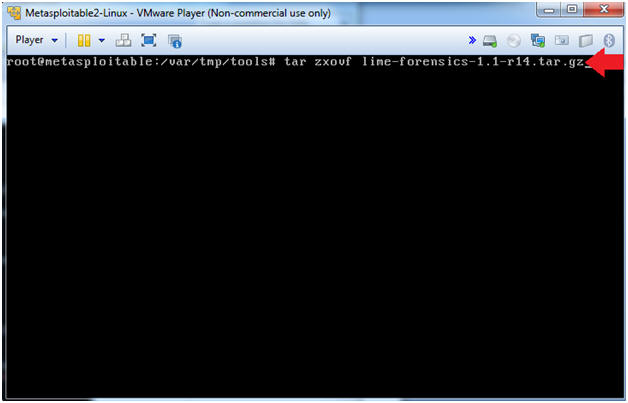
- Un-tar Lime
Forensics
- Instructions:
- tar zxovf lime-forensics-1.1-r14.tar.gz
- Instructions:
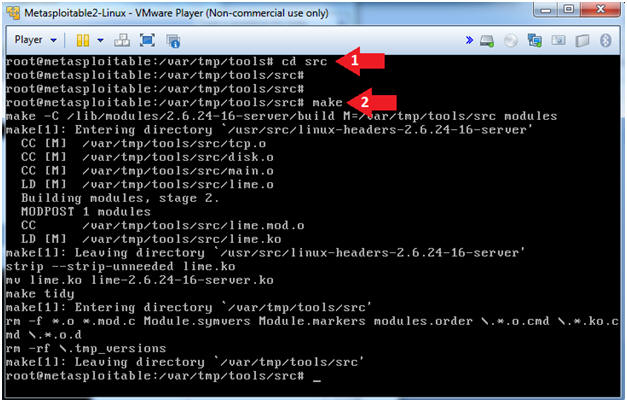
- Compile Lime Forensics
- Instructions:
- cd src
- make
- Instructions:
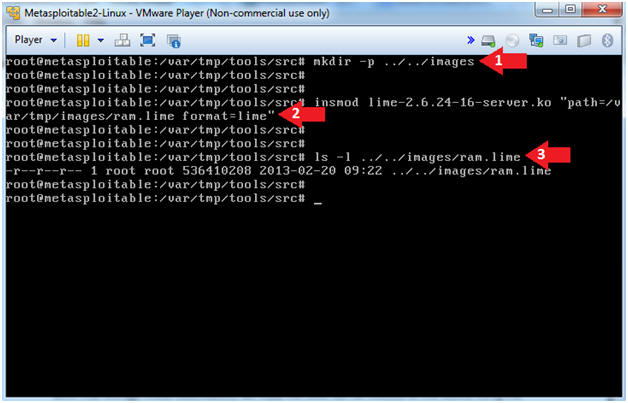
| Section 5. Create Lime Forensics Image |
- Create Lime Forensics Image
- Instructions:
- mkdir -p ../../images
- insmod lime-2.6.24-16-server.ko "path=/var/tmp/images/ram.lime format=lime"
- ls -l ../../images/ram.lime
- Instructions:
| Section 6. Start Up the BackTrack5R1 VM |
- Start Up VMWare Player
- Instructions:
- Click the Start Button
- Type Vmplayer in the search box
- Click on Vmplayer
-
- Instructions:
- Open a Virtual Machine
- Instructions:
- Click on Open a Virtual Machine
-
- Instructions:
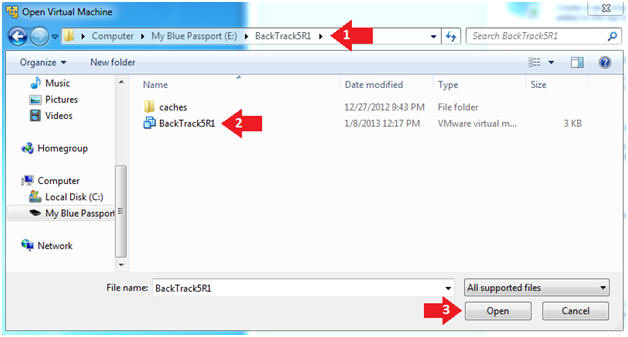
- Open the BackTrack5R1 VM
- Instructions:
- Navigate to where the BackTrack5R1 VM is located
- Click on on the BackTrack5R1 VM
- Click on the Open Button
- Instructions:
- Edit the BackTrack5R1 VM
- Instructions:
- Select BackTrack5R1 VM
- Click Edit virtual machine settings

- Instructions:
- Edit Virtual Machine Settings
- Instructions:
- Click on Network Adapter
- Click on the Bridged Radio button
- Click on the OK Button
- Instructions:
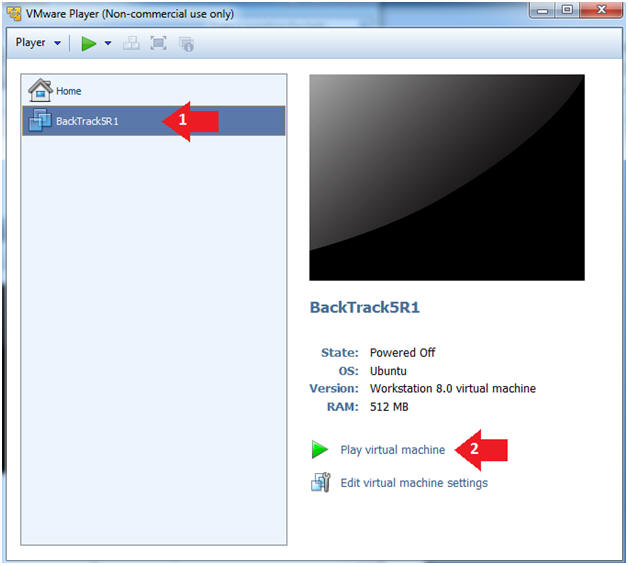
- Play the BackTrack5R1 VM
- Instructions:
- Click on the BackTrack5R1 VM
- Click on Play virtual machine
- Instructions:
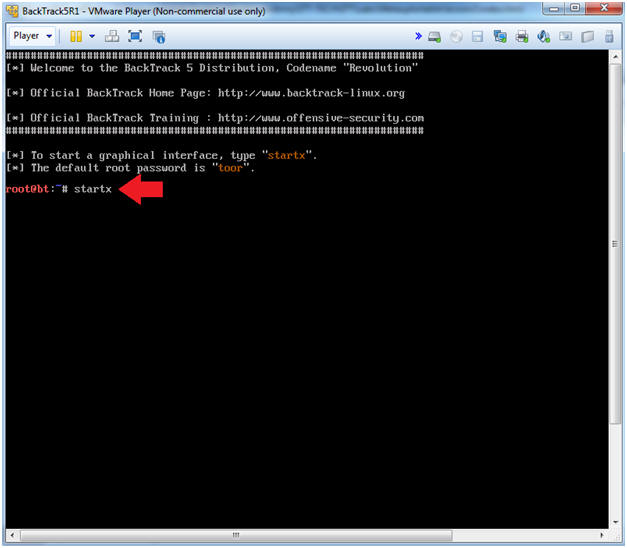
- Login to BackTrack
- Instructions:
- Login: root
- Password: toor or <whatever you changed it to>.

- Instructions:
- Bring up the GNOME
- Instructions:
- Type startx
- Instructions:
- Start up a terminal window
- Instructions:
- Click on the Terminal Window
- Instructions:
- Obtain the IP Address
- Instructions:
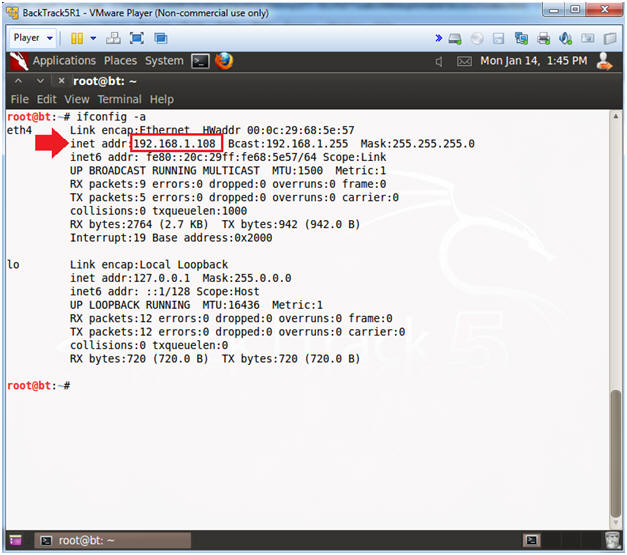
- ifconfig -a
- Note(FYI):
- My IP address 192.168.1.108.
- In your case, it will probably be different.
- Instructions:
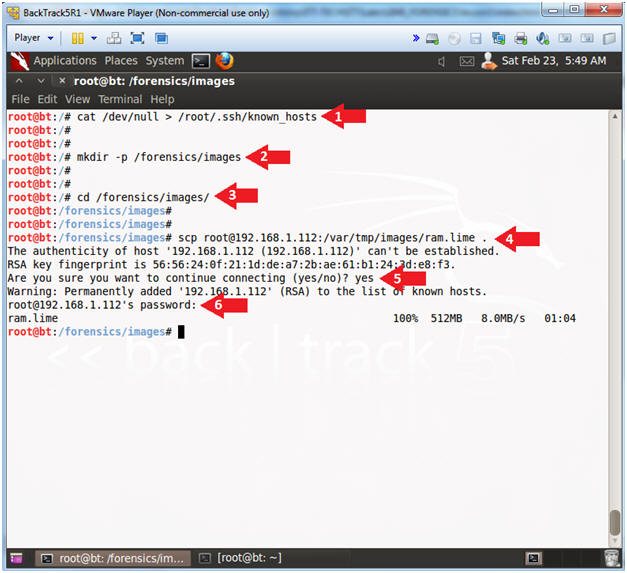
- Copy Over Lime Memory Dump
- Note(FYI):
- Replace 192.168.1.112 with your Metasploitable's IP Address obtained in (Section 2, Step 2)
- Instructions:
- cat /dev/null > /root/.ssh/known_hosts
- mkdir -p /forensics/images
- cd /forensics/images/
- scp root@192.168.1.112:/var/tmp/images/ram.lime .
- yes
- Enter Metasploitable Root Password
- Note(FYI):

| Section 7. Proof of Lab |
- Proof of Lab
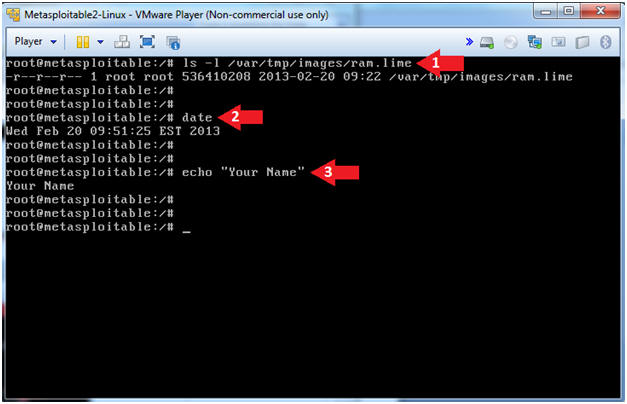
- Note(FYI):
- Perform the below commands on the Metasploitable VM.
-
Proof of Lab
Instructions
- ls -l /var/tmp/images/ram.lime
- date
- echo "Your Name"
- Replace the string "Your Name" with your actual name.
- e.g., echo "John Gray"
- Press the <Ctrl> and <Alt> key at the same time.
- Press the <PrtScn> key.
- Paste into a word document
- Upload to Moodle
- Note(FYI):