(LosBuntu: Lesson 3)
{ Create LosBuntu Virtual Machine }
| Section 0. Background Information |
- What is LosBuntu?
- I wanted to thank my good friend Carlos Cajigas (@carlos_cajigas) for creating LosBuntu and for his generous guidance and mentorship in Cyber Forensics.
- LosBuntu is a Linux Live DVD distribution (distro) that can be used to assist in data forensic investigations. It is a compilation of Master Cajigas' many years of experience as a former law enforcement agent and IBM forensics investigator.
-
Lab Notes
- In this lab we will do the following:
- Download the LosBuntu ISO
- Install LosBuntu to Hard Drive
- In this lab we will do the following:
- Legal Disclaimer
- As a condition of your use of this Web site, you warrant to computersecuritystudent.com that you will not use this Web site for any purpose that is unlawful or that is prohibited by these terms, conditions, and notices.
- In accordance with UCC § 2-316, this product is provided with "no warranties, either express or implied." The information contained is provided "as-is", with "no guarantee of merchantability."
- In addition, this is a teaching website that does not condone malicious behavior of any kind.
- You are on notice, that continuing and/or using this lab outside your "own" test environment is considered malicious and is against the law.
- © 2016 No content replication of any kind is allowed without express written permission.
| Section 1: Download LosBuntu ISO |
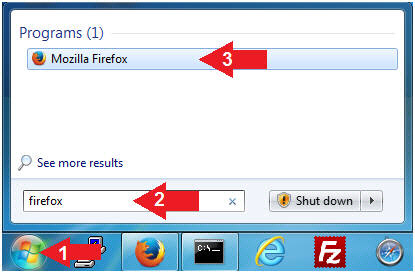
- Open Firefox (Host
Machine)
- Instructions:
- Click the Start Button
- Type firefox in the search box
- Click the firefox icon
- Instructions:
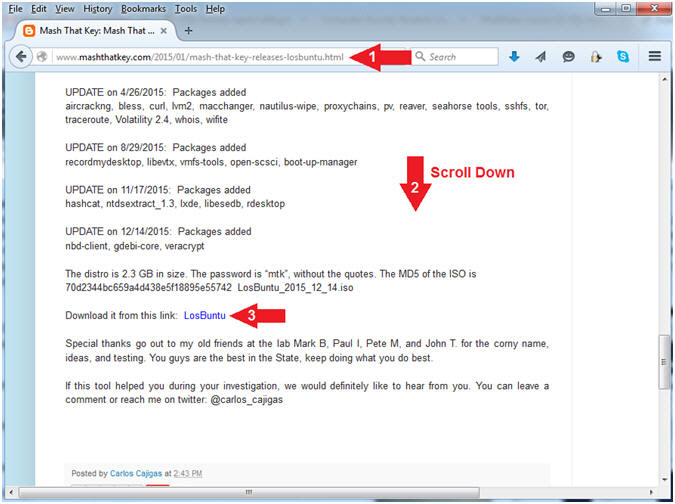
- Start LosBuntu Download (Part 1)
- Instructions:
- Navigate to the following URL
- http://www.mashthatkey.com/2015/01/mash-that-key-releases-losbuntu.html
- Scroll Down until you see the LosBuntu Link
- Click on LosBuntu
- Navigate to the following URL
- Instructions:
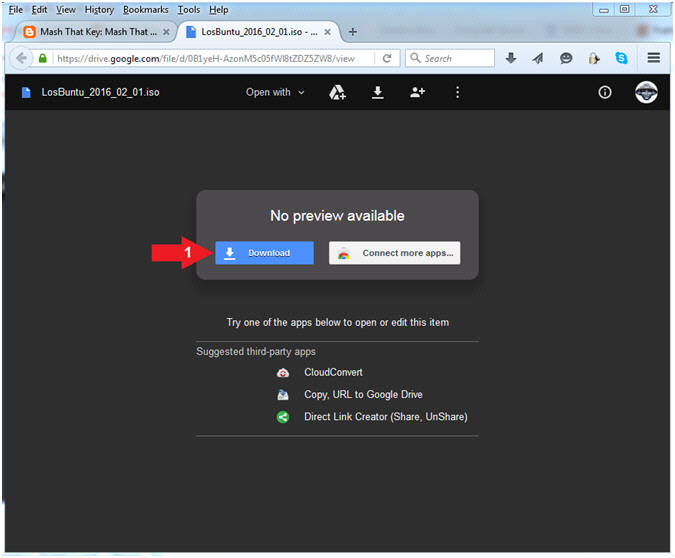
- Start LosBuntu Download (Part 2)
- Instructions:
- Click the Download button
- Instructions:
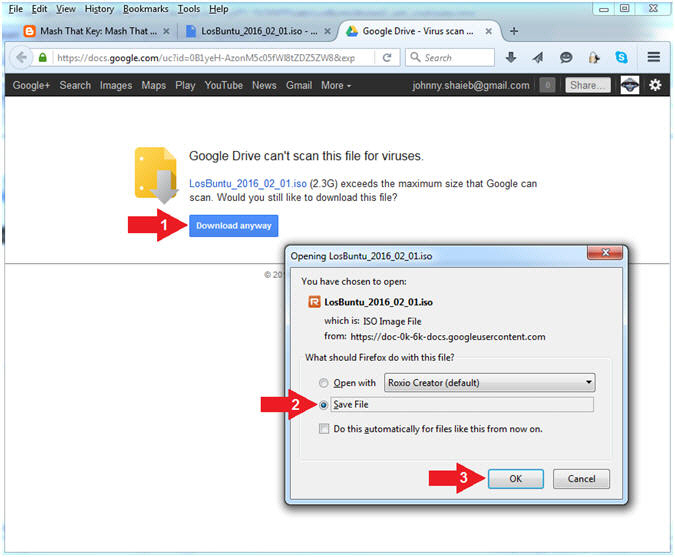
- Start LosBuntu Download (Part 3)
- Instructions:
- Click Download anyway
- Click the Save File radio button
- Click the OK button
- Instructions:
- Save LosBuntu
- Instructions:
- Navigate to your desired destination
directory
- In my case, C:\CSS\ISOs
- File name: LosBuntu_2016_02_01.iso
- Save as type: ISO Image File (*.iso)
- Click the Save button
- Navigate to your desired destination
directory
- Note(FYI):
- LosBuntu is subject to continual version updates.
-

- Instructions:
| Section 2: Create a New Virtual Machine |
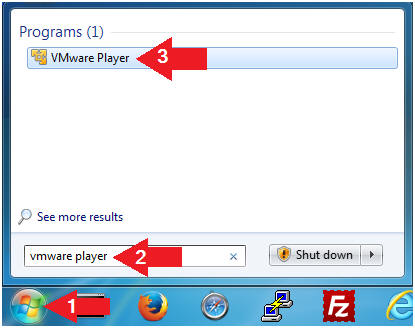
- Open VMware Player on your windows machine.
- Instructions:
- Click the Start Button
- Type "vmware player" in the search box
- Click on VMware Player
- Instructions:
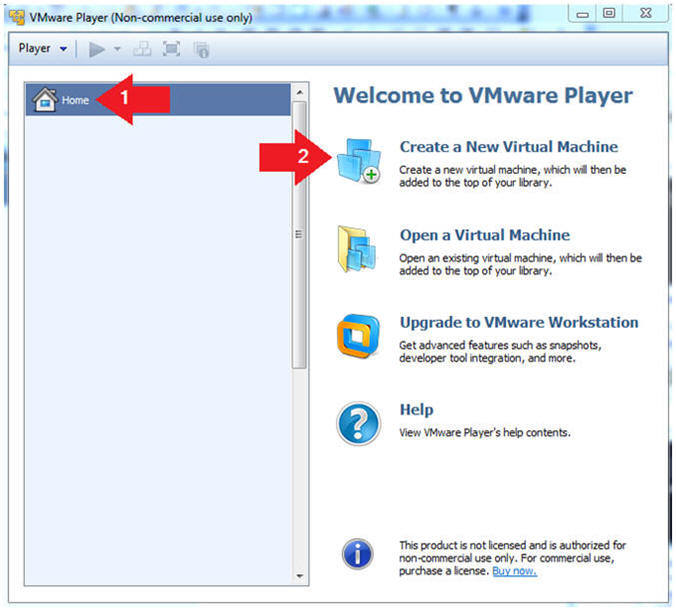
- Create a New Virtual Machine. (See Below)
- Instructions:
- Click on Home
- Click on Create a New Virtual Machine
- Instructions:
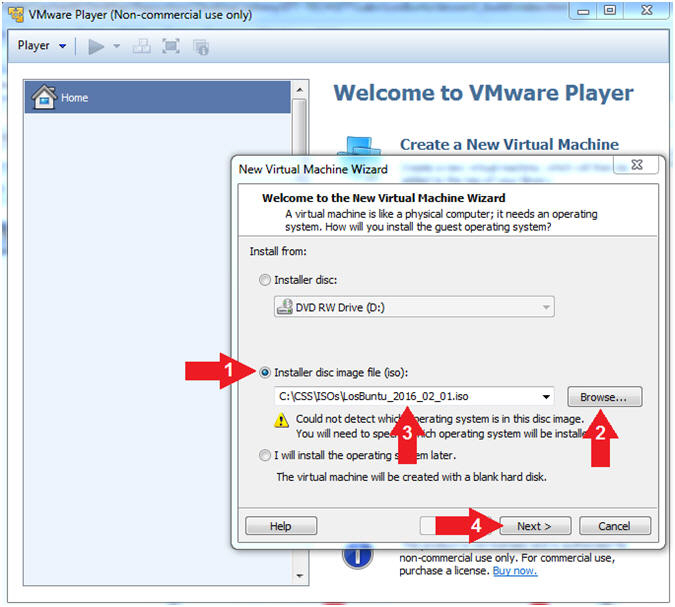
- Installation Media
- Instructions:
- Select Installer disk image file (iso):
- Click the Browse Button
- Navigate to the LosBuntu ISO Location
- In my case, C:\CSS\ISOs\LosBuntu_2016_02_01.iso
- Click Next
- Note(FYI):
- Command #3, your LosBuntu version might be newer than my version due to continual updates.
- Instructions:
- Select a Guest Operating System
- Instructions:
- Guest operating system: Linux
- Version: Ubuntu
- Select Next

- Instructions:
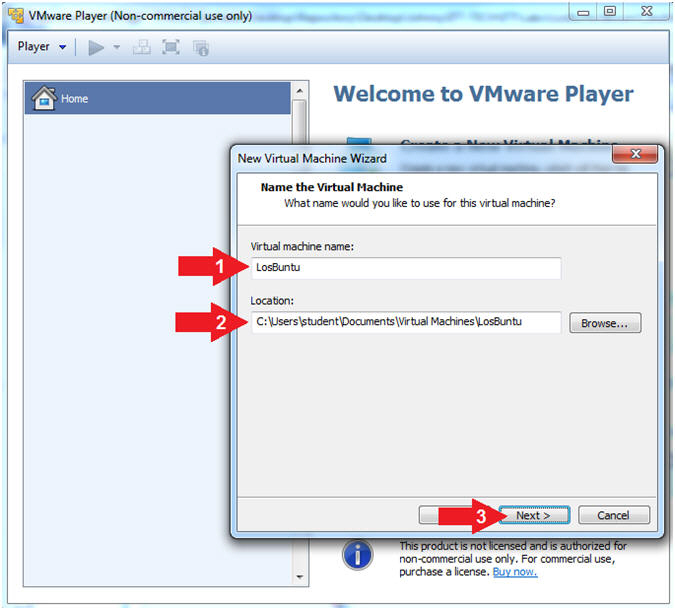
- Name the Virtual Machine
- Instructions:
- Virtual machine name: LosBuntu
- Location: Select your destination
location.
- In my case, C:\Users\student\Documents\Virtual Machines\LosBuntu
- Click the Next Button
- Instructions:
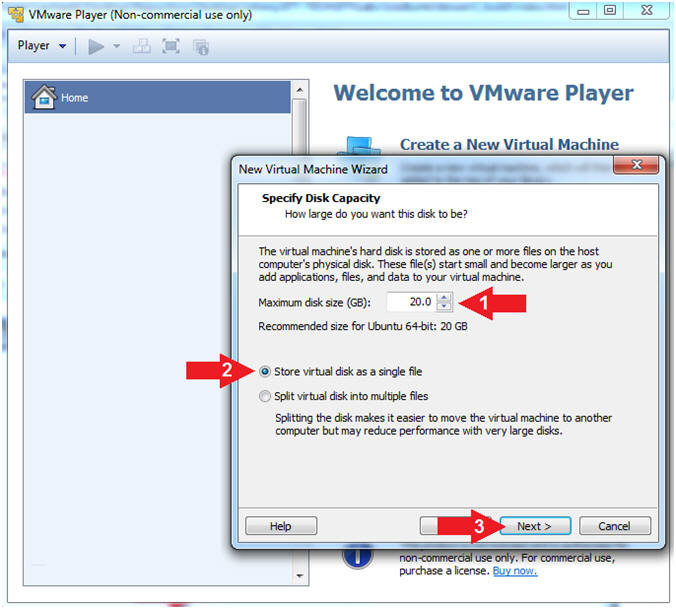
- Specify Disk Capacity.
- Instructions:
- Make the disk size to 20 GB.
- Select Store virtual disk as a single file.
- Select Next.
- Instructions:
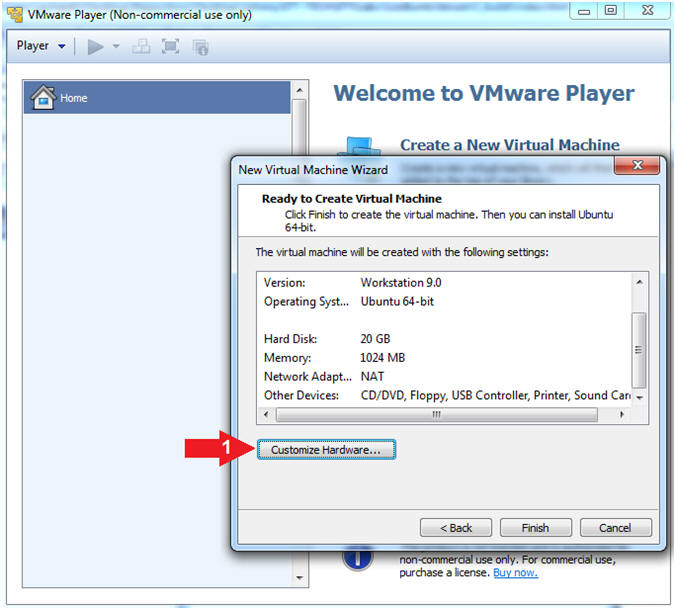
- Customize the Hardware.
- Instructions:
- Select the Customize Hardware Button.
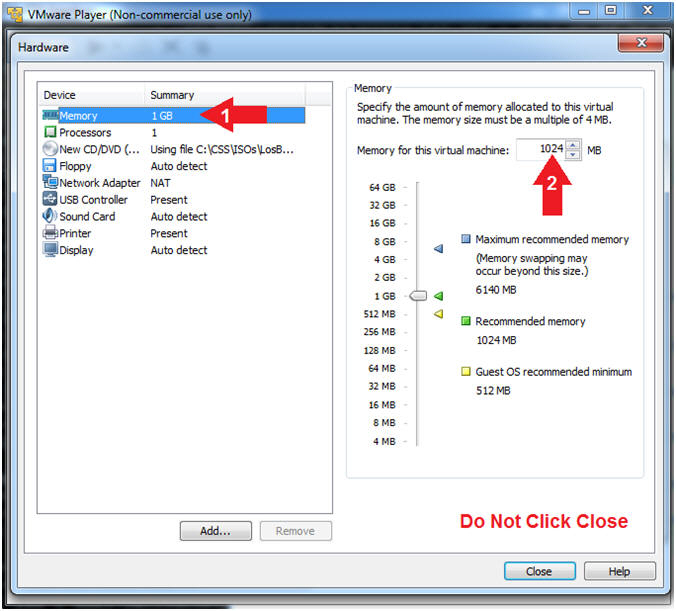
- Instructions:
- Configure Memory
- Instructions:
- Click on Memory.
- Up the memory to 1 GB
- Note(FYI):
- Do NOT Click the Close Button, we still have more to configure.
- Instructions:
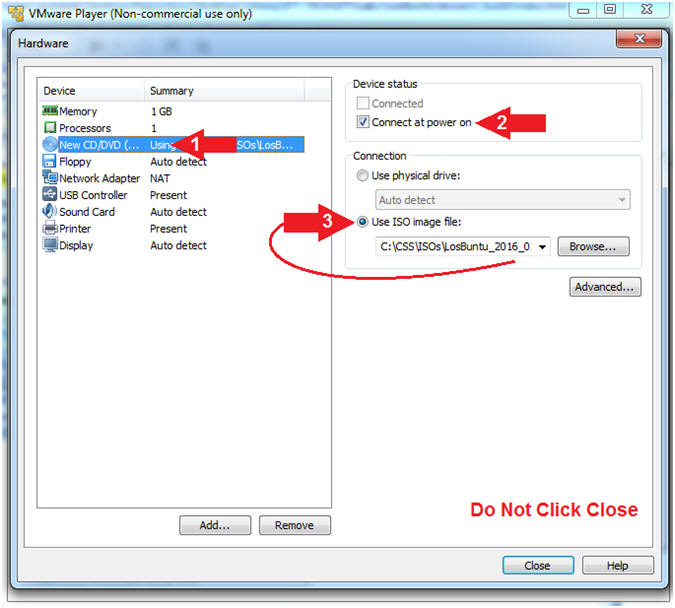
- Configure CD/DVD
- Instructions:
- Click on New CD/DVD.
- Check Connect at power on
- Select Use ISO image
file:
- Make sure the path to the ISO is present.
- Note(FYI):
- Do NOT Click the Close Button, we still have more to configure.
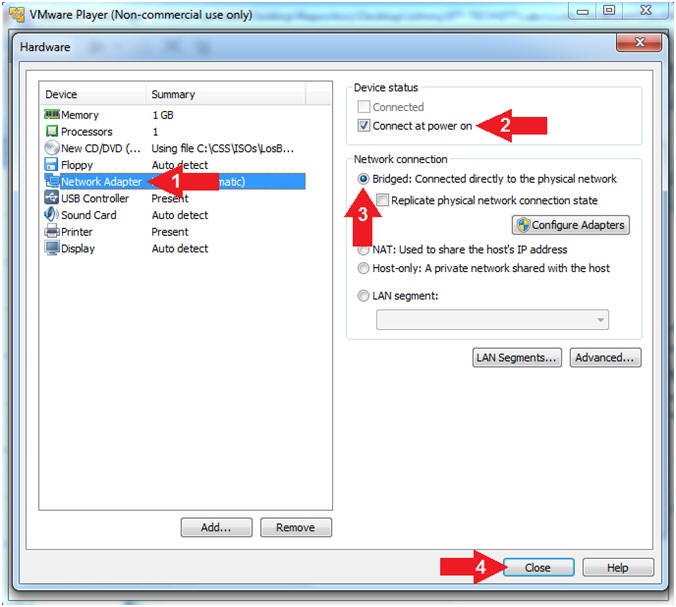
- Instructions:
- Configure the Network Adapter
- Instructions:
- Click on Network Adapter
- Check Connect at power on
- Select Bridged: Connect directly to the physical network
- Click the Close button.
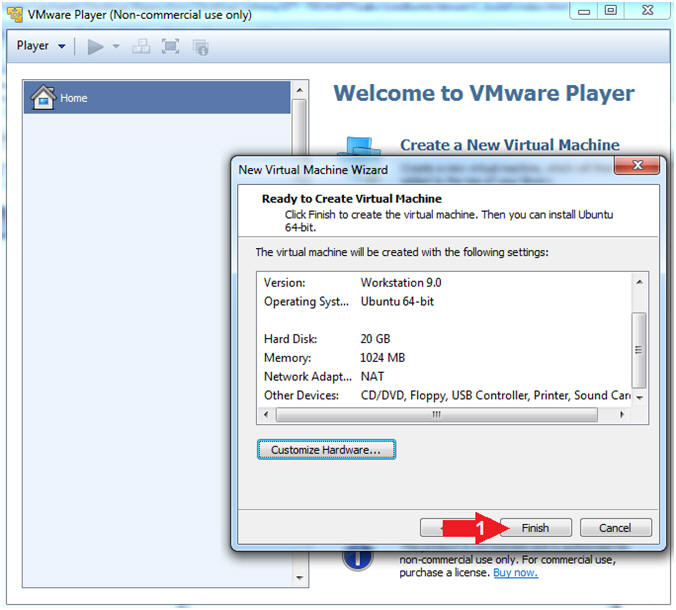
- Instructions:
- Click Finish (See Below)
- Instructions:
- Click the Finish Button
- Instructions:
| Section 3: Install LosBuntu to Hard Drive |
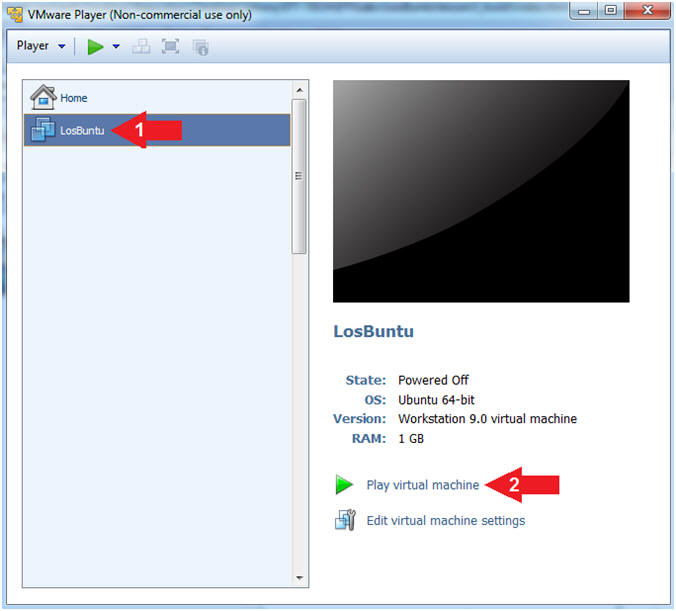
- Start the LosBuntu VM
- Instructions:
- Click on the LosBuntu VM
- Click on Play virtual machine
- Instructions:
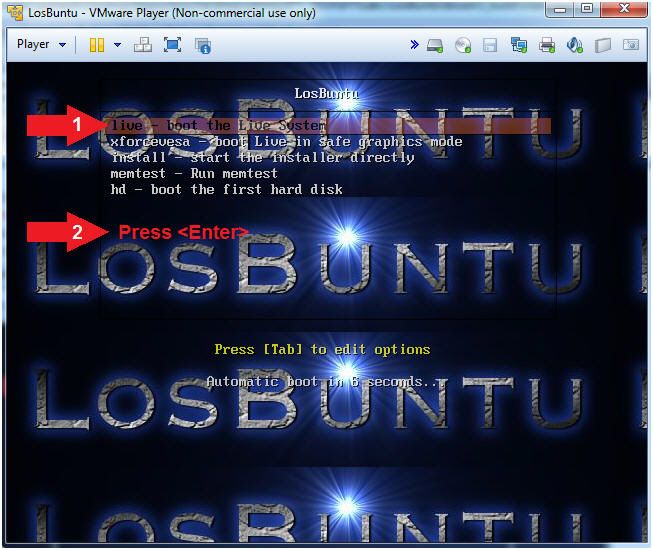
- LosBuntu Boot Selection
- Instructions:
- Arrow Down to where live - boot the Live System is highlighted
- Press <Enter>
- Instructions:
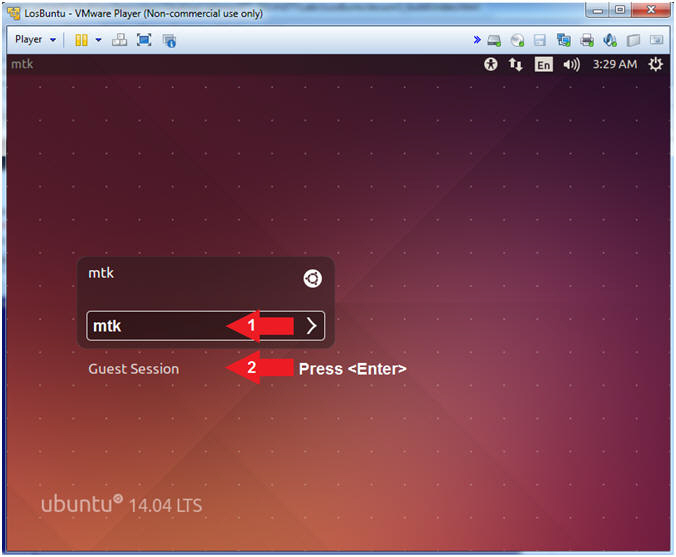
- Login to LosBuntu
- Instructions:
- Password: mtk
- Press <Enter>
- Instructions:
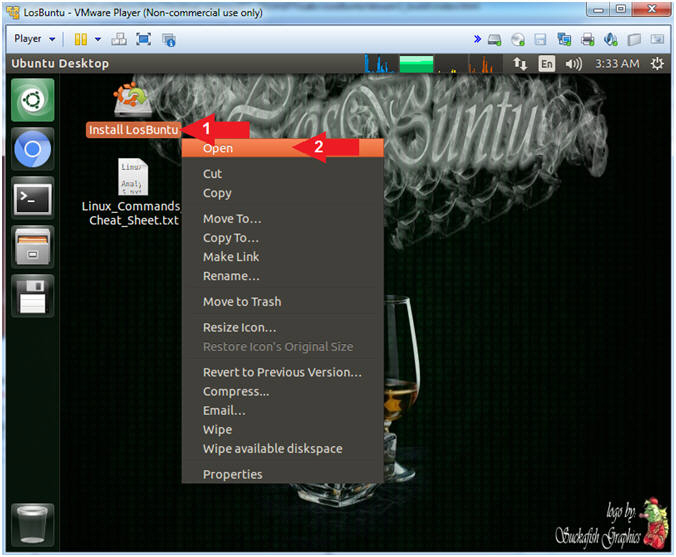
- Start LosBuntu Installation
- Instructions:
- Right Click on Install LosBuntu
- Select Open
- Instructions:
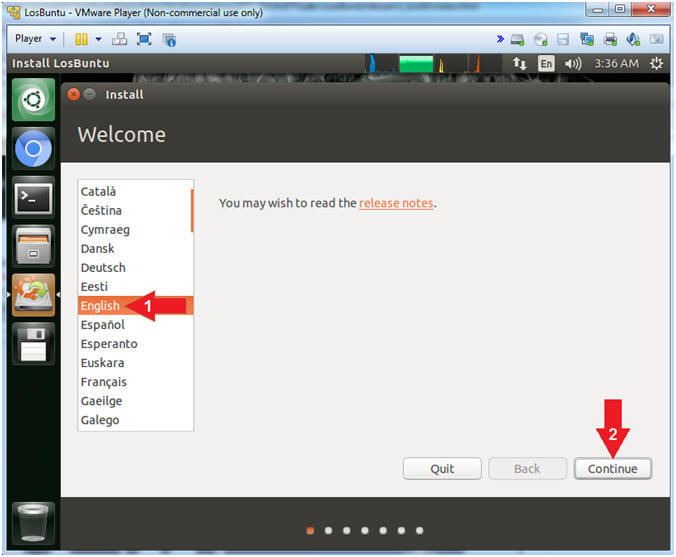
- Select Language
- Instructions:
- Select Language: English
- Click the Continue Button
- Instructions:
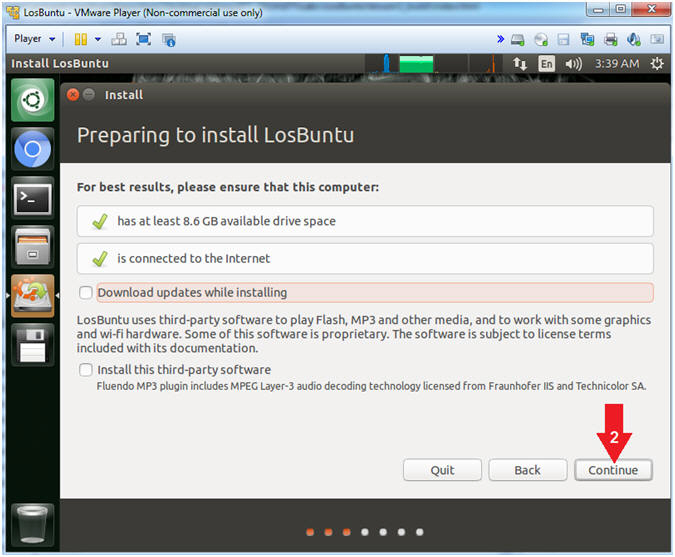
- Preparing to install LosBuntu
- Instructions:
- Click the Continue Button
- Instructions:
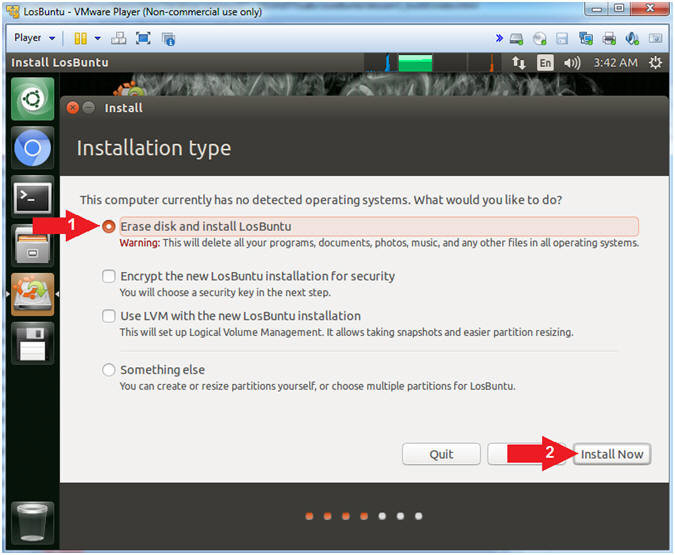
- Installation type
- Instructions:
- Select Erase disk and install LosBuntu
- Click the Install Now Button
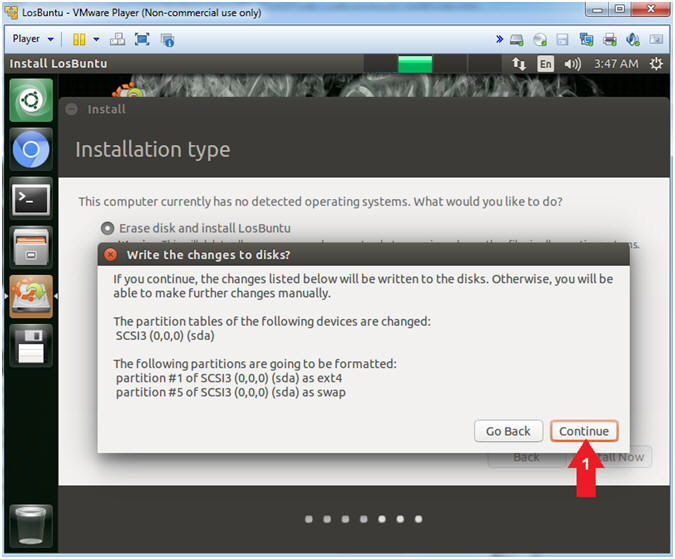
- Instructions:
- Write the changes to disk?
- Instructions:
- Click the Continue Button
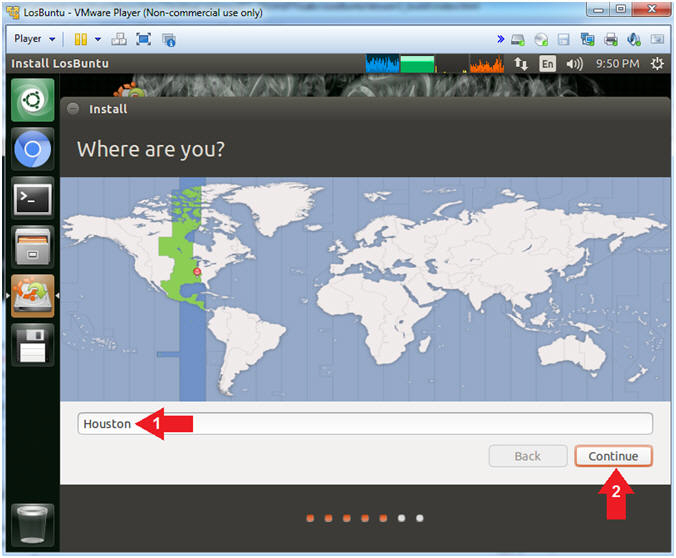
- Instructions:
- Where are you?
- Instructions:
- Location: Houston
- Click the Continue Button
- Note(FYI):
- Command #1, Replace Houston with your location.
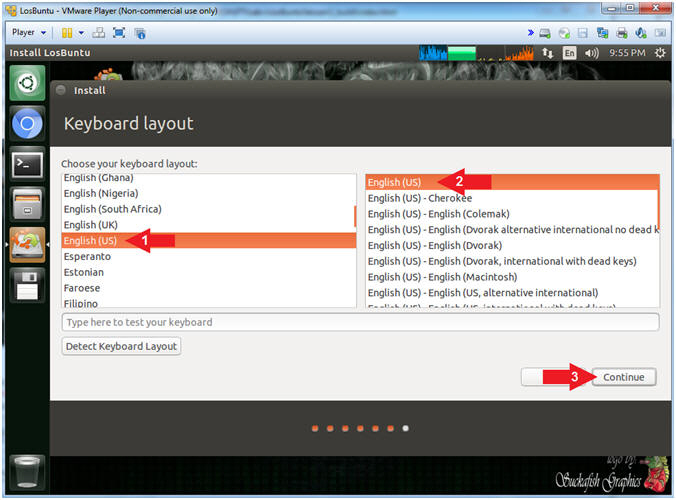
- Instructions:
- Keyboard layout
- Instructions:
- Choose your keyboard layout: English (US)
- English (US)
- Click Continue
- Instructions:
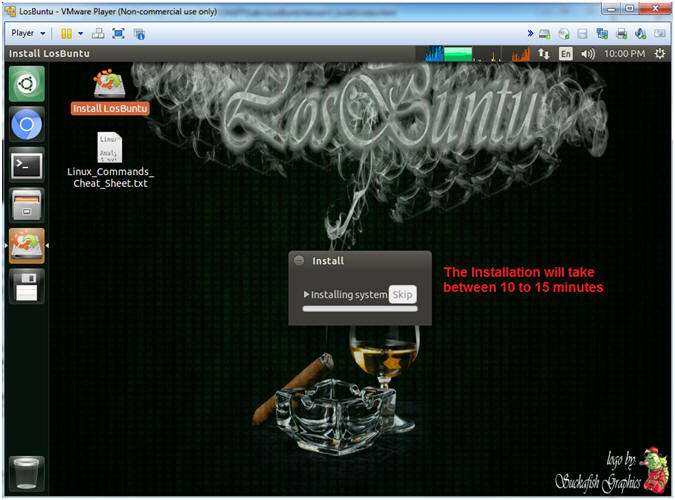
- Installation Process
- Note(FYI):
- The Installation will take between 10 to 15 minutes.
- Note(FYI):
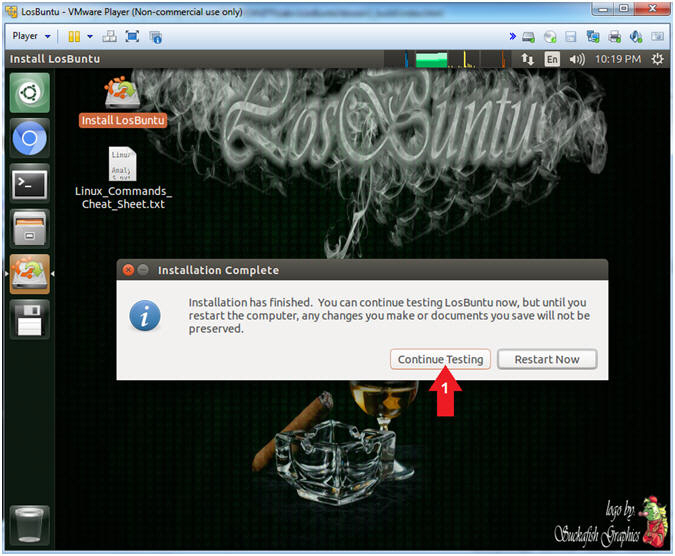
- Installation Complete
- Instructions:
- Click the Continue Testing Button
- Instructions:
| Section 4: Power Off Virtual Machine |
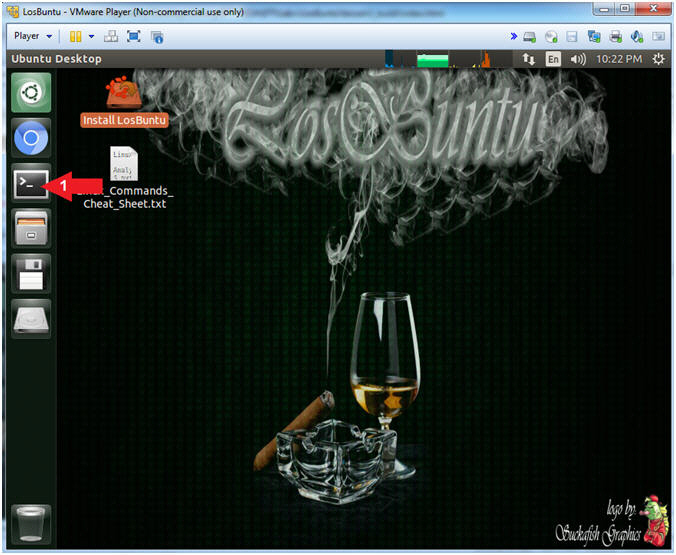
- Open Terminal Windows
- Instructions:
- Click on the Terminal Window

- Click on the Terminal Window
- Instructions:
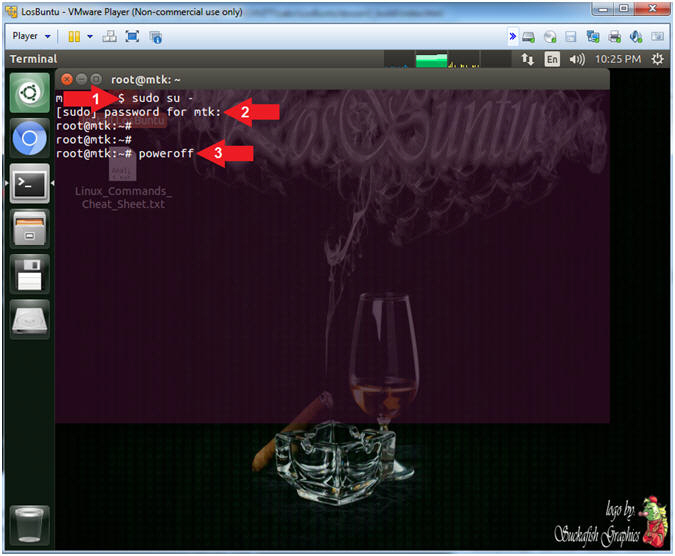
- Poweroff Machine
- Instructions:
- sudo su -
- [sudo] password for mtk: mtk
- poweroff
- Note(FYI):
- Command #1, Use (sudo) to execute the (su) command to switch to the root(-) user.
- Command #3, Use (poweroff) to turn off the Virtual Machine.
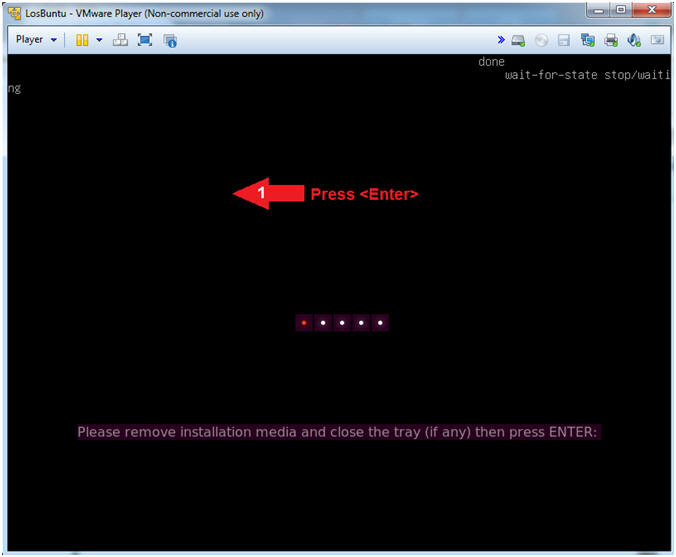
- Instructions:
- Installation Media
- Instructions:
- Press <Enter>
- Note(FYI):
- Command #1, The OS is detecting that there is still a CD (ie. an ISO) in the CD/DVD tray. Pressing <Enter> will resume the poweroff process.
- Instructions:
| Section 5: Power On the LosBuntu VM |
- Open VMware Player on your windows machine.
- Instructions:
- Click the Start Button
- Type "vmware player" in the search box
- Click on VMware Player
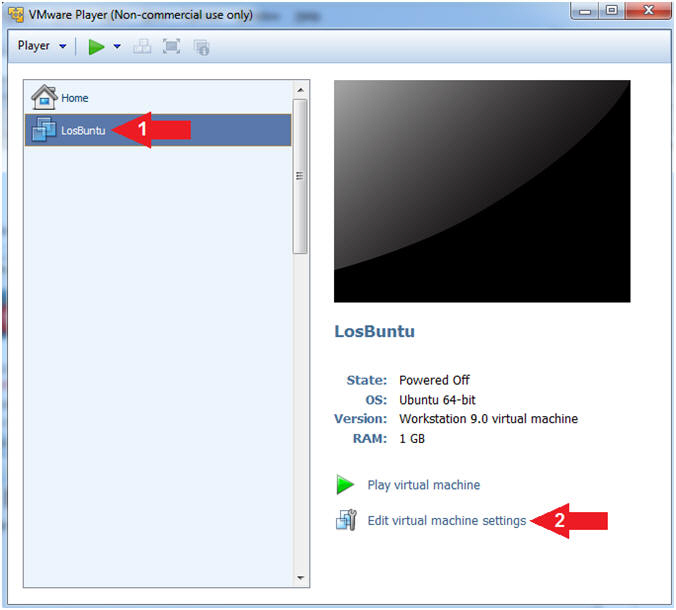
- Instructions:
- Edit Virtual Machine Settings
- Instructions:
- Select LosBuntu
- Click Edit Virtual Machine Settings
- Instructions:
- Configure Memory
- Instructions:
- Click on Memory.
- Up the memory to 1 GB
- Note(FYI):
- Do NOT Click the OK Button, we still have more to configure.

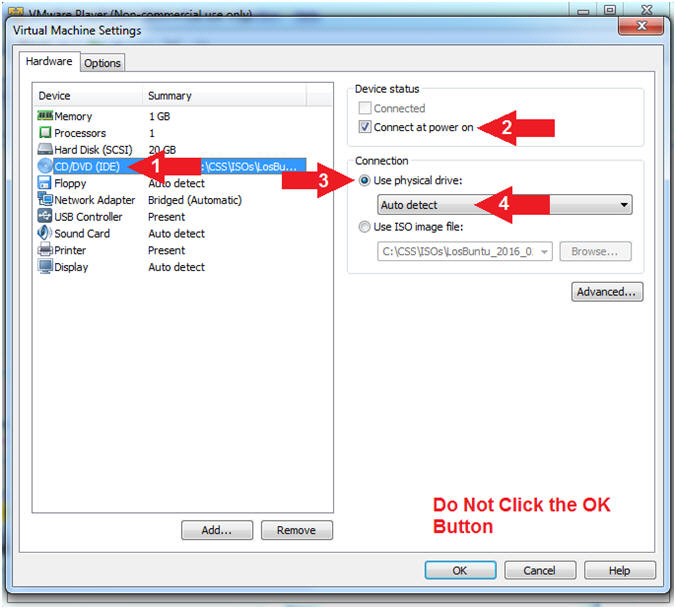
- Instructions:
- Configure CD/DVD(IDE)
- Instructions:
- Click on CD/DVD(IDE)
- Device status: Check Connect at power on
- Connection: Click Use physical drive
- Select Auto detect
- Note(FYI):
- Do NOT Click the OK Button, we still have more to configure
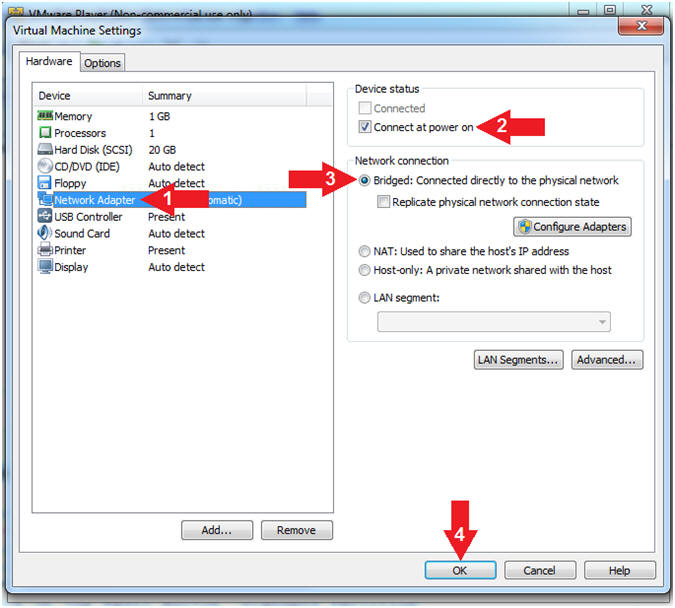
- Instructions:
- Configure Network Adapter
- Instructions:
- Click on Network Adapter
- Device status: Check Connect at power on
- Network Connection: Click Bridged: Connected directly...
- Click the OK Button
- Instructions:
- Play LosBuntu Virtual Machine
- Instructions:
- Select LosBuntu
- Click Play virtual machine
-

- Instructions:
| Section 6: Login to LosBuntu |
- Login to LosBuntu
- Instructions:
- Password: mtk
- Press <Enter>
- Instructions:
| Section 7: Configure Terminal Window Settings |
- Open Terminal Windows
- Instructions:
- Click on the Terminal Window
- Click on the Terminal Window
- Instructions:
- Terminal Window (Profile Preferences)
- Instructions:
- Edit --> Profile Preferences
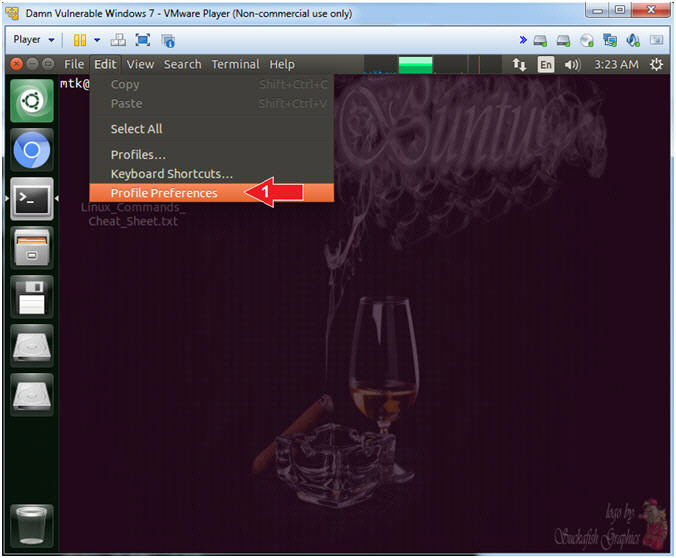
- Instructions:
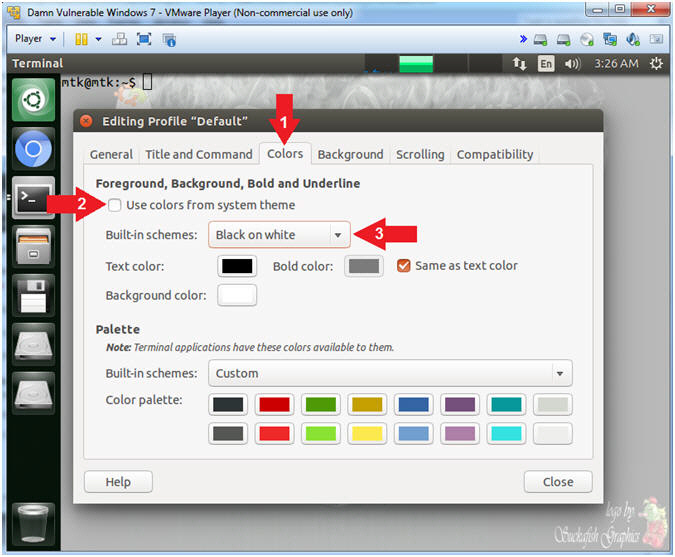
- Terminal Window (Profile Colors)
- Instructions:
- Click the Colors Tab
- Uncheck Use colors from system theme
- Built-in schemes: Black on white
- Instructions:
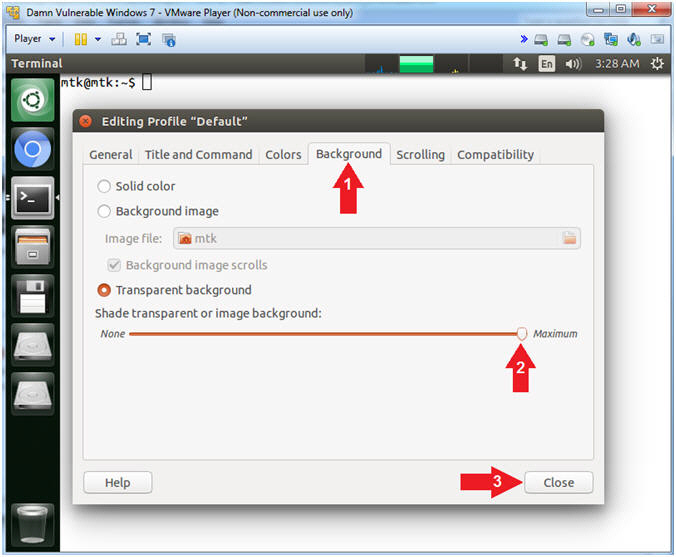
- Terminal Window (Profile Background)
- Instructions:
- Click the Background Tab
- Shade transparent or image background: Maximum
- Click the Close Button
- Instructions:
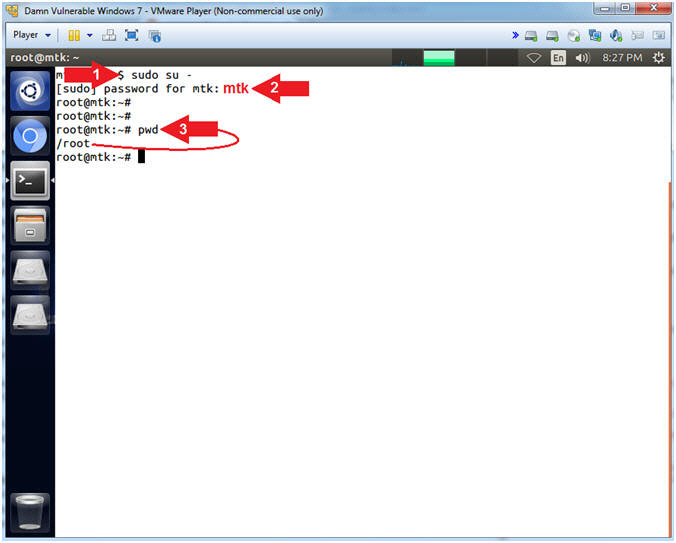
- Become root
- Instructions:
- sudo su -
- password: mtk
- pwd
- Note(FYI):
- Command #1, Use (sudo su -) to simulate an initial root login where the /etc/profile, .profile and .bashrc are executed. Not only will the root user's environment be present, but also the root user will be placed in it's own home directory (/root).
- Command #2, Use (pwd) to display the current working directory of the particular user.
- Instructions:
- Obtain IP Address
- Instructions:
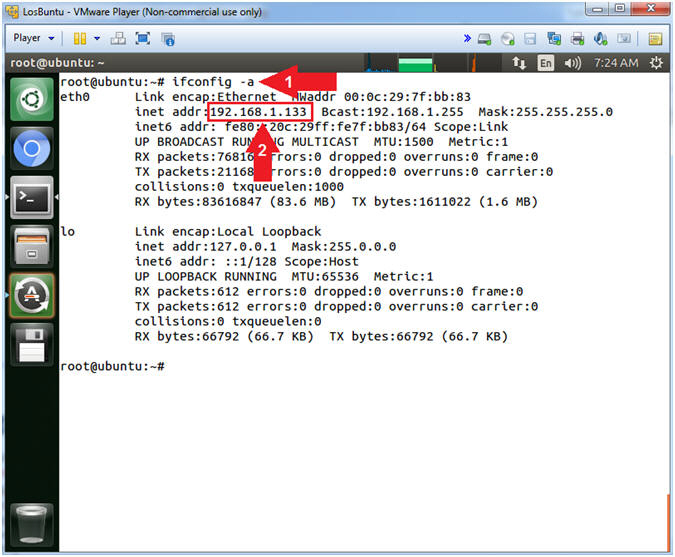
- ifconfig -a
- Record Your IP Address
- Note(FYI):
- Command #1, Use (ifconfig) to view all
(-a) IP Addresses associated with LosBuntu. You should only
have two interfaces: eth0 and lo.
- eth0 - Is the primary interface. In my case, the IP Address is 192.168.1.133.
- lo - Is the local loopback address. The loopback address is used to establish an IP connection to the same machine or computer being used by the end-user. The loopback construct gives a computer or device capable of networking the capability to validate or establish the IP stack on the machine.
- If your host machine has Internet
Connectivity, but LosBuntu does not have an IP Address associated
with eth0, then issue the following command as root.
- dhclient -v
- Command #1, Use (ifconfig) to view all
(-a) IP Addresses associated with LosBuntu. You should only
have two interfaces: eth0 and lo.
- Instructions:
| Section 8: Proof of Lab |
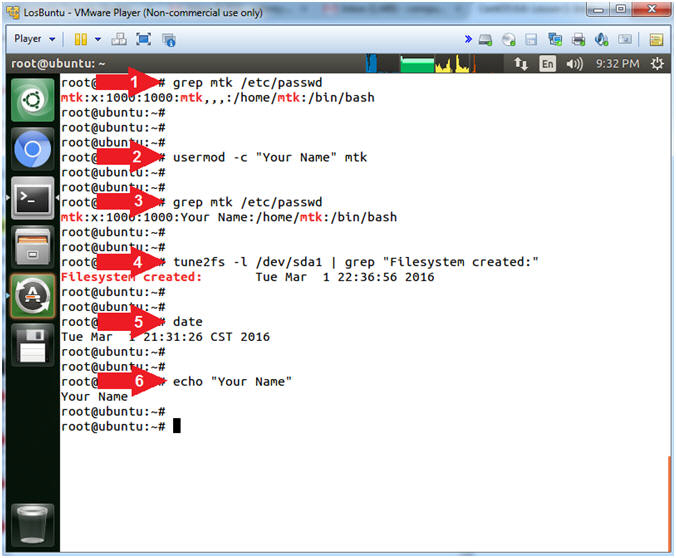
- Proof of Lab
- Instructions:
- grep mtk /etc/passwd
- usermod -c "Your Name" mtk
- grep mtk /etc/passwd
- tune2fs -l /dev/sda1 | grep "Filesystem created:"
- date
- echo "Your Name"
- Put in your actual name in place of "Your Name"
- e.g., echo "John Gray"
- Note(FYI):
- Command #4, Use (tune2fs) to list file system parameters associated with the root partition (/dev/sda1).
-
Proof of Lab
Instructions
- Press the <Ctrl> and <Alt> key at the same time.
- Press the <PrtScn> key.
- Paste into a word document
- Upload to Moodle
-
- Instructions: