(Trojan Horse 2: Lesson 2)
{ Placing the Trojan Horse on a Web Server }
| Section 0. Background Information |
- Pre-Requisite Lab
- Trojan Horse 1: Lesson 3: Placing the Trojan Horse on a Web Server
- Trojan Horse 2: Lesson 1: How to create and bundle the metasploit msfpayload reverse_tcp
- Overview
- This lab demonstrates how to do the
following:
- Verifying the Apache Web Server is running on BackTrack5R1.
- Verifying that SSHD is running on BackTrack5R1.
- Setting up the BackTrack5R1's /var/www/html/games directory.
- Moving the Trojan Horse from a Windows Platform to a Linux Machine (BackTrack5R1).
- This lab demonstrates how to do the
following:
- Legal Disclaimer
- As a condition of your use of this Web site, you warrant to computersecuritystudent.com that you will not use this Web site for any purpose that is unlawful or that is prohibited by these terms, conditions, and notices.
- In accordance with UCC § 2-316, this product is provided with "no warranties, either express or implied." The information contained is provided "as-is", with "no guarantee of merchantability."
- In addition, this is a teaching website that does not condone malicious behavior of any kind.
- Your are on notice, that continuing and/or using this lab outside your "own" test environment is considered malicious and is against the law.
| Section 1. Start Up BackTrack5R1 |
- Start Up BackTrack5R1.
- Instructions:
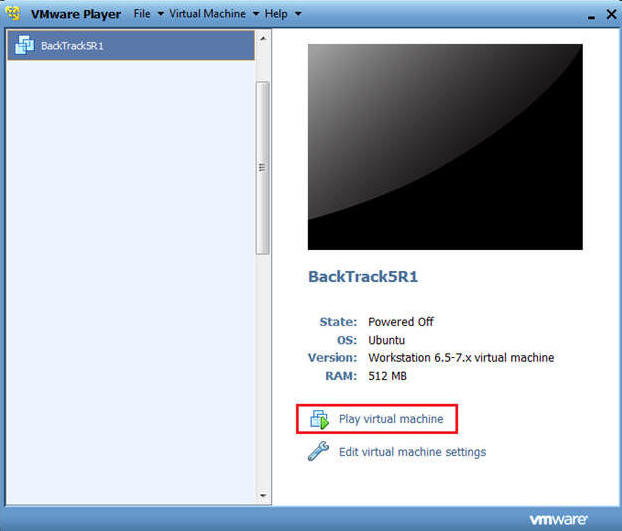
- Start Up your VMware Player
- Play virtual machine
- Instructions:
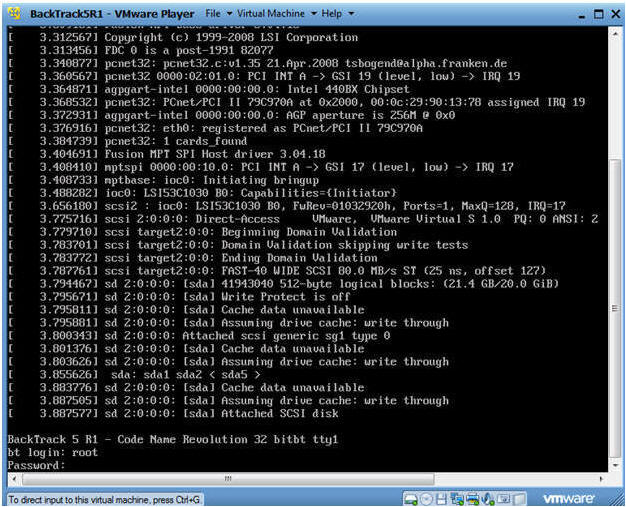
- Login to BackTrack
- Instructions:
- Login: root
- Password: toor or <whatever you changed it to>.
- Instructions:
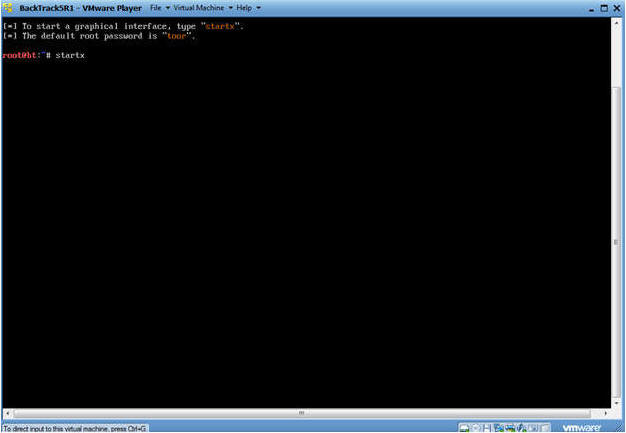
- Bring up the GNOME
- Instructions:
- Type startx
- Instructions:
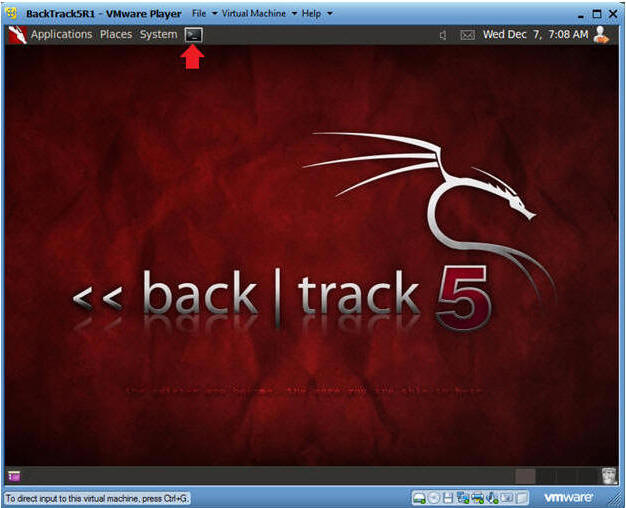
- Start up a terminal window
- Instructions:
- Click on the Terminal Window
- Instructions:
- Obtain the IP Address
- Instructions:
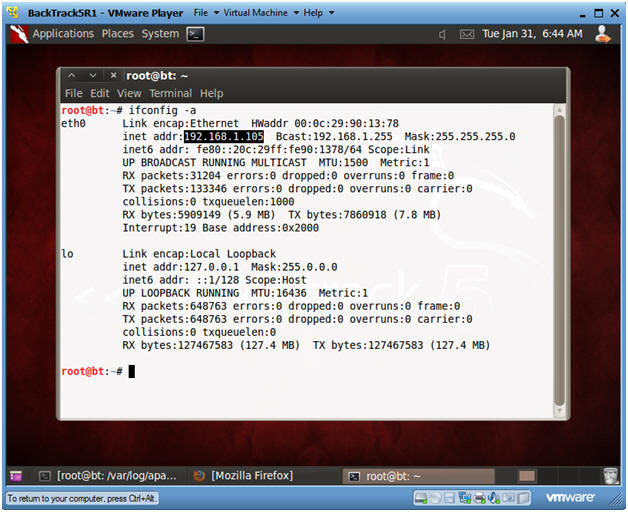
- ifconfig -a
- Notes:
- My IP address 192.168.1.105. In your case, it will probably be different.
- You will later use this IP Address when you SFTP the Trojan Horse from your Windows Client to this BackTrack Machine.
- Instructions:
| Section 2. Set Up BackTrack Trojan Horse Web Directory |
- Check if Apache Web Server is Running
- Instructions:
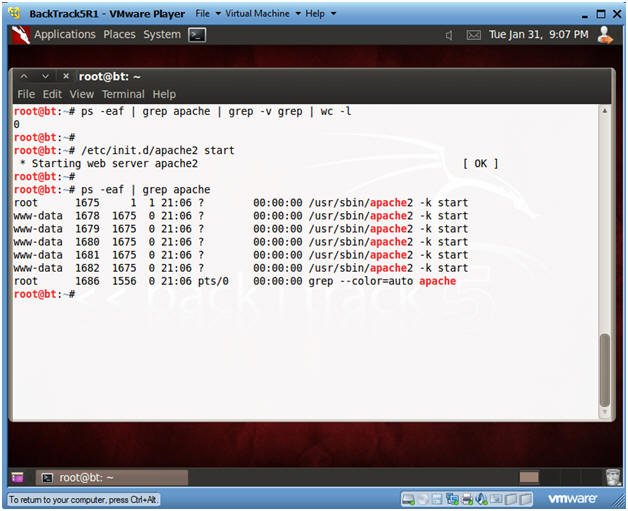
- ps -eaf | grep apache | grep -v grep |
wc -l
- "0" was returned because the Apache Webserver is not running.
- /etc/init.d/apache2 start
- This is the Apache Webserver start up script.
- ps -eaf | grep apache
- ps -eaf | grep apache | grep -v grep |
wc -l
- Notes:
- Apache2 comes standard with BackTrack5R1.
- If your version of BackTrack5R1 does not come with Apache, then do the following:
- dpkg --get-selections | grep apache2
- If you do not see apache2 as installed, then continue to the next step..
- apt-get install apache2
- dpkg --get-selections | grep apache2
- Instructions:
- Create Trojan Horse Web Directory
- Instructions:
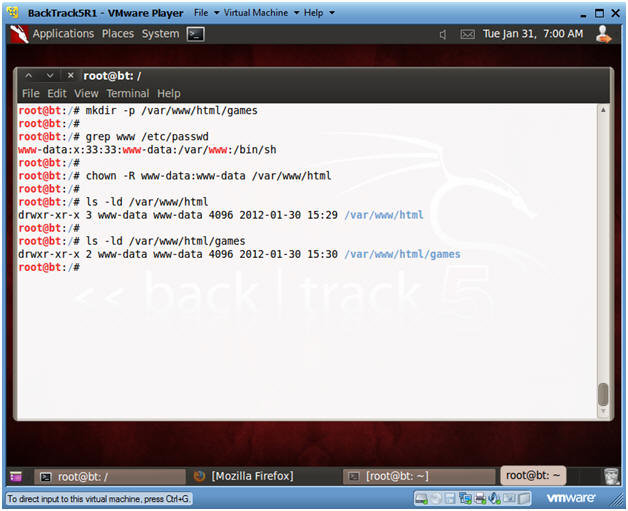
- mkdir -p /var/www/html/games
- Apache2's rootdir is /var/www in BackTrack5R1.
- grep www /etc/passwd
- Subsequent directories under /var/www should be owned by user "www-data" or whatever is the username for Apache.
- chown -R www-data:www-data /var/www/html
- Change ownerships from root to user www-data for everything under and including /var/www/html
- ls -ld /var/www/html
- ls -ld /var/www/html/games
- mkdir -p /var/www/html/games
- Instructions:
| Section 3. Start Up SSHD on BackTrack5R1 |
- Verifying the /etc/init.d/ssh start up script.
- Instructions:
- On BackTrack5R1, open a Console Terminal
- If you are not root, become root.
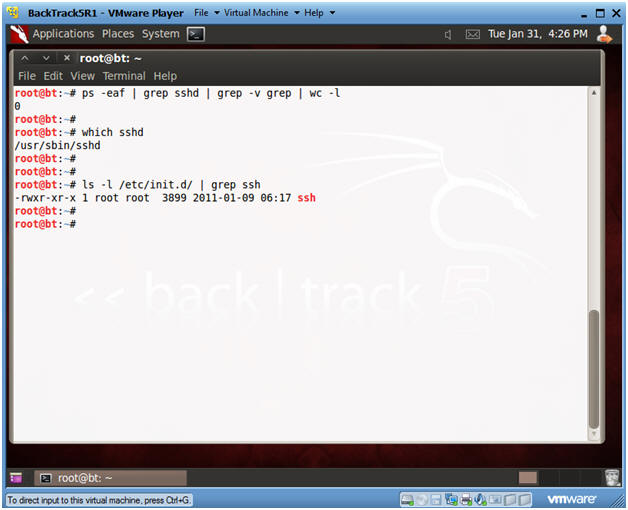
- ps -eaf | grep sshd | grep -v grep | wc
-l
- Check to see if SSHD is running.
- A "0" is returned, because not SSHD processes are running.
- which sshd
- The which command tells us that (1) sshd is located at /usr/sbin/sshd, and (2) that ssh is installed on the system.
- ls -l /etc/init.d | grep ssh
- /etc/init.d is where all the tradition startup scripts result for sysvinit.
- We are searching this directory to see if there is a start up script for ssh.
- Instructions:
- Start Up SSHD
- Instructions:
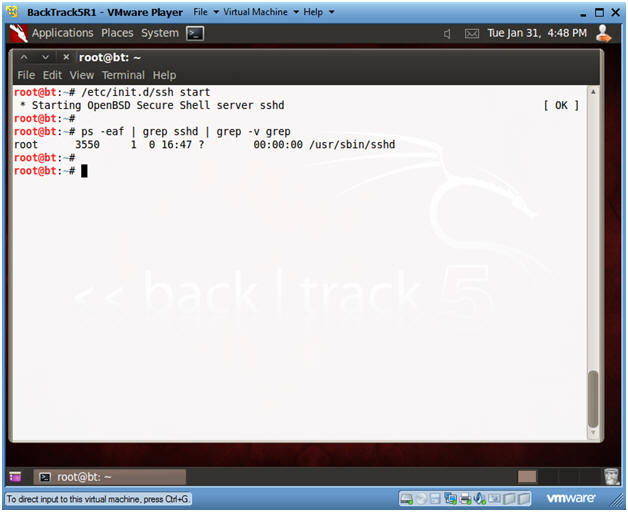
- /etc/init.d/ssh start
- ps -eaf | grep sshd | grep -v grep
- Instructions:
| Section 4. Start Up Windows Machine |
- Booting up WindowsVulerable01
- Instructions:
- Start up VMware Player
- Select WindowsVulerable01
- Play Virtual Machine
- Note:
- For those of you that are not part of my class, WindowsVulernable01 is a Windows XP Machine.
- Any version of Windows can be used.
- But you must have first completed the pre-requisite labs listed in the overview section.

- Instructions:
- WindowsVulerable01 Authentication
- Instructions:
- Login as administrator
- Instructions:
| Section 5. Start up FileZilla |
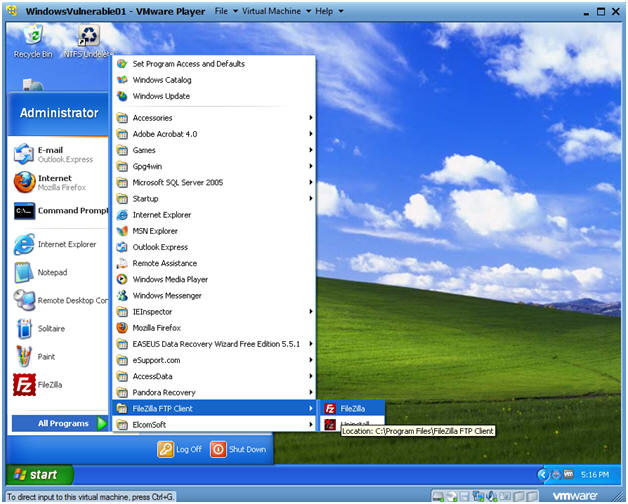
- Start Up FileZilla.
- Instructions:
- On WindowsVulnerable01
- Bring Up Internet Explorer
- Start --> All Programs --> FileZilla FTP Client --> FileZilla
- Notes
(If Not
Installed):
- If FileZilla is not installed, you can obtain the client from the following location: http://filezilla-project.org/download.php
- Make Sure you install it on WindowsVulnerable01 or the machine that contains your Trojan Horse.
-
- Instructions:
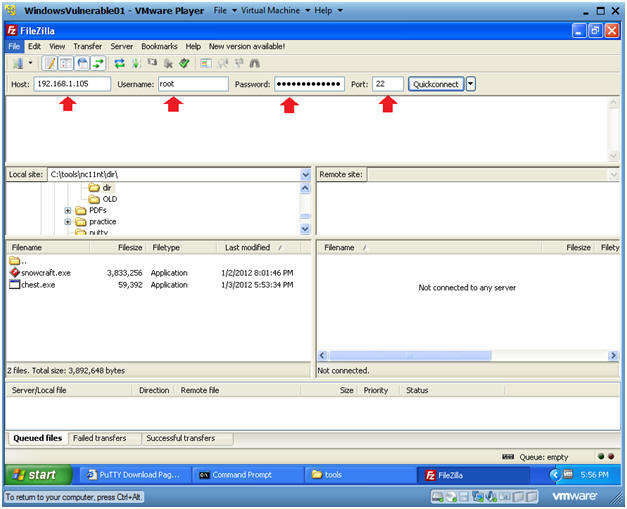
- Establish a Connection to Backtrack5R1
- Instructions:
- Host: 192.168.1.105
- Your IP Address was obtained in Section 0, Step 5.
- Username: root
- Password: <Supply your root password>
- Port: 22
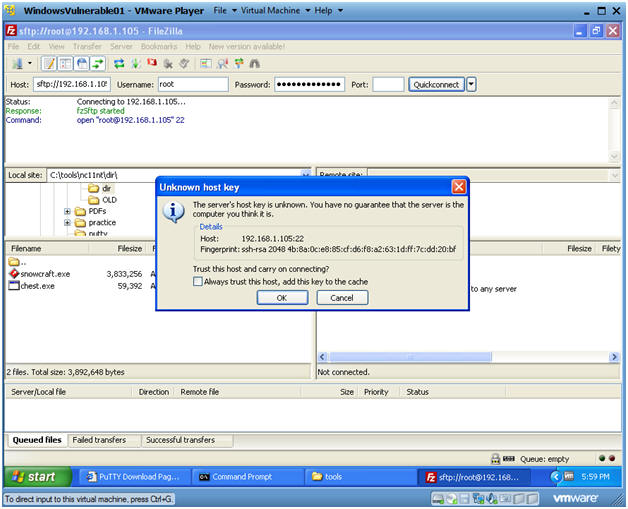
- Host: 192.168.1.105
 .
.
- Instructions:
- Unknown host key
- Instructions:
- Click OK
- Instructions:
- Drag and Drop
- Instructions:
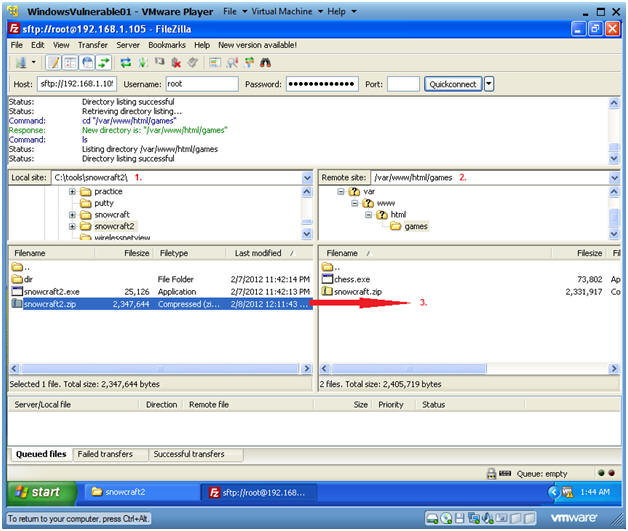
- Local Site: C:\tools\snowcraft2
- Remote Site: /var/www/html/games
- Drag and Drop snowcraft2.zip from C:\tools\snowcraft2 to /var/www/html/games.
- Instructions:
| Section 6. Proof of Lab |
- Open a Command Prompt
- Instruction(On
BackTrack5R1):
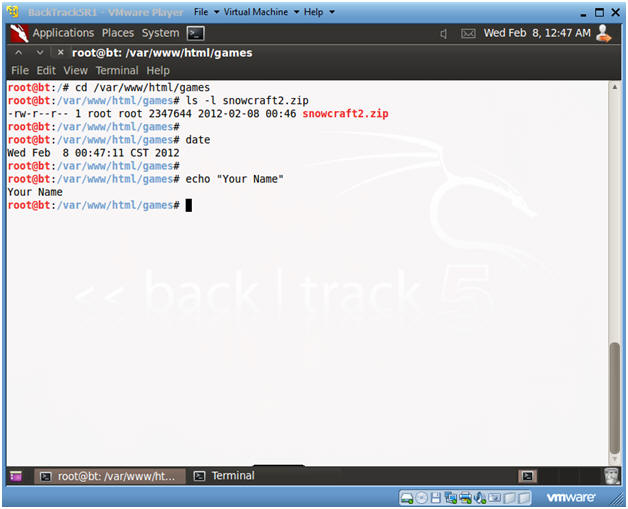
- cd /var/www/html/games
- ls -l
- date
- echo "Your Name"
- Replace the string "Your Name" with your actual name.
- E.g., echo "John Gray"
- Proof of Lab Instructions
- Do a PrtScn
- Paste into a word document
- Upload to Moodle
- Instruction(On
BackTrack5R1):
