Tenable Network
Security provides enterprise-class solutions
for continuous monitoring and visibility of
vulnerabilities, configurations, user
activity and system events that impact
security and compliance.
(NESSUS: Lesson 1)
{ Set up scans and read results }
| Background Information |
- What is NESSUS?
- Nessus features high-speed discovery, configuration auditing, asset profiling, sensitive data discovery and vulnerability analysis of your security posture.
-
- Reference Link:
-
Lab Notes
- In this lab we will do the following:
- Create a Nessus Internal Scan
- Scan Damn Vulnerable WXP-SP2
- Analyze Results
- Export Results
- In this lab we will do the following:
- Legal Disclaimer
- As a condition of your use of this Web site, you warrant to computersecuritystudent.com that you will not use this Web site for any purpose that is unlawful or that is prohibited by these terms, conditions, and notices.
- In accordance with UCC § 2-316, this product is provided with "no warranties, either express or implied." The information contained is provided "as-is", with "no guarantee of merchantability."
- In addition, this is a teaching website that does not condone malicious behavior of any kind.
- Your are on notice, that continuing and/or using this lab outside your "own" test environment is considered malicious and is against the law.
- © 2012 No content replication of any kind is allowed without express written permission.
| Section 1: Login to PENTEST-WXP (Attacking Machine) |
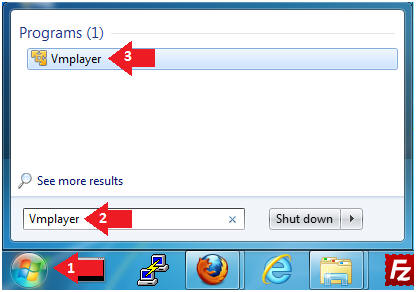
- Start Up VMWare Player
- Instructions:
- Click the Start Button
- Type Vmplayer in the search box
- Click on Vmplayer
- Instructions:
- Edit Virtual Machine Settings
- Instructions:
- Click on PENTEST-WXP
- Edit Virtual Machine Settings
- Note:
- This VM is running Windows XP.
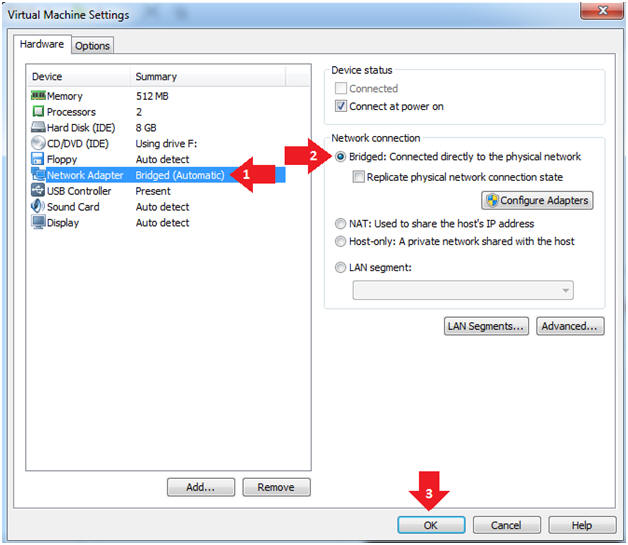
- Instructions:
- Set Network Adapter
- Instructions:
- Click on Network Adapter
- Click on the radio button "Bridged: Connected directly to the physical network".
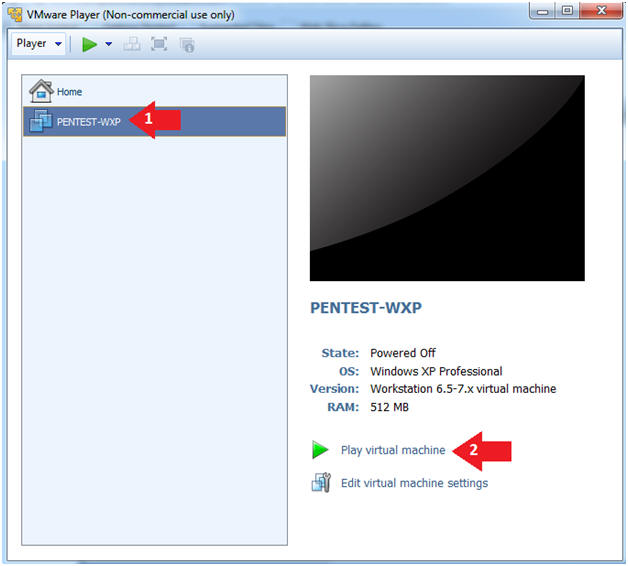
- Instructions:
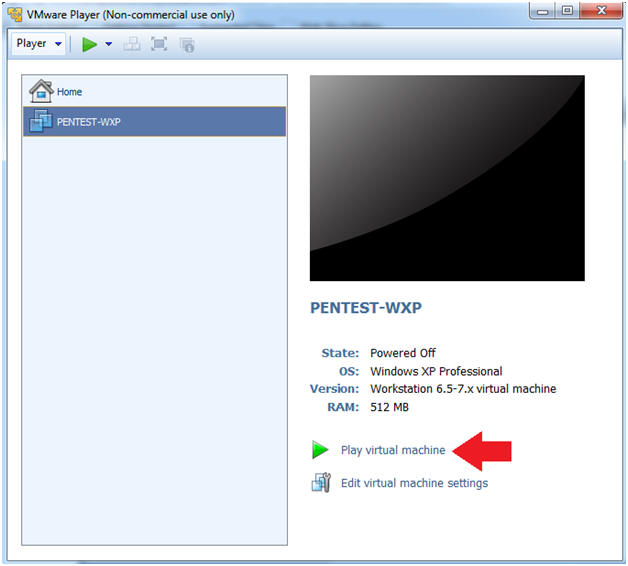
- Start Up PENTEST-WXP
- Instructions:
- Click Play virtual machine
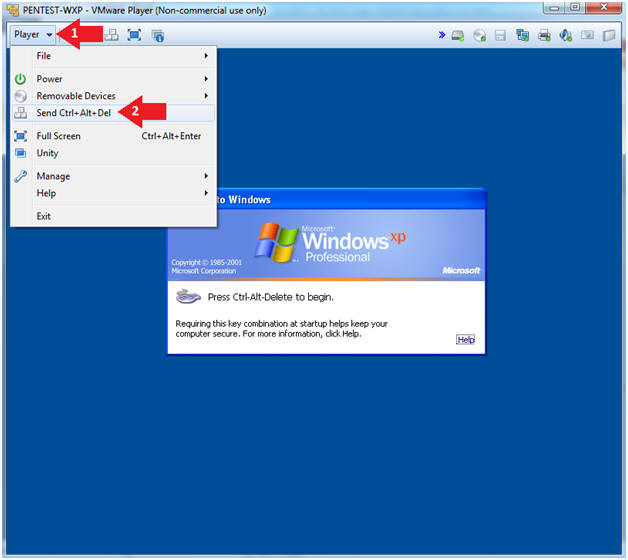
- Instructions:
- Send Ctrl+Alt+Del
- Instructions:
- Click Player
- Click Send Ctrl+Alt+Del
- Instructions:
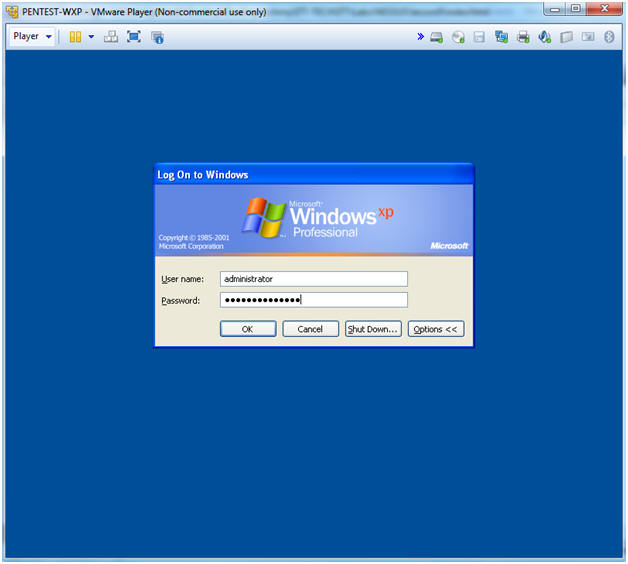
- Logging into PENTEST-WXP
- Instructions:
- Username: administrator
- Password: Supply your password
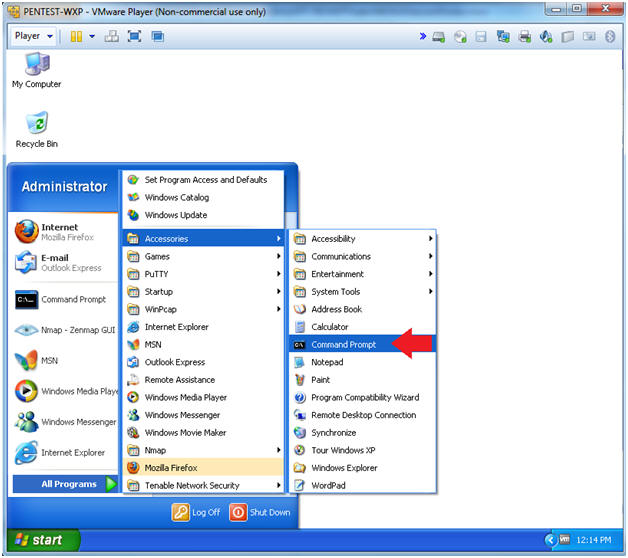
- Instructions:
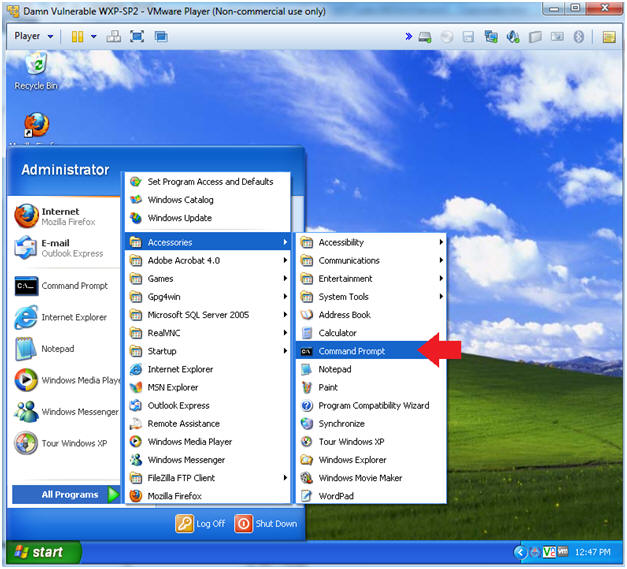
- Open a Command Prompt
- Instructions:
- Start --> All Programs --> Accessories --> Command Prompt
- Instructions:
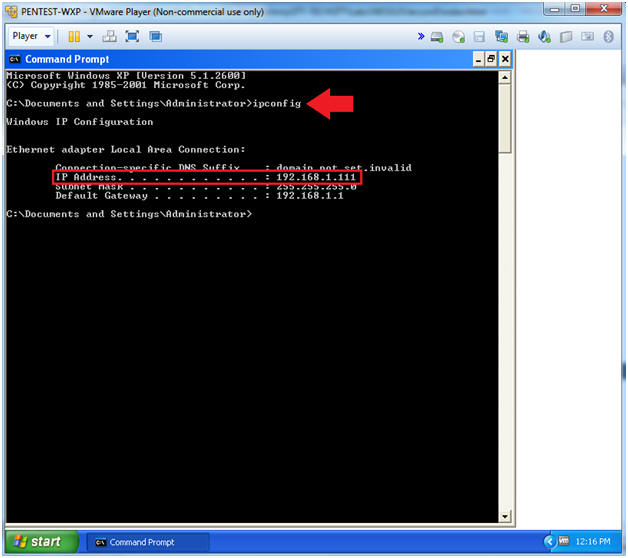
- Determine IP Address
- Instructions:
- ipconfig
- Note(FYI):
- My IP Address is 192.168.1.111.
- Your IP Address will probably be different.
- Instructions:
| Section 2: Login to Damn Vulnerable WXP-SP2 (Victim Machine) |
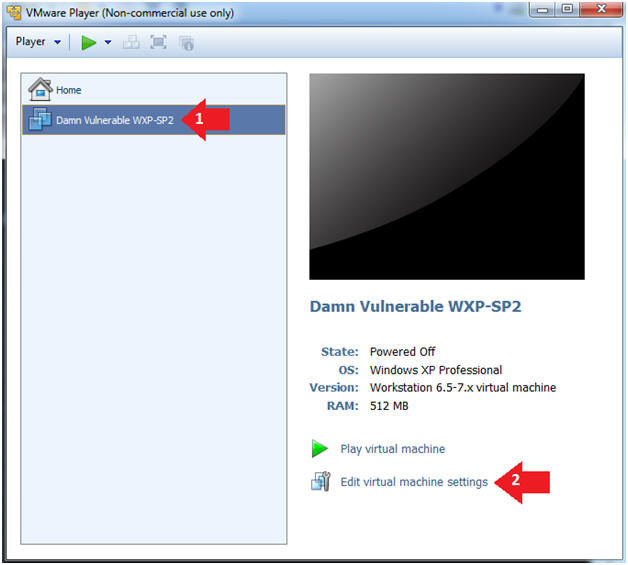
- Edit Virtual Machine Settings
- Instructions:
- Click on Damn Vulnerable WXP-SP2
- Edit Virtual Machine Settings
- Note:
- This VM is running Windows XP.
- This is the Victim Machine that we will be scanning with PENTEST-WXP.
- Instructions:
- Set Network Adapter
- Instructions:
- Click on Network Adapter
- Click on the radio button "Bridged: Connected directly to the physical network".
- Instructions:
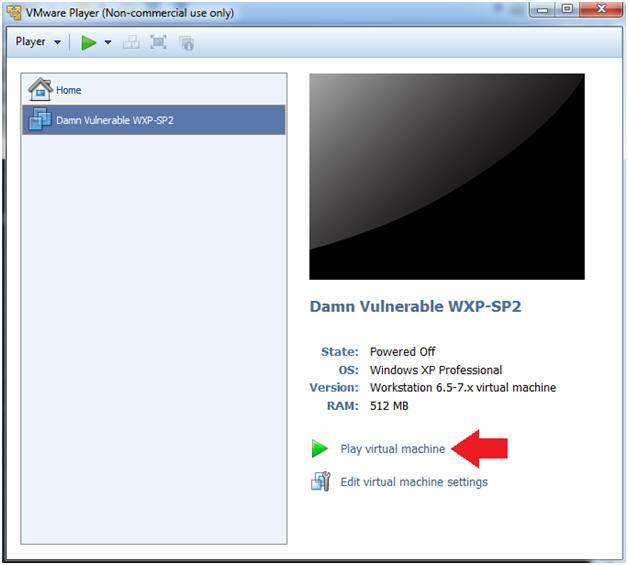
- Start Up Damn Vulnerable WXP-SP2.
- Instructions:
- Start Up your VMware Player
- Play virtual machine
- Instructions:
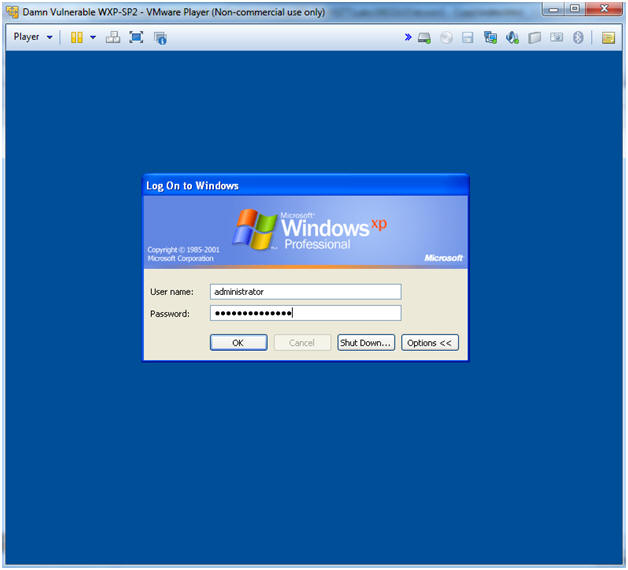
- Logging into Damn Vulnerable WXP-SP2.
- Instructions:
- Username: administrator
- Password: Use the Class Password or whatever you set it.
- Instructions:
- Open a Command Prompt
- Instructions:
- Start --> All Programs --> Accessories --> Command Prompt
- Instructions:
- Obtain the IP Address
- Instructions:
- In the Command Prompt type "ipconfig"
- Note(FYI):
- In my case, Damn Vulnerable WXP-SP2's IP Address 192.168.1.116.
- This is the IP Address of the Victim Machine.
- Record your IP Address.
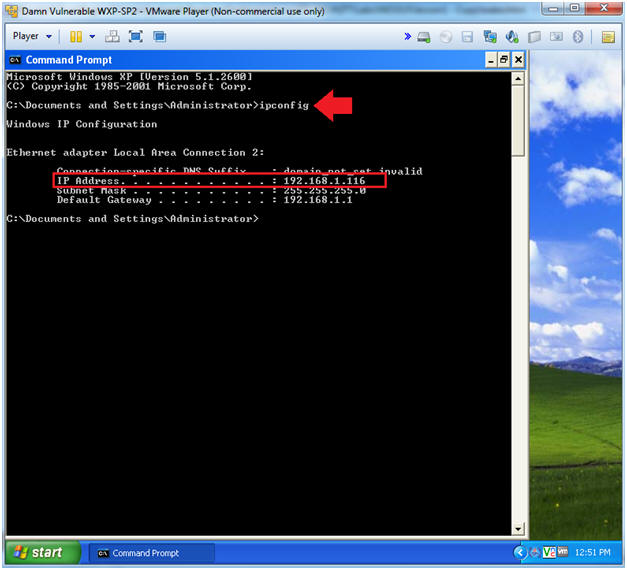
- Instructions:
| Section 3: Login to Nessus |
- Start the Nessus Web Client
- Instructions:
- Make sure you are on PENTEST-WXP
- Click on the Nessus Web Client located on the desktop
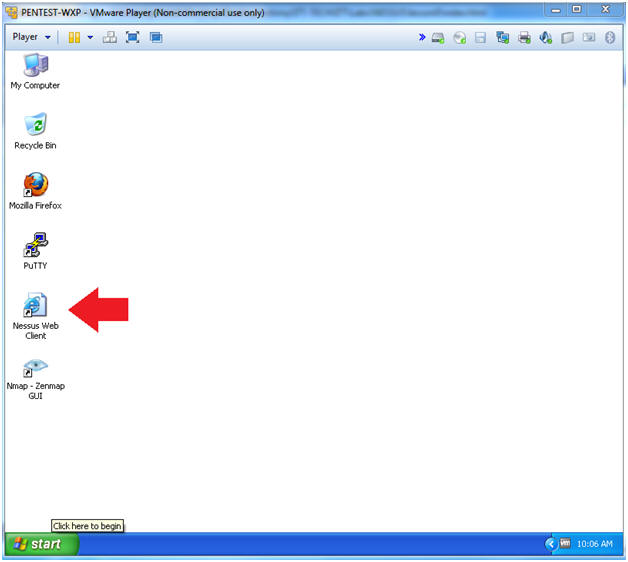
- Instructions:
- Login To Nessus
- Instructions:
- Username: admin
- Password: Supply your password
- Click the Sign In To Continue Button
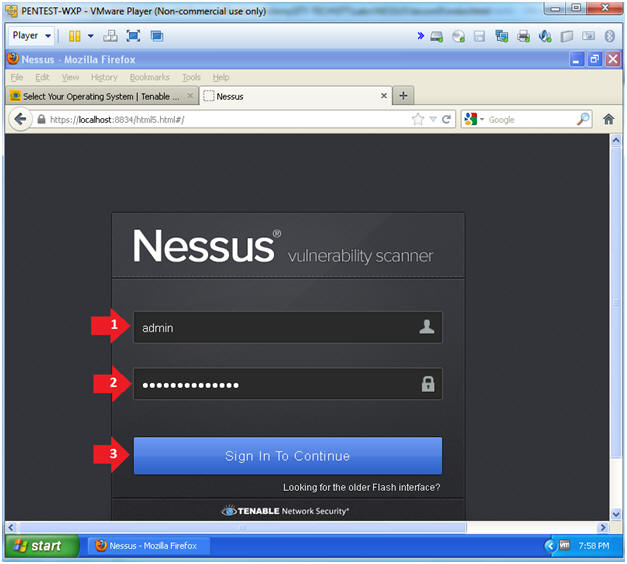
- Instructions:
| Section 4: Creating a Scan |
- Click on Scan
- Instructions:
- Click on the Scan Tab
- Click on New Scan
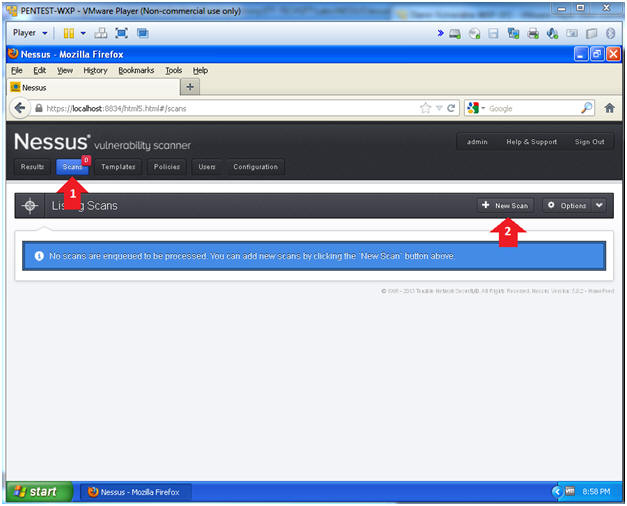
- Instructions:
- Create New Scan
- Instructions:
- Scan Title: Damn Vulnerable WXP-SP2
- Scan Type: Run Now
- Scan Policy: Internal Network Scan
- Scan Target:
Input Damn
Vulnerable WXP-SP2's IP Address.
- In my case, the IP Address is 192.168.1.116
- Click the Create Scan Button
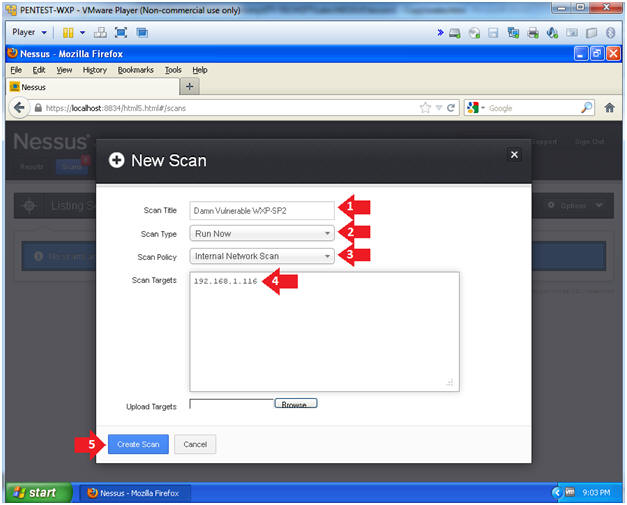
- Instructions:
- Monitor the Scan
-
Instructions:
- Click on the Running Status
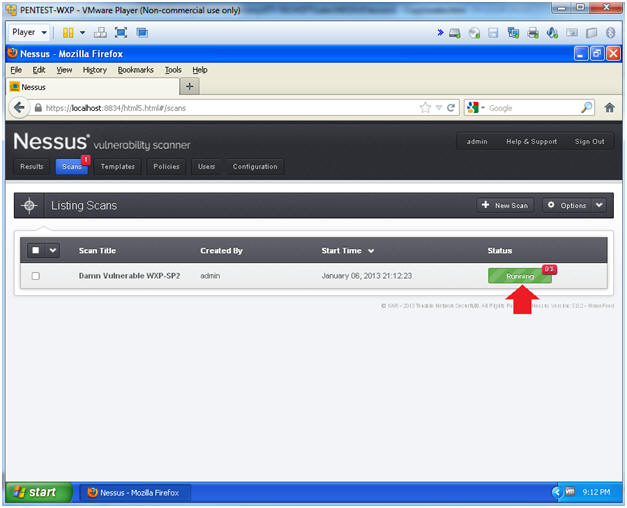
-
Instructions:
- Host Result Summary
-
Instructions:
- Wait 5 to 10 minutes until scan is 100% complete.
- Click on the purple section to see the most critical vulnerabilities.
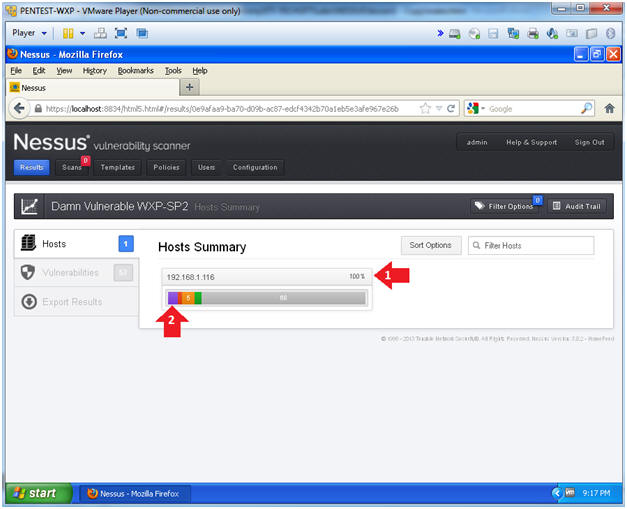
-
Instructions:
- View Critical Alert(s)
-
Instructions:
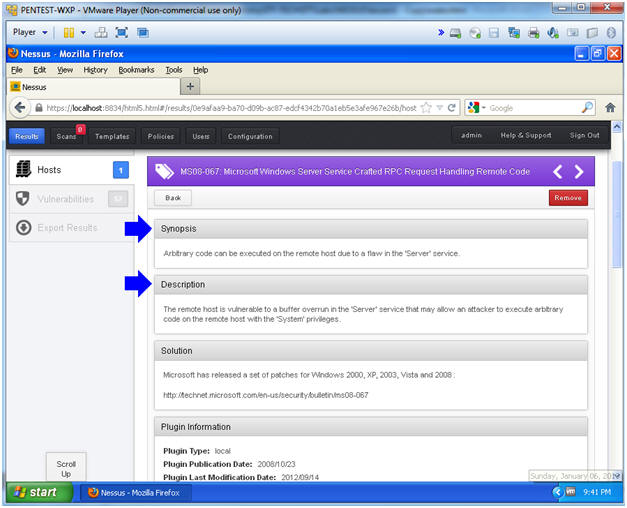
- Click on MS08-067
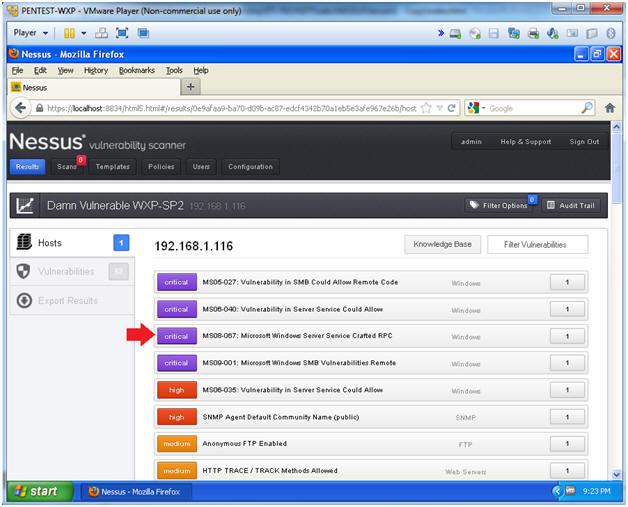
-
Instructions:
- Analyzing MS08-067 Results
-
Instructions:
- Read the Synopsis
- Read the Description
- Read the Vulnerability Information
- This will show you which tools can be used to exploit this vulnerability.
- Note(FYI):
- Basically the attacker can use a tool like Metasploit to mangle the kernel by overflowing the stack and then execute code after overrunning the kernel.
-
Instructions:
- View Critical Alert
-
Instructions:
- Export Format: CSV
- Click the Export Button
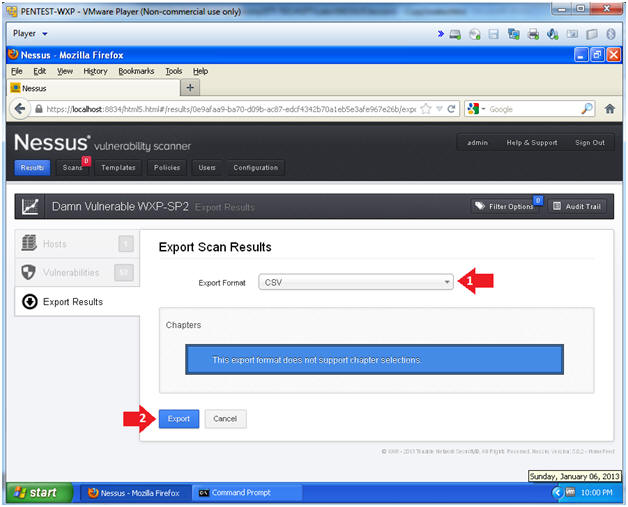
-
Instructions:
- Download Report
-
Instructions:
- Click the radio button "Save File"
- Click the OK button.
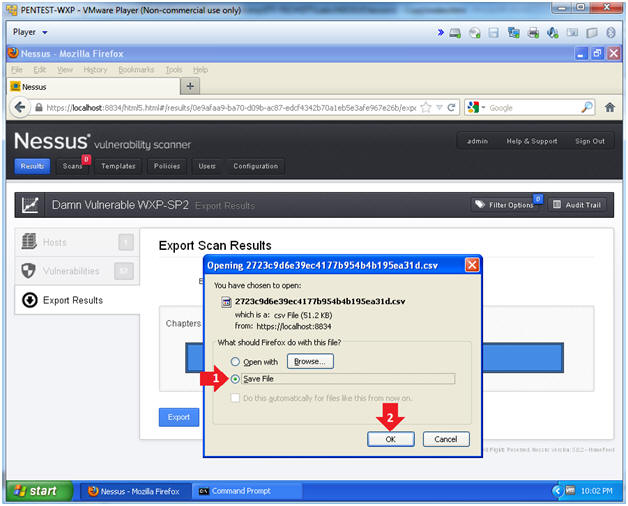
-
Instructions:
| Section 5: Proof of Lab |
- Open a Command Prompt
- Instructions:
- Start --> All Programs --> Accessories --> Command Prompt
- Instructions:
-
Proof of Lab Instructions
- Instructions:
- cd "My Documents\Downloads"
- type *.csv | findstr MS08-067
- date /t
- echo "Your Name"
- Replace the string "Your Name" with your actual name.
- e.g., echo "John Gray"
- Do a PrtScn
- Paste into a word document
- Upload to Moodle

- Instructions: