(NESSUS: Lesson 4)
{ Install Nessus on Kali Rolling Edition }
| Section 0. Background Information |
- What is NESSUS?
- Tenable Network Security provides enterprise-class solutions for continuous monitoring and visibility of vulnerabilities, configurations, user activity and system events that impact security and compliance.
- Nessus features high-speed discovery, configuration auditing, asset profiling, sensitive data discovery and vulnerability analysis of your security posture
- Pre-Requisite
-
Lab Notes
- In this lab we will do the following:
- Install Nessus.
- Start the Nessus service
- Configure Nessus certificate
- Login Nessus
- In this lab we will do the following:
- Legal Disclaimer
- As a condition of your use of this Web site, you warrant to computersecuritystudent.com that you will not use this Web site for any purpose that is unlawful or that is prohibited by these terms, conditions, and notices.
- In accordance with UCC § 2-316, this product is provided with "no warranties, either express or implied." The information contained is provided "as-is", with "no guarantee of merchantability."
- In addition, this is a teaching website that does not condone malicious behavior of any kind.
- You are on notice, that continuing and/or using this lab outside your "own" test environment is considered malicious and is against the law.
- © 2013 No content replication of any kind is allowed without express written permission.
| Section 1: Login to Kali |
- Start Up VMWare Player
- Instructions:
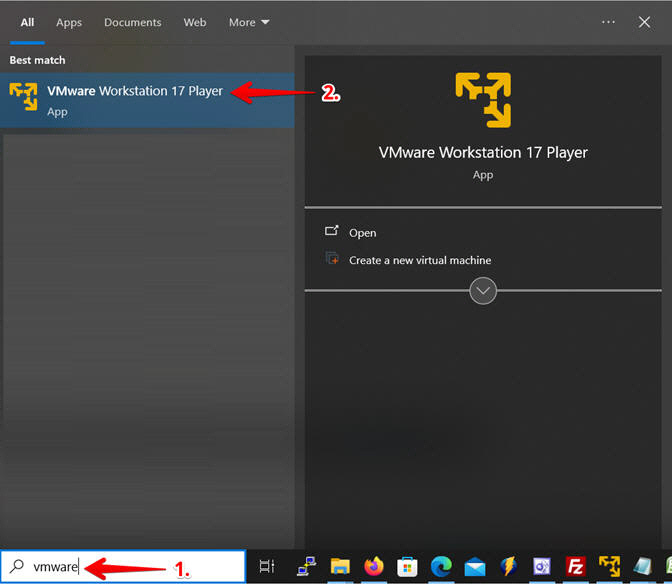
- Click the Start Button
- Type Vmplayer in the search box
- Click on Vmplayer
- Instructions:
- Edit the kali2 VM
- Instructions:
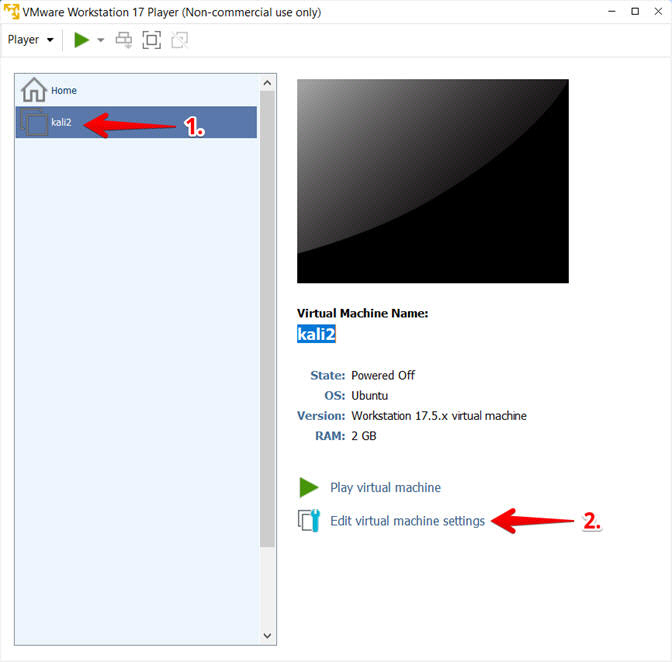
- Select kali2 VM
- Click Edit virtual machine settings
- Instructions:
- Edit Virtual Machine Settings
- Instructions:
- Click on Network Adapter
- Click on the Bridged Radio button
- Click on the OK Button
- Instructions:
- Play the kali2 VM
- Instructions:
- Click on the kali2 VM
- Click on Play virtual machine

- Instructions:
- Supply Username and Password
- Instructions:
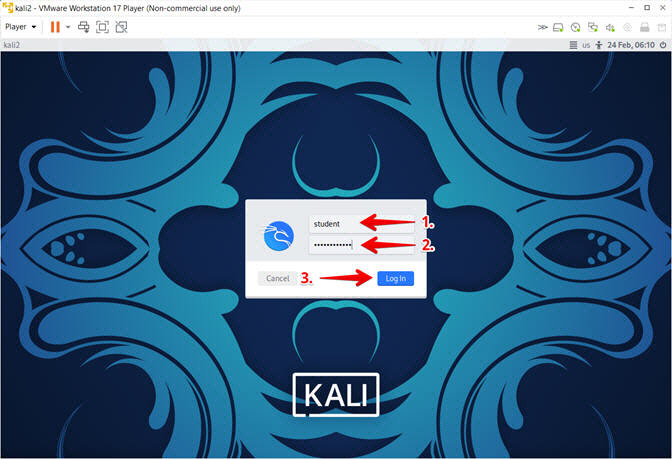
- Provide username
- Provide password
- Click the Log In Button
- Instructions:

| Section 2: Bring up a console terminal |
- Open a Terminal Emulator
- Instructions:
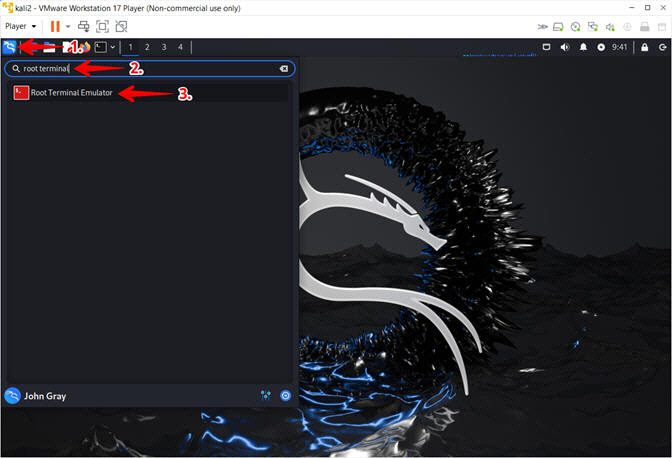
- Click the Kali Icon in the upper left corner
- Search for the string root terminal
- Click on the Root Terminal Emulator Icon
- Instructions:
- Authentication
- Instructions:
- Supply Password
- Click the Authenticate Button
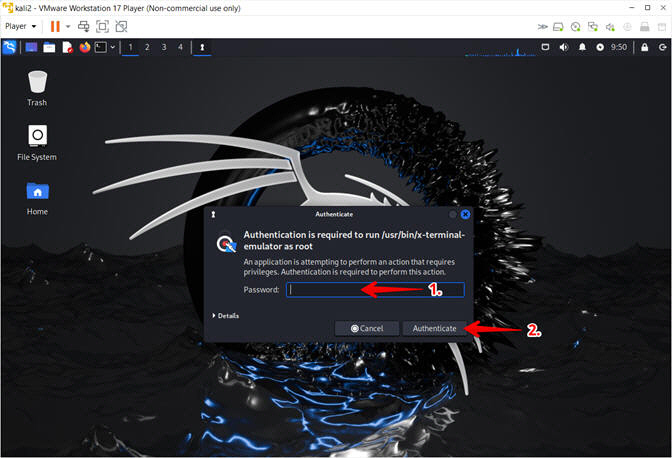
- Instructions:
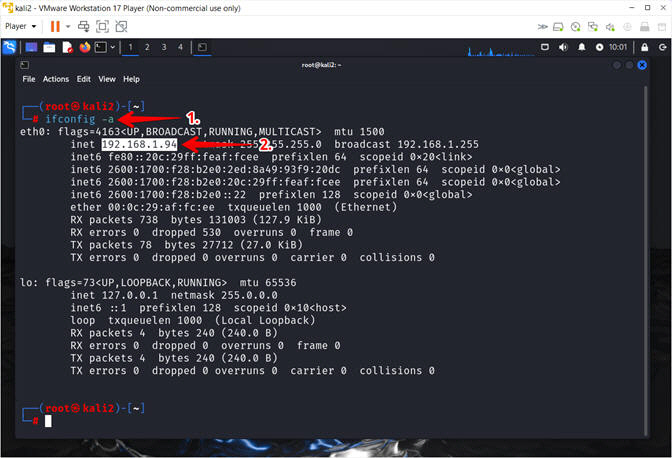
- Obtain the IP Address
- Instructions:
- ifconfig -a
- Record your IP Address
- Note(FYI):
- My IP address 192.168.1.94.
- In your case, it will probably be different.
- Run "dhclient -v" if you do not have an IP address.
- Instructions:
| Section 3: Download Nessus |
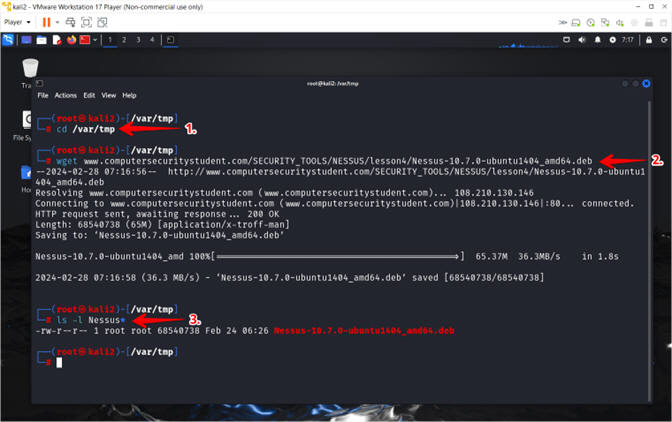
- Download Nessus
- Instructions:
- cd /var/tmp
- wget www.computersecuritystudent.com/SECURITY_TOOLS/NESSUS/lesson4/Nessus-10.7.0-ubuntu1404_amd64.deb
- ls -l Nessus*
- Note(FYI):
- "/var/tmp" is a common place to download files.
- That latest version of Nessus can be
retrieved from the Tenable website.
- http://www.tenable.com/products/nessus/select-your-operating-system
- Use "ls" with the "-l" option to long list or provide details (e.g., permissions, ownerships, byte size, date, filename) of the Nessus deb (i.e., Debian Package) file you just downloaded.
- Instructions:
| Section 4: Install Nessus |
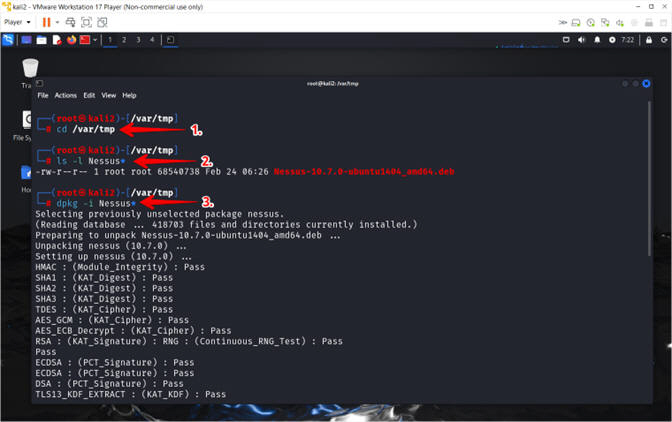
- Install Nessus
- Instructions
- cd /var/tmp
- ls -l Nessus*
- dpkg -i Nessus*
- Notes
- #1, Change Directory (cd) into the (/var/tmp) directory.
- #2, Use (ls -l) to long list the details of the Nessus package.
- #3, Use (dpkg -i) to install the Nessus package.
- For steps #2 and #3 I am using a the wildcard(*) just encase the version changes.
- Instructions
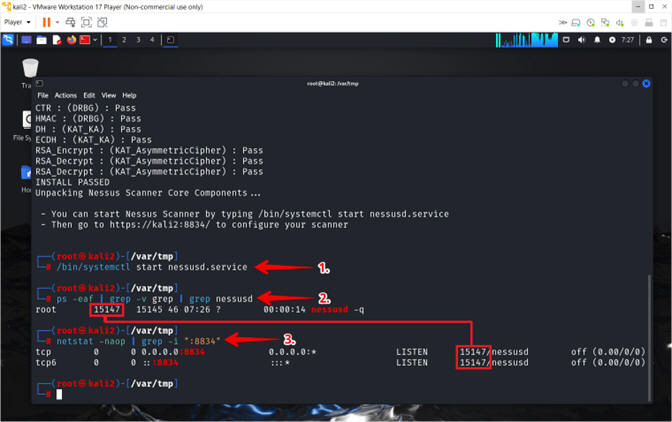
- Start Nessus
- Instructions
- /bin/systemctl start nessusd.service
- ps -eaf | grep -v grep | grep nessusd
- netstat -naop | grep -i ":8834"
- Notes
- #1, The script (/bin/systemctl start nessusd.service) provides the ability to start, stop and restart the Nessus Application.
- #2, Use the process (ps) command to display all (-eaf) running processes. Use (grep -v grep) to ignore (-v) any lines that contain the actual grep process. Use (grep nessusd) to display only lines that contain the (nessusd) process.
- #3, Use (netstat) to display all (-a) numeric (-n) network connections and list timers (-o) and process IDs (-p).
- Instructions
| Section 5: Configure Firefox Downloads |
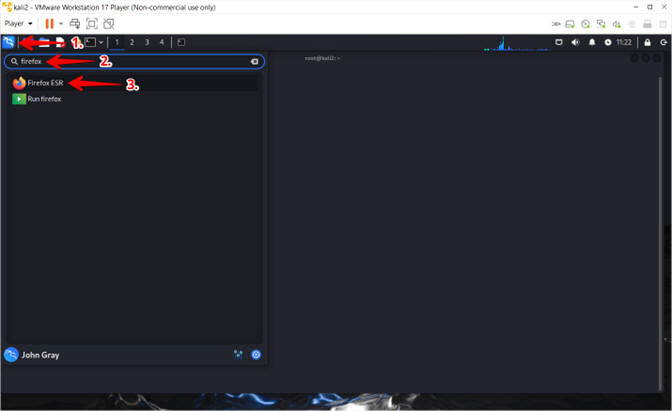
- Start Firefox Instance
- Instructions:
- Click the Kali Icon
- Search for firefox
- Click the FireFox ESR Icon
- Instructions:
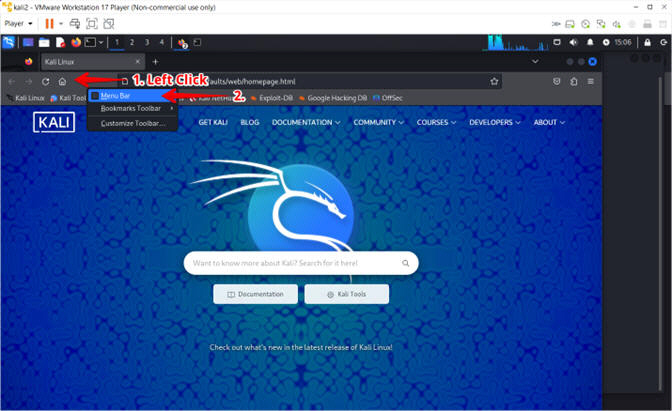
- Enable Menu Bar
- Instructions:
- Left Click by the Home Icon
- Select the Menu Bar
- Instructions:
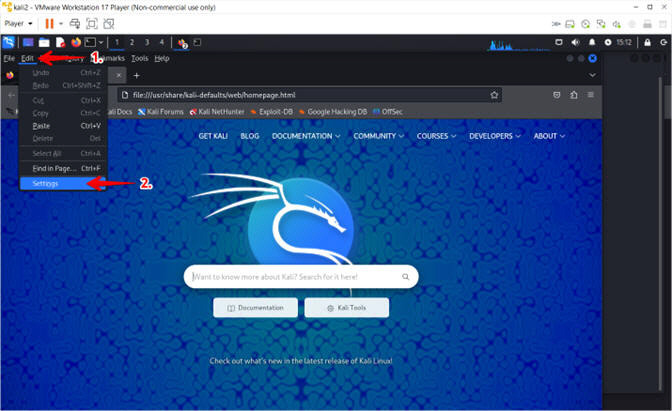
- Enter Setting
- Instructions:
- Select Edit
- Select Settings
- Instructions:
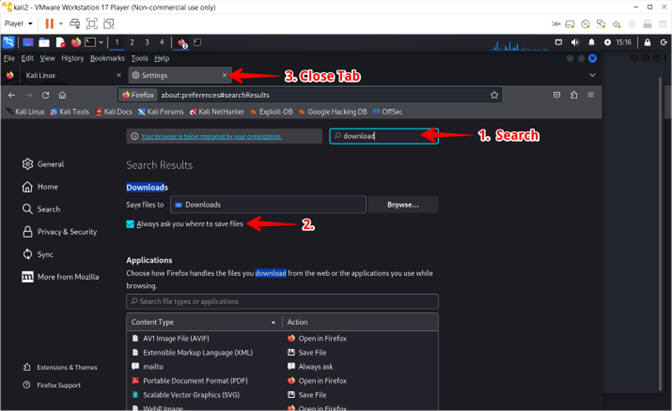
- Configure Downloads
- Instructions:
- Search for downloads
- Select Always ask you where to save files
- Instructions:
| Section 6: Obtain Nessus Activation Code |
- Obtain Registration Code
- Instructions:
- Place the following URL into Firefox
- http://www.tenable.com/products/nessus-home
- Supply First Name
- Supply Last Name
- Supply Email
- Click the Register Button
- Place the following URL into Firefox
- Instructions:
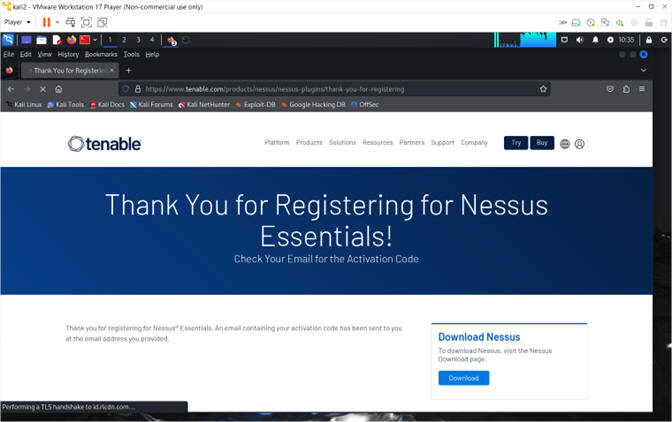
- Thank You For Registering
- Note(FYI):
- You will receive an email from Nessus containing your registration Key.
- Note(FYI):

| Section 7: Registered Nessus |
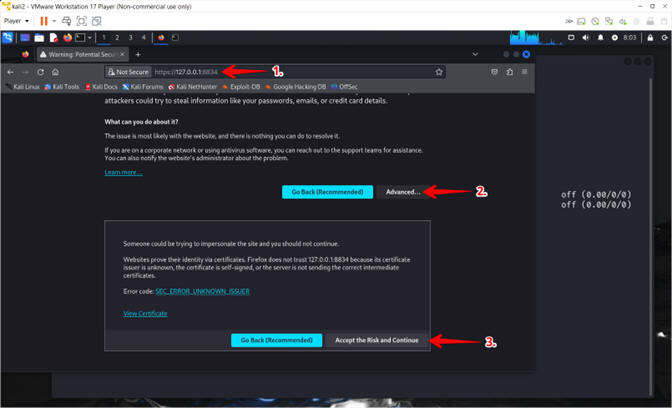
- Invalid Certificate Warning
- Instructions:
- Navigate to https://127.0.0.1:8834/
- Click the Advanced button
- Click the Accept the Risk and Continue button
- Instructions:
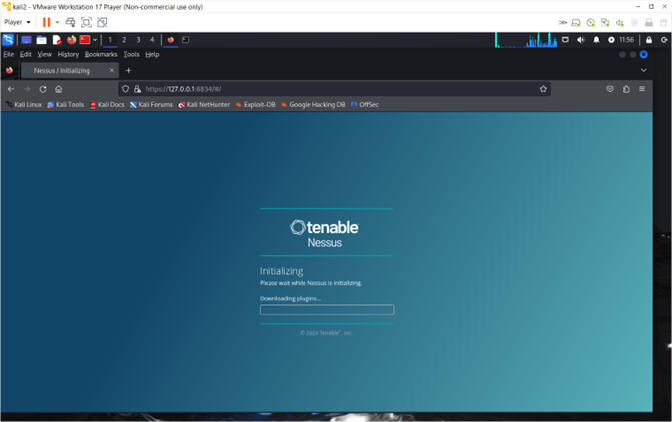
- Initialization
- Notes(FYI):
- This will take 3 to 5 minutes
- Notes(FYI):
- Get an activation code
- Instructions:
- Skip the First Name, Last Name, and Email inputs.
- Click the Skip Button
- Notes(FYI):
- Per (Section 6, Step 2) you should have received an email with an activation code.
- Instructions:
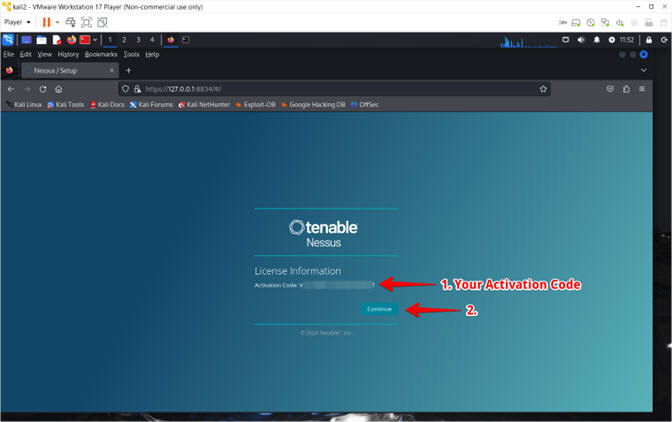
- Register Nessus
- Instructions:
- Activation Code: Paste Activation Code
- Click the Continue Button
- Note(FYI):
- Per (Section 6, Step 2) the Activation Code should have been sent to your email address that you supplied earlier.
- Instructions:
- License Information
- Instructions:
- Your activation code will be displayed
- Click the Continue button
- Instructions:
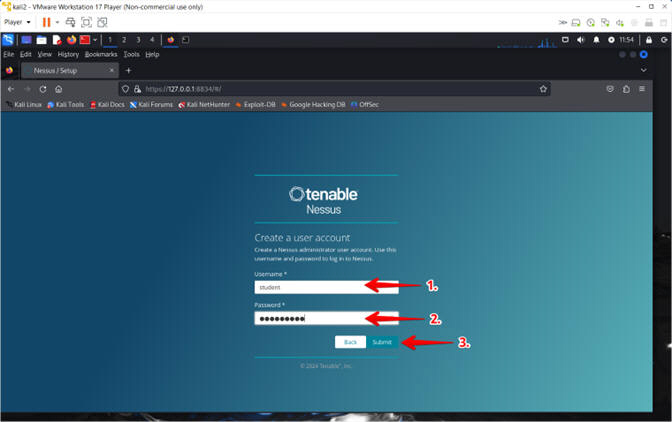
- Nessus Account Setup
- Instructions:
- Username: student
- Password: Supply Password
- Click the Continue Button
- Instructions:
- Nessus Plugin Download
- Notes(FYI):
- The download will take between 1 to 5 hours.
- Notes(FYI):
- Nessus Expert Trial
- Instructions:
- Notice Plugins are updating
- Close the Nessus Export Trial message
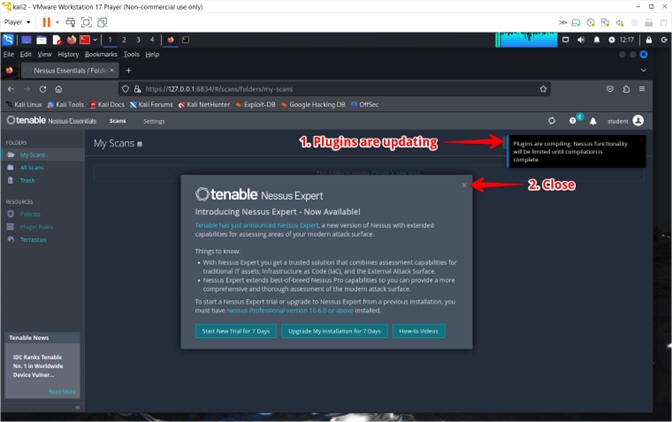
- Instructions:
- Updating Nessus Plugins (Part 1)
- Notes(FYI):
- The pinwheel indicates that plugins are being downloaded.
- This process will take between 1 to 5 hours.
- Scanning will not be available until complete.
- Notes(FYI):
- Updating Nessus Plugins (Part 2)
- Notes(FYI):
- The pinwheel indicates that plugins are being downloaded.
- This process will take between 1 to 5 hours.
- Scanning will not be available until complete.
- Notes(FYI):


| Section 8: Login to Nessus |
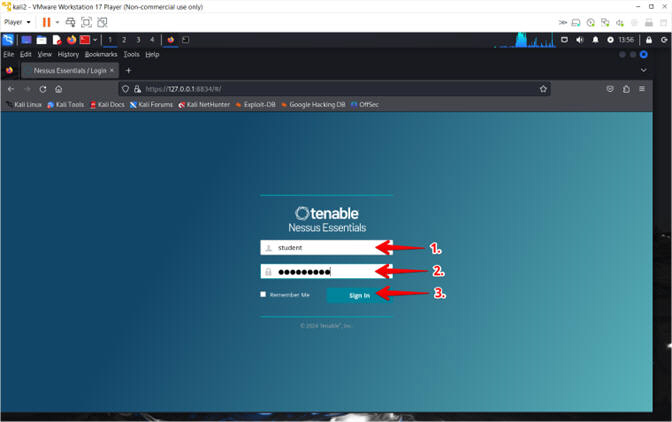
- Login To Nessus
- Instructions:
- Login: student
- Password: Supply Password
- Click the Sign In Button
- Instructions:
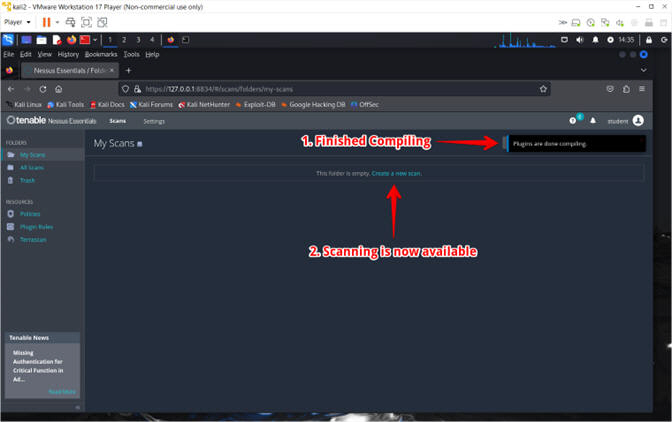
- Finished Compiling
- Note(FYI):
- Nessus will display a message that the "Plugins are done compiling"
- Notice the "Create a new scan" like is clickable an no longer grayed out.
- Note(FYI):
| Section 9: Proof of Lab |
- Open a Terminal Emulator
- Instructions:
- Click the Kali Icon in the upper left corner
- Search for the string root terminal
- Click on the Root Terminal Emulator Icon
- Instructions:
- Authentication
- Instructions:
- Supply Password
- Click the Authenticate Button
- Instructions:
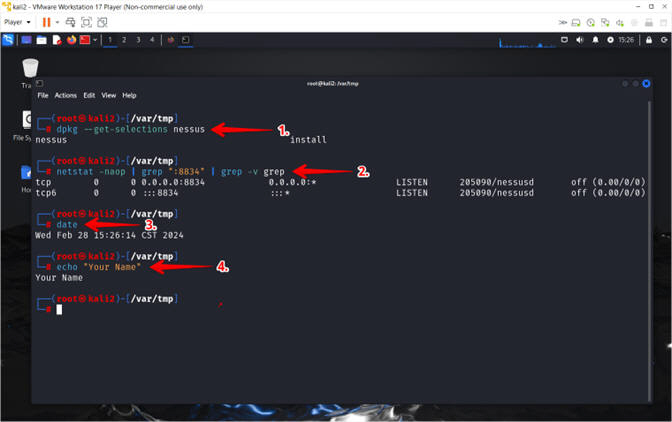
- Proof of Lab
- Instructions
- dpkg --get-selections nessus
- netstat -nao | grep 8834 | grep -v grep
- date
- echo "Your Name"
- Put in your actual name in place of "Your Name"
- e.g., echo "John Gray"
- date
-
Proof Of Lab Instructions:
- Press the PrtScn key
- Paste into a word document
- Upload to Moodle
- Instructions
| Section 10: Log Out of Nessus |
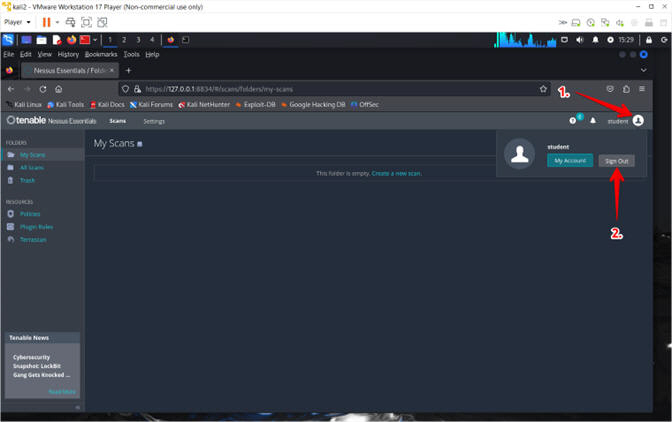
- Logout of Nessus
- Instructions:
- Click on the student user icon
- Click Sign Out
- Instructions: