(bWAPP v2.2: Lesson 1)
{ Download and Prepare bWAPP Virtual Machine }
| Section 0. Background Information |
- What is bWAPP?
- bWAPP, or a buggy web application, is a free and open source deliberately insecure web application. It helps security enthusiasts, developers and students to discover and to prevent web vulnerabilities.
- bWAPP prepares one to conduct successful penetration testing and ethical hacking projects.
- Special thanks goes to Malik Mesellem for creating such a wonderful application and environment. For more extensive training, please visit www.itsecgames.com.
- By downloading and using this software, you agree to bWAPP's license terms.
-
Lab Notes
- In this lab we will do the following:
- Download bWAPP
- Configure Keyboard
- Configure Date and Time
- Verify bWAPP is working
- In this lab we will do the following:
- Legal Disclaimer
- As a condition of your use of this Web site, you warrant to computersecuritystudent.com that you will not use this Web site for any purpose that is unlawful or that is prohibited by these terms, conditions, and notices.
- In accordance with UCC § 2-316, this product is provided with "no warranties, either express or implied." The information contained is provided "as-is", with "no guarantee of merchantability."
- In addition, this is a teaching website that does not condone malicious behavior of any kind.
- You are on notice, that continuing and/or using this lab outside your "own" test environment is considered malicious and is against the law.
- © 2015 No content replication of any kind is allowed without express written permission.
| Section 1. Download 7-Zip (Pre-Requisite) |
- Open a Command Prompt
- Note(FYI):
- If 7-zip is already installed on your host system, then skip Section 1 and proceed to Section 2.
- Instructions:
- Click the Start Button
- Type cmd in the search box
- Click the cmd icon

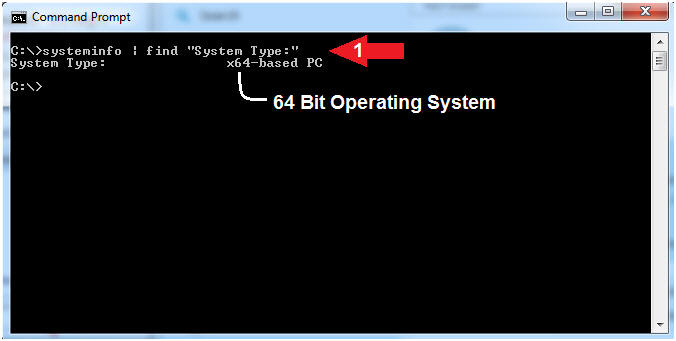
- Note(FYI):
- Determine System Type
- Instructions:
- systeminfo | find "System Type:"
- Note(FYI):
- x64 - 64 Bit Operating System
- x86 - 32 Bit Operating System
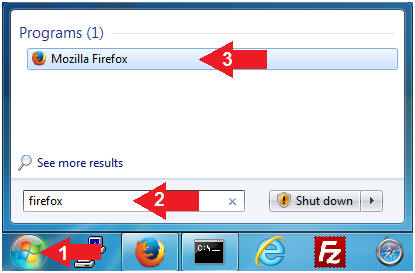
- Instructions:
- Open Firefox
- Instructions:
- Click the Start Button
- Type firefox in the search box
- Click the firefox icon
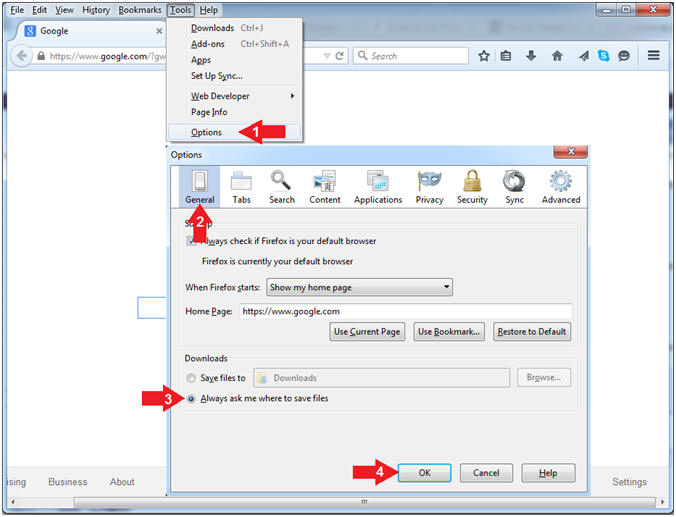
- Instructions:
- Save Files Configuration Location
- Instructions:
- Tools --> Options
- Click the General Tab
- Click the radio button Always ask me where to save files
- Click the OK button
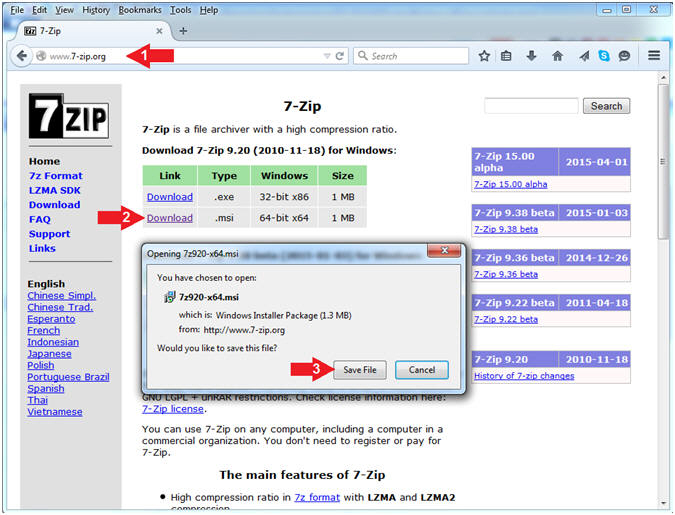
- Instructions:
- Start 7-Zip Download
- Instructions:
- http://www.7-zip.org
- Click Download
- Click the Save File Button
- Note(FYI):
- Use Section 1, Step 2 to determine if you should download the 32-bit or 64-bit version.
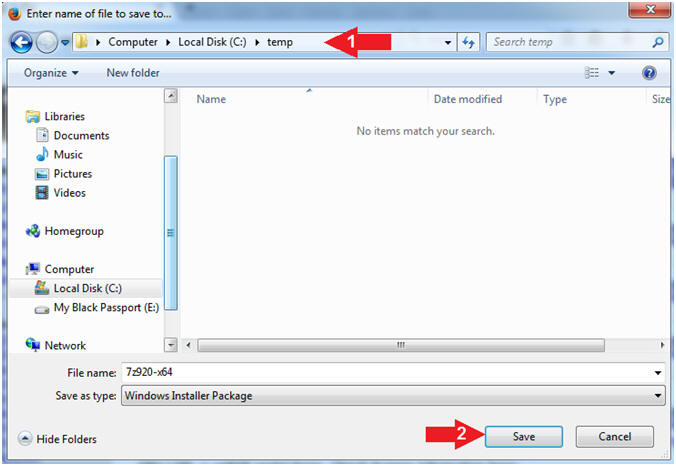
- Instructions:
- Save 7-Zip
- Instructions:
- Navigate to C:\temp
- Click the Save Button
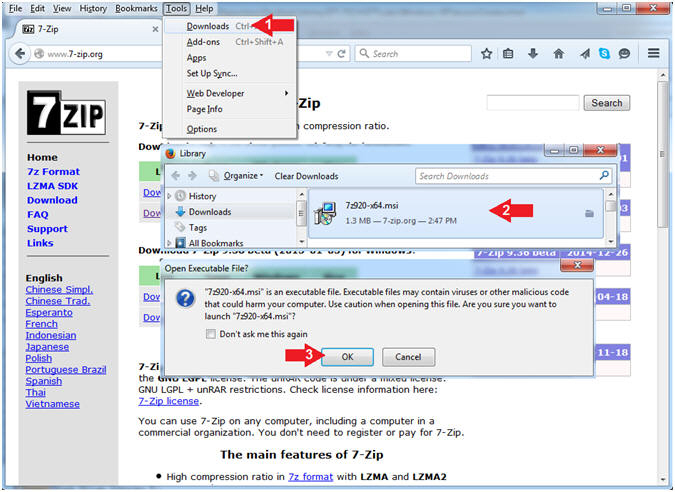
- Instructions:
- Open Executable File
- Instructions:
- Tools --> Download
- Double Click on 7z*.msi file
- Click the OK Button
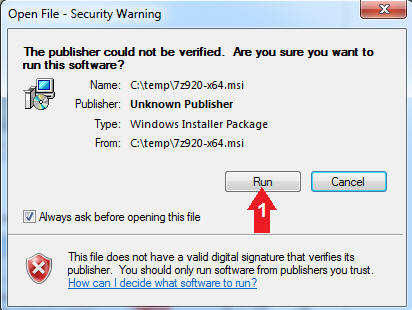
- Instructions:
- Open Executable File
- Instructions:
- Click the Run Button
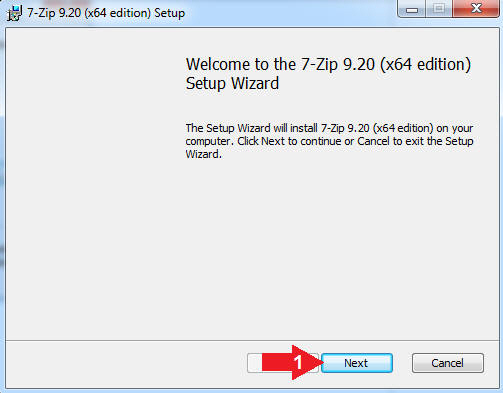
- Instructions:
- 7-Zip Setup Wizard
- Instructions:
- Click the Next Button
- Instructions:
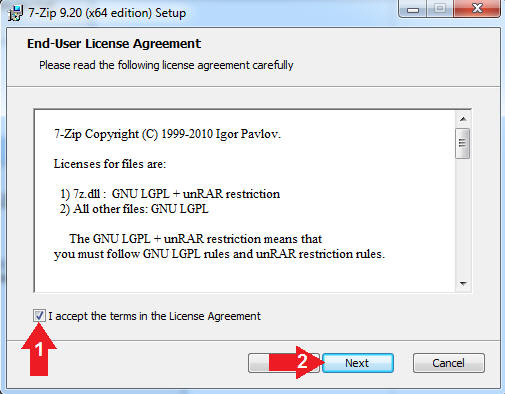
- 7-Zip EULA
- Instructions:
- Check I Accept...
- Click the Next Button
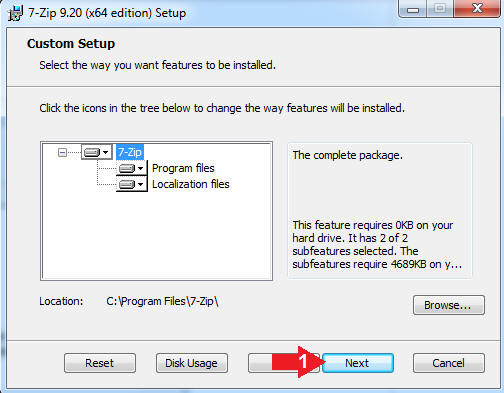
- Instructions:
- 7-Zip Custom Setup
- Instructions:
- Click the Next Button
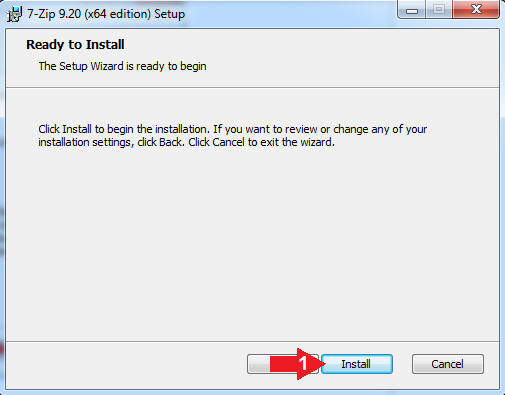
- Instructions:
- 7-Zip Installation
- Instructions:
- Click the Install Button
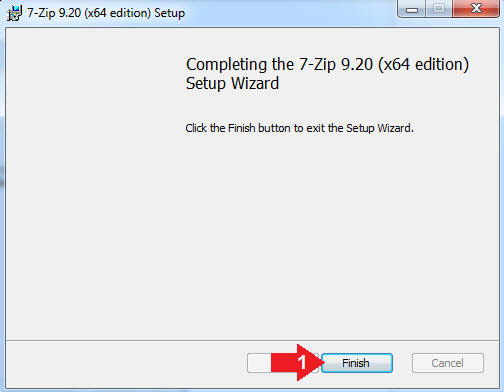
- Instructions:
- 7-Zip Completion
- Instructions:
- Click the Finish Button
- Instructions:
| Section 2. Download bWAPP VM |
- Download Windows bWAPP
- Instructions:
- http://sourceforge.net/projects/bwapp/files/bee-box/bee-box_v1.6.7z/download
- Click direct link
- Select VMware Player for Windows
- Click the Save File Radio button
- Click the OK Button

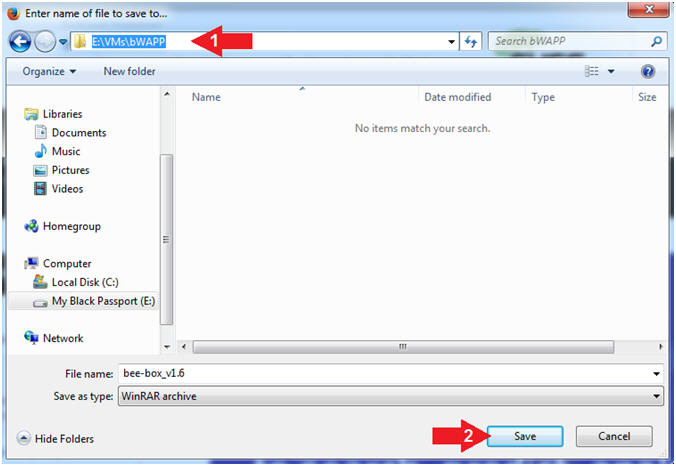
- Instructions:
- Download Location
- Instructions:
- Navigate to your preferred download
directory
- In my case, E:\VMs\bWAPP
- Click the Save Button
- Navigate to your preferred download
directory
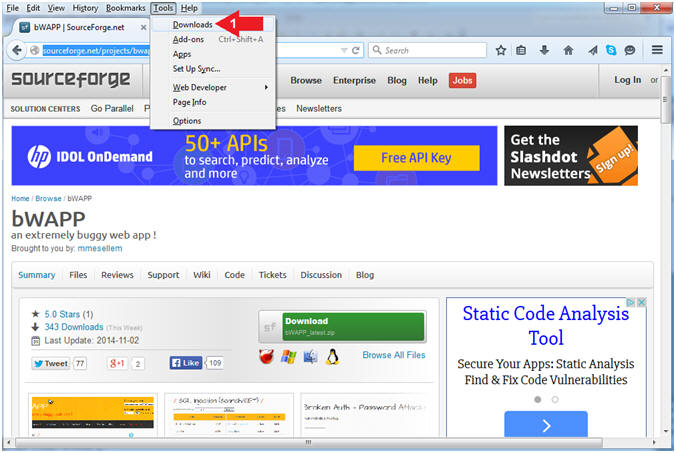
- Instructions:
- Go To Downloads Folder (Part 1)
- Instructions:
- Tools --> Downloads
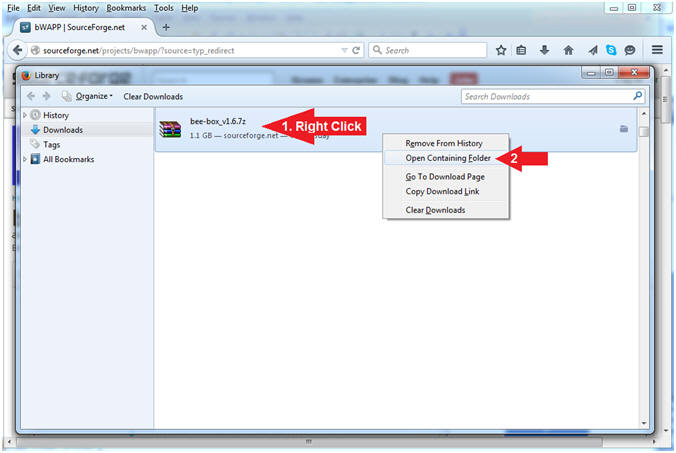
- Instructions:
- Go To Downloads Folder (Part 2)
- Instructions:
- Right Click on bee-box_v1.6.7z
- Open Containing Folder
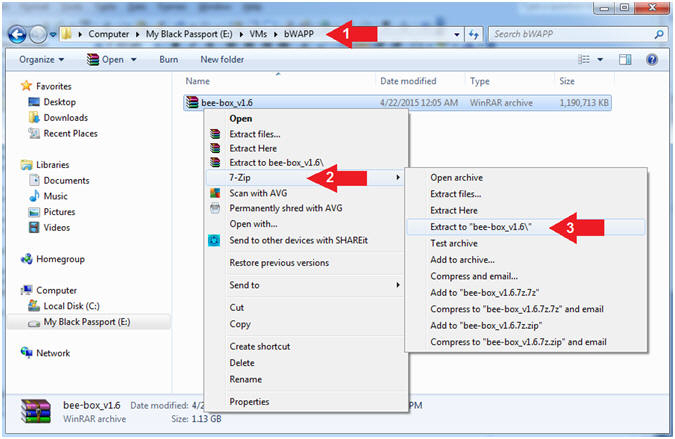
- Instructions:
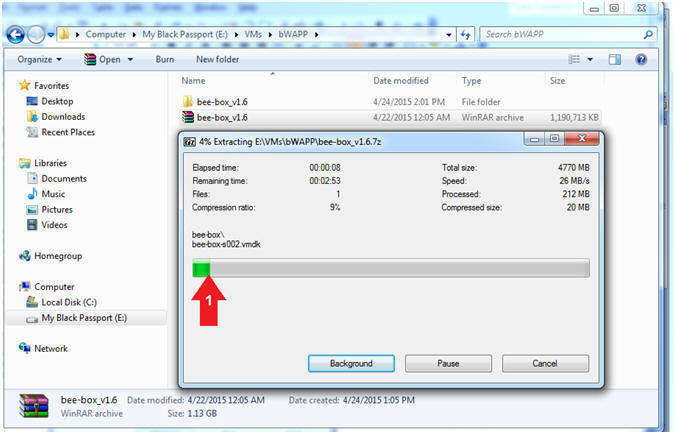
- Extract Files
- Instructions:
- Right Click on bee-box_v1.6
- Select 7-Zip
- Extract Here
- Instructions:
- Extract Process
- Note(FYI):
- The Extraction Process will take between 2 to 5 minutes.
- Continue to Next Step after the extraction completes.
- Note(FYI):
| Section 3. Create a New Virtual Machine |
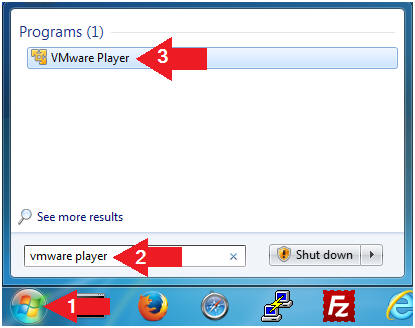
- Open VMware Player on your windows machine.
- Instructions:
- Click the Start Button
- Type "vmware player" in the search box
- Click on VMware Player
- Instructions:
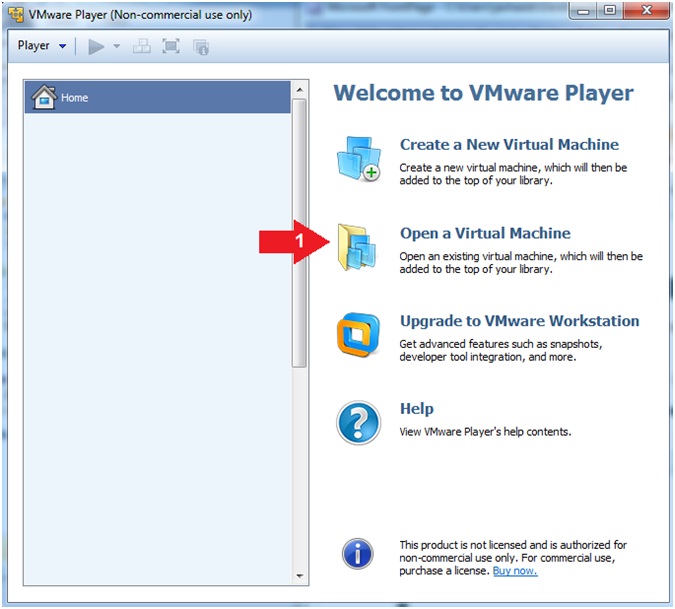
- Create a New Virtual Machine. (See Below)
- Instructions:
- Click on Open a Virtual Machine
- Instructions:
- Open Virtual Machine
- Instructions:
- Navigate To Extracted Virtual Machine
Location
- In my case, the directory was E:\VMs\bWAPP\bee-box_v1.6\bee-box
- Click bee-box
- Click the Open Button
- Navigate To Extracted Virtual Machine
Location

- Instructions:
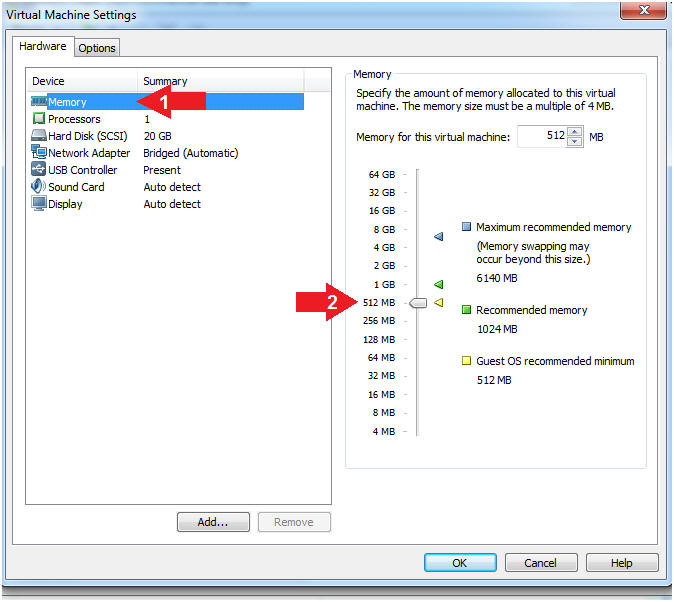
- Configure Memory Settings
- Instructions:
- Click on Memory
- Select 512 MB
- Note(FYI):
- Do not click the OK button
- Instructions:
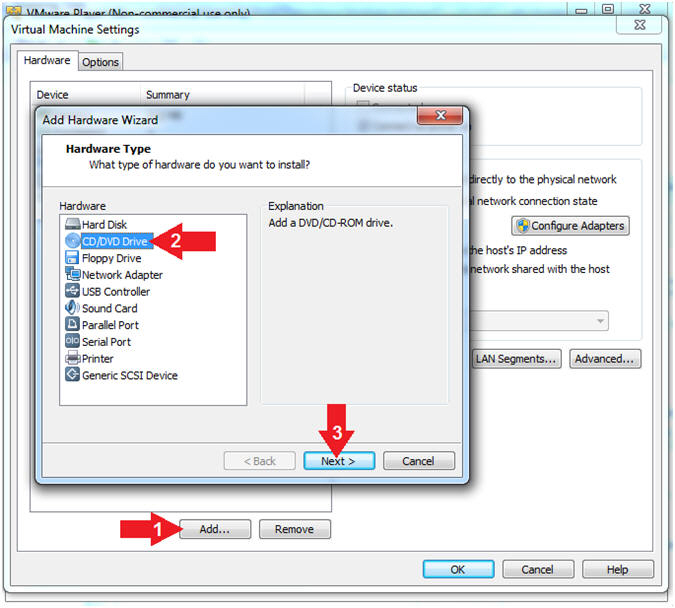
- Configure CD/DVD Drive (Part 1)
- Instructions:
- Click the Add... Button
- Click on CD/DVD Drive
- Click the Next Button
- Note(FYI):
- The CD/DVD Drive is necessary for VM Tools updates.
- Instructions:
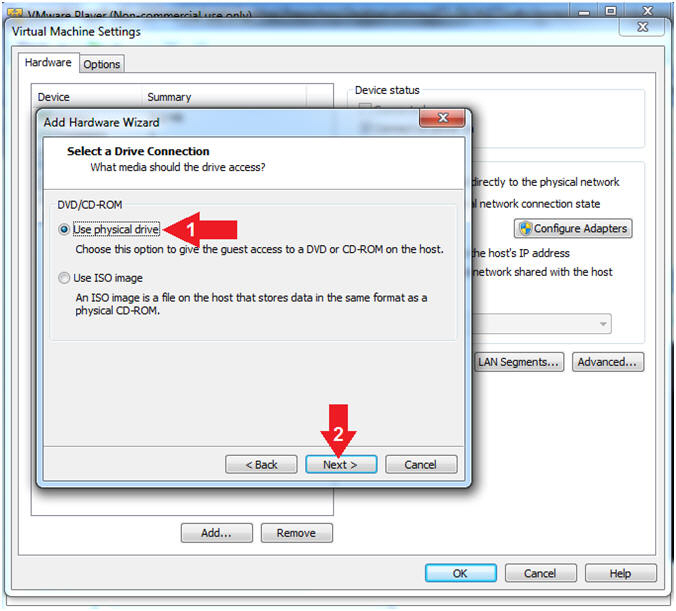
- Configure CD/DVD Drive (Part 2)
- Instructions:
- Click radio button Use Physical Drive
- Click the Next Button
- Instructions:
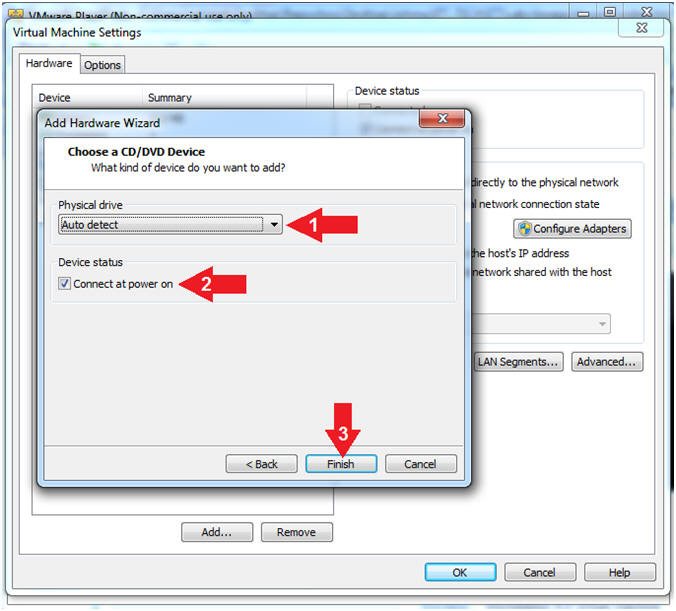
- Configure CD/DVD Drive (Part 3)
- Instructions:
- Physical drive: Auto detect
- Device status: Check Connect at power on
- Click the Finish Button
- Instructions:
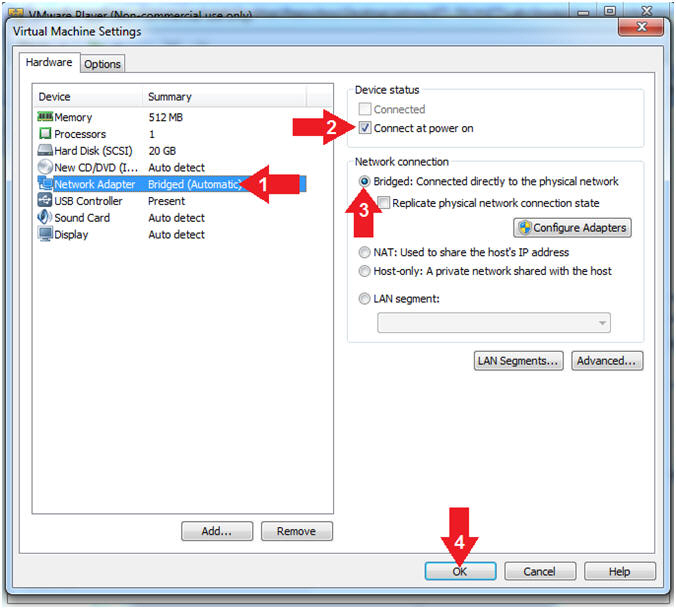
- Configure Network Adapter
- Instructions:
- Click on Network Adapter
- Device Status: Check Connect at power on
- Click the Bridged radio button
- Click the OK Button
- Instructions:
| Section 4. Play bee-box v1.6 |
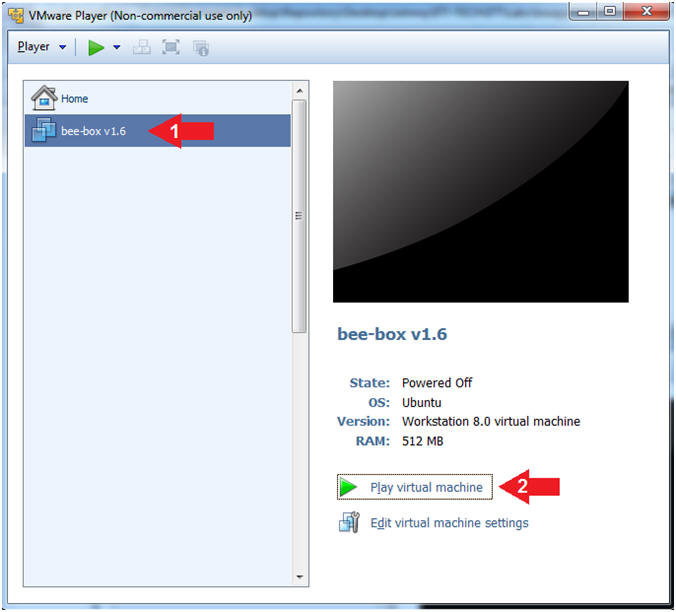
- Play Virtual Machine
- Instructions:
- Click on bee-box v1.6
- Click on Play virtual machine
- Instructions:
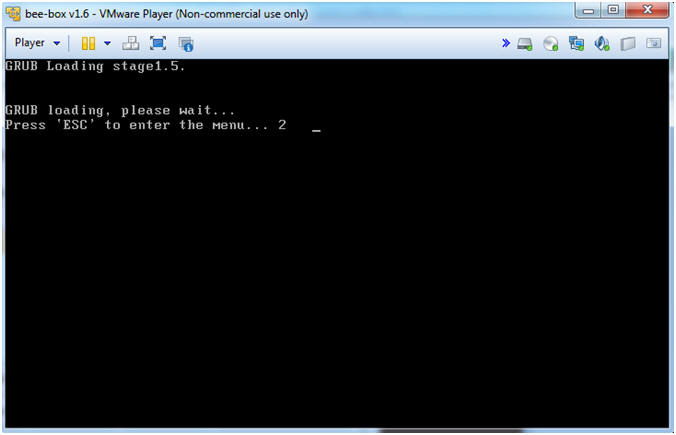
- GRUB Loading Screen
- Note(FYI):
- You will see the GRUB loading screen
- This can be used to hack the root password if you ever lose it.
- Note(FYI):
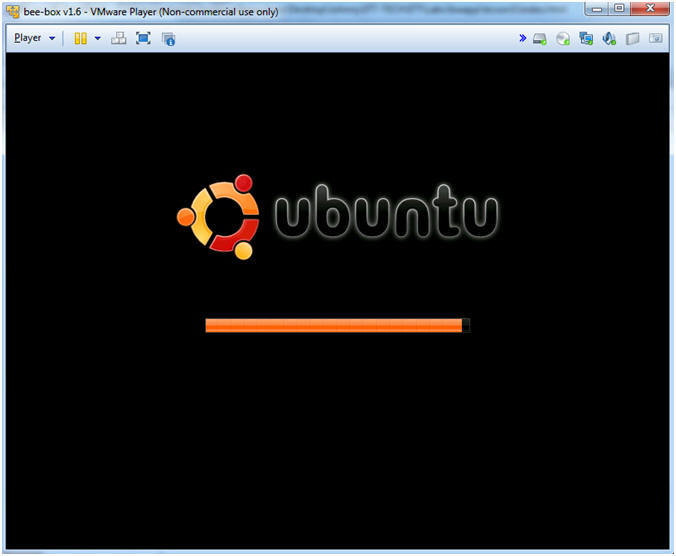
- Ubuntu Loading Screen
- Note(FYI):
- You will see an ubuntu loading screen
- Note(FYI):
| Section 5. Configure Keyboard Layout |
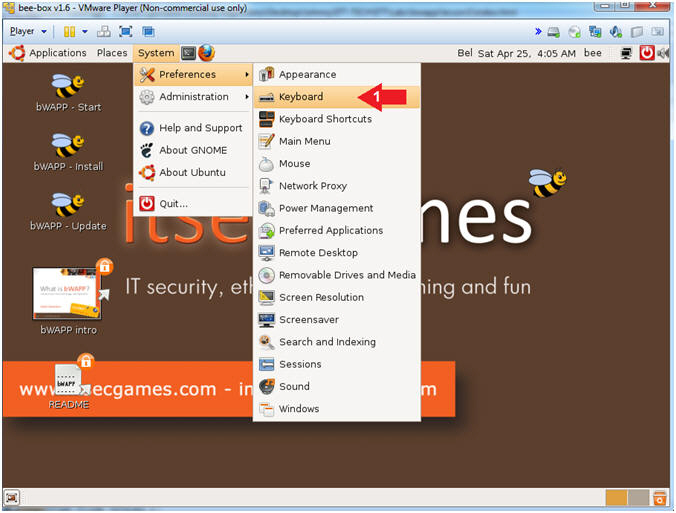
- Configure Keyboard (Part 1)
- Note(FYI):
- This step is not necessary if you speak Dutch, because the Keyboard is already set to Belgium.
- Instructions:
- System --> Preferences --> Keyboard
- Note(FYI):
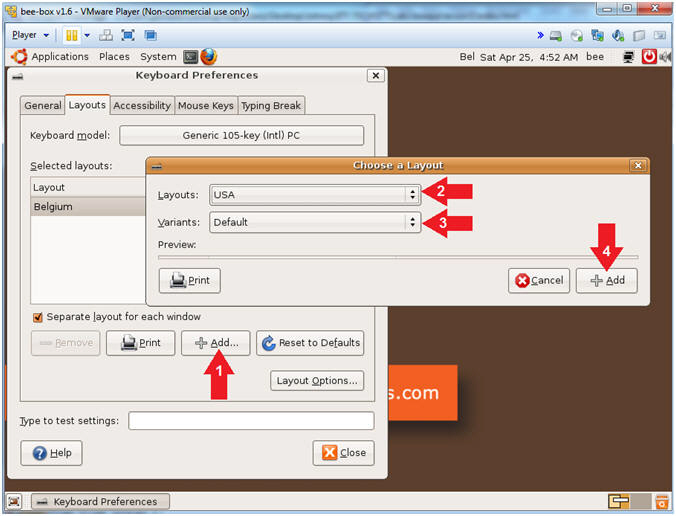
- Choose a Layout (Part 2)
- Instructions:
- Click the Add... button
- Layouts: USA
- Variants: Default
- Click the Add button
- Instructions:
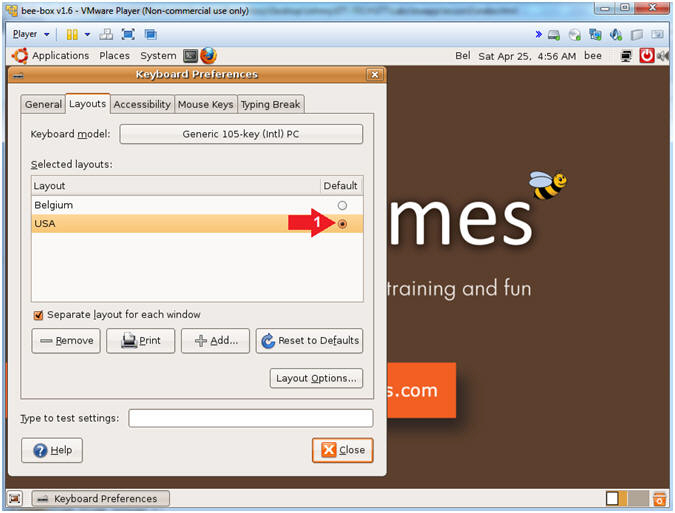
- Set Default Layout (Part 3)
- Instructions:
- Click the USA default radio button
- Instructions:
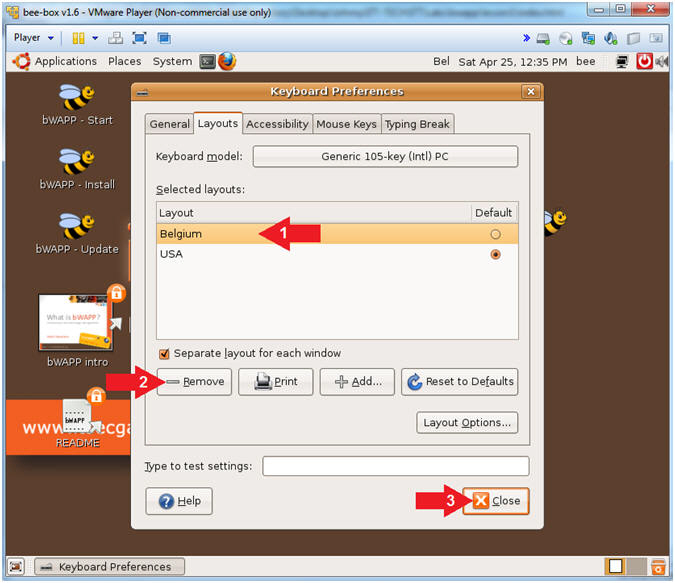
- Remove Belgium (Part 4)
- Instructions:
- Click Belgium Radio Button
- Click the Remove Button
- Click the Close Button
- Instructions:
| Section 6. Configure Date and Time |
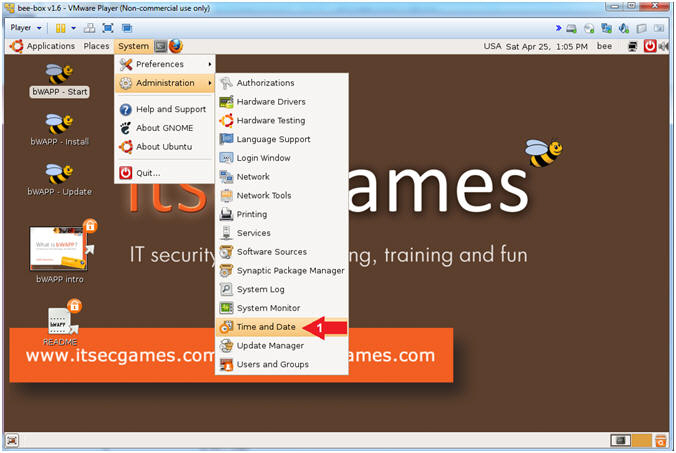
- Configure Time and Date
- Instructions:
- System --> Administration --> Time and Date
- Instructions:
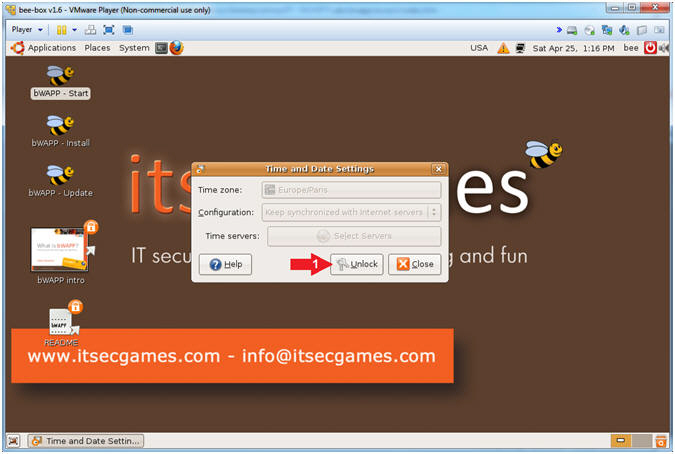
- Configure Time and Date Settings
- Instructions:
- Click the Unlock Button
- Instructions:
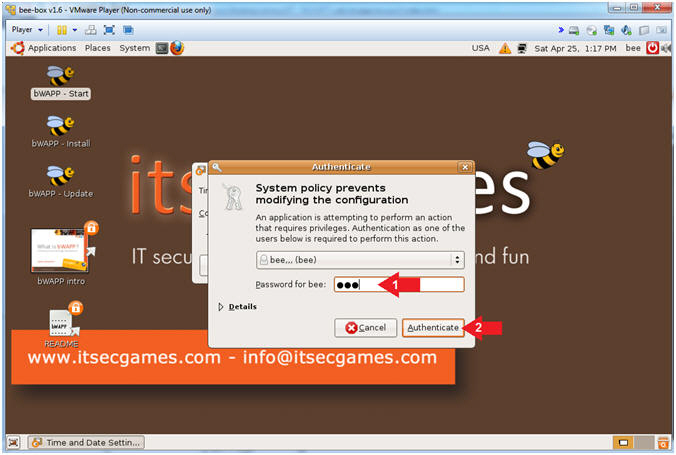
- Authenticate
- Instructions:
- Password for bee: bug
- Click the Authenticate Button
- Instructions:
- Configure Time and Date Settings
- Instructions:
- Time zone: Click the downdrop menu

- Instructions:
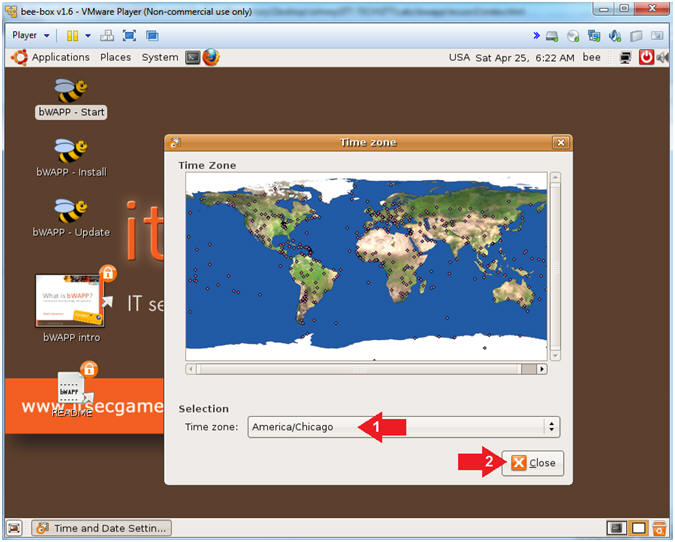
- Time zone
- Instructions:
- Time zone: Select your preferred timezone
- Click the Close Button
- Instructions:
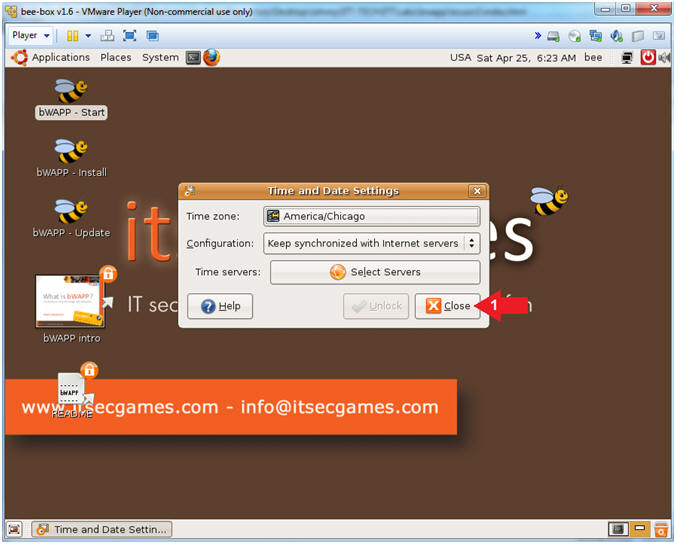
- Configure Time and Date Settings
- Instructions:
- Click the Close Button
- Instructions:
| Section 7. Open bWAPP |
- Open bWAPP
- Instructions:
- Click the bWAPP - Start icon
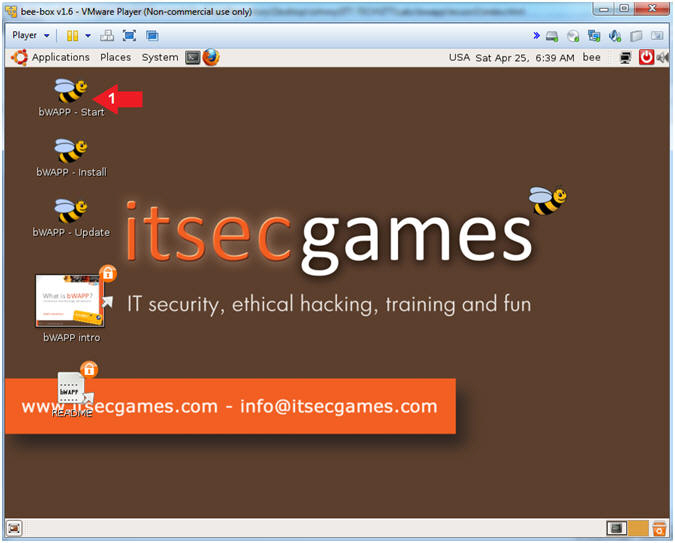
- Instructions:
- Login to bWAPP
- Instructions:
- Login: bee
- Password: bug
- Set the security level: low
- Click the Login Button
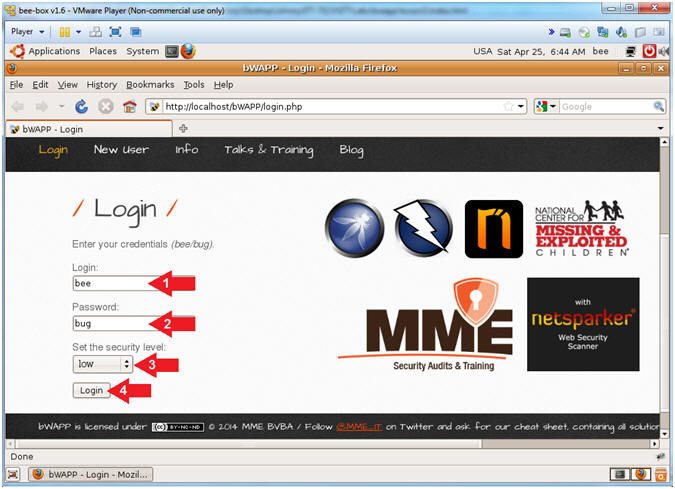
- Instructions:
- Display bWAPP Lessons
- Note(FYI):
- Clicking on the bWAPP downdrop menu will display all the Hack Lessons.
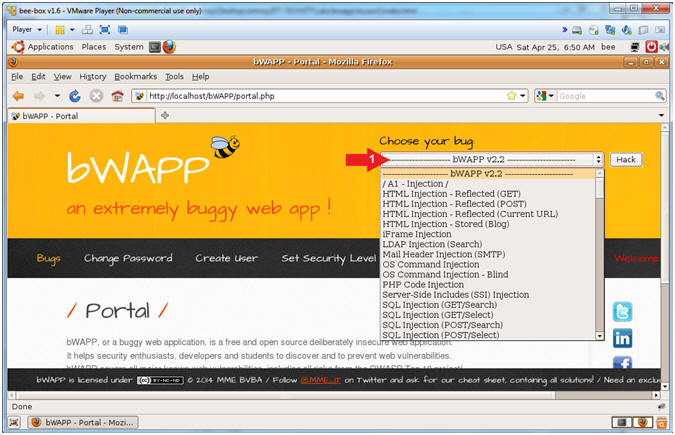
- Note(FYI):
| Section 9. Proof of Lab |
- Open Terminal Window
- Instructions:
- Click the Terminal Window Icon
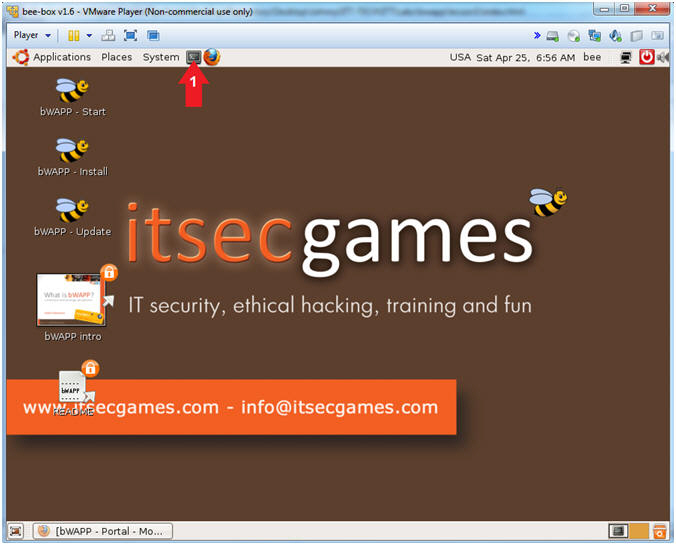
- Instructions:
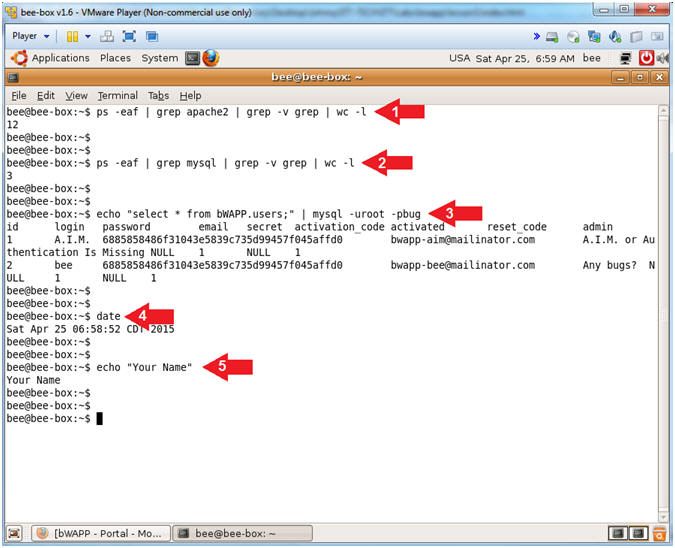
- Proof of Lab
- Instructions:
- ps -eaf | grep apache2 | grep -v grep | wc -l
- ps -eaf | grep mysql | grep -v grep | wc -l
- echo "select * from bWAPP.users;" | mysql -uroot -pbug
- date
- echo "Your Name"
- Put in your actual name in place of "Your Name"
- e.g., echo "John Gray"
-
Proof of Lab
Instructions
- Press the <Ctrl> and <Alt> key at the same time.
- Press the <PrtScn> key.
- Paste into a word document
- Upload to Moodle
- Instructions:
| Section 10. Shutdown bee-box |
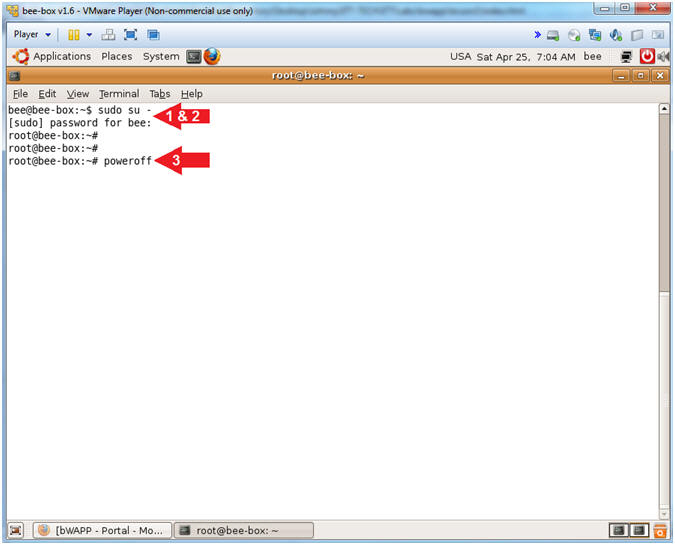
- Poweroff Machine
- Instructions:
- sudo su -
- [sudo] password for bee: bug
- poweroff
- Instructions: