(CentOS 6: Lesson 2)
{ Use CentOS 6.6 Grub to boot into single user mode }
| Section 0. Background Information |
- Background information.
- Lets say you lost the root password and you have no way to figure it out. No problem. All you simply have to do is to physically power off the machine and power it back on. During the start of the reboot, hit the "e" or the "down arrow" key. If you are using VMware, you will need to click in the Black VMware window before reboot and then press the "e" key.
- Legal Disclaimer
- As a condition of your use of this Web site, you warrant to computersecuritystudent.com that you will not use this Web site for any purpose that is unlawful or that is prohibited by these terms, conditions, and notices.
- In accordance with UCC § 2-316, this product is provided with "no warranties, either express or implied." The information contained is provided "as-is", with "no guarantee of merchantability."
- In addition, this is a teaching website that does not condone malicious behavior of any kind.
- Your are on notice, that continuing and/or using this lab outside your "own" test environment is considered malicious and is against the law.
- © 2012 No content replication of any kind is allowed without express written permission.
| Section 1. Prerequisite |
- You must have physical access to a real machine or virtual machine.
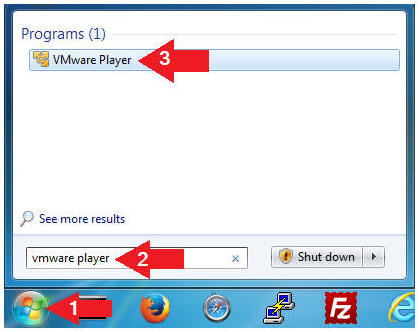
- Open VMware Player on your windows machine.
- Instructions:
- Click the Start Button
- Type "vmware player" in the search box
- Click on VMware Player
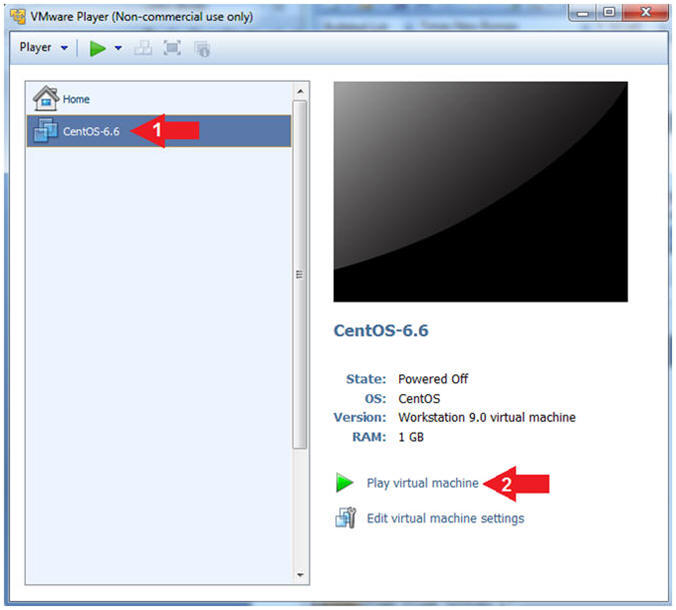
- Instructions:
- Start the CentOS-6.6 VM
- Instructions:
- Click on the CentOS-6.6 VM
- Click on Play virtual machine
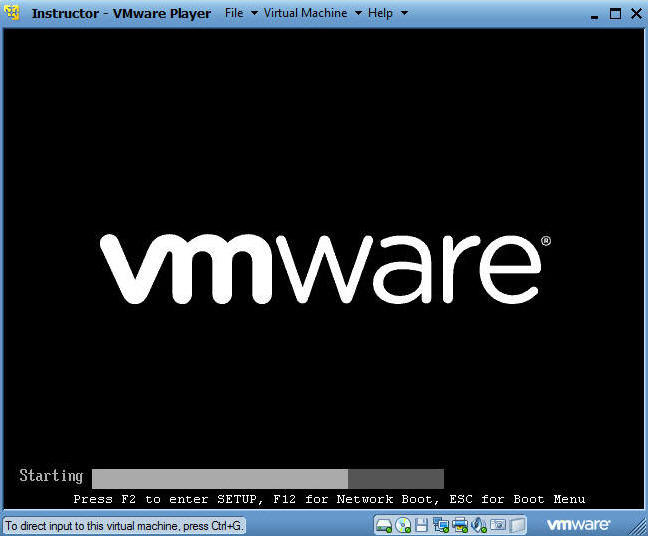
- Instructions:
- Boot to Grub 2 Menu
- Instructions
- Once you see the below vmware screen, (1) Left Click in the screen and (2) press the "e" key
- Note(FYI):
- This might take you a few times so be patient!!!
- Physical Machine Instructions
(Optional)
- Physically power off the machine.
- Physically power on the machine.
- During the boot process, either hit the "e" or "down arrow" key
- Instructions
| Section 2. Configure grub to provide single user root prompt |
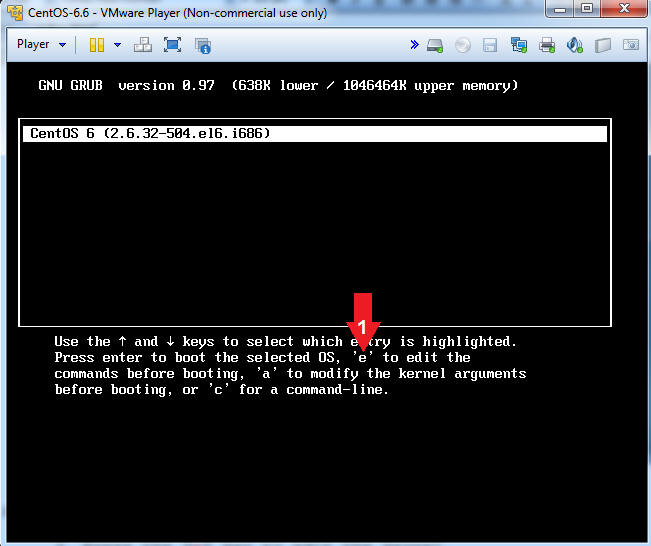
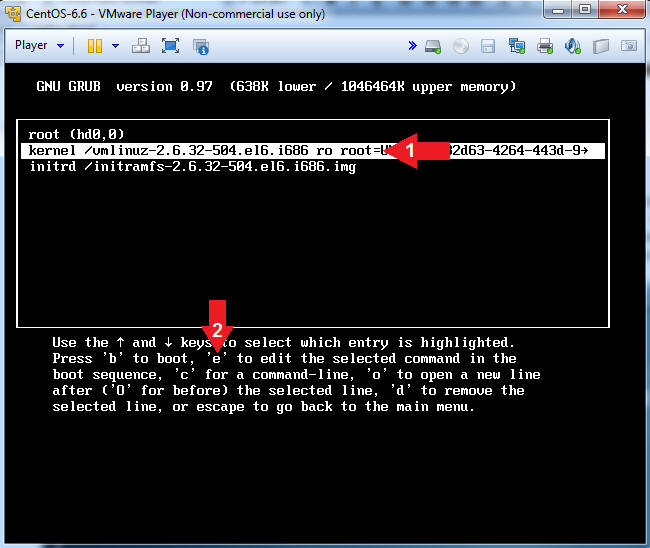
- Access the Grub Menu
- Note(FYI):
- Section 1, Step 3 should produce the below screen.
- Instructions:
- Press the "e" key to access the kernel selection.
- Note(FYI):
- Access the Kernel
- Instructions:
- Make sure the kernel line is highlighted
- Press the "e" key to edit the kernel.
- Note(FYI): What is the kernel?
- The kernel is the part of the operating system that allocates machine resources, including memory, disk space, and CPU cycles, to all other programs that run on a computer. The kernel includes the low-level hardware interfaces (a.k.a drivers) and manages processes, the means by which Linux executes programs.
- Instructions:
- You should see the below screen.
- Instructions:
- Proceed to step 4.
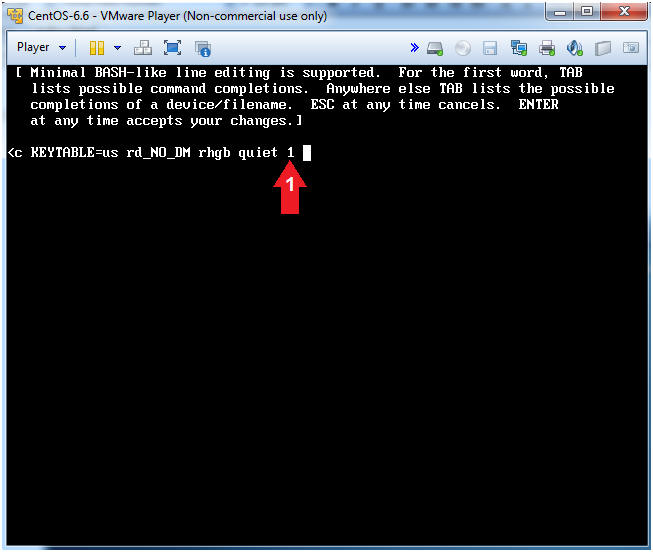
- Instructions:
- Prepare Operating System to Boot into Single
User Mode
- Instructions:
- Press the <Spacebar> and Type 1 after the word quiet (See Below)
- Press Enter.
- Note(FYI):
- This is how we will put the system into single user mode.
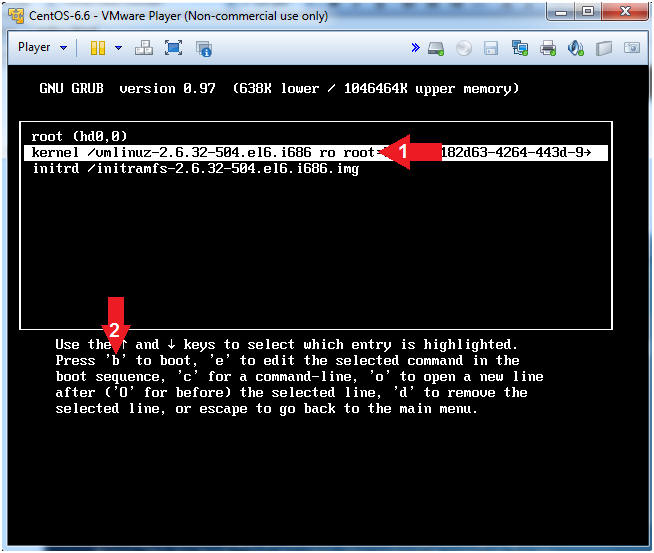
- Instructions:
- Boot the System
- Instructions:
- Make sure the kernel line is highlighted
- Type "b" to boot.
- Note(FYI):
- The below screen is the result of pressing enter in step 4.
- Instructions:
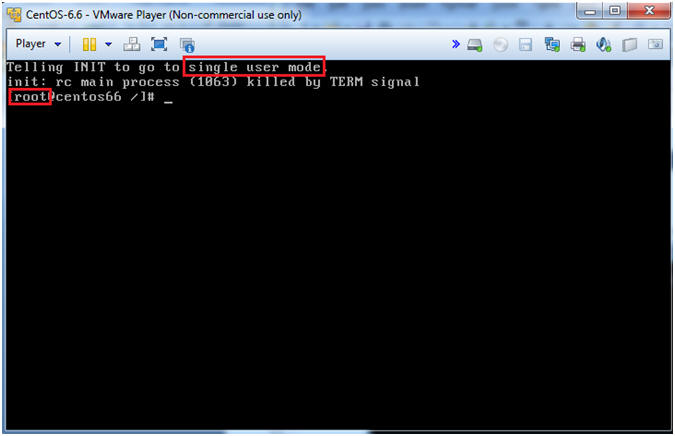
| Section 3. Single User Mode |
- Got Root?
- Note(FYI):
- Now your system is in single user mode.
- Note(FYI):
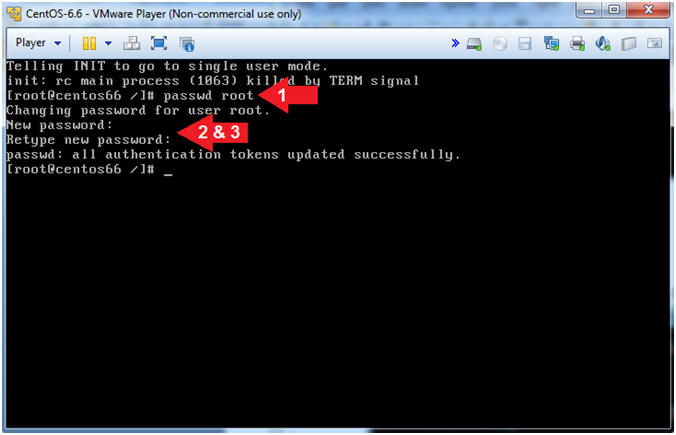
- Create a new root password
- Instructions:
- passwd root
- New password: <Supply a new password>
- Retype new password: <Re-Supply the new password>
- Note(FYI):
- Notice you were not prompted for the old root password.
- Instructions:
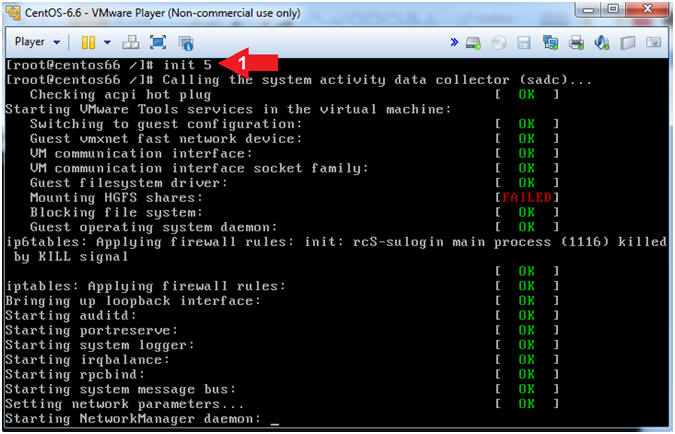
- Boot machine into the Graphical Multiuser
Interface
- Instructions:
- init 5
- Note(FYI):
Below are all the run levels.
- init 0 - Halt
- init 1 - Single User, File Systems are Mounted, Network Down.
- init 2 - Multi User, No NFS, File Systems Mounted, Network Up.
- init 3 - Multi User, File Systems are Mounted, Network Up.
- init 4 - User defined.
- init 5 - Graphical Multiuser, File Systems Mounted, Network Up.
- init 6 - Reboot.
- Instructions:
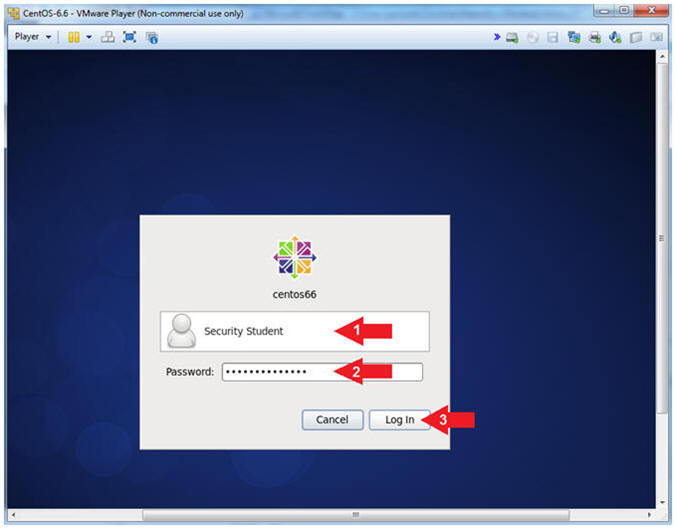
- Login to CentOS
- Note(FYI):
- Until you click the user, in this case Security Student, the Password field will not be displayed.
- Instructions:
- Click on Security Student
- This will display the password text box.
- Supply its' password
- Click the Log In Button
- Click on Security Student
- Note(FYI):
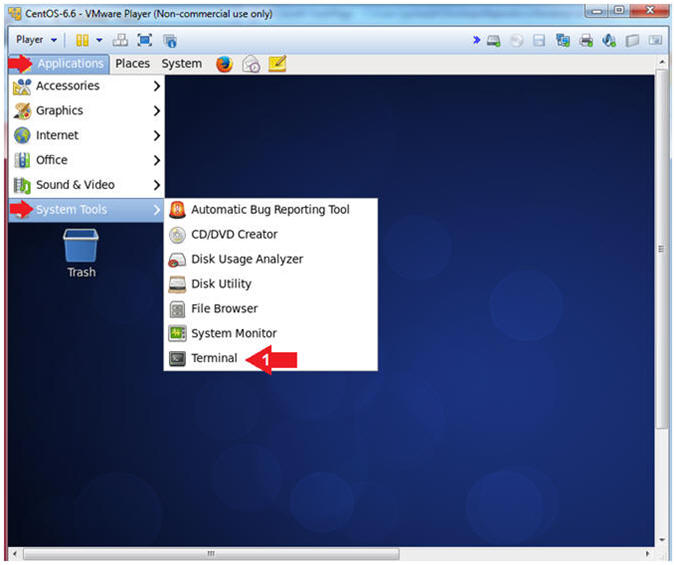
- Open a Terminal
- Instructions:
- Applications --> System Tools --> Terminal
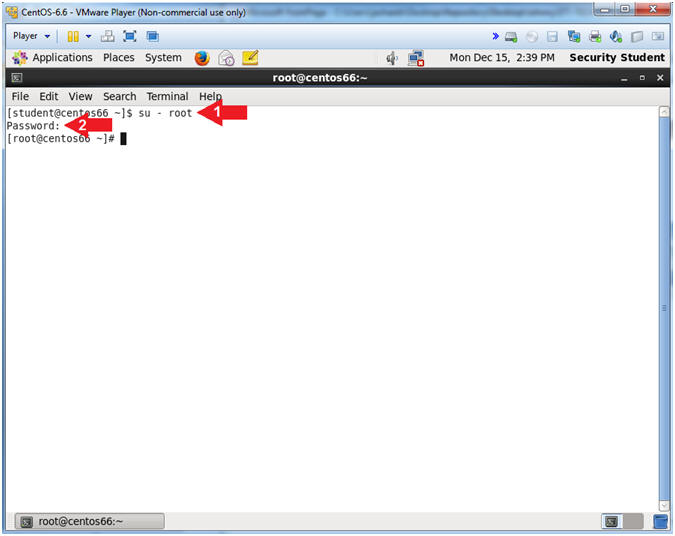
- Instructions:
- Switch User to Root
- Instructions:
- su - root
- Provide the Root Password
-
- Instructions:
| Section 4. Proof of Lab |
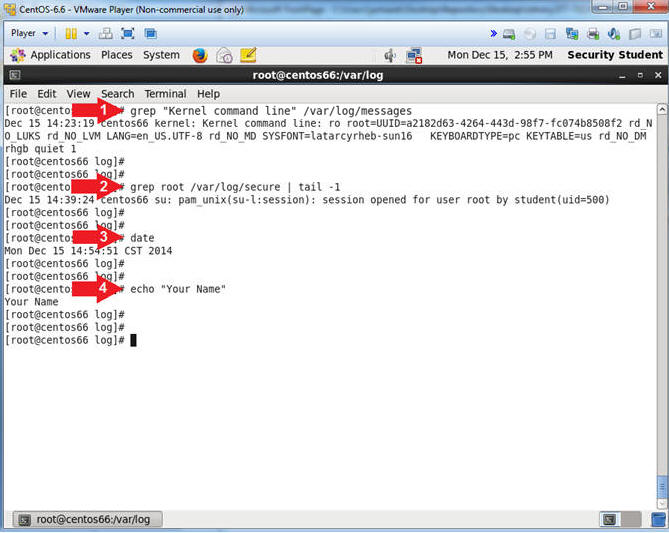
- Proof of Lab
- Instructions:
- grep "Kernel command line" /var/log/messages
- grep root /var/log/secure | tail -1
- date
- echo "Your Name"
- Put in your actual name in place of "Your Name"
- e.g., echo "John Gray"
-
Proof of Lab
Instructions
- Press the <Ctrl> and <Alt> key at the same time.
- Press the <PrtScn> key.
- Paste into a word document
- Upload to Moodle
-
- Instructions: