(Fedora: Lesson 21)
{ Fixing VMWare Player Erratic Mouse Grab or Un-Grab }
| Section 0. Background Information |
- What is the scenario?
- With newer versions of VMware Player and older versions of operating systems, the mouse behaves erratically.
- Although I can make an educated guess, I am not going to pretend to explain the linkage between the mouse dlls and VMware player library to tell you why this erratic behavior occurs.
- However, I can definitely show you how to fix it.
- Legal Disclaimer
- As a condition of your use of this Web site, you warrant to computersecuritystudent.com that you will not use this Web site for any purpose that is unlawful or that is prohibited by these terms, conditions, and notices.
- In accordance with UCC § 2-316, this product is provided with "no warranties, either expressed or implied." The information contained is provided "as-is", with "no guarantee of merchantability."
- In addition, this is a teaching website that does not condone malicious behavior of any kind.
- Your are on notice, that continuing and/or using this lab outside your "own" test environment is considered malicious and is against the law.
- © 2015 No content replication of any kind is allowed without express written permission.
| Section 1: Obtain Virtual Machine Working Directory |
- Note: Make sure all your VMware Player Instances are either OFF -or- SUSPENDED.
- Start VMware Player
- Instructions
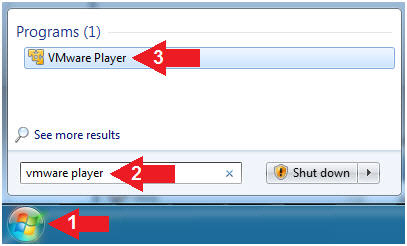
- For Windows 7
- Click Start Button
- Search for "vmware player"
- Click VMware Player
- For Windows XP
- Starts --> Programs --> VMware Player
- For Windows 7
- Instructions
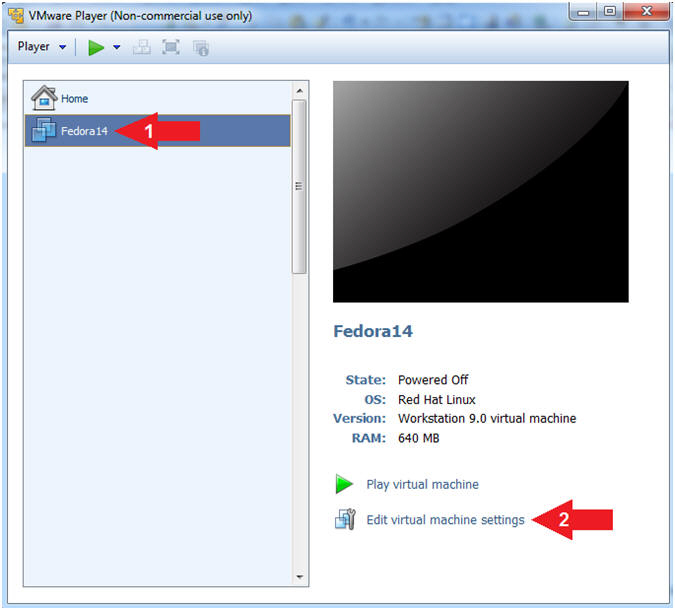
- Edit Fedora14 Virtual Machine Settings
- Instructions:
- Highlight Fedora14
- Click Edit virtual machine settings
- Instructions:
- Copy Virtual Machine Working Directory
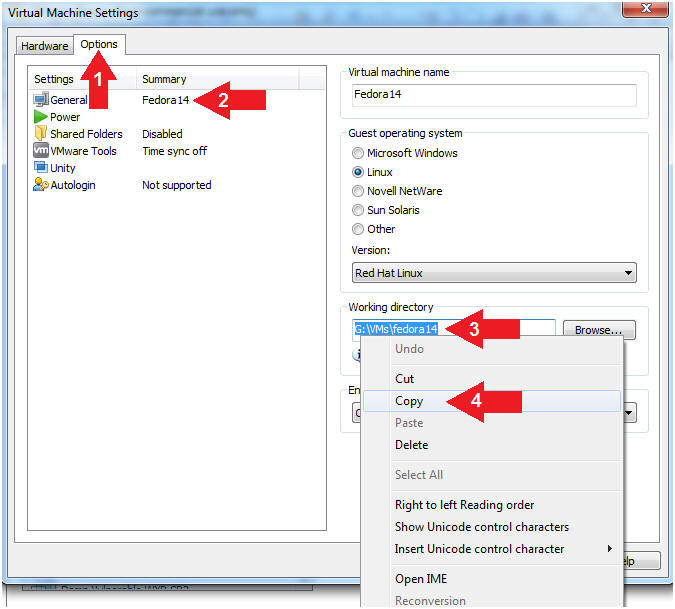
- Instructions:
- Click the Options Tab
- Click on General
- Highlight and Right Click on the
Working Directory
- In my case, I highlighted G:\VMs\fedora14
- Select Copy
- Instructions:
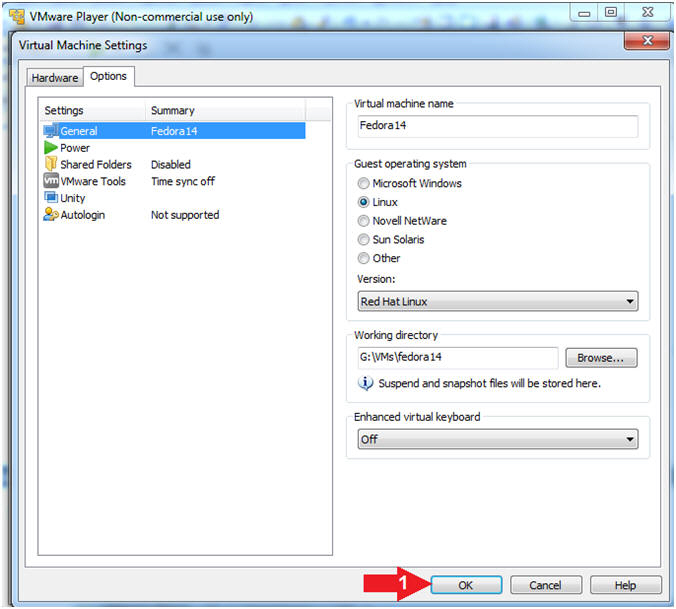
- Close Virtual Machine Settings
- Instructions:
- Click the OK Button
- Instructions:
| Section 2: Modify VMware Virtual Machine Configuration File (.vxm) |
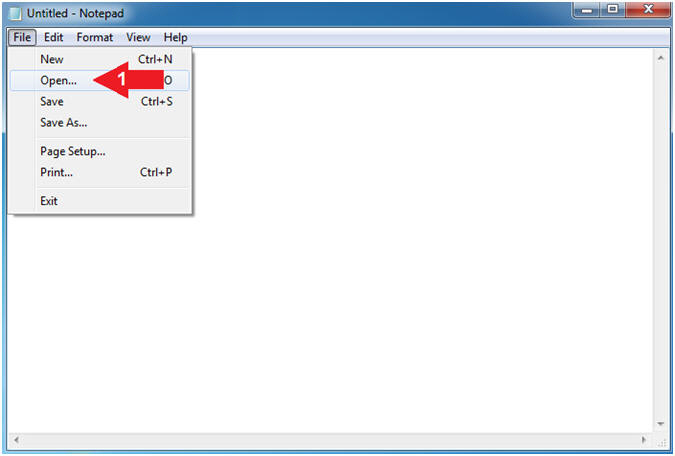
- Open Notepad
- Instructions:
- Click the Windows Start Button
- Search for Notepad
- Click on Notepad

- Instructions:
- Open a File
- Instructions:
- File --> Open
- Instructions:
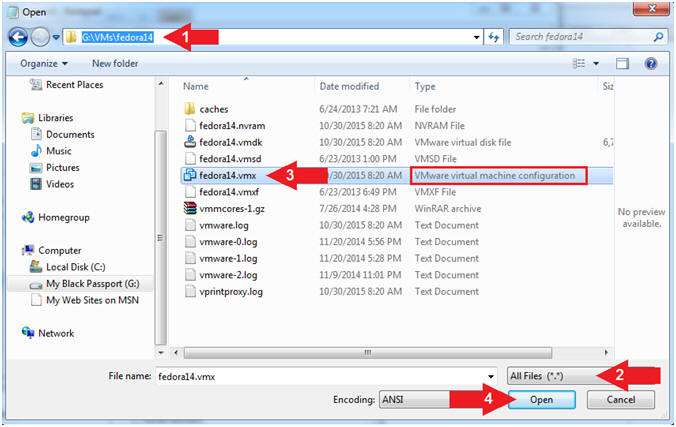
- Open VMware Virtual Machine Configuration (.vmx)
- Instructions:
- Paste or Navigate to your VM Location
- In my case, G:\VMs\fedora14
- See Section 1 Step 3
- Make sure All Files (*.*) is selected
- Click on your VMware virtual machine
configuration File
- In my case, fedora14.vmx
- If your file extension is not turned on, then select the file by Type (VMware virtual machine configuration)
- Click the Open button
- Paste or Navigate to your VM Location
- Instructions:
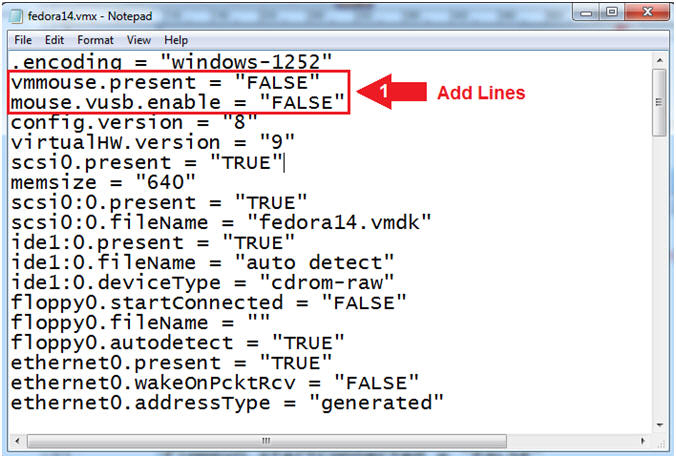
- Add Mouse Configuration Lines
- Instructions:
- Add the follow two lines immediately
after the first line
- vmmouse.present = "FALSE"
- mouse.vusb.enable = "FALSE"
- Add the follow two lines immediately
after the first line
- Instructions:
- Save File
- Instructions:
- File --> Save

- Instructions:
| Section 3: Modify VMware preferences.ini |
- Open Notepad
- Instructions:
- Click the Windows Start Button
- Search for Notepad
- Click on Notepad
- Instructions:
- Open a File
- Instructions:
- File --> Open
- Instructions:
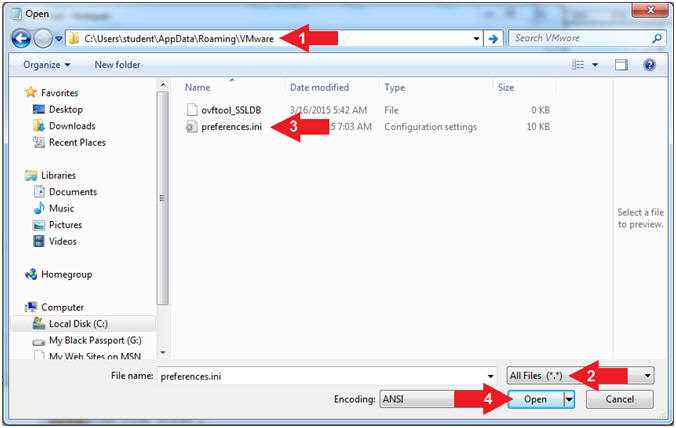
- Open the VMware preferences.ini file
- Instructions:
- Navigate to C:\users\[User]\AppData\Roaming\VMWARE\preferences
- In my case, C:\Users\student\AppData\Roaming\VMware
- Make sure All Files (*.*) is selected
- Click on preferences.ini
- Click the Open button
- Navigate to C:\users\[User]\AppData\Roaming\VMWARE\preferences
- Instructions:
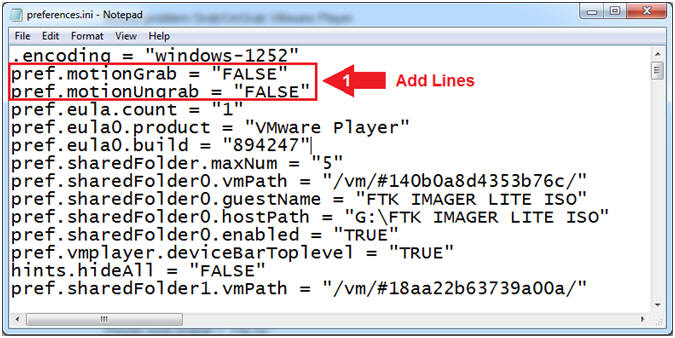
- Add Motion Grab Configuration Lines
- Instructions:
- Add the follow two lines immediately
after the first line
- pref.motionGrab = "FALSE"
- pref.motionUngrab = "FALSE"
- Add the follow two lines immediately
after the first line
- Instructions:
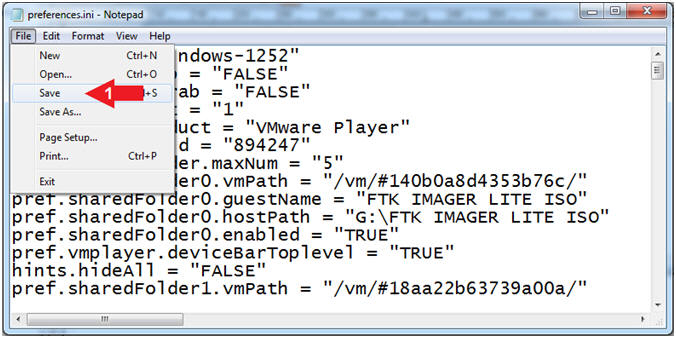
- Save File (preferences.ini)
- Instructions:
- File --> Save
- Instructions: