(Ubuntu: Lesson 11)
{ Add New Disk, Create Partition Table and Filesystem }
| Section 0. Background Information |
- Summary
- In this lab we will add a new disk to our Ubuntu VM, create a partition, create a filesystem and mount the filesystem on the /tmp directory.
- We are create a /tmp filesystem, because VMWare Easy Installer does not allow you to carve out separate partitions and filesystems.
- Prerequisite
-
Lab Notes
- In this lab we will how to do the following:
- We will add a new disk to the Ubuntu VM.
- We will create a new partition.
- We will create an ext2 filesystem.
- We will mount the filesystem on the /tmp directory.
- In this lab we will how to do the following:
- Legal Disclaimer
- As a condition of your use of this Web site, you warrant to computersecuritystudent.com that you will not use this Web site for any purpose that is unlawful or that is prohibited by these terms, conditions, and notices.
- In accordance with UCC § 2-316, this product is provided with "no warranties, either express or implied." The information contained is provided "as-is", with "no guarantee of merchantability."
- In addition, this is a teaching website that does not condone malicious behavior of any kind.
- You are on notice, that continuing and/or using this lab outside your "own" test environment is considered malicious and is against the law.
- © 2012 No content replication of any kind is allowed without express written permission.
| Section 1: Start Ubuntu 12.04 |
- Start VMware Player
- Instructions
- For Windows 7
- Click Start Button
- Search for "vmware player"
- Click VMware Player
- For Windows XP
- Starts --> Programs --> VMware Player
- For Windows 7

- Instructions
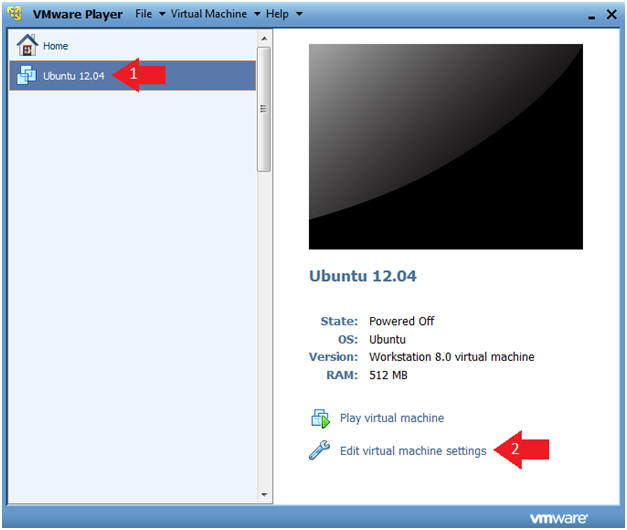
- Verify Virtual Machine Settings.
- Instructions
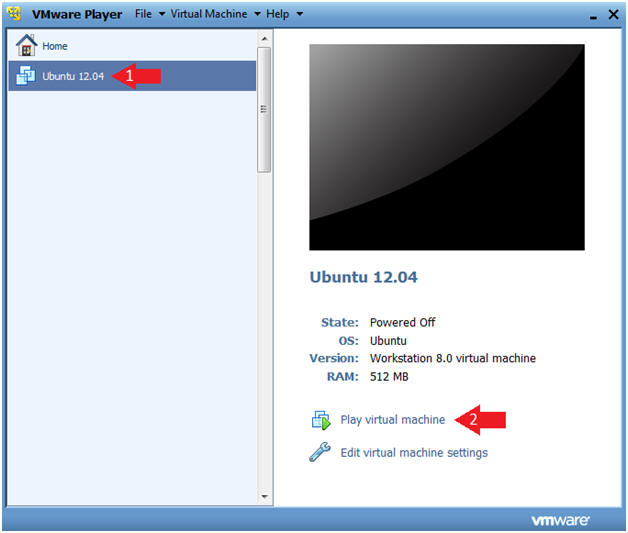
- Click on Ubuntu 12.04
- Click on Edit virtual machine settings
- Instructions
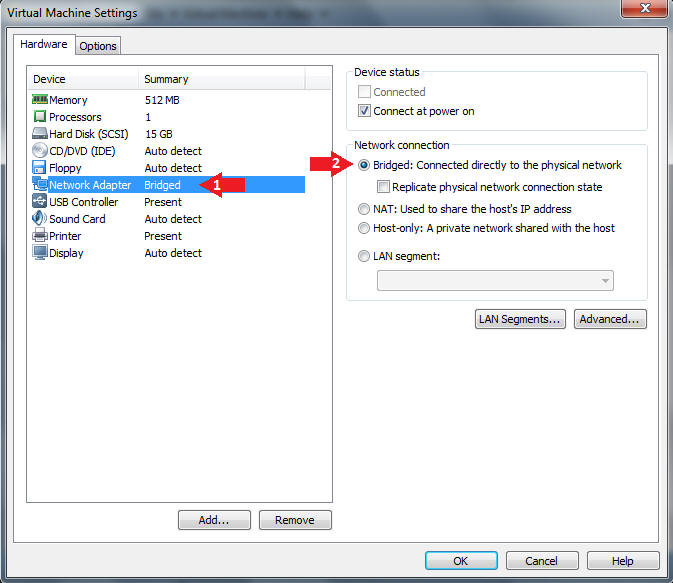
- Configure Network Adapter
- Instructions
- Click on Network Adapter
- Click on the Bridged Radio Button
- DO NOT Click on the Close Button
- Instructions
| Section 2: Add Hard Drive to Ubuntu 12.04 Virtual Machine |
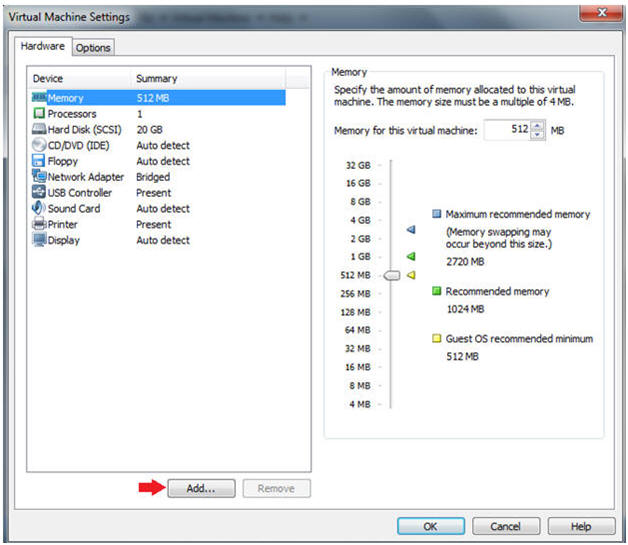
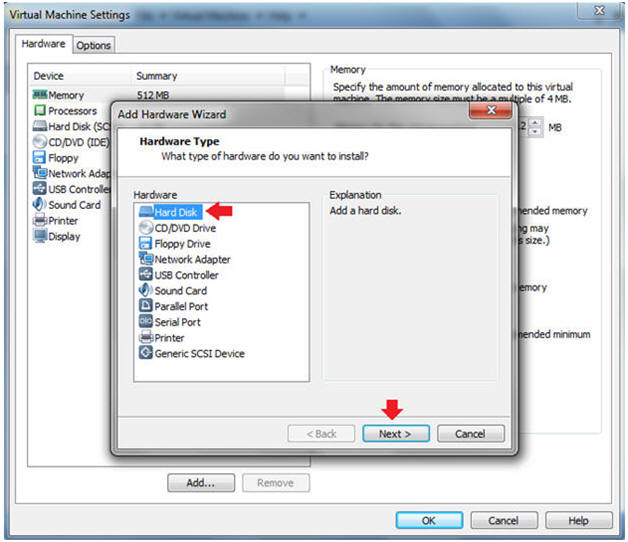
- Add Device
- Instructions:
- Click on the Add.. Button
- Instructions:
- Add Hard Disk
- Instructions:
- Click on Hard Disk
- Click Next
- Instructions:
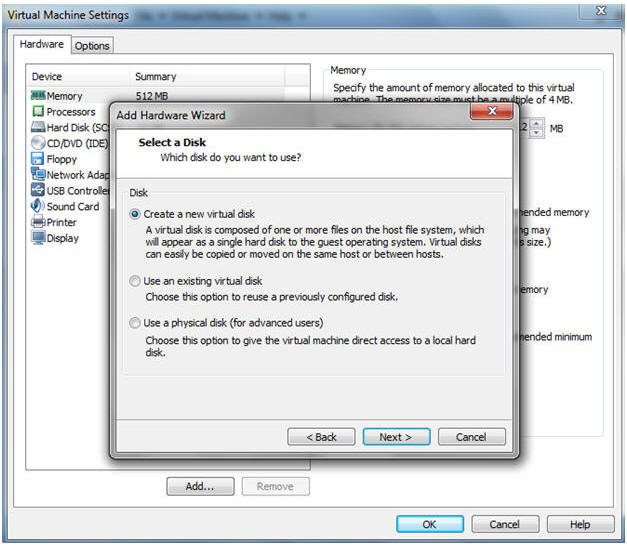
- Select a Disk
- Instructions:
- Select "Create a new virtual disk"
- Click Next
- Instructions:
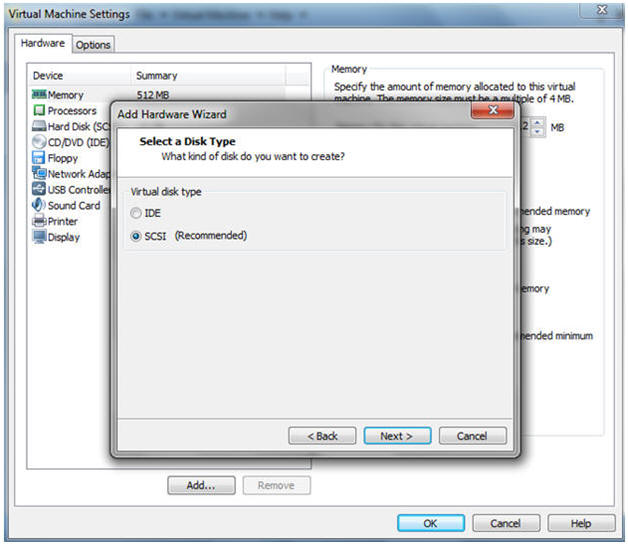
- Select Virtual disk type
- Instructions:
- Select SCSI (Recommended)
- Instructions:
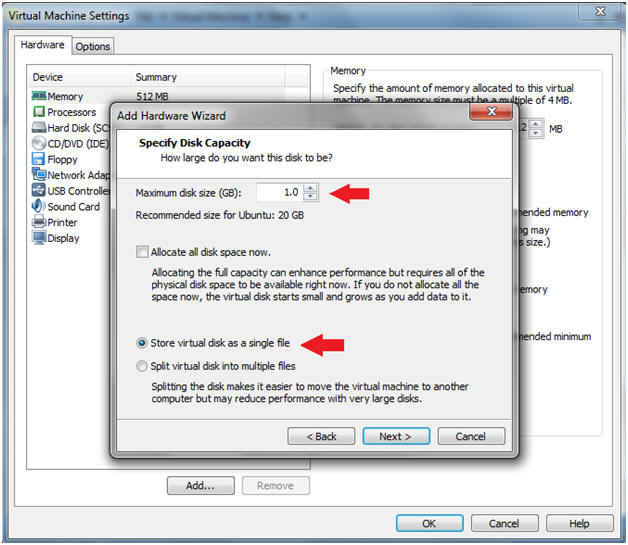
- Specify Disk Capacity
- Instructions:
- Maximum disk size (GB): 1.0
- Select "Store virtual disk as a single file"
- Click Next
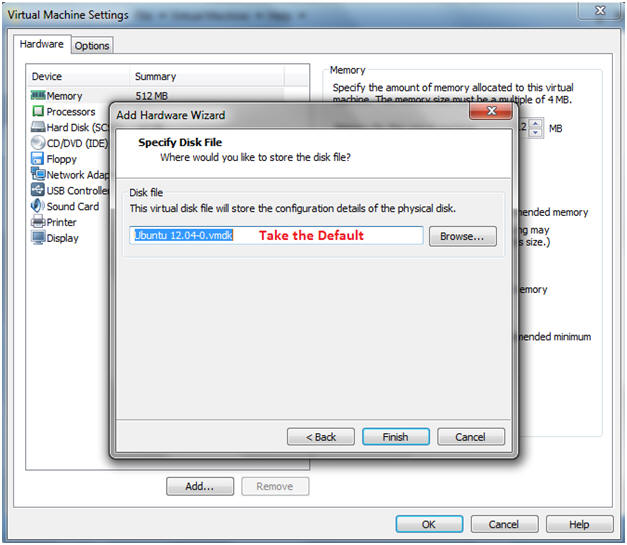
- Instructions:
- Name Disk File
- Instructions:
- Take the default name
- Click Finish
- Instructions:
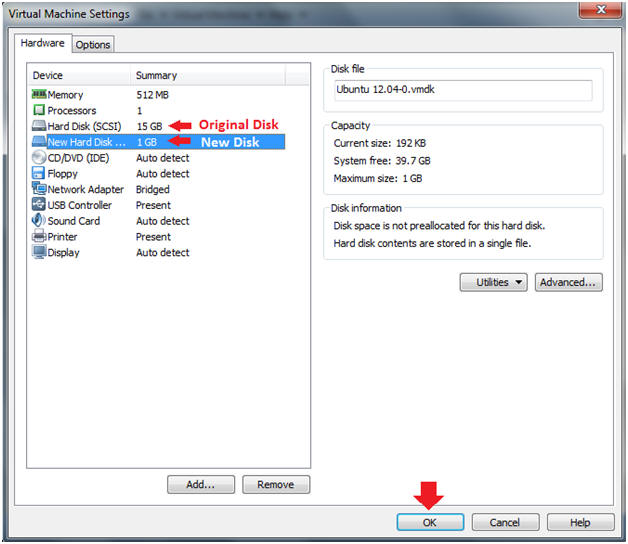
- View Results
- Note(FYI):
- You should see two disk, the original disk and the New Hard Disk.
- Instructions
- Click the OK button.
- Note(FYI):
- Start the Ubuntu 12.04 VM
- Instructions
- Click on Ubuntu 12.04
- Click on Play virtual machine
- Instructions
| Section 3: Login to Ubuntu |
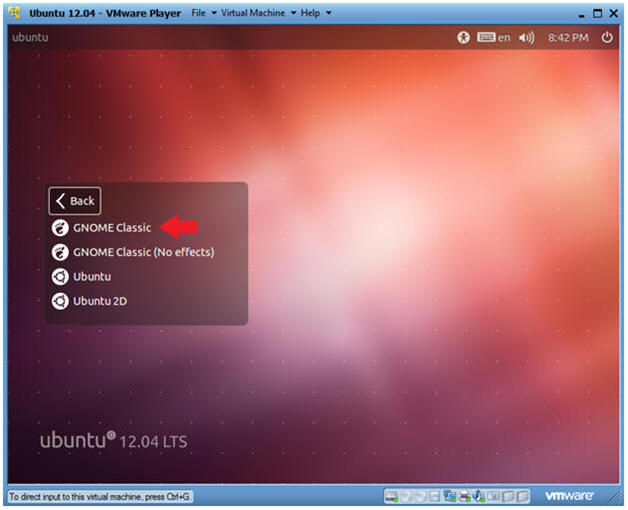
- Change to Gnome Classic
- Instructions:
- Click on the Circle
- Instructions:
- Select Gnome Classic
- Instructions:
- Double Click on GNOME Classic
- Instructions:
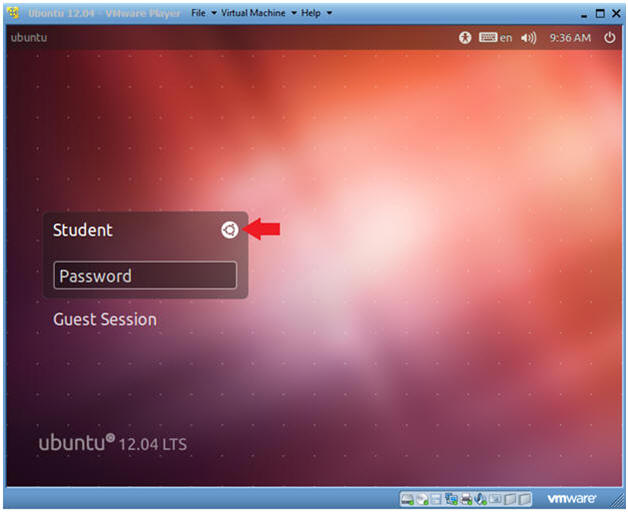
- Login to Server
- Instructions
- User: Student
- Password: Please supply the student password.
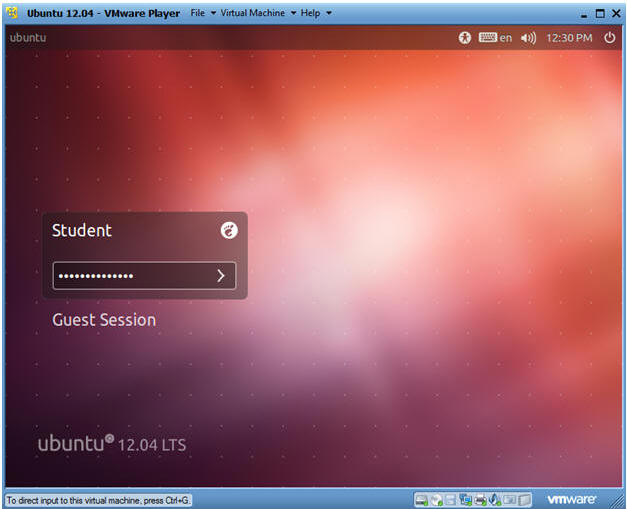
- Instructions
| Section 4: Become Root and Verify Network Connection |
- Start up a Terminal
- Instructions
- Click on the Terminal
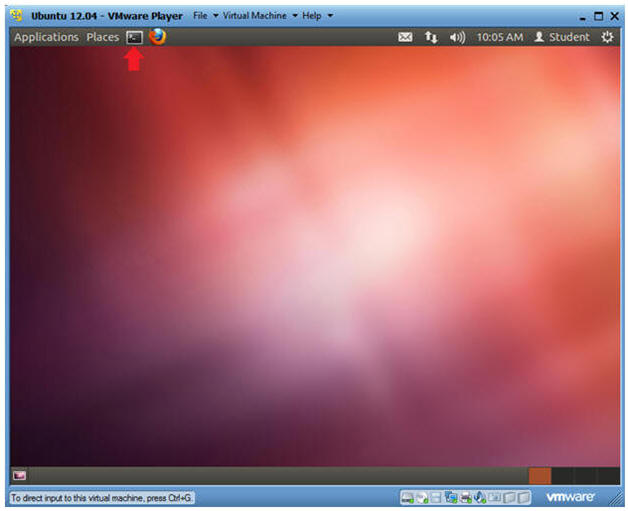
- Instructions
- Become Root
- Instructions
- sudo su -
- Supply the student password.
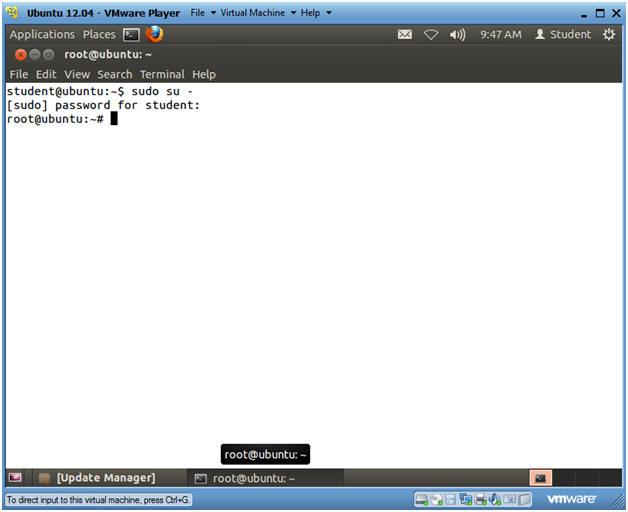
- Instructions
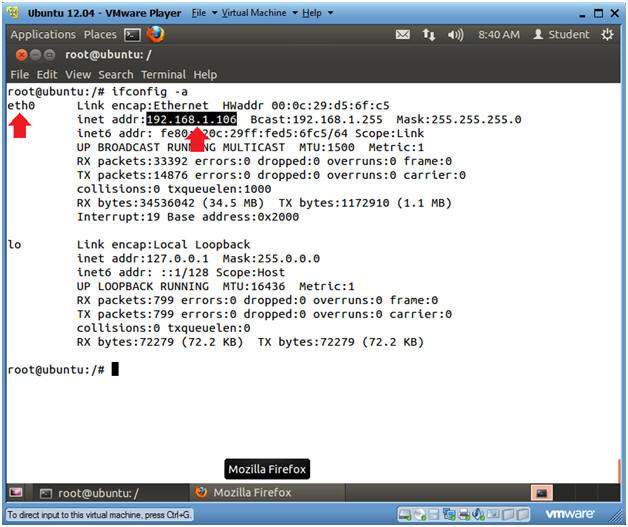
- Verify you have a network connection
- Instructions
- ifconfig -a
- eth0 is the name of my interface.
- 192.168.1.106 is my network IP address.
- ifconfig -a
- Note(FYI):
- If you do not have an DHCP IP Address
try the following:
- dhclient
- OR
- /etc/init.d/networking restart
- dhclient
- If you do not have an DHCP IP Address
try the following:
- Instructions
| Section 5: Partition New Disk |
- Update apt-get's package index
- Instructions
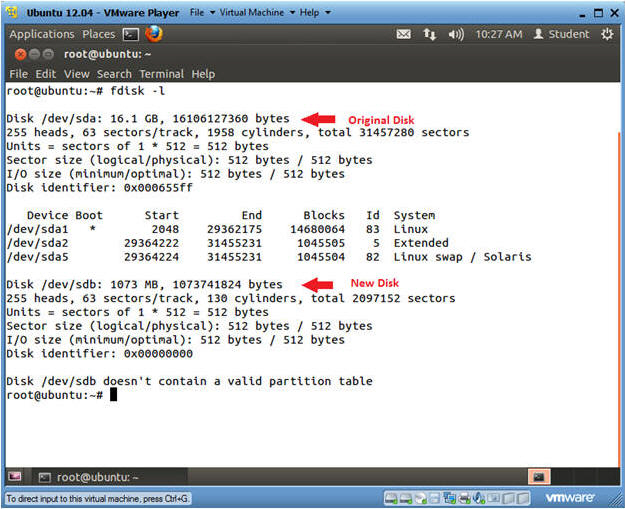
- fdisk -l
- Note(FYI):
- You should see the following two disk
names:
- /dev/sda: 16.1 GB
- This is the original disk.
- Notice there is a partition table
- /dev/sdb: 1073 MB
- This is the new disk.
- It contains 130 cylinders.
- Notice that /dev/sdb does not have a valid partition table.
- /dev/sda: 16.1 GB
- You should see the following two disk
names:
- Instructions
- Partition the New Disk
- Instructions:
- fdisk -c /dev/sdb
- Select m
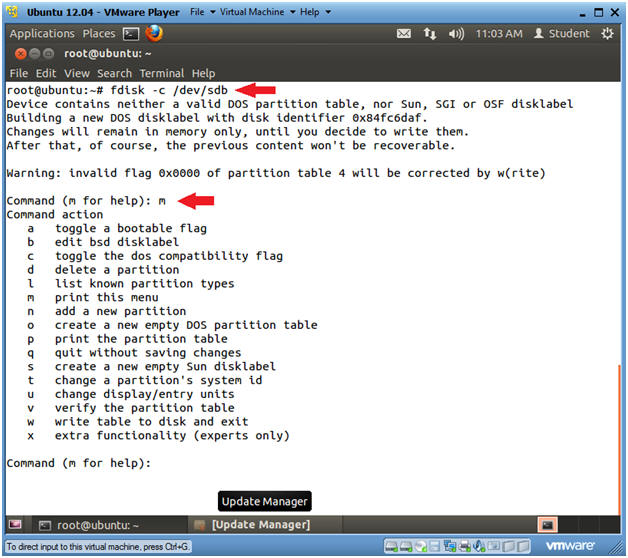
- Instructions:
- Partition the New Disk
- Instructions:
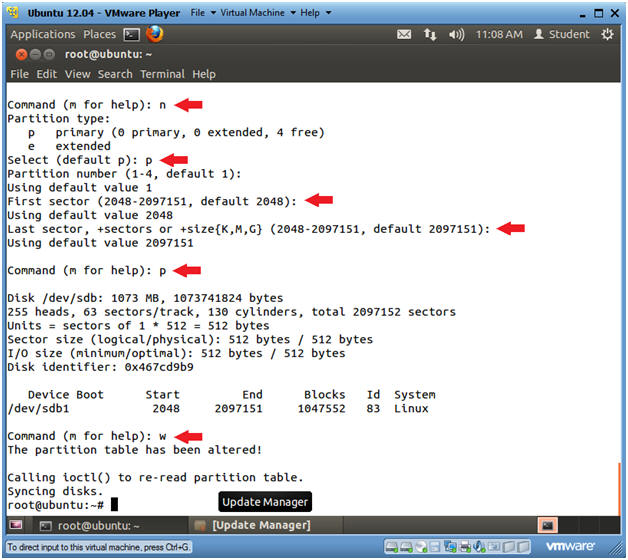
- Command (m for help): n
- Add New Disk
- Select default p): p
- Make Primary Partition
- Partition number (1-4, default 1):
<Press Enter>
- "1" is the partition number for disk /dev/sdb.
- First section: <Press Enter>
- Last sector: <Press Enter>
- Command (m for help): p
- Print the partition table.
- Command (m for help): w
- Write the table to disk and exit
- Command (m for help): n
- Instructions:
| Section 6: Create New File System |
- Create a new filesystem
- Instructions:
- mkfs.ext2 /dev/sdb1
- Create an ext2/ext3/ext4 filesystem
- mkfs.ext2 /dev/sdb1
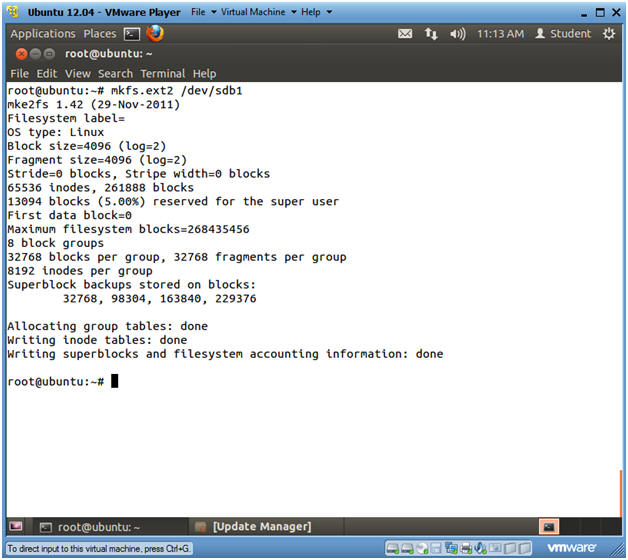
- Instructions:
| Section 7: Mount New Filesystem |
- Mount New File System
- Instructions
- df -h
- mount /dev/sdb1 /tmp
- chmod 1777 /tmp
- df -h
- ls -ld /tmp
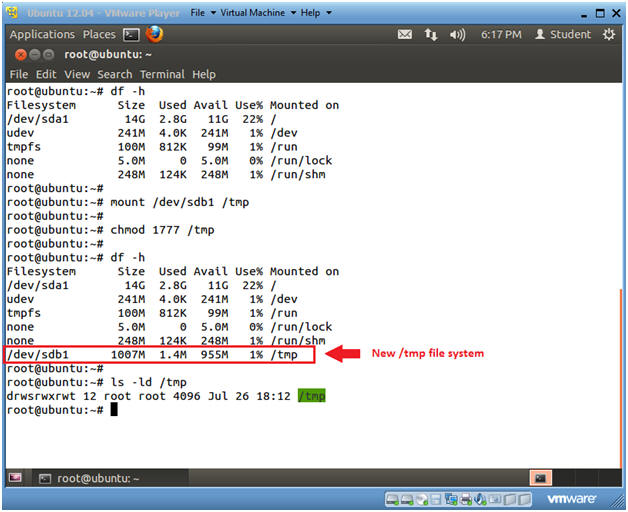
- Instructions
| Section 8: Add New Filesystem to /etc/fstab |
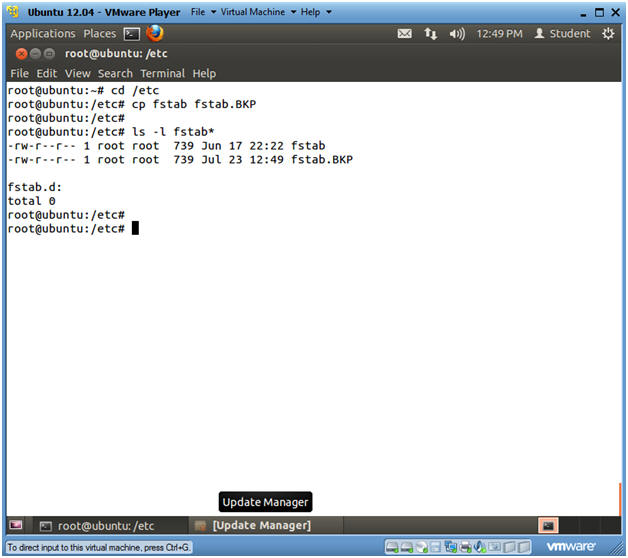
- Make a Backup Copy of the /etc/fstab
- Instructions:
- cd /etc/
- cp fstab fstab.BKP
- ls -l fstab*
- Instructions:
- Open the /etc/fstab
- Instructions:
- vi fstab
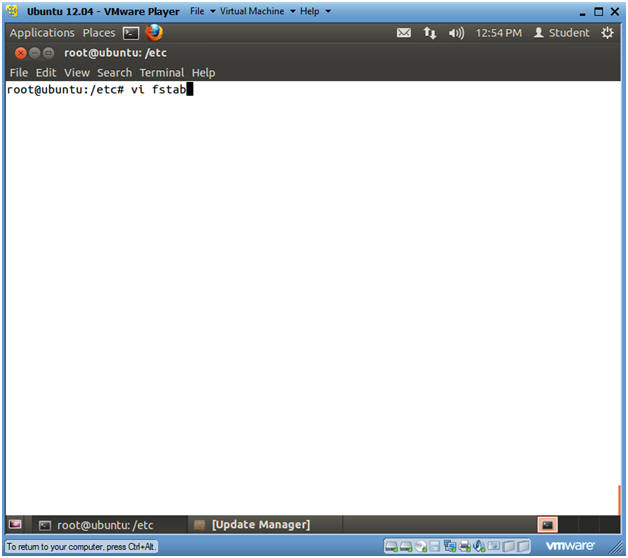
- Instructions:
- Create New Line
- Instructions
- Arrow down to the first UUID line.
- Press the "o" key to insert a new line underneath this line.
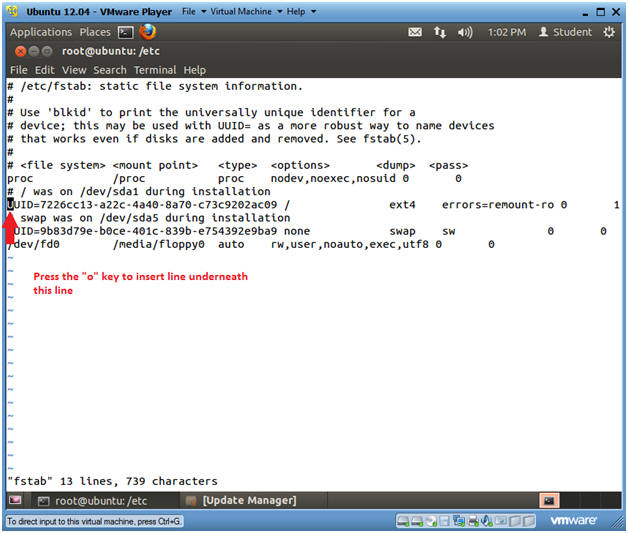
- Instructions
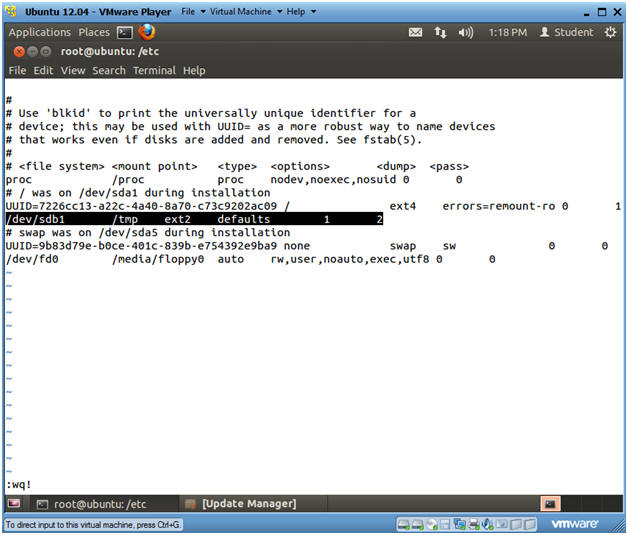
- Add /tmp to /etc/fstab
- Note(FYI):
- <TAB> requires you to press the actual <TAB> Key.
- Instructions
- Type the following Line:
- /dev/sdb1<TAB>/tmp<TAB>ext2<TAB>defaults<TAB>1<TAB>2
- (See Picture)
- Press the <Esc> Key
- Type ":wq!" to save and exit.
- Type the following Line:
- Note(FYI):
| Section 9: Proof of Lab |
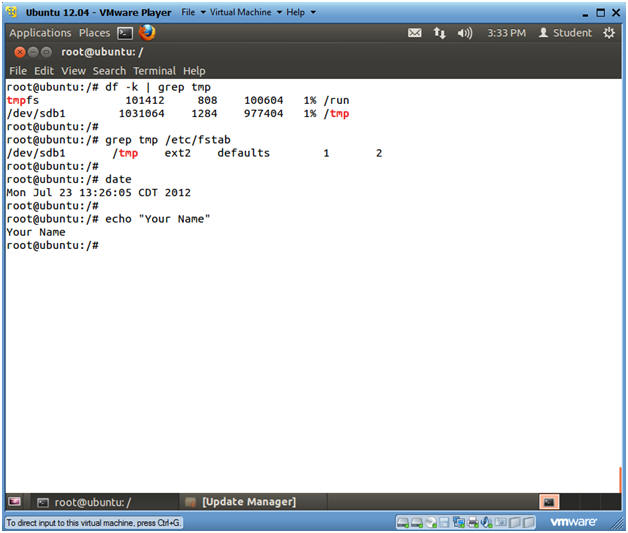
- Proof of Lab
- Instructions
- df -k | grep tmp
- grep tmp /etc/fstab
- date
- echo "Your Name"
- Replace the string "Your Name" with your actual name.
- i.e., echo "John Gray"
-
Proof of Lab Instructions
- Press both the <Ctrl> and <Alt> keys at the same time.
- Do a <PrtScn>
- Paste into a word document
- Upload to Moodle
- Instructions