(Ubuntu: Lesson 7)
{ Enable and Disable the BIOS Power On Password }
| Section 0. Background Information |
- Background information.
- The following lab will show you how to enable and disable the BIOS Power On Password.
- Enabling the BIOS Power On Password will prevent an attacker from physically a CD/iso to boot the Server.
- In Lesson 5, We used a live CD/iso to clear root's password.
- Prerequisite
-
Lab Notes
- In this lab we will how to do the following:
- We will show you how to both enable and disable the BIOS Power On Password.
- In this lab we will how to do the following:
- Legal Disclaimer
- As a condition of your use of this Web site, you warrant to computersecuritystudent.com that you will not use this Web site for any purpose that is unlawful or that is prohibited by these terms, conditions, and notices.
- In accordance with UCC § 2-316, this product is provided with "no warranties, either express or implied." The information contained is provided "as-is", with "no guarantee of merchantability."
- In addition, this is a teaching website that does not condone malicious behavior of any kind.
- You are on notice, that continuing and/or using this lab outside your "own" test environment is considered malicious and is against the law.
- © 2012 No content replication of any kind is allowed without express written permission.
| Section 1: Start Ubuntu 12.04 |
- Start Ubuntu 12.04
- Instructions
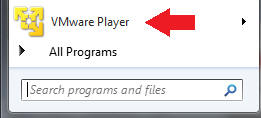
- For Windows 7
- Start --> All Programs --> VMware Player
- For Windows XP
- Starts --> Programs --> VMware Player
- For Windows 7
- Instructions
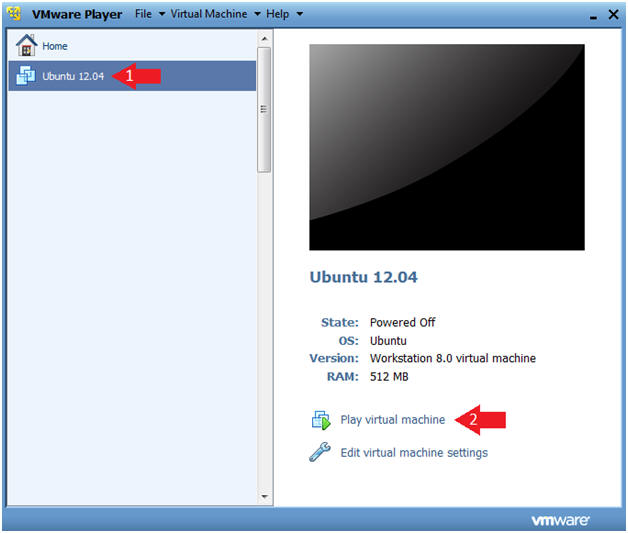
- Start the Ubuntu 12.04 VM
- Instructions
- Click on Ubuntu 12.04
- Click on Play virtual machine
- Instructions
| Section 2: Boot into BIOS Setup Utility |
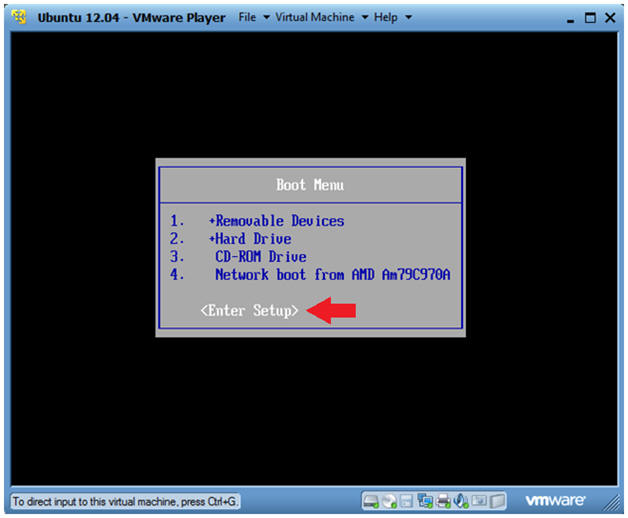
- Access the Boot Menu
- Instructions
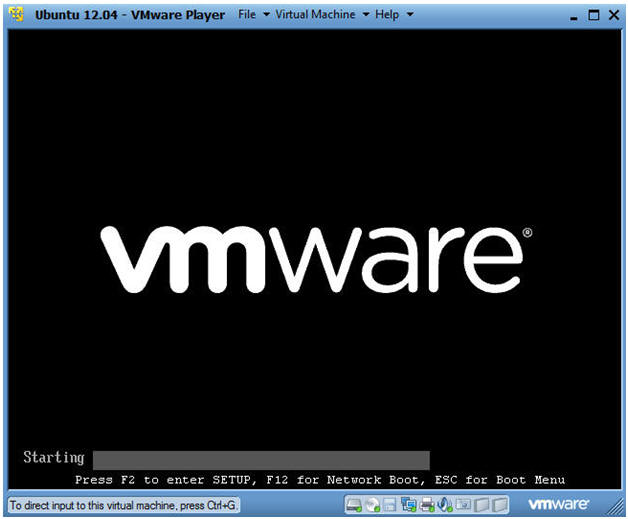
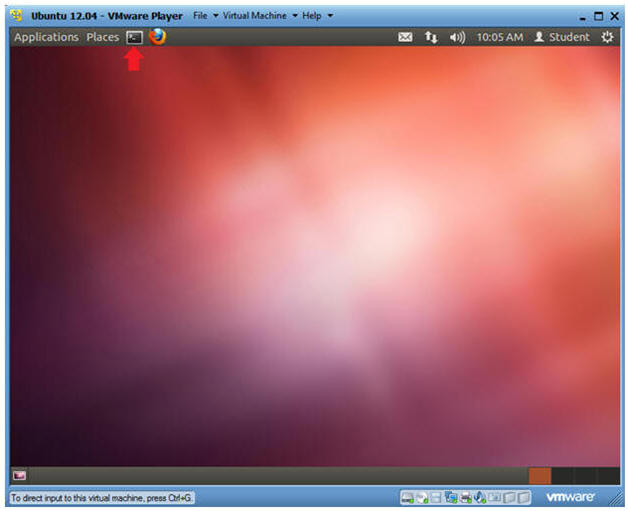
- Once you see the below vmware screen, (1) Left Click in the screen and (2) press the <Esc> key.
- Instructions
- Enter Setup
- Instructions
- Arrow Down to where <Enter Setup> is highlighted
- Press <Enter>
- Instructions
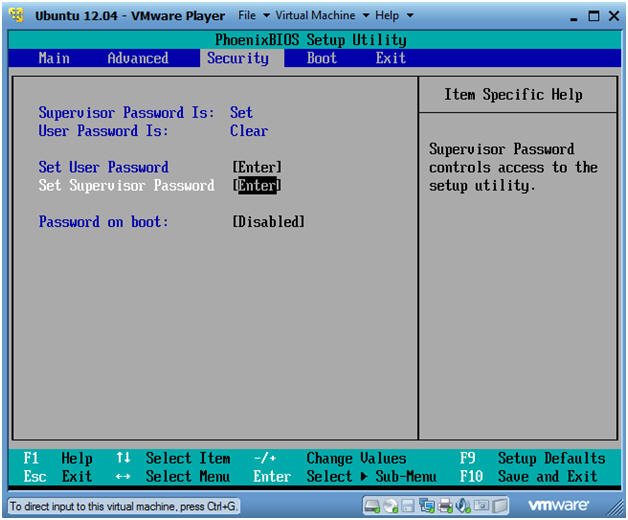
- Navigate to the Security Tab
- Instructions
- Right Arrow over to where Security is highlighted
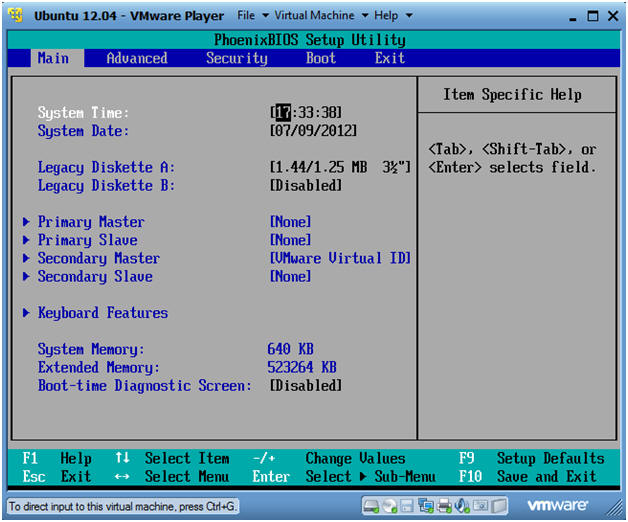
- Instructions
- Set Supervisor Password
- Instructions
- Down arrow to where "Set Supervisor Password" is highlighted
- Press <Enter>
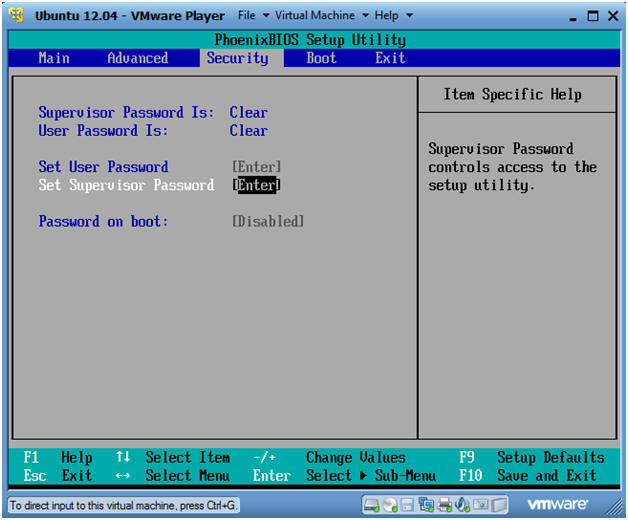
- Instructions
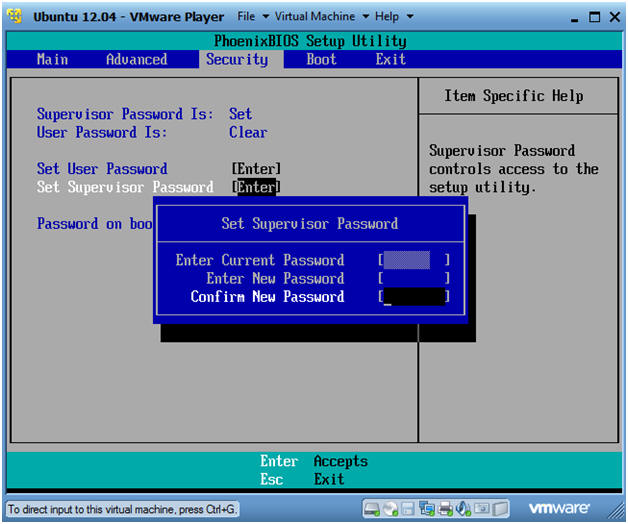
- Enter Password
- Instructions
- Enter New Password and press <Enter>
- Confirm New Password and press <Enter>

- Instructions
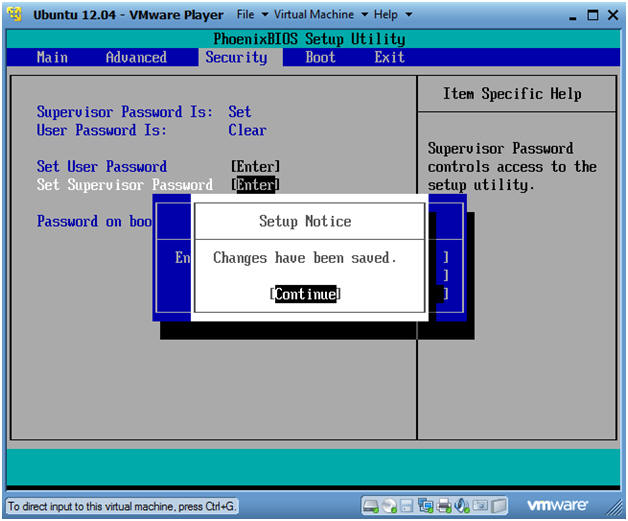
- Setup Notice
- Instructions
- Press <Enter>
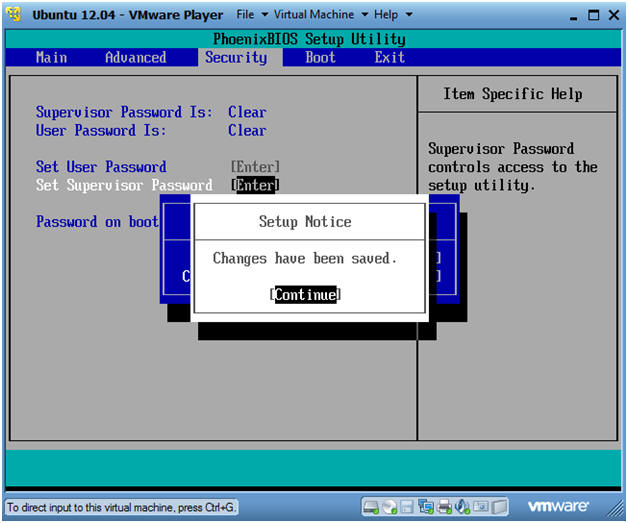
- Instructions
- Exit and Save
- Instructions
- Arrow right to where Exit is highlighted.
- Make sure Exit Saving Changes is highlighted
- Press <Enter>
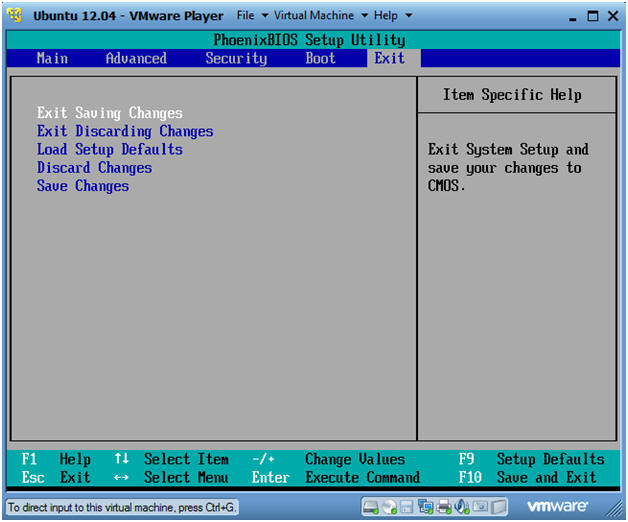
- Instructions
- Setup Confirmation
- Instructions
- Save configuration changes and exit now? Yes, press <Enter>
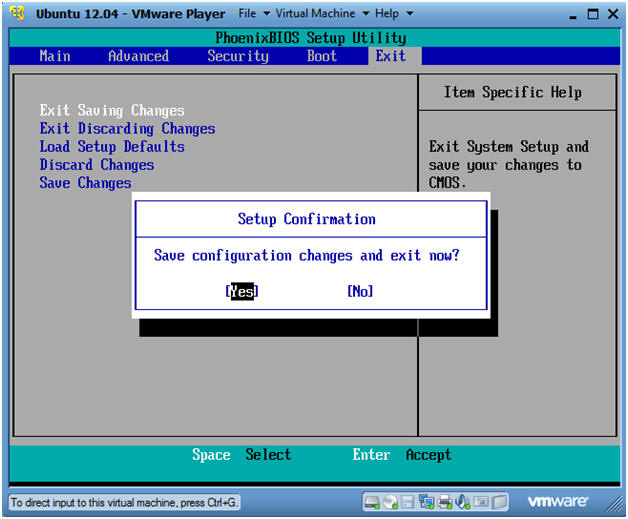
- Instructions
- Edit the Grub Menu
- Note
- You may or may not see the grub menu after exiting the BIOS setup utility. If you do, then follow this and the next step. If you are not presented with the grub menu, then continue to the next section.
- Instructions
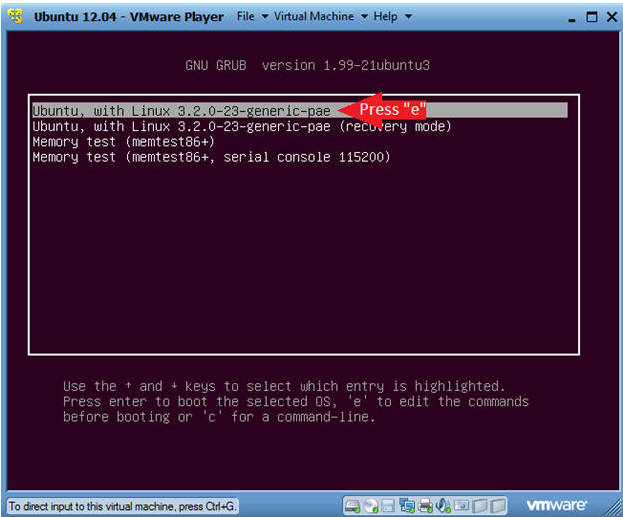
- Make sure Ubuntu, with Linux 3.2.0-23-generic-pae is highlighted.
- Press "e".
- Note
- Boot Machine
- Instructions
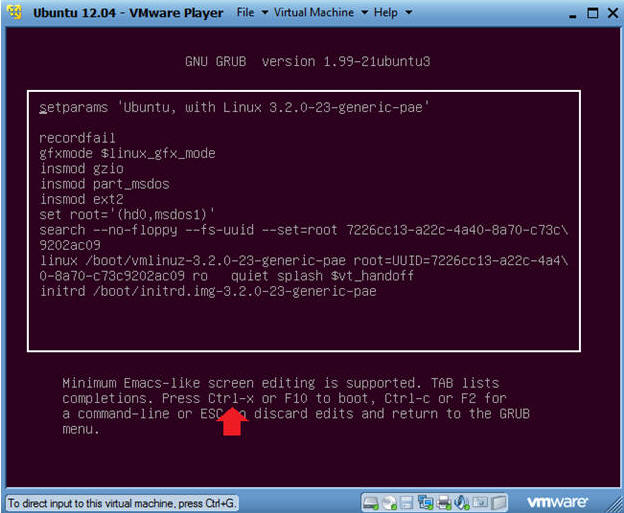
- Press <Ctrl> and "x" to boot the machine.
- Instructions
| Section 3: Login to Ubuntu |
- Login to Server
- Instructions
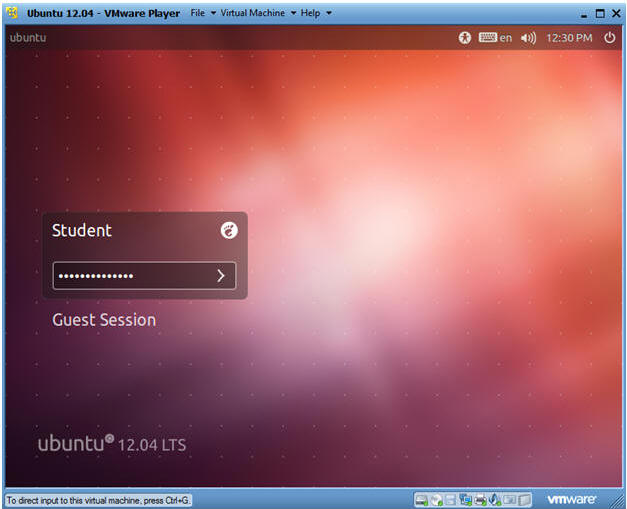
- User: Student
- Password: Please supply the student password.
- Instructions
- Start up a Terminal
- Instructions
- Click on the Terminal
- Instructions
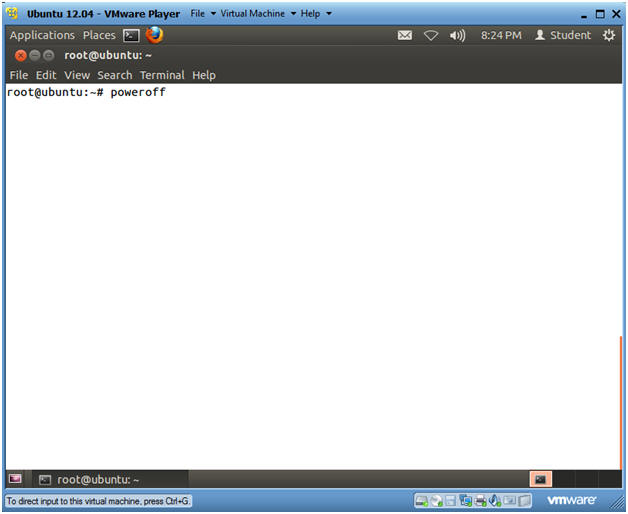
- Become Root
- Instructions
- sudo su -

- Instructions
- Power off Server
- Instructions
- poweroff
- Note(FYI):
- We are powering off the server to test the power on password.
- Instructions
| Section 4: Test BIOS Power On Password |
- Start the Ubuntu 12.04 VM
- Instructions
- Click on Ubuntu 12.04
- Click on Play virtual machine
- Instructions
- Access the Boot Menu
- Instructions
- Once you see the below vmware screen, (1) Left Click in the screen and (2) press the <Esc> key.
- Instructions
- Enter Setup
- Instructions
- Arrow Down to where <Enter Setup> is highlighted
- Press <Enter>
- Instructions
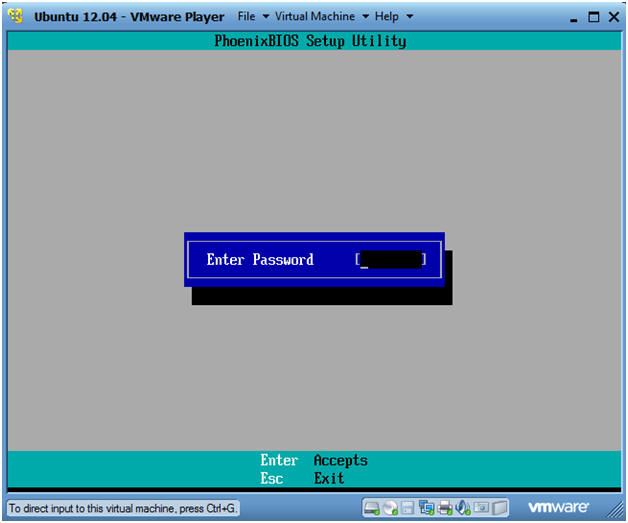
- Supply BIOS Power On Password
- Instructions
- Enter Password: Supply the BIOS Power
On Password
- This is the password that you created in (Section 2, Step 5).
- Enter Password: Supply the BIOS Power
On Password
-
Proof of Lab Instructions
- Press both the <Ctrl> and <Alt> keys at the same time.
- Do a <PrtScn>
- Paste into a word document
- Upload to Moodle
- Instructions
| Section 5: Disable Power On Password |
- Note(FYI):
- This part of the lab is optional.
- If you lose your power on password, then you will no longer be able to recover the root password by booting from a CD.
- Navigate to Security Tab
- Instructions
- From the Main tab, right arrow over to the Security Tab.
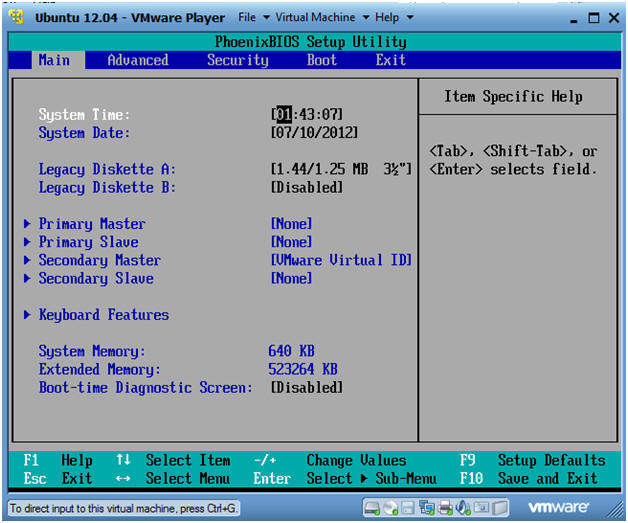
- Instructions
- Supervisor Password
- Instructions
- Down cursor to where Set Supervisor Password is highlighted.
- Press <Enter>
- Instructions
- Disable Supervisor Password
- Instructions
- Enter Current Password: Supply the password, Press <Enter>
- Enter New Password: Leave this blank, Press <Enter>
- Confirm New Password: Leave this blank, Press <Enter>
- Instructions
- Setup Notice
- Instructions
- Press <Enter>
- Instructions
- Exit and Save
- Instructions
- Arrow right to where Exit is highlighted.
- Make sure Exit Saving Changes is highlighted
- Press <Enter>
- Instructions
- Setup Confirmation
- Instructions
- Save configuration changes and exit now? Yes
- Instructions
- Edit the Grub Menu
- Note
- You may or may not see the grub menu after exiting the BIOS setup utility. If you do, then follow this and the next step. If you are not presented with the grub menu, then continue to the next section.
- Instructions
- Make sure Ubuntu, with Linux 3.2.0-23-generic-pae is highlighted.
- Press "e".
- Note
- Boot Machine
- Instructions
- Press <Ctrl> and "x" to boot the machine.
- Instructions
| Section 6: Proof of Lab |
- Proof of Lab
-
Proof of Lab
Instructions
- See (Section 4, Step 4)
-
Proof of Lab
Instructions