(Windows 2008 Server: Lesson 4)
{ Creating Users and using dsquery }
| Section 0. Background Information |
- In this lab.
- In this lab we will create three users that will be used in the follow labs that we will assign to groups and ACLs
- Also you will learn about the active directory command called dsquery. (For more on dsquery, please visit the below link).
- http://technet.microsoft.com/en-us/library/cc755655%28WS.10%29.aspx
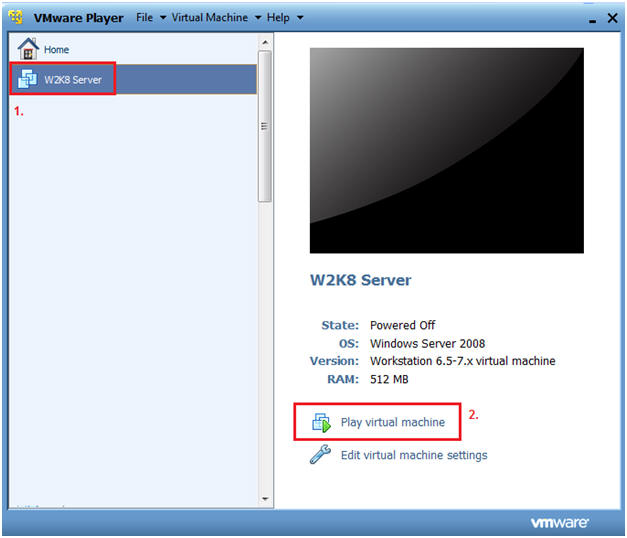
| Section 1. Login to your W2K8 server. |
- Start your Windows 2008 Server
- Instructions:
- Click on W2K8 Server
- Click on Play virtual machine
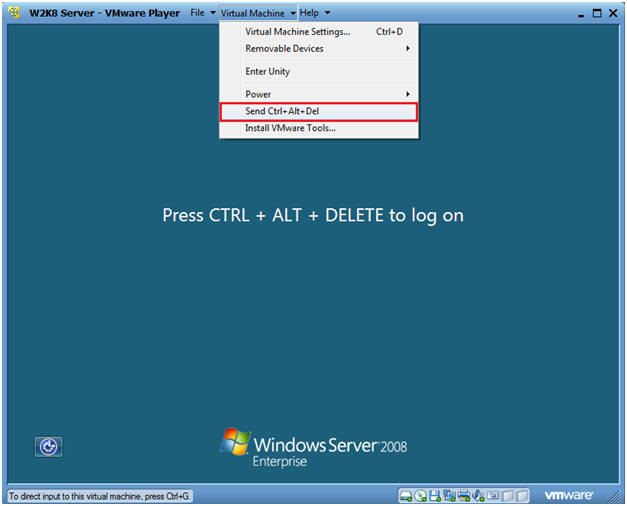
- Instructions:
- CRTL + ALT + DELETE
- Instructions
- Virtual Machine
- Send Ctrl+Alt+Del
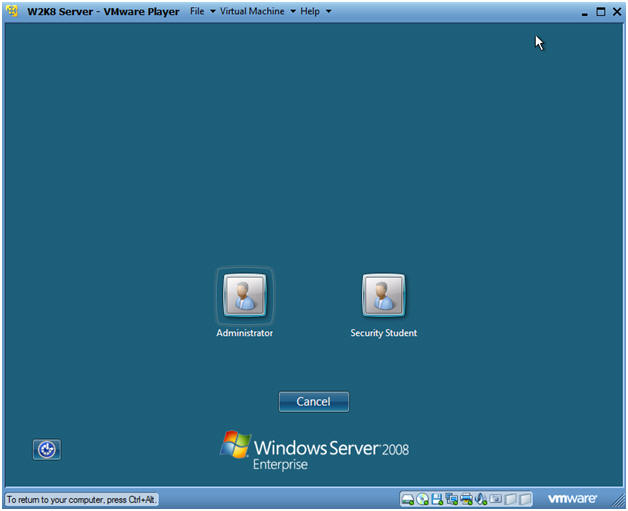
- Instructions
- Login as Administrator
- Click on the Administrator icon.
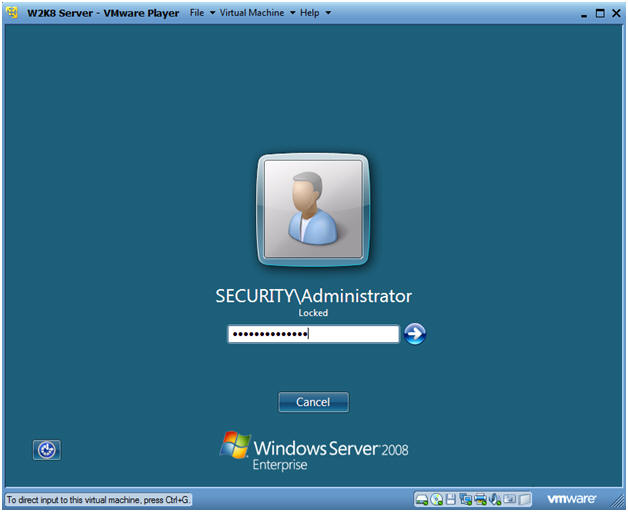
- Login
- Command: Provide the password for the Administrator account.
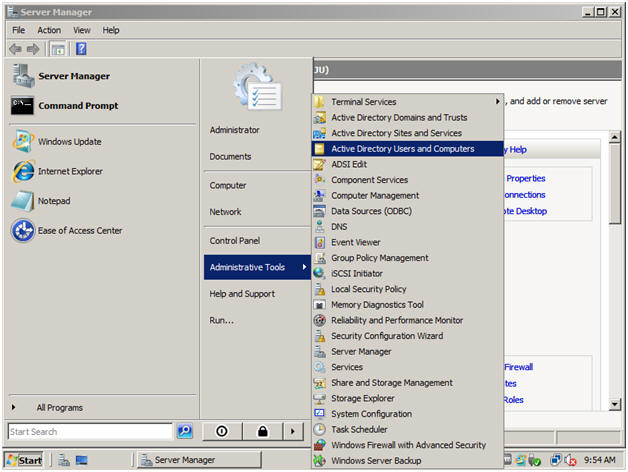
| Section 2. Launching Active Directory Users and Computers |
- Launch Active Directory Users and Computers
- Instructions:
- Start --> Administrative Tools --> Active Directory Users and Computers
-
- Instructions:
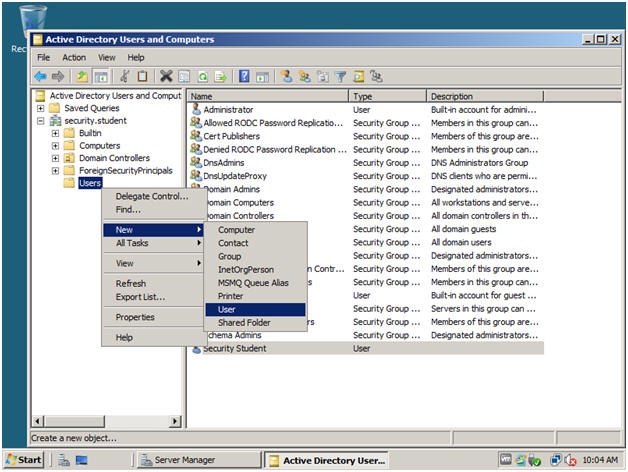
| Section 3. Create Username "manager" |
- Create a New User
- Instructions:
- Right Click on User
- New --> User
-
- Instructions:
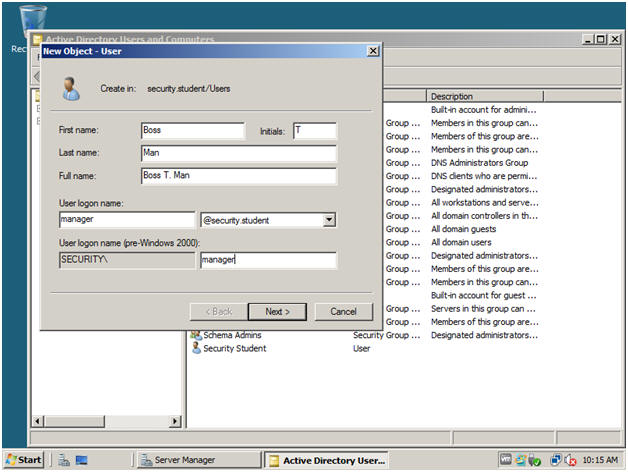
- Name the New User
- Instructions:
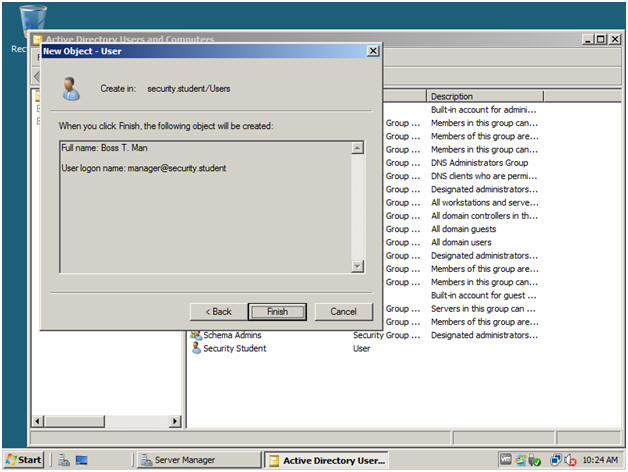
- First name: Boss
- Initials: T
- Last: Man
- Full name: Boss T. Man
- User logon name: manager
- Click Next
- Instructions:
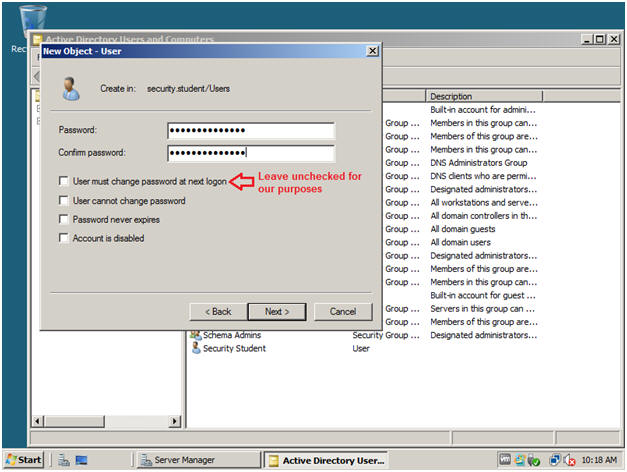
- Edit the New User's Password
- Notes:
- Normally when creating a user's password, you would want the user to change their password at the next login.
- Instructions:
- Enter our standard classroom password.
- Click Next
- Notes:
- Finishing the User Creation Process
- Instructions:
- Click the Finish Button
- Instructions:
| Section 4. Create Username "teamlead" |
- Create a New User
- Instructions:
- Right Click on User
- New --> User
-
- Instructions:
- Name the New User
- Instructions:
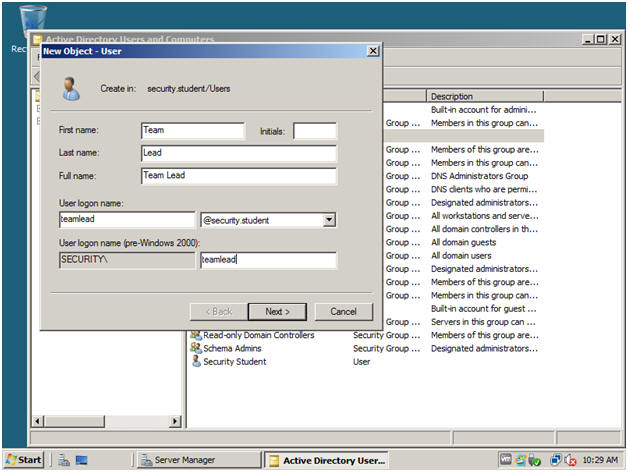
- First name: Team
- Initials:
- Last: Lead
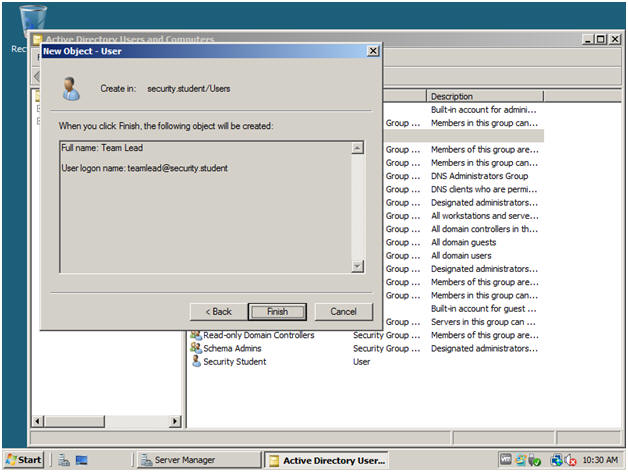
- Full name: Team Lead
- User logon name: teamlead
- Click Next
- Instructions:
- Edit the New User's Password
- Notes:
- Normally when creating a user's password, you would want the user to change their password at the next login.
- Instructions:
- Enter our standard classroom password.
- Click Next
- Notes:
- Finishing the User Creation Process
- Instructions:
- Click the Finish Button
- Instructions:
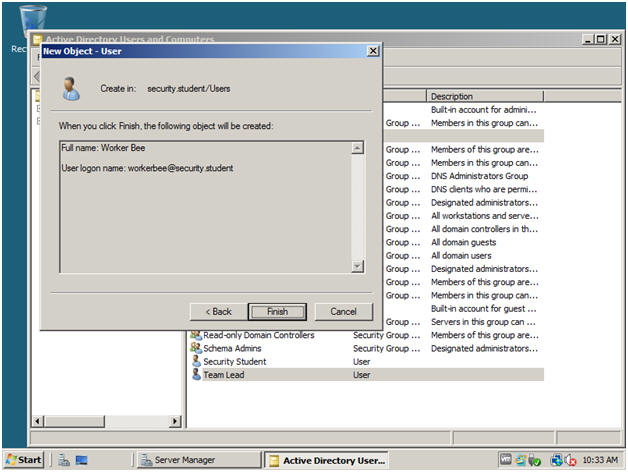
| Section 5. Create Username "workerbee" |
- Create a New User
- Instructions:
- Right Click on User
- New --> User
-
- Instructions:
- Name the New User
- Instructions:
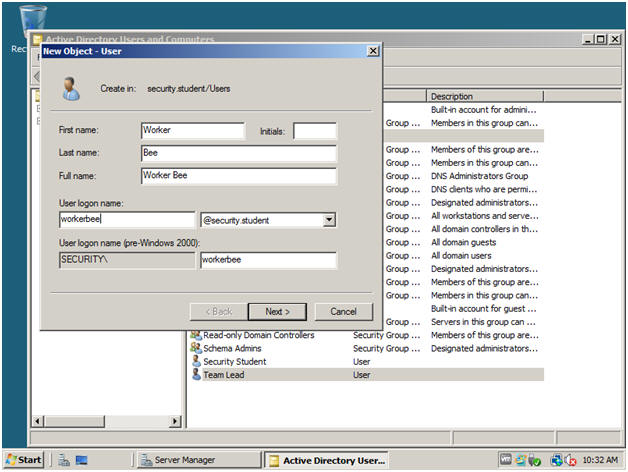
- First name: Worker
- Initials:
- Last: Bee
- Full name: Worker Bee
- User logon name: workerbee
- Click Next
- Instructions:
- Edit the New User's Password
- Notes:
- Normally when creating a user's password, you would want the user to change their password at the next login.
- Instructions:
- Enter our standard classroom password.
- Click Next
- Notes:
- Finishing the User Creation Process
- Instructions:
- Click the Finish Button
- Instructions:
| Section 6. Allow Active Directory User to Logon Locally. |
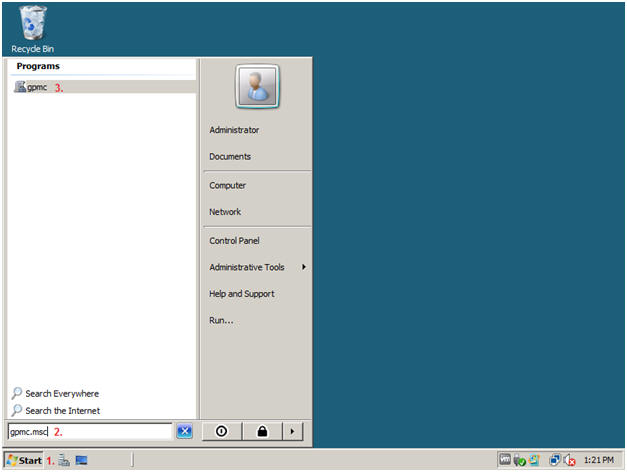
- Open up Group Policy Management
- Instructions:
- Click on the Start button
- In the search box, type gpmc.msc
- Click on gpmc
-
- Instructions:
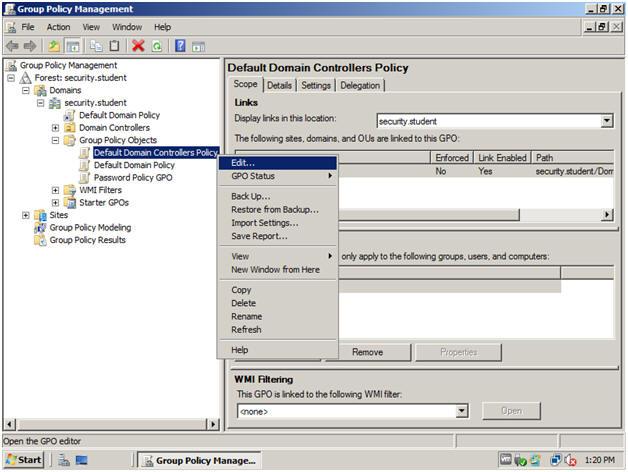
- Edit Default Domain Controllers Policy
- Instructions:
- Domains --> security.student --> Group Policy Objects
- Right Click on Default Domain Controllers Policy
- Click on Edit
- Instructions:
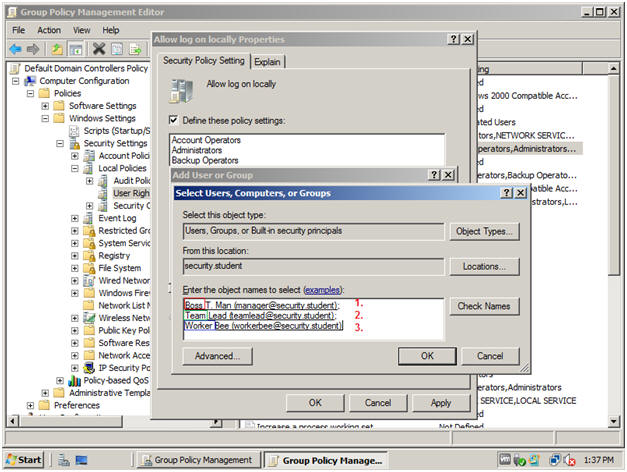
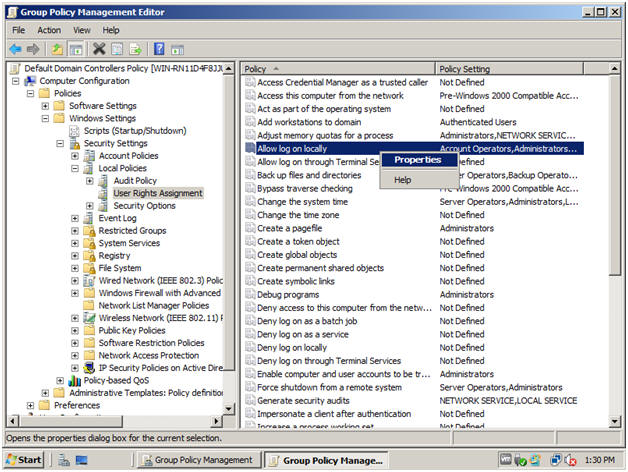
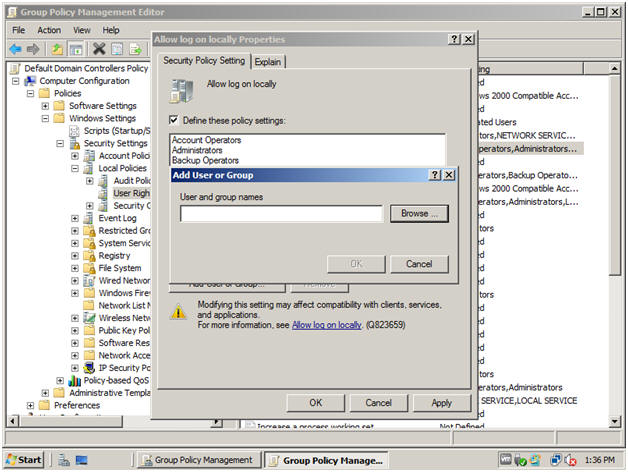
- Edit "Allow log on locally" Policy
- Instructions:
- Computer Configuration --> Windows Settings --> Security Settings --> Local Policies
- Click on User Rights Assignments
- Right Click on "Allow log on locally"
- Click on Properties
- Instructions:
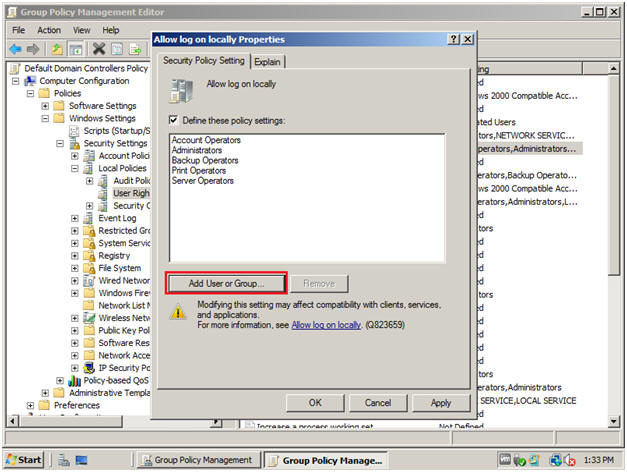
- Add User or Group to "Allow log on locally
Properties" (Step 1)
- Instructions:
- Click the Add User or Group... Button
- Instructions:
- Add User or Group to "Allow log on locally
Properties" (Step 2)
- Instructions:
- Click the Browse... Button
- Instructions:
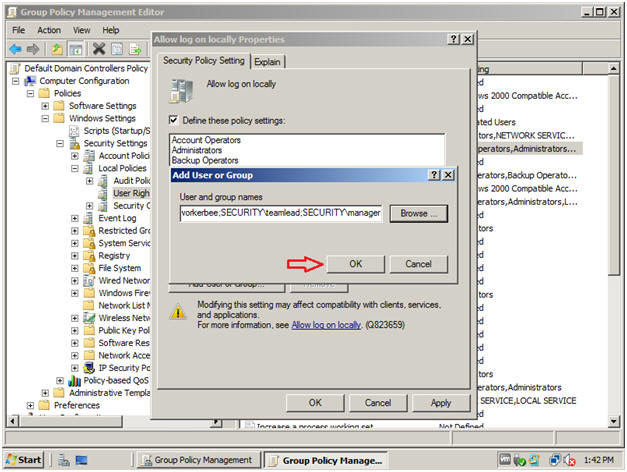
- Add Users to "Allow Log on locally" Properties
(Step 3)
- Instructions
- In the Text Box type "Boss" and Click the Check Names Button.
- In the Text Box type "Team" and Click the Check Names Button.
- In the Text Box type "Worker" and Click the Check Names Button.
- Click OK
- Instructions
- Add Users to "Allow Log on locally" Properties
(Step 4)
- Instructions
- Click OK
- Instructions
- Add Users to "Allow Log on locally" Properties
(Step 5)
- Instructions
- Click OK
- Instructions
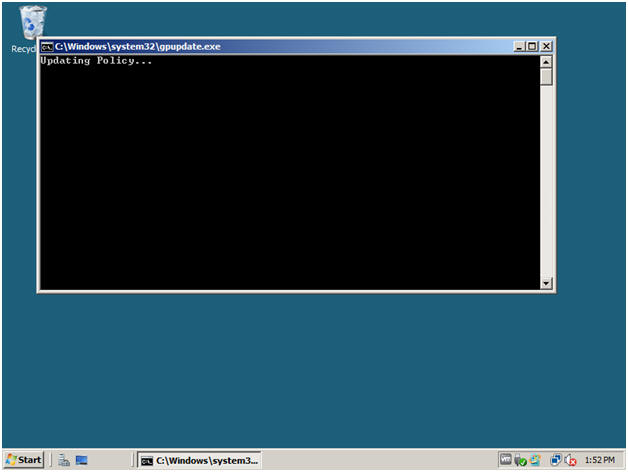
- Group Policy Update Utility (Step 1)
- Instructions
- Click the Start Button
- In the search box, type "gpupdate /force"
- Click the gpupdate /force program
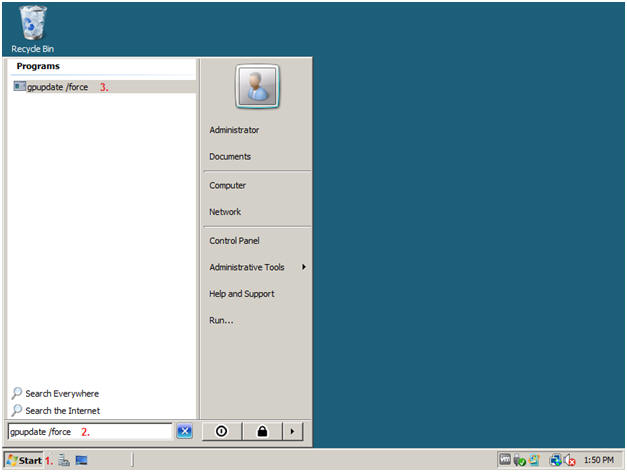
- Instructions
- Group Policy Update Utility (Step 2)
- Notes
- You will see the below screen.
- Once the update is complete the black box will close.
- Notes
| Section 7. Proof of Lab |
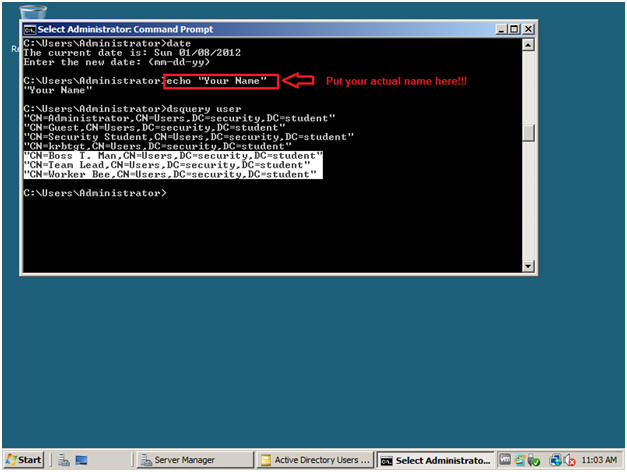
- Start Up the Command Prompt
- Instructions
- Start --> Command Prompt
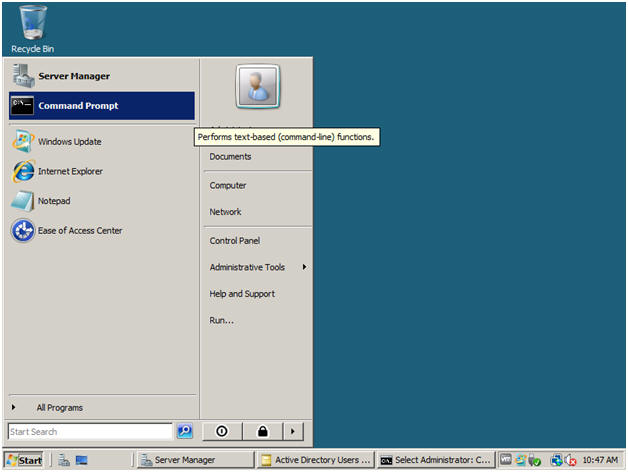
- Instructions
- Create a New User
- Instructions:
- Type "date", hit enter twice
- echo "Your Name", where "Your Name" is your actual name.
- dsquery user
- dsquery is an active directory command that lets you query for various active directory objects, including users.
-
Proof of Lab
- Press the PrtScn Button
- Paste into a Word Document
- Upload to Moodle
-
- Instructions: