(Helix)
{ Getting Started }
| Section 0. Background Information |
- Helix3 is a Live CD built on top of Ubuntu. It focuses on incident response and computer forensics. According to Helix3 Support Forum, e-fense is no longer planning on updating the free version of Helix.
- See http://www.e-fense.com/products.php
| Section 1. Downloading Helix |
- On any machine connected to the Internet, bring
up a Web Browser.
- In my case, I am using a Windows Machine that has a USB hard drive attached to it.
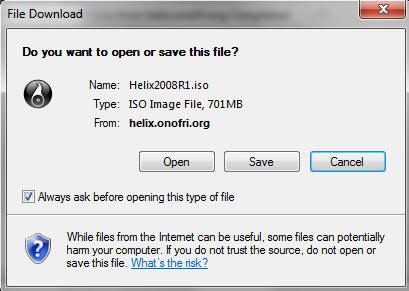
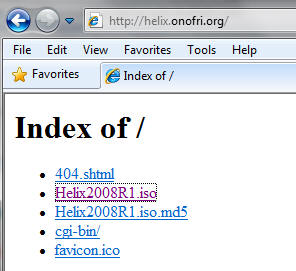
- Go To
http://helix.onofri.org/Helix2008R1.iso
- Saving the ISO
- Command: Click Save
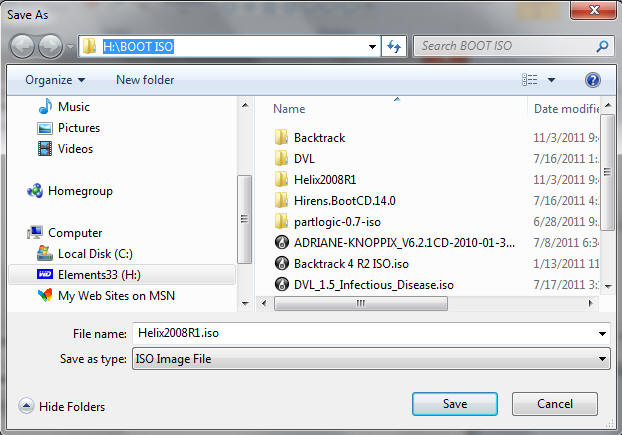
- Saving ISO to a location
- Instruction: It's up to you where you want to save the file. In my case, I will save the ISO to H:\BOOT ISO
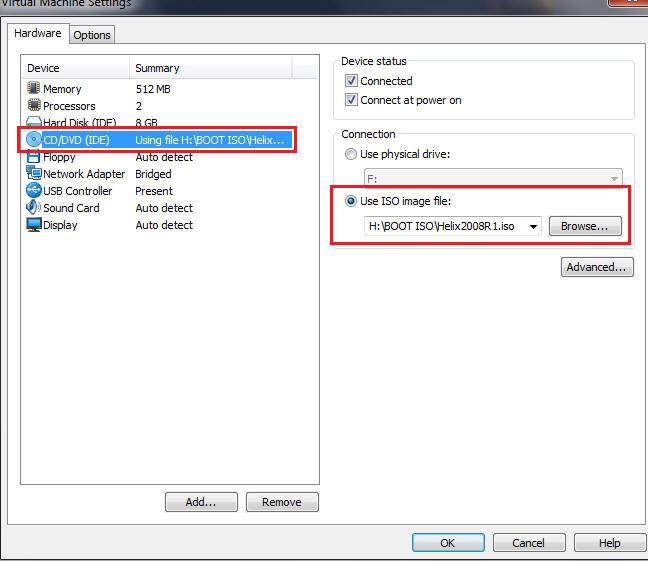
| Section 2. Configure the Windows Virtual Machine to boot up Helix |
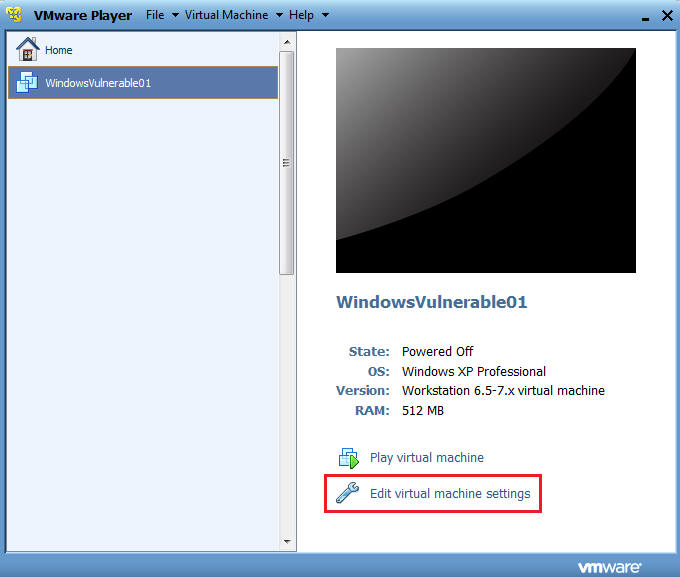
- Edit the WindowsVulnerable01 virtual machine. (See Below)
- Note: For those of you that don't have access to class material, this can be Windows XP, 2000, 2003 and 7.
- Configure Windows to boot off of Helix
- Instructions:
- Select CD/DVD (IDE)
- Select the Use ISO image file
- Browse to where you saved the Helix iso.
- Note: In my case, I save it in the following location:
- H:\BOOT ISO\Helix2008R1.iso
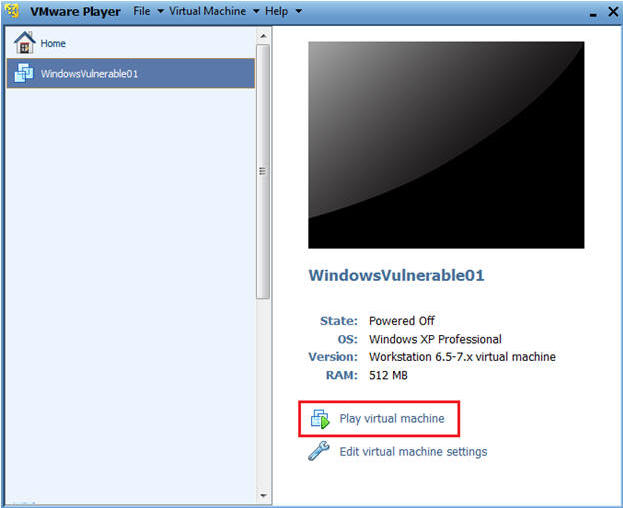
- Instructions:
- Play the Virtual Machine
- Select Play Virtual Machine
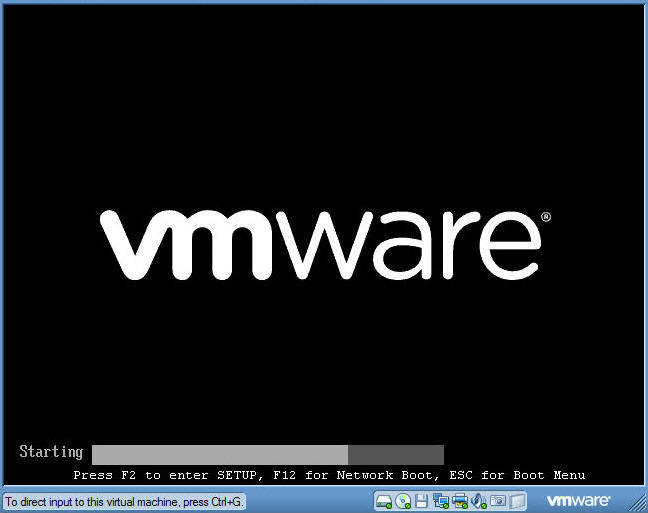
| Section 3. Start Up Helix |
- Booting from the ISO
- At the same time, Click the right mouse key and the press the ESC button, when the screen starts to change to the VMware screen below.
- Note: This might take you a few times so be patient!!!
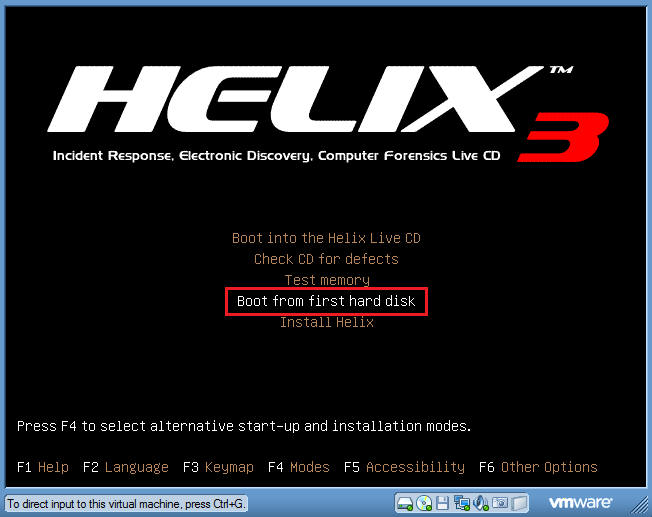
- Boot Menu Selection
- Command:
- Select CD-ROW Drive
- Press Enter
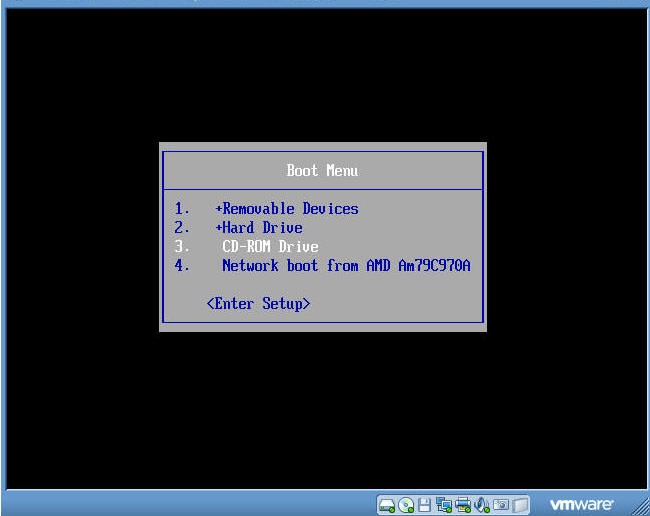
- Command:
- Booting from Helix Options
- Instructions:
- Boot into the Helix Live CD
- This will take you into a knoppix/linux operating systems.
- Unfortunately, VMware seems to not allow mouse clicks.
- In the future, I will experiment with VirtualBox to see if the same issue is present.
-
Boot from first hard disk
- Select this option.
- This will allow you to run the Helix CD from Windows.
- Boot into the Helix Live CD
- Instructions:
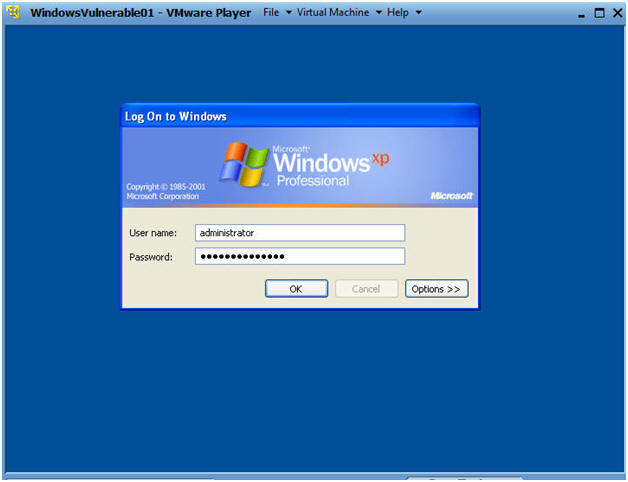
- Log into your Windows Machine
- Instructions:
- Its probably a good idea to long in with an administrator account to ensure you can run the Helix CD.
 .
.
- Instructions:
| Section 4. Start Up Terminal Window |
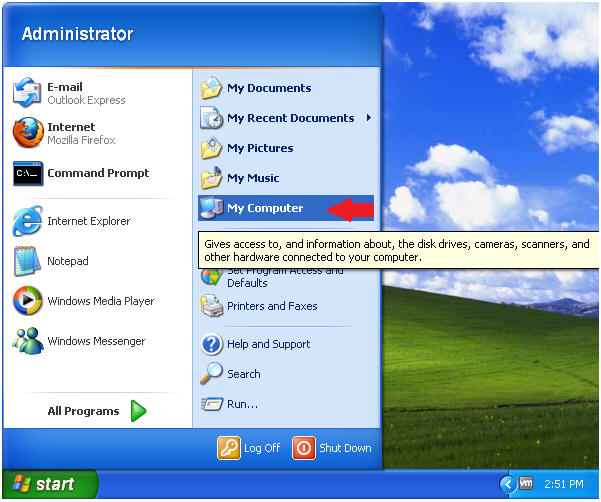
- Open Up My Computer
- Command: Start --> My Computer
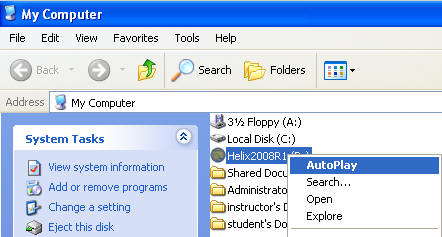
- Starting Up Helix
- Command:
- Right Click on Helix2008R1
- Click on AutoPlay
- Command:
- Select Language
- Command:
- Select English
- Click Accept
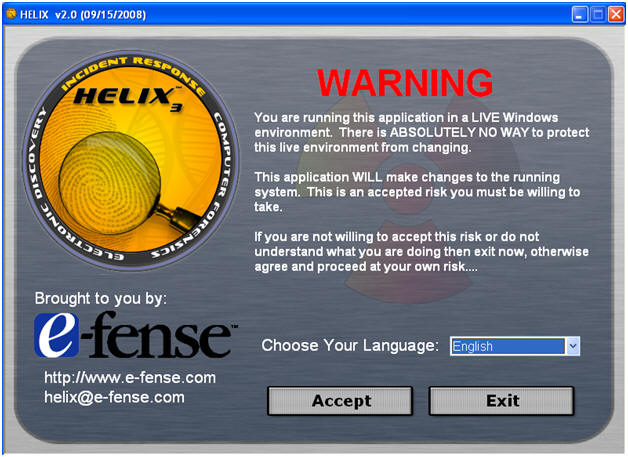
- Command:
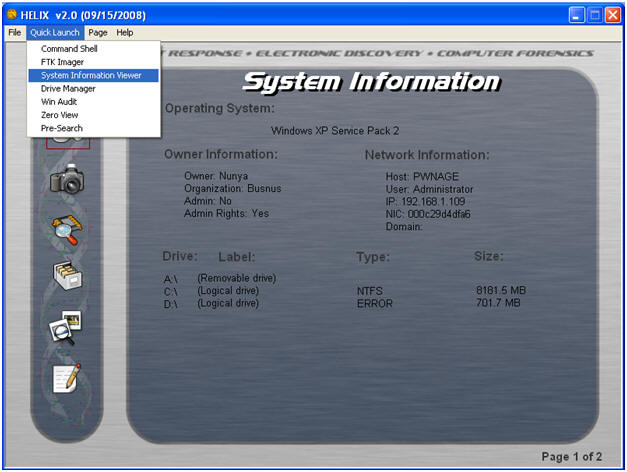
| Section 5. Preview system information |
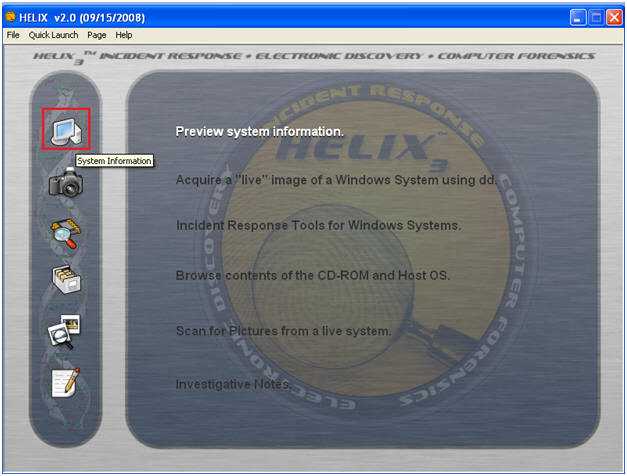
- Preview system information
- Command: Select System Information
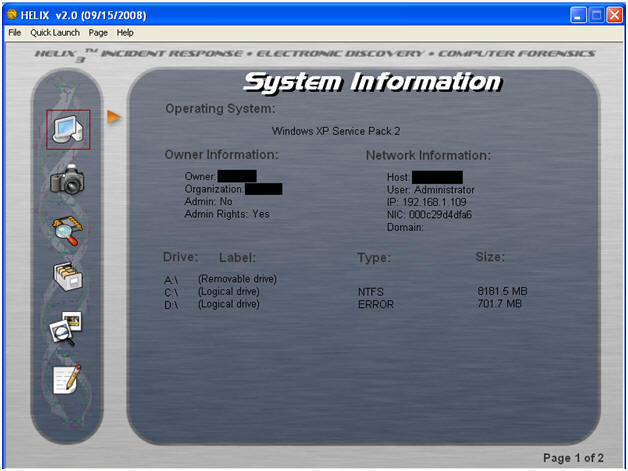
- Review System Information
- Note: The basic system information is included here like hostname, owner, organization, IP address, NIC, and drives.
| Section 6. Preview Running Processes |
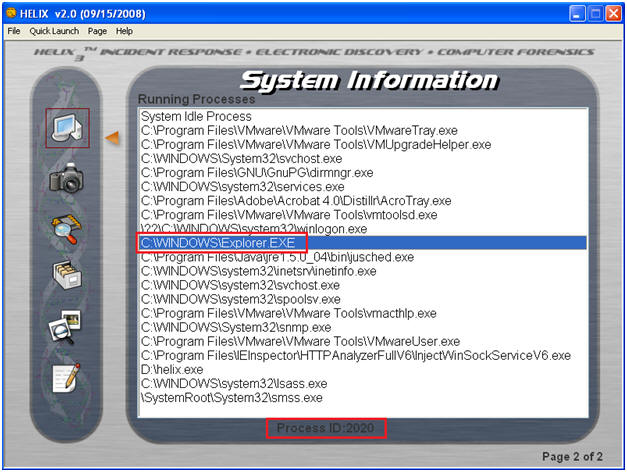
- Preview Running Processes
- Command: Select: Page --> System --> Running Processes

- View a Process ID (PID)
- Command: Select any process.
- Note: The Process ID number is displayed down low.
| Section 7. System Information Viewer Running Processes |
- Preview Running Processes
- Command: Select: Quick Launch --> System Information Viewer
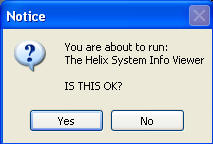
- Select Yes
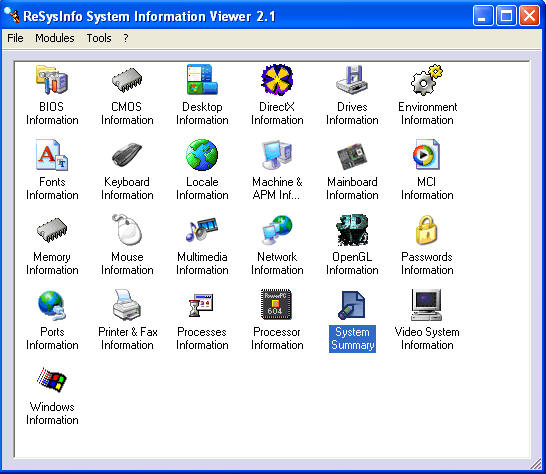
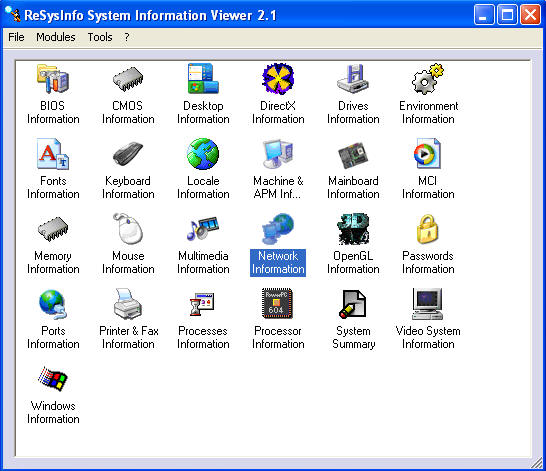
- ReSysInfo System Information Viewer 2.1
- Command: Select System Summary
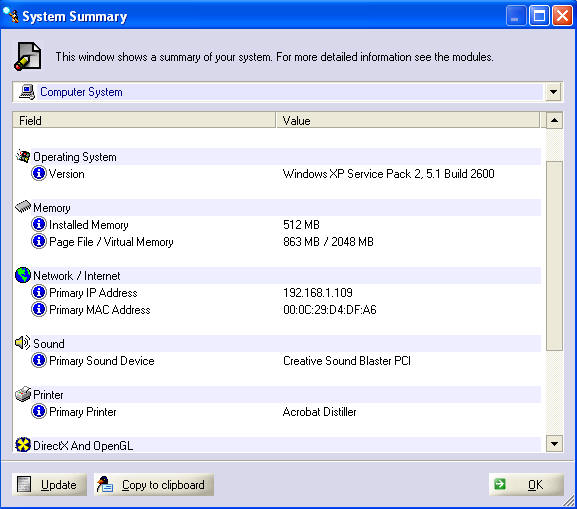
- System Summary View
- Note: This is another view that show basic system information. Notice you have the ability to copy to this system information to the clipboard.
| Section 8. View Network Information |
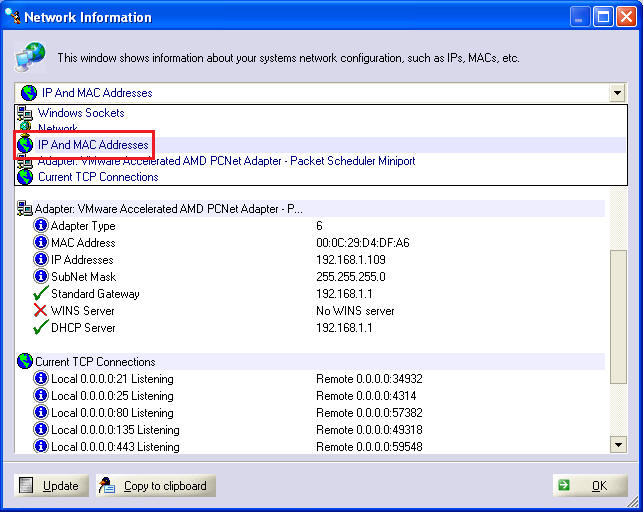
- Network Information
- Command: Select Network Information
- View IP and MAC Information
- Command: Select IP And MAC Address
- Proof of Lab: Cut and Paste a screen shot into a word document and upload to Moodle.
| Section: Proof of Lab5 |
- Cut and Paste a screen shot found in Section 8, Step 2 in a word and upload to Moodle.