(Damn Vulnerable Linux: [DVL])
{ How to Install DVL }
| Section 0. Background Information |
- What is Damn Vulnerable Linux?
- Damn Vulnerable Linux (DVL) is everything a good Linux distribution isn't. Its developers have spent hours stuffing it with broken, ill-configured, outdated, and exploitable software that makes it vulnerable to attacks.
- DVL isn't built to run on your desktop -- it's a learning tool for security students. DVL is a live CD available as a 150MB ISO.
- It's based on the popular mini-Linux distribution Damn Small Linux (DSL), not only for its minimal size, but also for the fact that DSL uses a 2.4 kernel, which makes it easier to offer vulnerable elements that might not work under the 2.6 kernel.
- It contains older, easily breakable versions of Apache, MySQL, PHP, and FTP and SSH daemons, as well as several tools available to help you compile, debug, and break applications running on these services, including GCC, GDB, NASM, strace, ELF Shell, DDD, LDasm, LIDa, and more.
- DVL was initiated by Thorsten Schneider of the International Institute for Training, Assessment, and Certification (IITAC) and Secure Software Engineering (S²e) in cooperation with Kryshaam from the French Reverse Engineering Team. "The main idea behind DVL," says Schneider, "was to build up a training system that I could use for my university lectures." His goal was to design a Linux system that was as vulnerable as possible, to teach topics such as reverse code engineering, buffer overflows, shellcode development, Web exploitation, and SQL injection.
| 1. Prerequisite |
- You need to have virtualization software that allows you to create operating system images using either an ISO or installation CD. For this "how to", I will be using VMware Workstation. However, you can also use other popular tools, such as, VirtualBox.
| 2. Download the Damn Vulnerable Linux (DVL) iso |
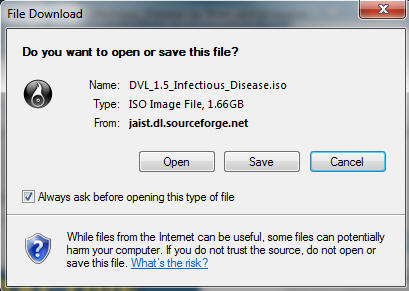
- Download DVL
- Click Save
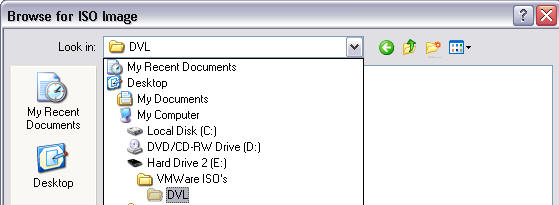
- Save to C:\VMware ISO's\DVL\
- In my case, I save it to an external hard drive, hence Hard Drive 2 (E:)
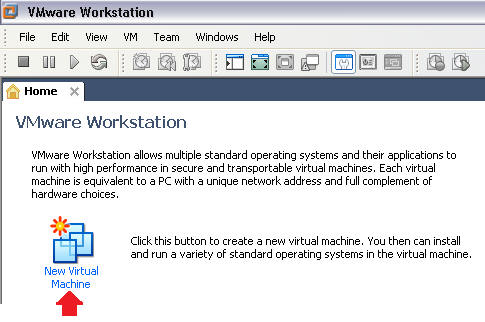
| 2. Start VMware Workstation |
- Programs --> VMware --> VMware Workstation.
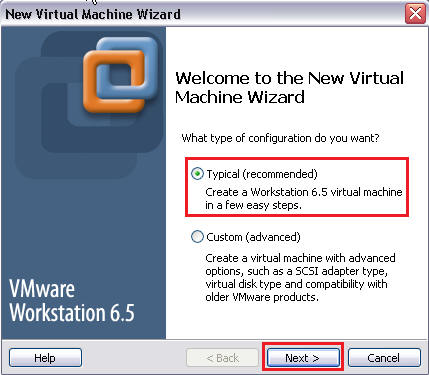
| 3. Create VMware Image |
- Click on New Virtual Machine.
- Bring up a FireFox Browser on your DVL machine.
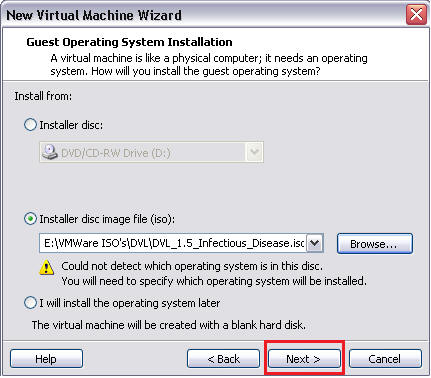
- Select Install disc image file (iso)
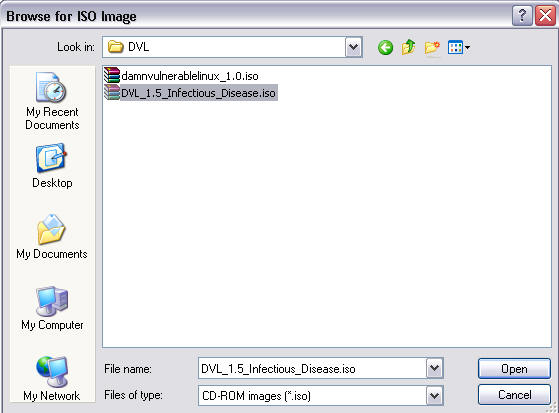
- Select the Browse Button
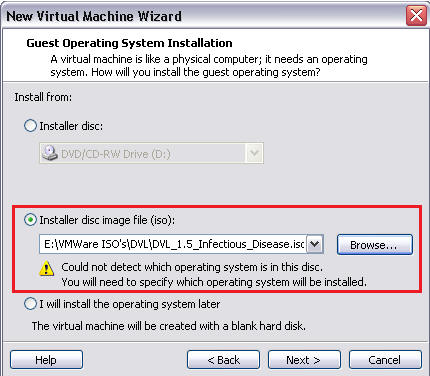
- Navigate to where you save the DVL iso.
- In my case, the iso was saved to E:\VMware ISO's\DVL\
- Select DVL iso and click open
- Select Next
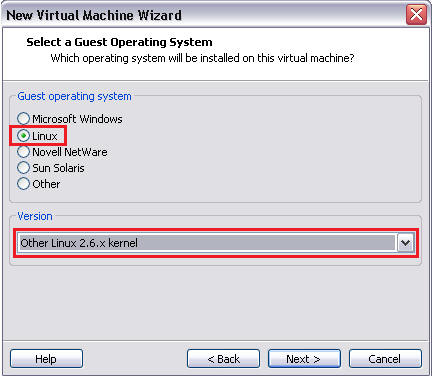
- Select the Linux OS, and Other Linux 2.6.x kernel
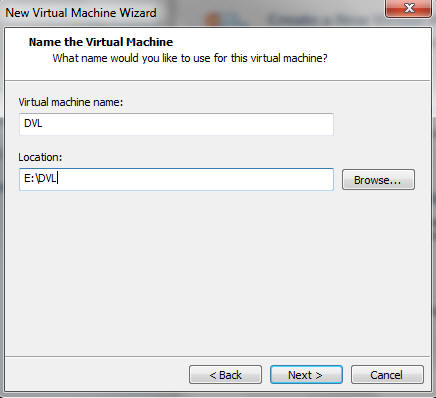
- Naming and Saving Location
- Virtual machine name: DVL
- Location: In my case, I save it to my external hard drive at E:\VMware
- Specify Disk Capacity
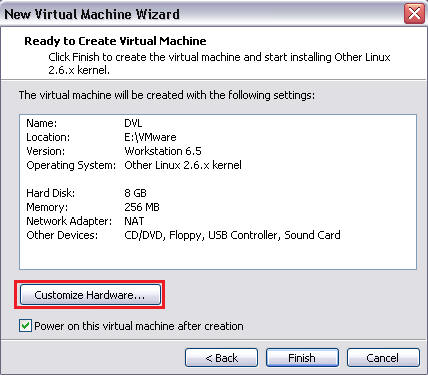
- Click on the Customize Hardware...
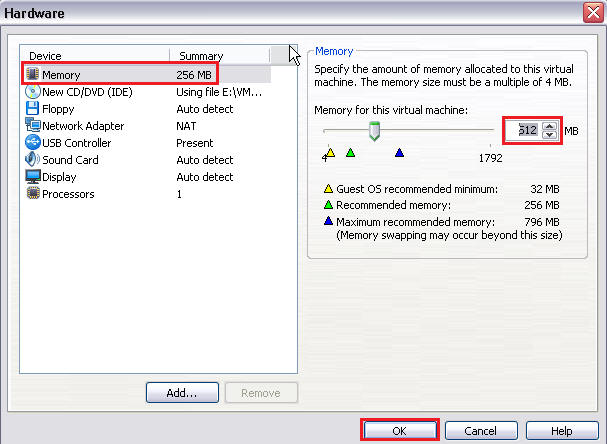
- Select Memory
- Increase the memory from 256 MB to 512 MB.
- Click OK.
- Click Finish
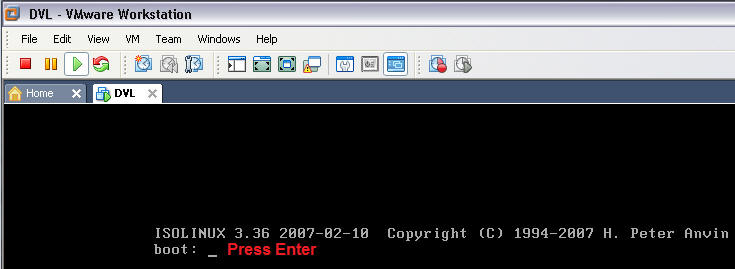
- Press Enter when you see "boot: "

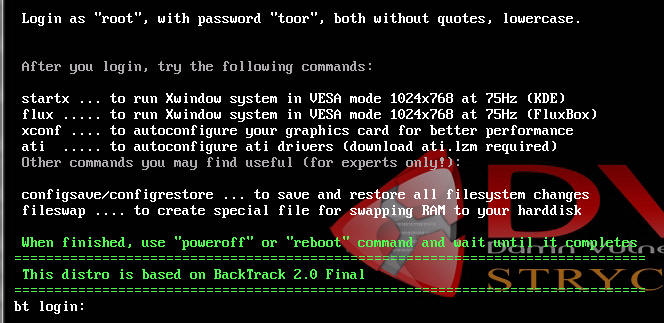
| 3. Login to DVL |
- Credentials (See Below)
- Login: root
- Password: toor
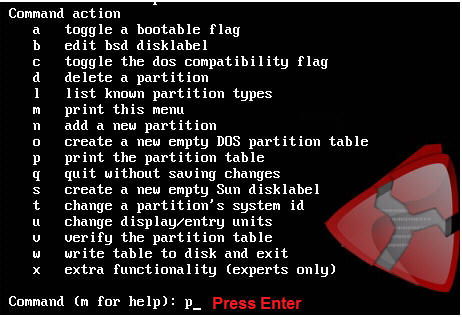
| 3. Partition the disk |
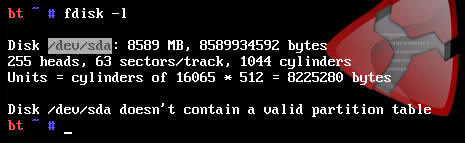
- Determine what disk to format
- Command: fdisk -l
- Note: In my case, the disk is named /dev/sda
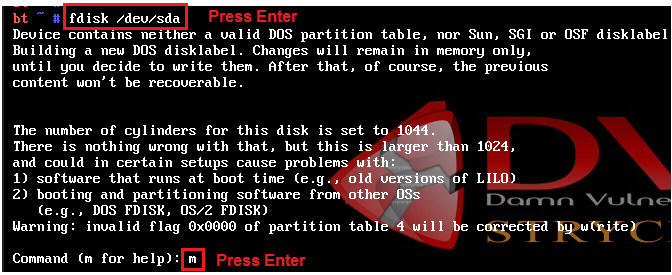
- Select disk to be partitioned
- Command: fdisk /dev/sda
- Input: m
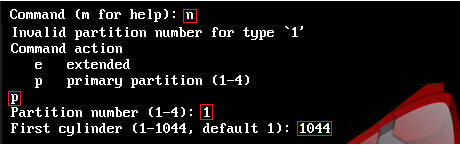
- View the partition table
- Select "p"
- Note: There is 1044 cylinders

- Add a new partition
- Select "n"
- Select "p"
- Select "1"
- Select the maximum amount of cylinders 1044.
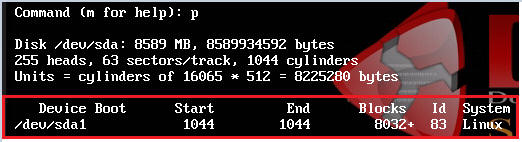
- View newly created partition
- Select "p"
- Note: Previously when "p" was selected there was not a partition listed.
- Save the new partition
- Select "w"

- Exit out of fdisk
- Select "q"

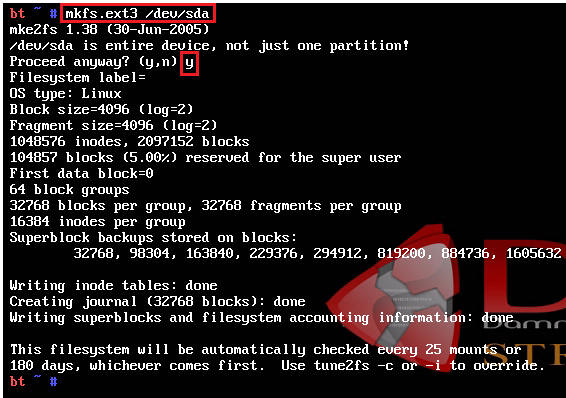
| 4. Format the partition |
- Format the partition on /dev/sda
- Command: mkfs.ext3 /dev/sda
- Proceed: y
- Create a folder to mount the partition on.
- Command: mkdir /mnt/dvl

- Mount the hard drive to the /mnt/dvl directory
- Command: mount /dev/sda /mnt/dvl

| 3. Copy DVL image to hard drive |
- startx (See Below)
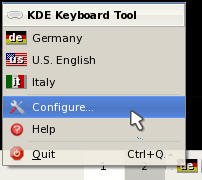
- Change Language to English (See Below)
- Right Click on DE and click on Configure
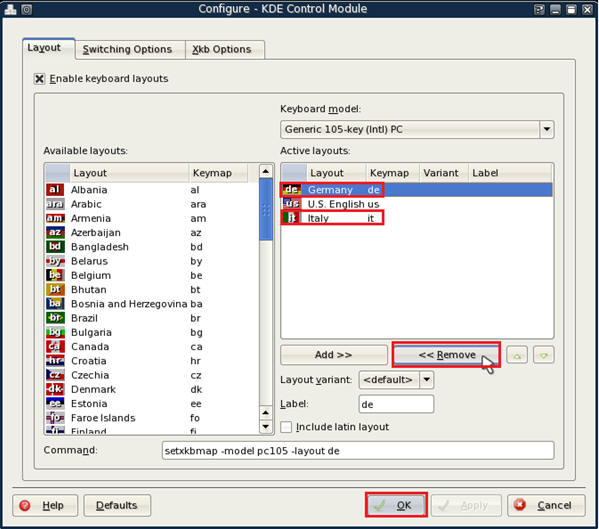
- Highlight Germany, Click on Remove.
- Highlight Italy, Click on Remove.
- Only U.S. English should be left.
- Click Apply
- Click OK
- Right Click on DE and click on Configure
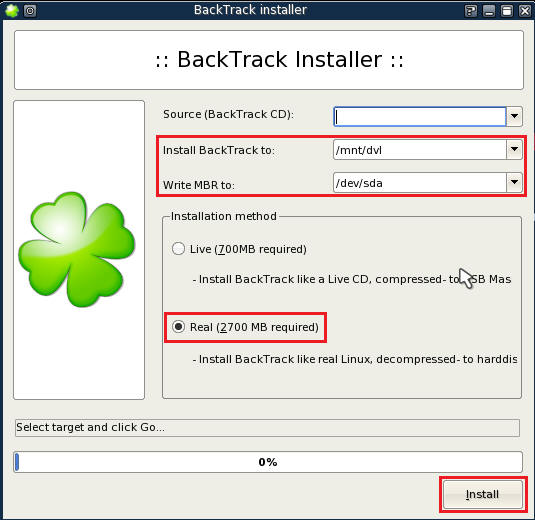
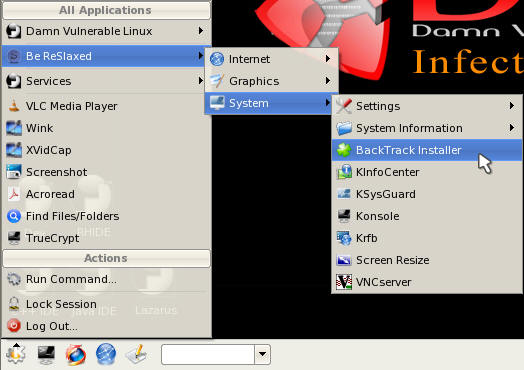
- Start the backlash installer
- Configure installer as seen below
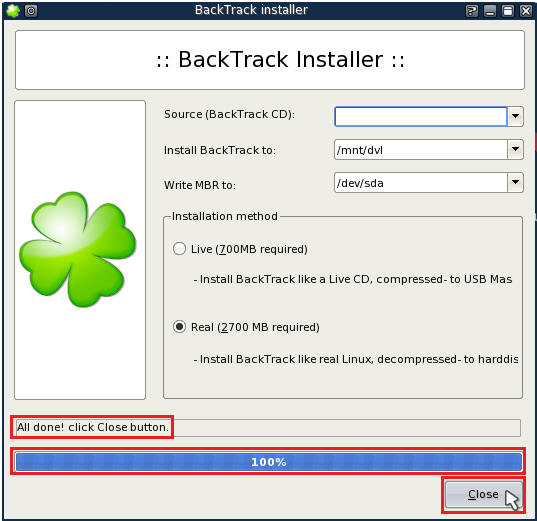
- Note: If the installer completes in a few seconds, then the installer actually failed. The installer should take 5 to 10 minutes to complete. You should see messages like copying /opt with the status bar inching slowly forward.
- Click the close button, when you see a status
message of "All done! click Close button" and a status bar of 100% complete
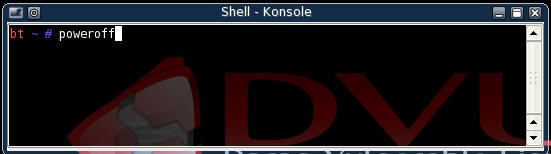
- Start up a terminal
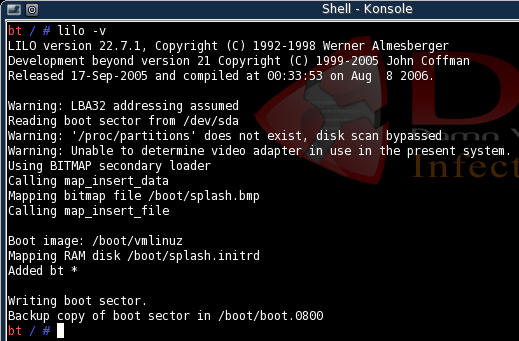
- Install the boot loader
- Command: lilo -v
- Command:
poweroff
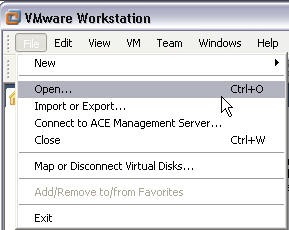
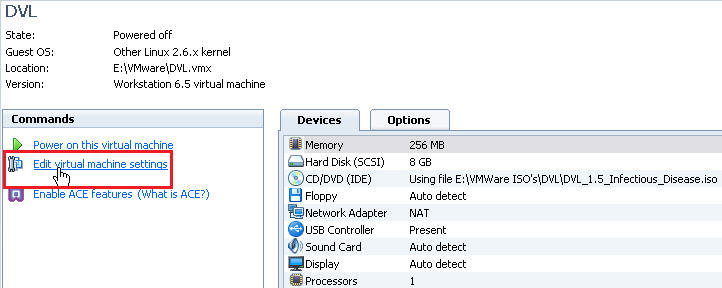
- Edit virtual machine settings
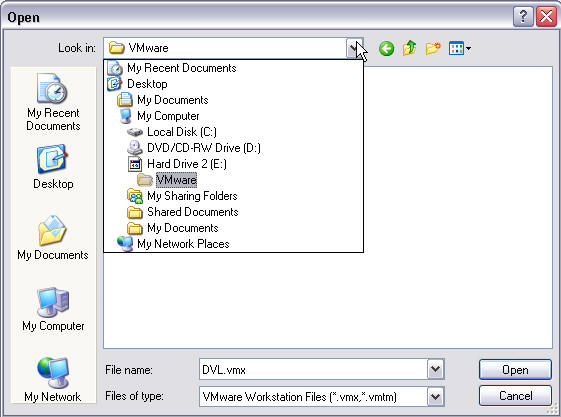
- VMware Workstation --> File --> Open
- Navigate to where you created the DVL.vmx
image
- Edit Virtual machine settings
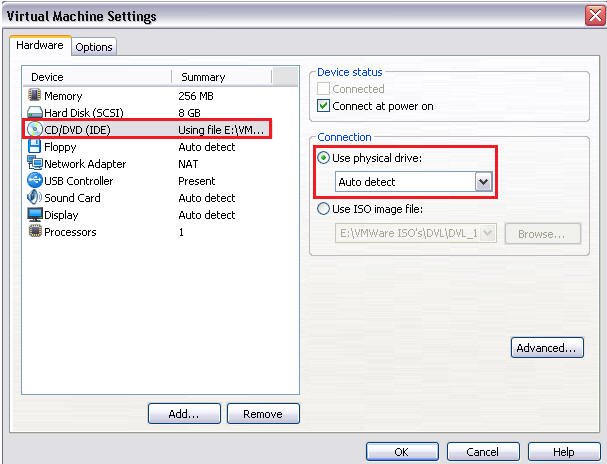
- Highlight CD/DVD
- Select the "Use physical drive:" radio button
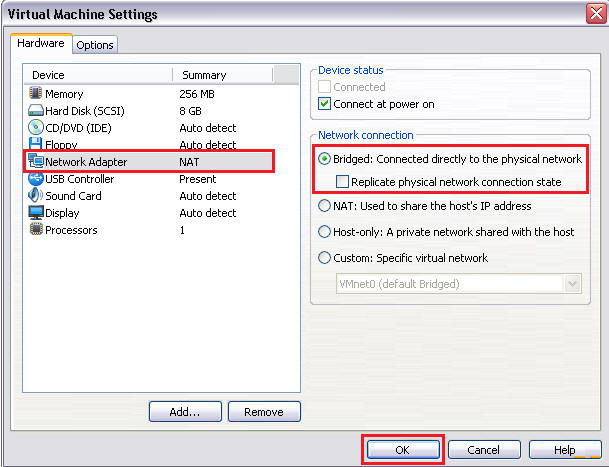
- Highlight CD/DVD
- Select the "Bridged: Connected..." radio button
- Select OK
- VMware Workstation --> File --> Open
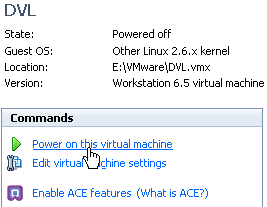
- Power on this virtual machine
- Have fun hacking, ethically of course.


| Section: Proof of Lab |
- Have fun hacking, ethically of course.