(Kali: Lesson 1)
{ Installing Kali 1.0 }
| Section 0. Background Information |
- What is Kali
- Kali Linux is an advanced Penetration Testing and Security Auditing Linux distribution.
- Kali is a complete re-build of BackTrack
Linux, adhering completely to Debian development standards, which
contains for the following features:
- More than 300 penetration testing tools
- Vast wireless device support
- Custom kernel patched for injection
- Secure development environment
- Legal Disclaimer
- As a condition of your use of this Web site, you warrant to computersecuritystudent.com that you will not use this Web site for any purpose that is unlawful or that is prohibited by these terms, conditions, and notices.
- In accordance with UCC § 2-316, this product is provided with "no warranties, either express or implied." The information contained is provided "as-is", with "no guarantee of merchantability."
- In addition, this is a teaching website that does not condone malicious behavior of any kind.
- Your are on notice, that continuing and/or using this lab outside your "own" test environment is considered malicious and is against the law.
- © 2013 No content replication of any kind is allowed without express written permission.
| Section 1: Create a New Virtual Machine |
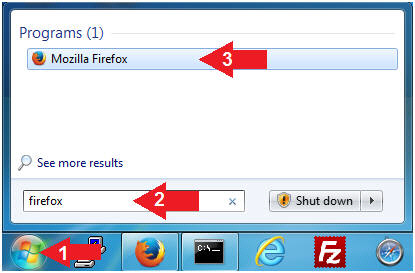
- Open Firefox
- Instructions:
- Click the Start Button
- Type firefox in the search box
- Click the firefox icon
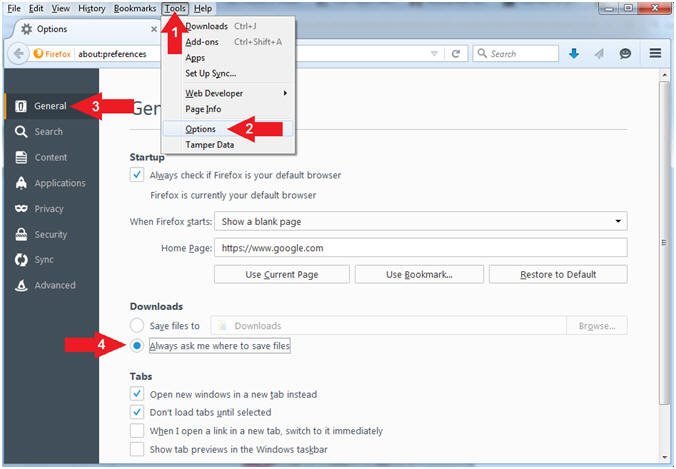
- Instructions:
- Save Files Configuration Location
- Instructions:
- Click Tools
- Click Options
- Click the General Tab
- Click the radio button Always ask me where to save files
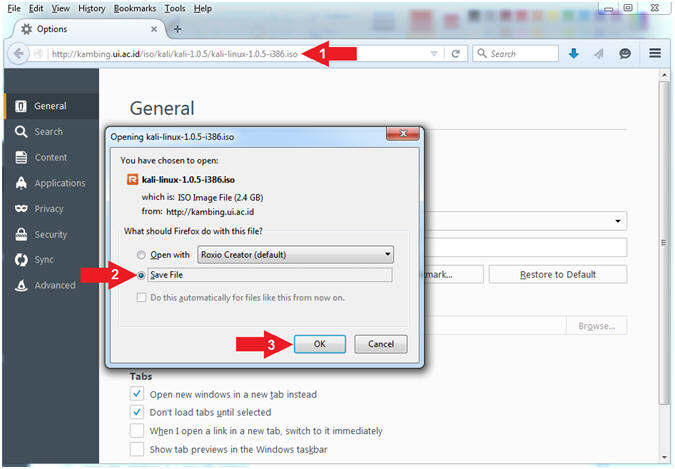
- Instructions:
- Start Kali 1.0.5 Download
- Instructions:
- Navigate to one of the following
download locations
- http://old.kali.org/kali-images/kali-1.0.5/kali-linux-1.0.5-i386.iso
- Click the Save File Radio Button
- Click the OK Button
- Navigate to one of the following
download locations
- Note(FYI):
- The download size will be 2.4 G
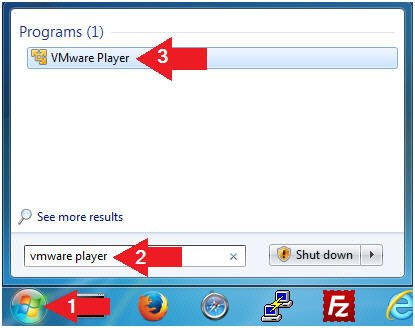
- Instructions:
- Open VMware Player on your windows machine.
- Instructions:
- Click the Start Button
- Type "vmware player" in the search box
- Click on VMware Player
- Instructions:
- Create a New Virtual Machine. (See Below)
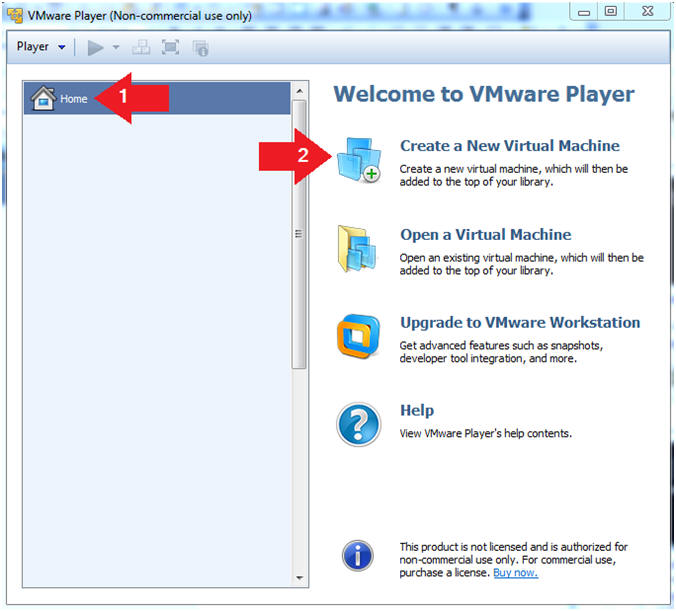
- Instructions:
- Click on Home
- Click on Create a New Virtual Machine
- Instructions:
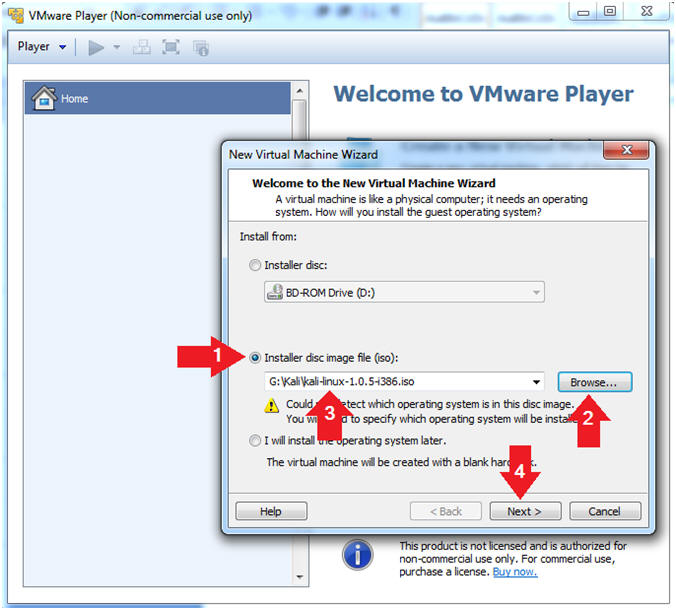
- Installation Media
- Instructions:
- Select the radio button "Installer disc image file (iso):"
- Click the Browse Button.
- Navigate to where you Kali iso is located and select it.
- Click Next
- Instructions:
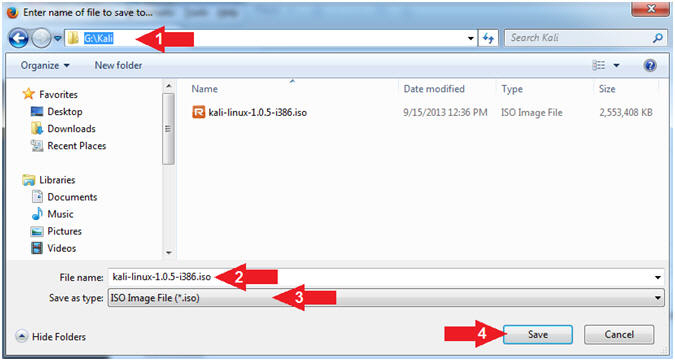
- Save Kali 1.0.5
- Instructions:
- Navigate to your desired
download directory
- My desired download directory is G:\Kali
- Filename: kali-linux-1.0.5-i386.iso
- Save as type: ISO Image File(*.iso)
- Click the Save Button
- Navigate to your desired
download directory
- Instructions:
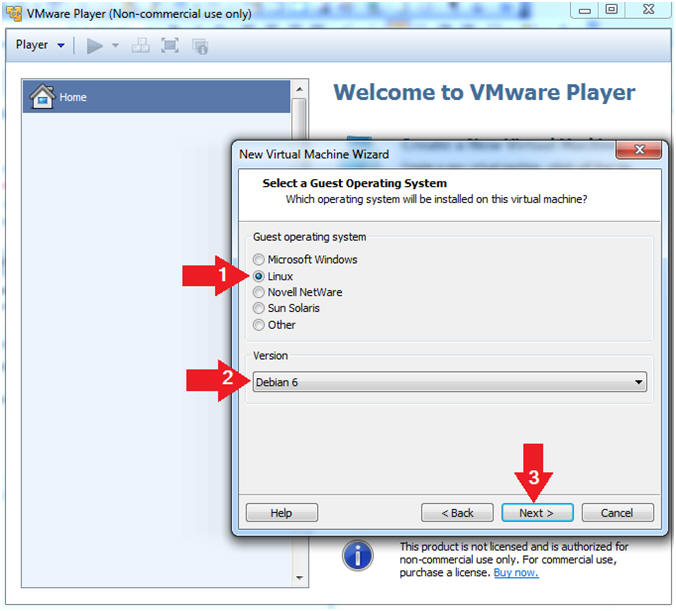
- Select a Guest Operating System
- Instructions:
- Guest operating system: Linux
- Version: Debian 6
- Select Next
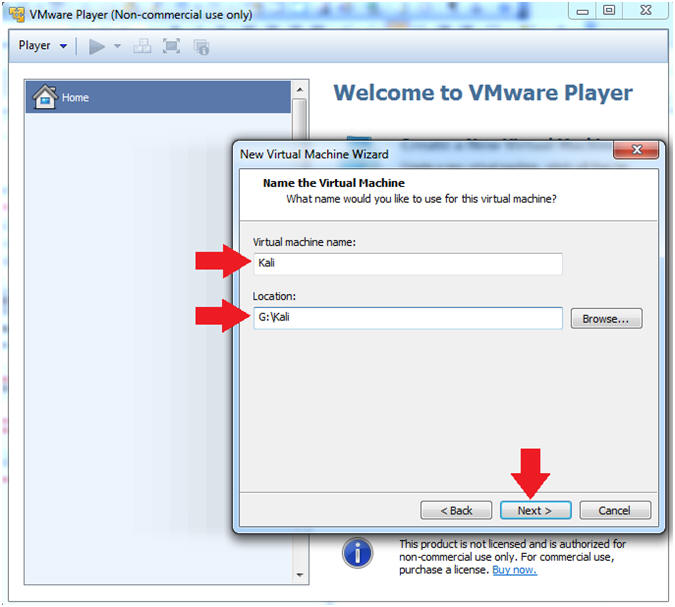
- Instructions:
- Name the Virtual Machine
- Instructions:
- Virtual machine name: Kali
- Location: G:\Kali
- In my case, I saved it to my USB drive.
- Click the Next Button
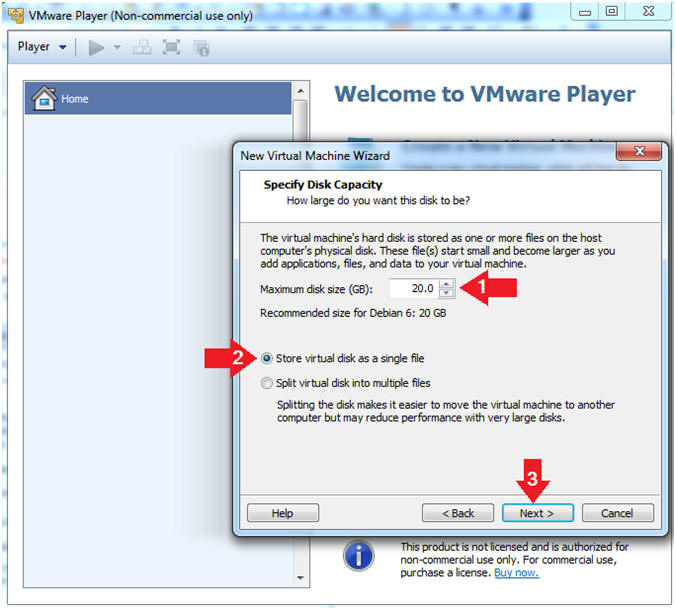
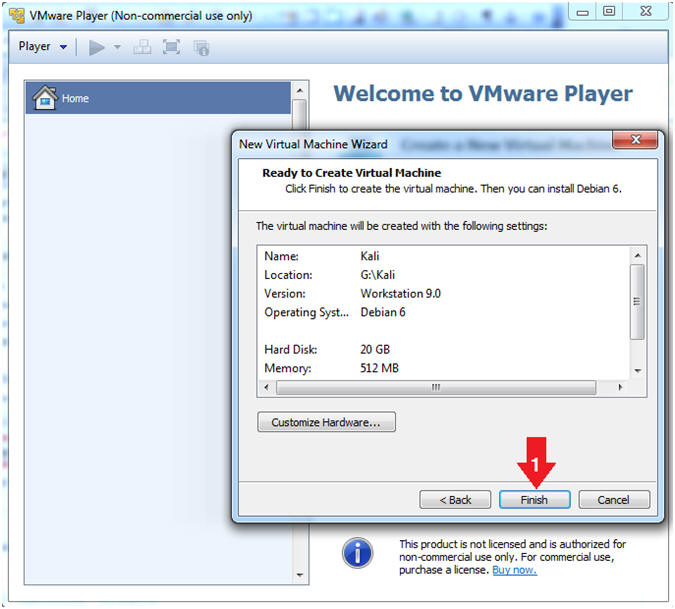
- Instructions:
- New Virtual Machine Wizard
- Instructions:
- Maximum disk size (GB): For our purposes use 20GB.
- Radio Button: Store virtual disk as an single file
- Select Next
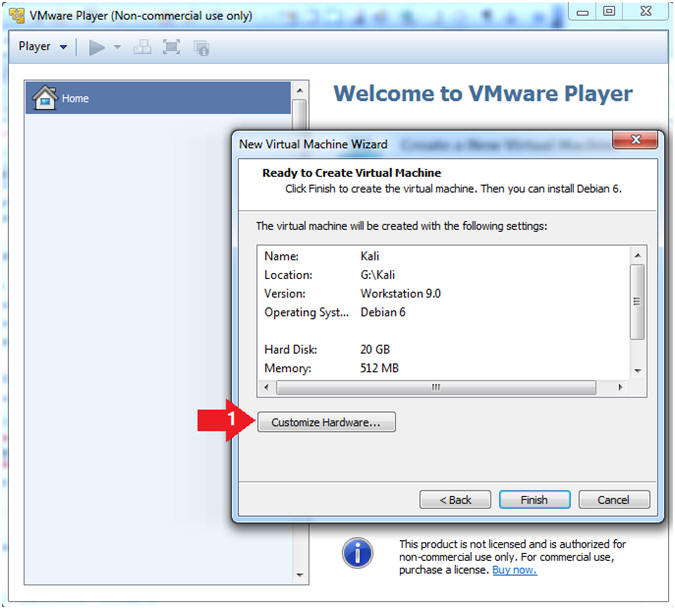
- Instructions:
- Customize Hardware
- Instructions:
- Click on the "Customize Hardware..." button
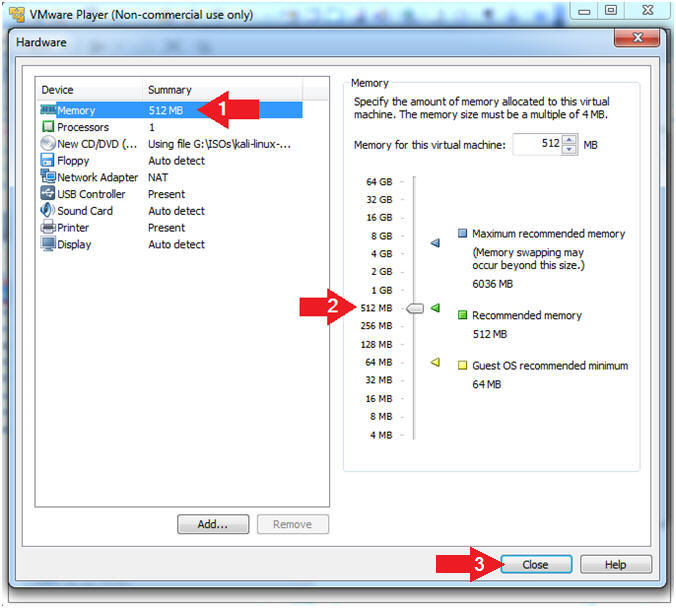
- Instructions:
- Verify Memory Settings
- Instructions:
- Click on Memory (which is highlighted in blue)
- Make sure 512 MB is selected.
- Click on the Close Button
- Instructions:
- Click on the Finish button.
- Instructions:
- Click the Finish button
- Instructions:
| Section 2: Start Installation |
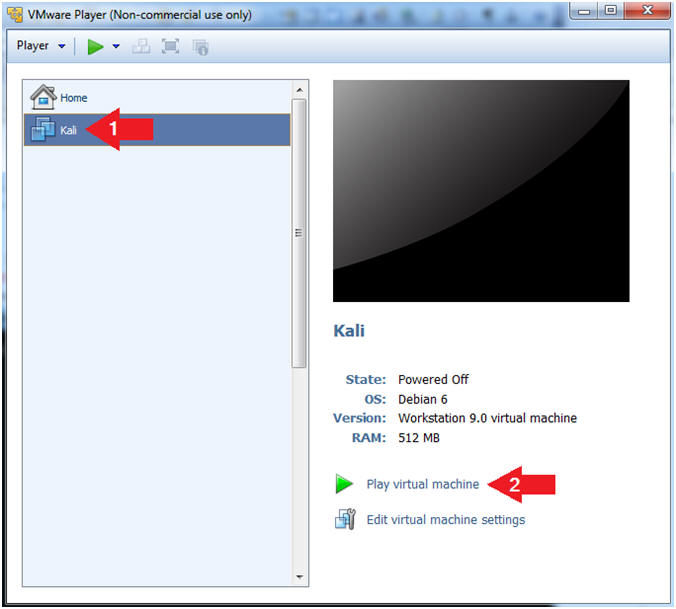
- Start the Kali VM
- Instructions:
- Click on the Kali VM
- Click on Play virtual machine
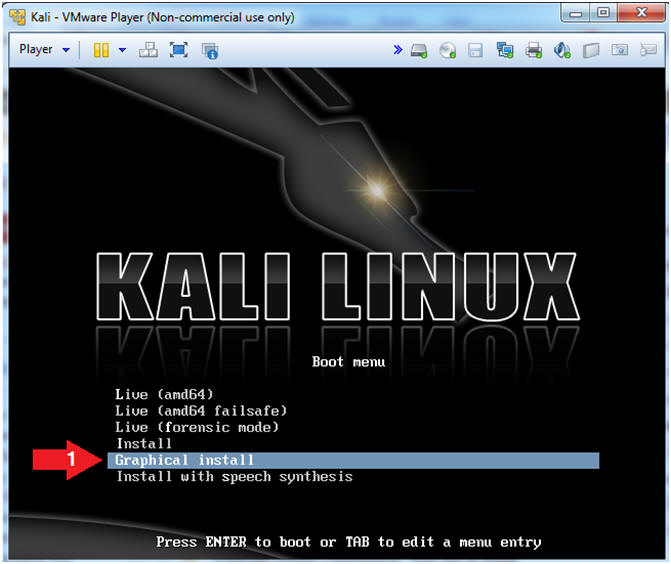
- Instructions:
- Kali Linux Boot Menu
- Instructions:
- Arrow Down to Graphical Install
- Press <Enter>
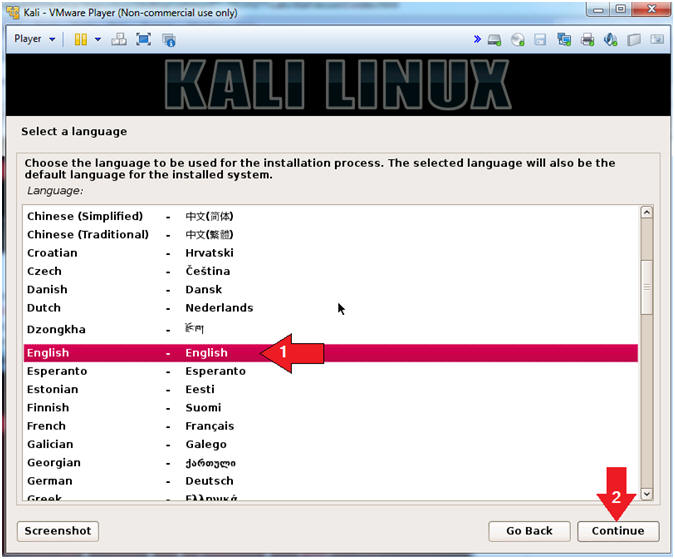
- Instructions:
- Select a Language
- Instructions:
- Click on English
- Click the Continue Button
- Instructions:
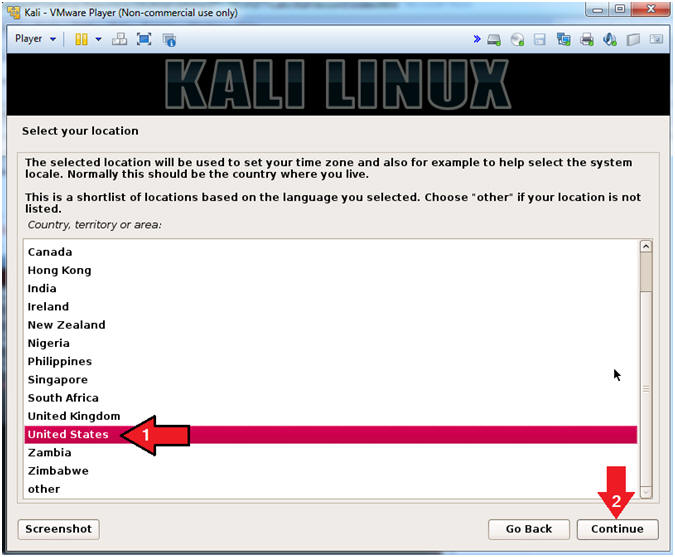
- Select your location
- Instructions:
- Click on United States
- Click the Continue Button
- Instructions:
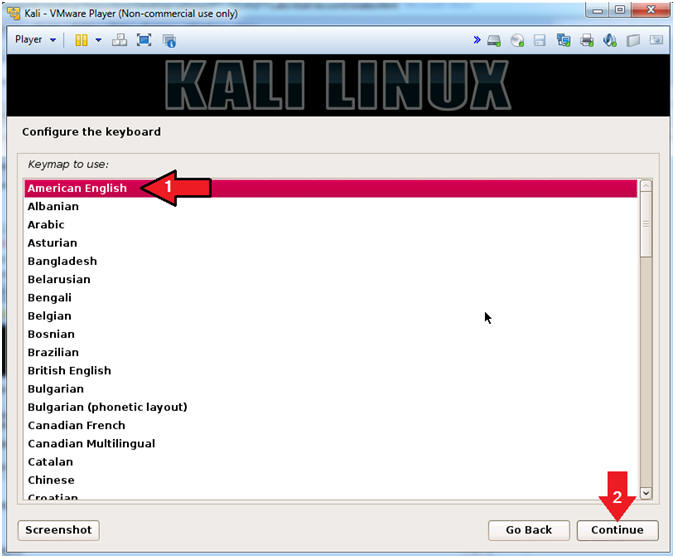
- Select the keyboard
- Instructions:
- Click on American English
- Click the Continue Button
- Instructions:
- Configure the network
- Instructions:
- Hostname: Kali
- Click the Continue Button

- Instructions:
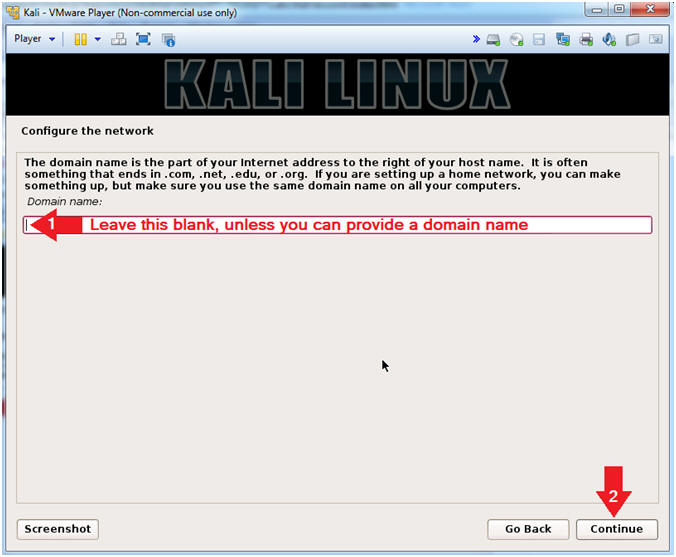
- Configure the network
- Instructions:
- Domain name: Leave this blank, unless you can provide a domain name.
- Click the Continue Button
- Instructions:
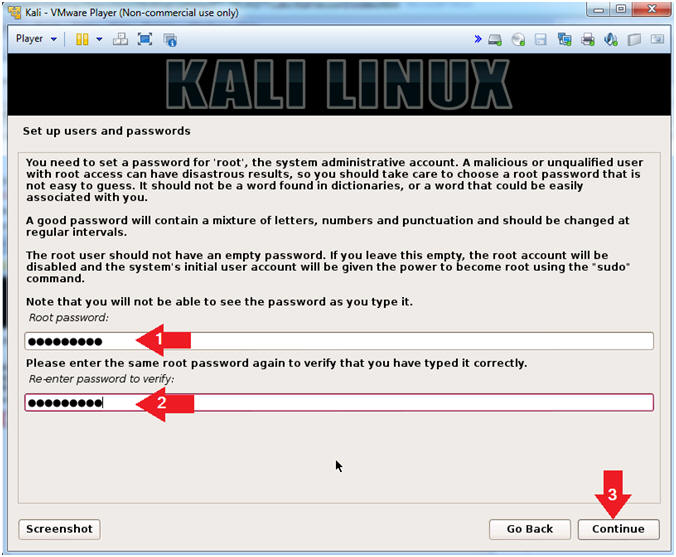
- Set up users and passwords
- Instructions:
- Root password: Provide a password
- Re-Enter Root password to verify: Provide the same password
- Click the Continue Button
- Instructions:
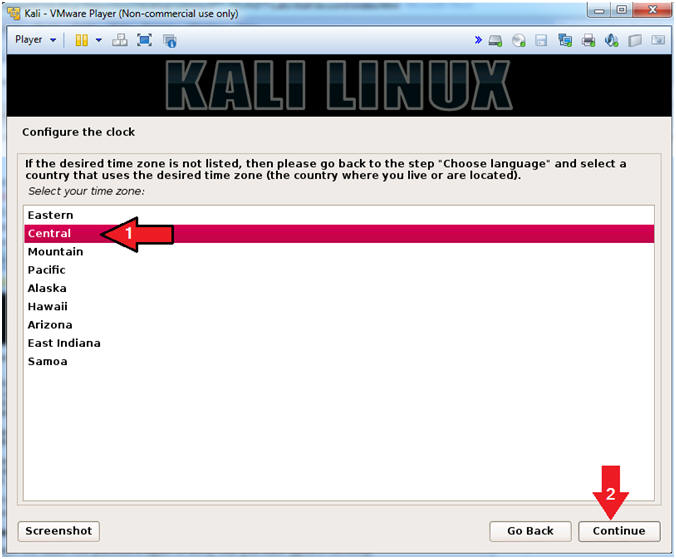
- Configure the clock
- Instructions:
- Click on Central
- Click the Continue Button
- Instructions:
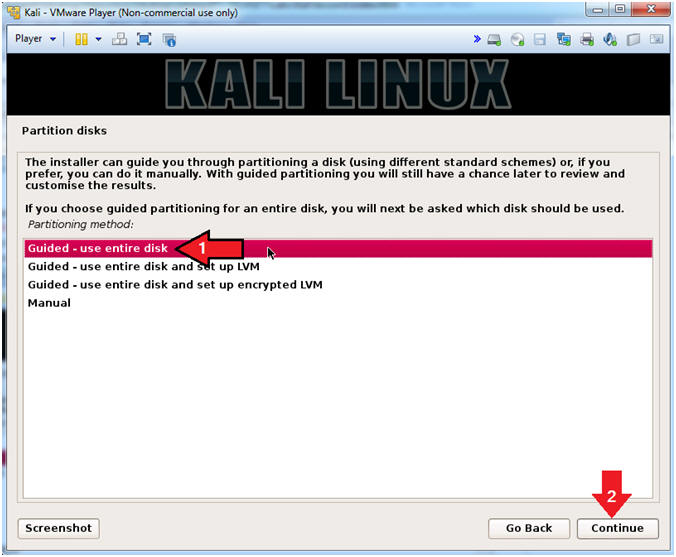
- Partition disks
- Instructions:
- Click on Guided - use entire disk
- Click the Continue Button
- Instructions:
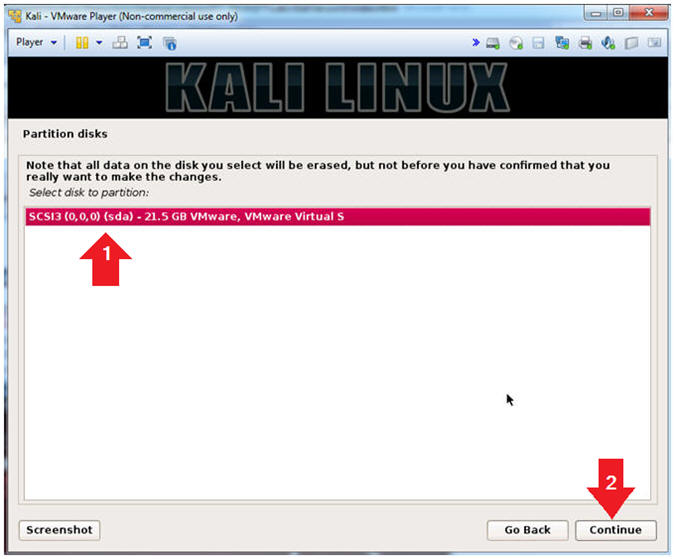
- Select disk to partition
- Instructions:
- Click on the disk (See picture)
- Click the Continue Button
- Instructions:
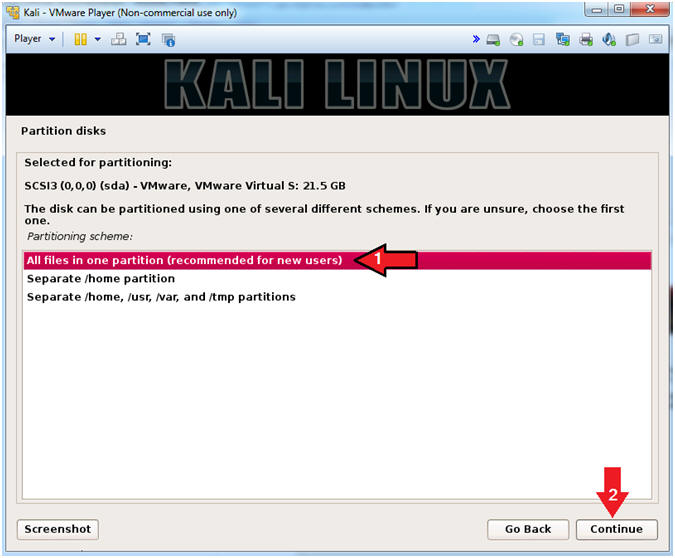
- Partitioning Scheme
- Instructions:
- Click on "All file in one partition (recommended for new users)"
- Click the Continue Button
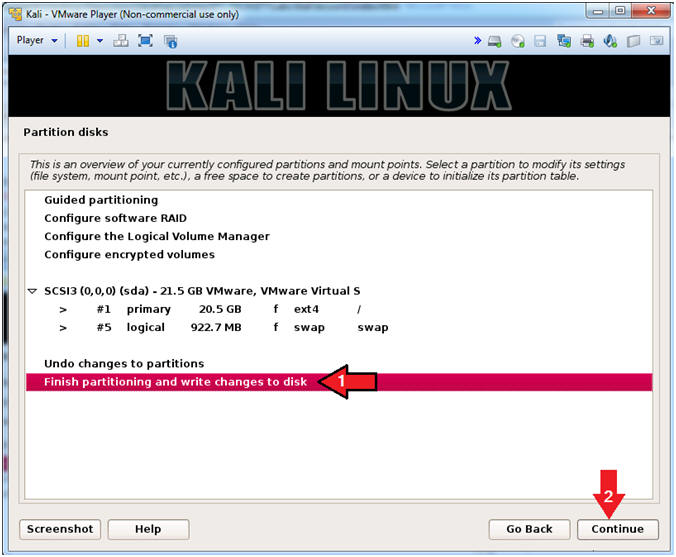
- Instructions:
- Partition Overview
- Instructions:
- Click on "Finish partitioning and write changes to disk"
- Click the Continue Button
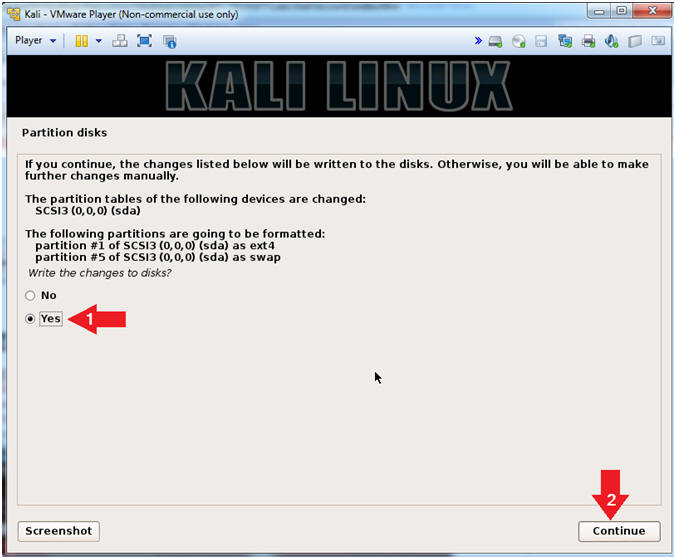
- Instructions:
- Write the changes to disks?
- Instructions:
- Click the Yes radio button
- Click the Continue Button
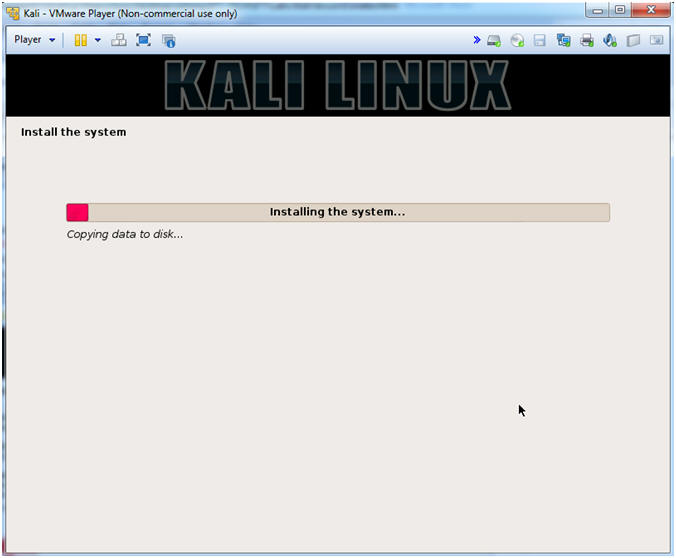
- Instructions:
- Install the system
- Note(FYI):
- This will take about 15 to 30 minutes.
- Note(FYI):
- Use a network mirror?
- Instructions:
- Click the No radio button
- Click the Continue Button
- Note(FYI):
- In the past, I advised student's to select Yes. However, this version of Kali requires the repository to use archive packages, which we will take care of later in the lesson.

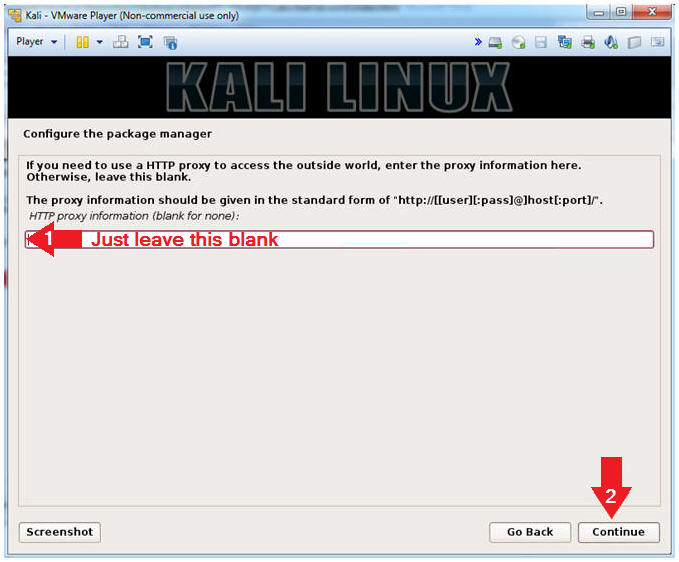
- Instructions:
- Configure the package manager
- Instructions:
- HTTP Proxy information: Just leave this blank
- Click the Continue Button
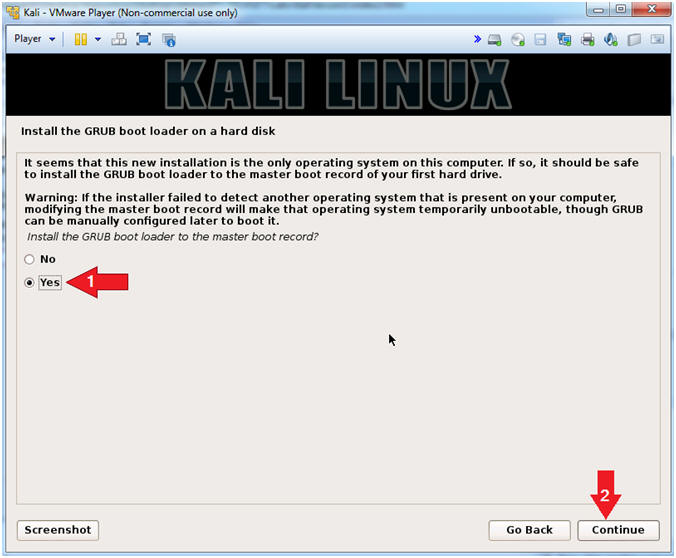
- Instructions:
- Install the GRUB boot loader to the master boot
record?
- Instructions:
- Click the Yes radio button
- Click the Continue Button
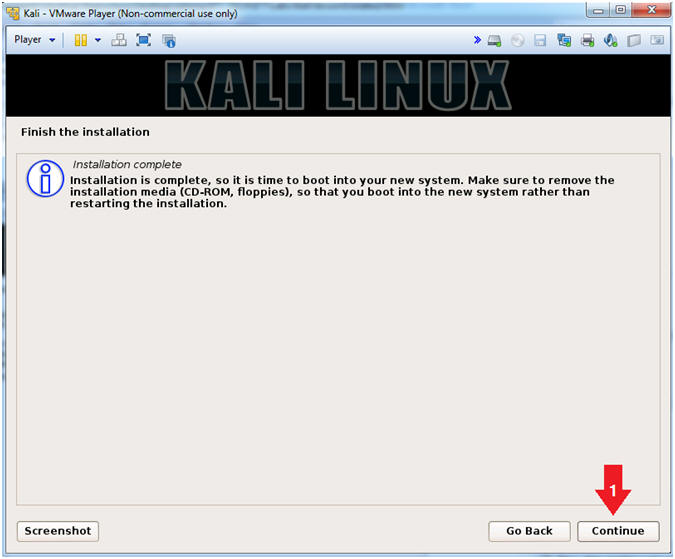
- Instructions:
- Installation Complete
- Instructions:
- Click the Continue Button
- Note(FYI):
- After you click continue you system will finish its' configuration and proceed to reboot.
- Instructions:
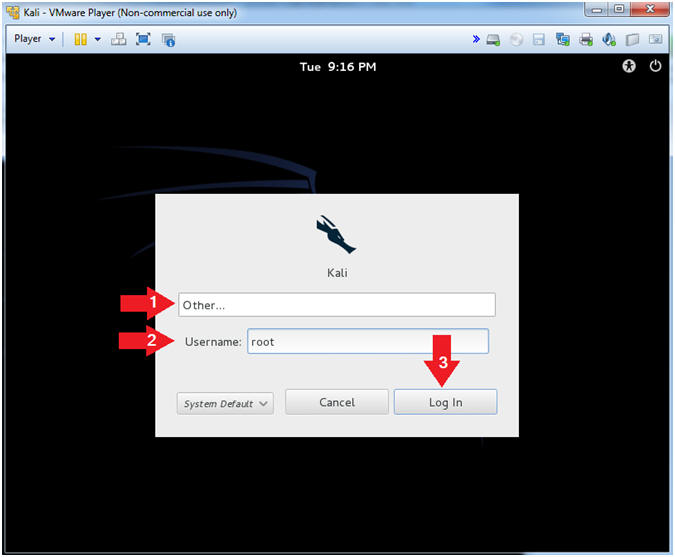
| Section 3: Login to Kali |
- Supply Username
- Instructions:
- Click Other
- Username: root
- Click the Login Button
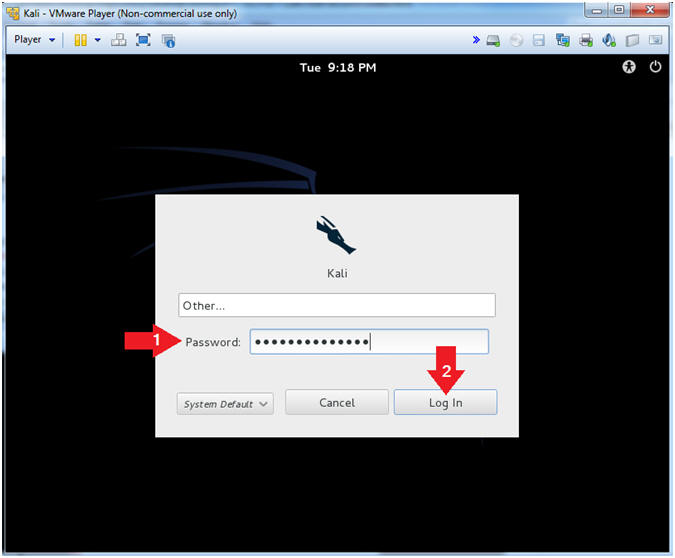
- Instructions:
- Supply Password
- Instructions:
- Password: Provide the root password
- Click the Login Button
- Instructions:
| Section 4: Install VM Tools |
- Open Install VMware Tool...
- Instructions:
- Player --> Manage --> Install VMware Tool...

- Instructions:
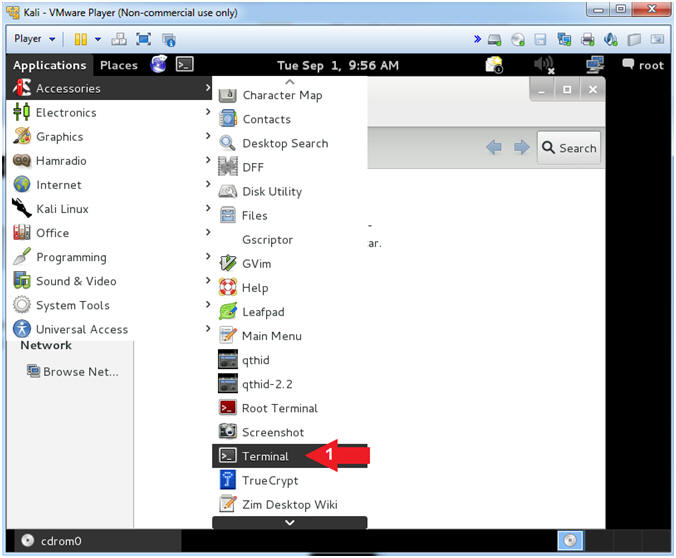
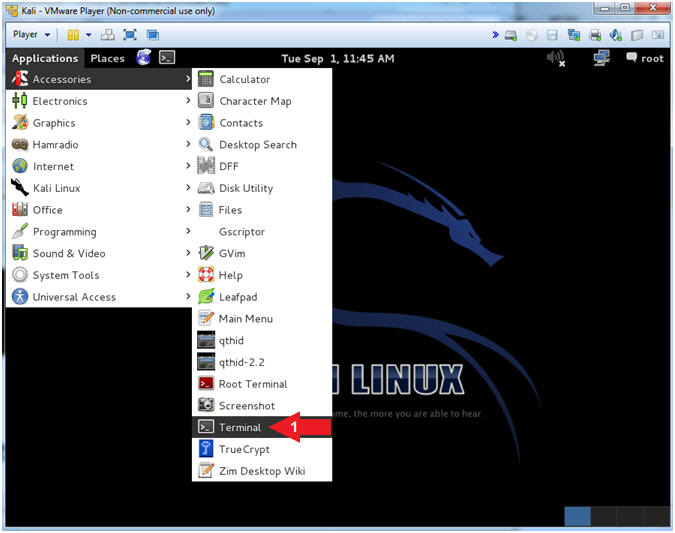
- Open Terminal
- Instructions:
- Applications --> Accessories --> Terminal
- Instructions:
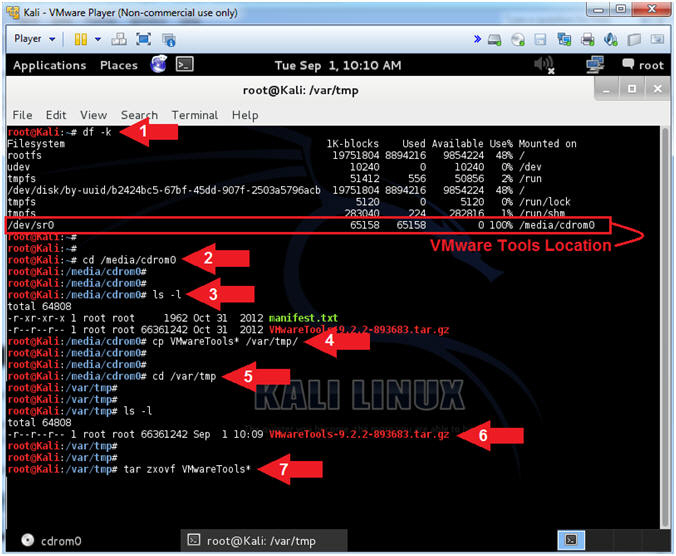
- Untar/Unzip VMware Tools Bundle
- Instructions:
- df -k
- cd /media/cdrom0
- ls -l
- cp VMwareTools* /var/tmp/
- cd /var/tmp
- ls -l
- tar zxovf VMwareTools*
- cd vmware-tools-distrib
- perl vmware-install.pl default
- Note(FYI):
- df -k, report file system disk space usage. (-k), use 1024 block size.
- cd /media/cdrom0, navigate to the /media/cdrom0 directory where the VMware tools is located.
- ls -l, list directory contents. (-l), use a long listing format.
- cp VMwareTools* /var/tmp/, Copy the VMwareTools bundle to the /var/tmp directory. (*), is a wild card to prevent me of having to type the complete file name.
- cd /var/tmp, Change directory to the /var/tmp directory.
- ls -l, list directory contents. (-l), use a long listing format.
- tar zxovf VMwareTools*, Tar is being used to unzip(z), extract(x), preserve ownership(o), verbose(v), and use file(f).
- Instructions:
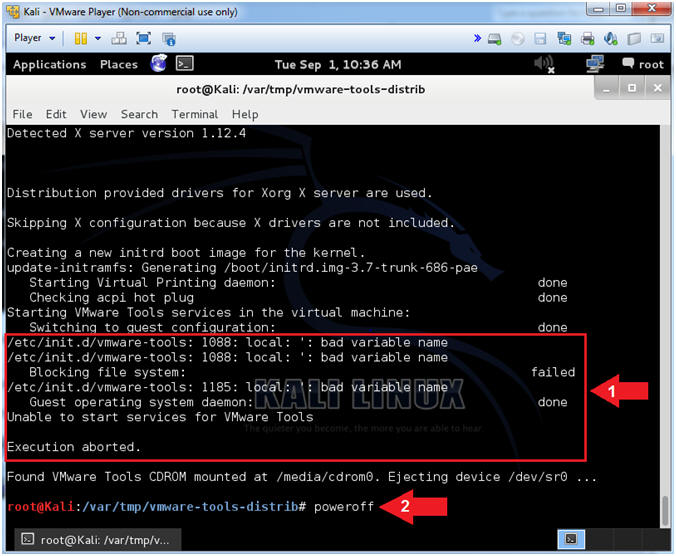
- Reviewing VMware Tools Logs
- Instructions:
- Although the installation said it failed, it really did not. All that is required is a reboot.
- poweroff
- Instructions:
| Section 5: Configure Settings and Start the Kali VM |
- Open VMware Player on your windows machine.
- Instructions:
- Click the Start Button
- Type "vmware player" in the search box
- Click on VMware Player

- Instructions:
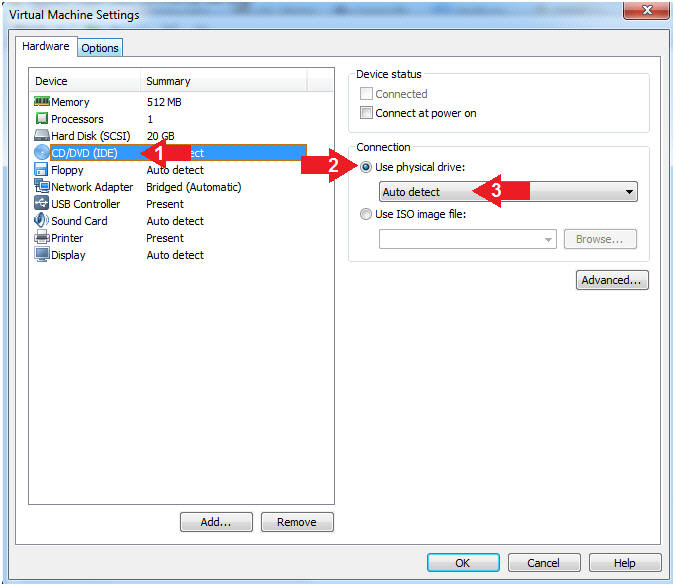
- Auto Detect Hard Drive
- Instructions:
- Click on CD/DVD(IDE)
- Click the Use physical drive: radio button
- Make sure Auto detect is selected
- Instructions:
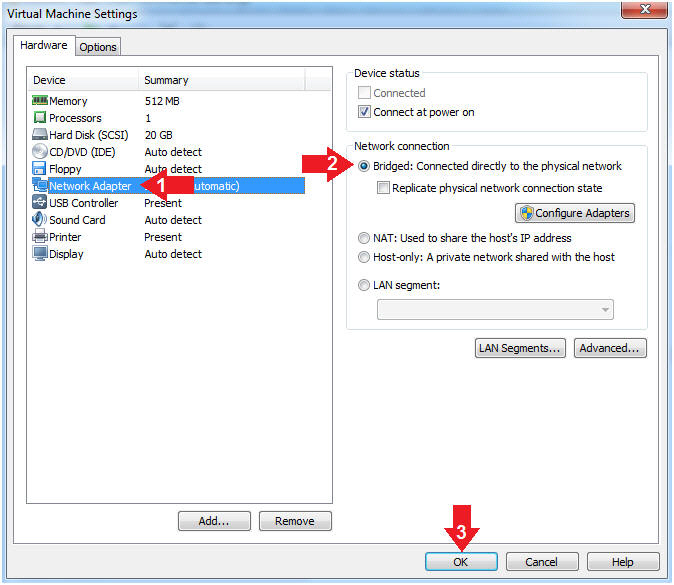
- Edit Network Adapter
- Instructions:
- Highlight Network Adapter
- Select Bridged
- Click the OK Button
- Instructions:
- Start the Kali VM
- Instructions:
- Click on the Kali VM
- Click on Play virtual machine
- Instructions:
- Supply Username
- Instructions:
- Click Other
- Username: root
- Click the Login Button
- Instructions:
- Supply Password
- Instructions:
- Password: Provide the root password
- Click the Login Button
- Instructions:
- Open Terminal
- Instructions:
- Applications --> Accessories --> Terminal
- Instructions:
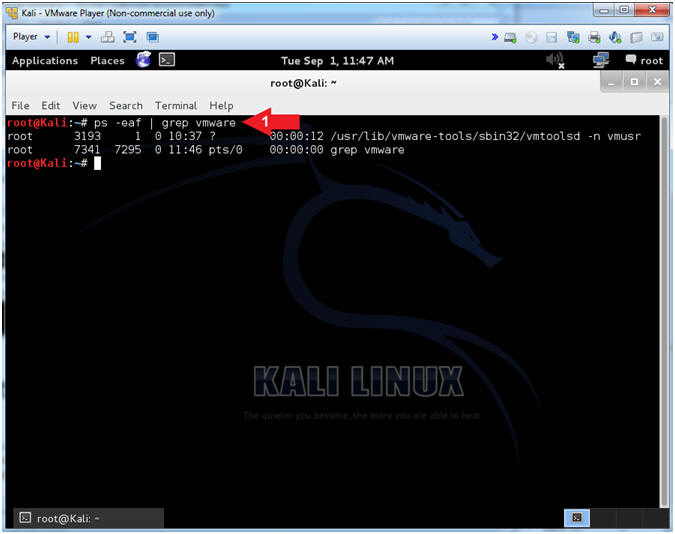
- Verify that VMware Tools is Installed
- Instructions:
- ps -eaf | grep vmware
- Note(FYI):
- Notice the following process --> /usr/lib/vmware-tools/sbin32/vmtoolsd
- Instructions:
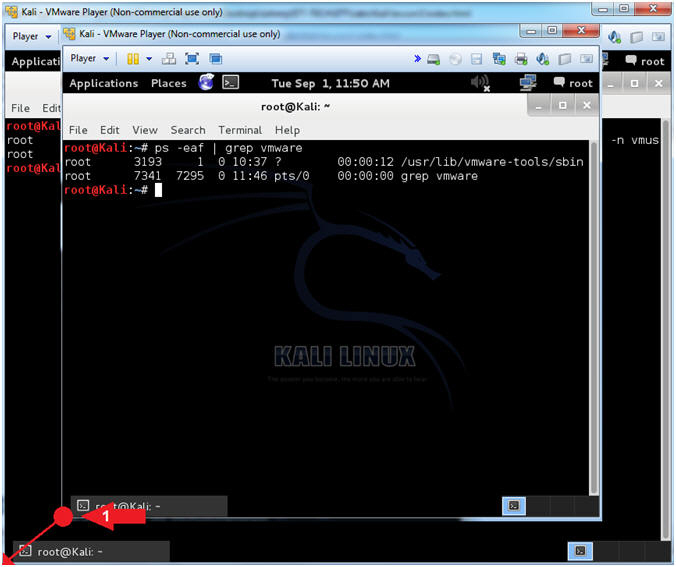
- Change Window Size
- Instructions:
- Put your cursor on the bottom left corner and right click. You should able to change the dimensions of your screen by dragging the corner.
- Instructions:

| Section 6: Upgrade and Update Packages |
- Supply Password
- Instructions:
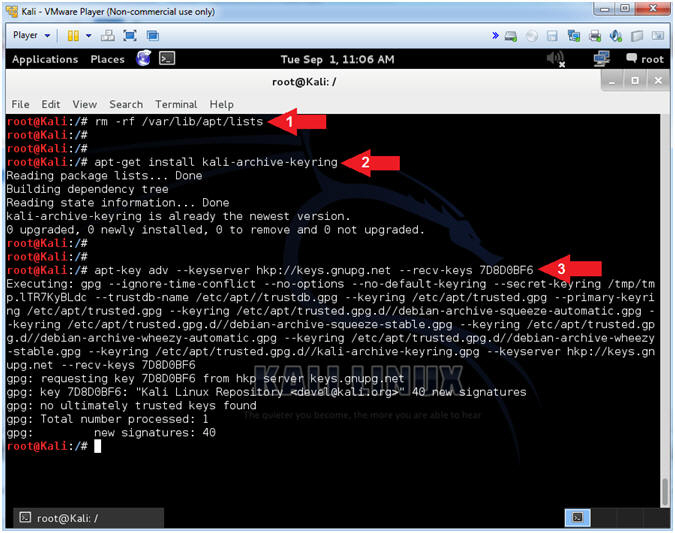
- rm -rf /var/lib/apt/lists
- apt-get install kali-archive-keyring
- apt-key adv --keyserver hkp://keys.gnupg.net --recv-keys 7D8D0BF6
- Note(FYI):
- Remove the repository file, since they are no longer valid.
- The keyring is required to install operating system packages.
- apt-key is used to manage the list of keys used by apt to authenticate packages. Packages which have been authenticated using these keys will be considered trusted.
- Instructions:
- Upgrade and Update
- Instructions:
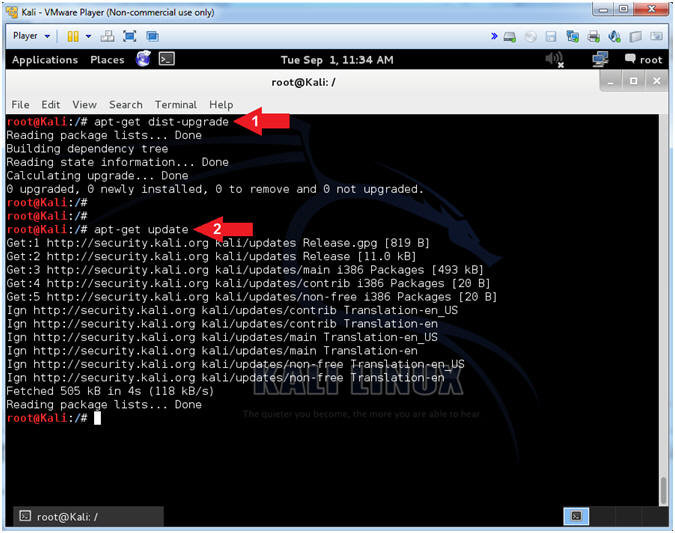
- apt-get dist-upgrade
- apt-get update
- Note(FYI):
- dist-upgrade in addition to performing the function of upgrade, also intelligently handles changing dependencies with new versions of packages; apt-get has a "smart" conflict resolution system, and it will attempt to upgrade the most important packages at the expense of less important ones if necessary.
- The 'update' command is used to resynchronize the package index files from the their sources specified in /etc/apt/sources.list file. The update command fetched the packages from their locations and update the packages to newer version.
- Instructions:
| Section 7: Terminal Window Preferences |
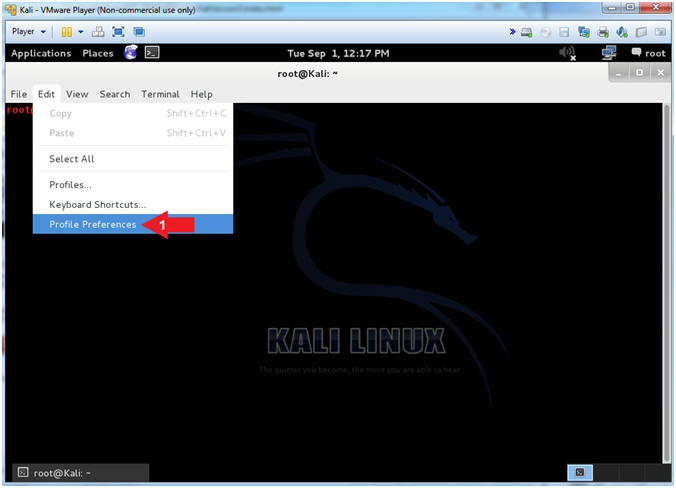
- Access Terminal Profile Preferences
- Instructions:
- Edit --> Profile Preferences
- Instructions:
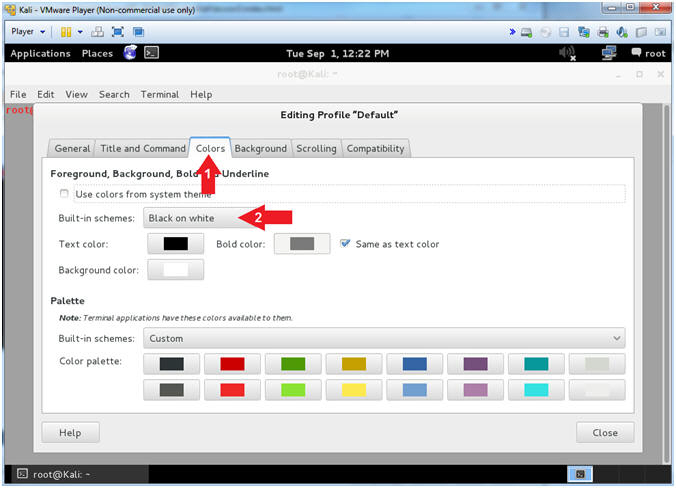
- Change Font Color
- Instructions:
- Click on the Colors Tab
- Built-in schemes: Black on white
- Instructions:
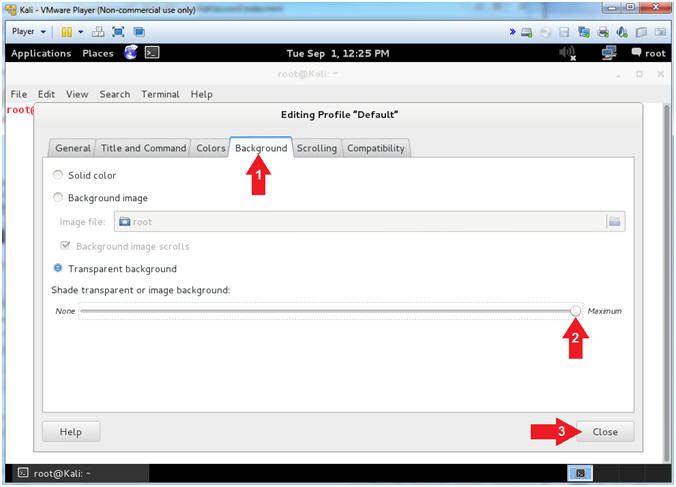
- Change Background Color
- Instructions:
- Click Background Tab
- Maximum Transparent background slider
- Click the Close Button
- Instructions:
| Section 8: Proof of Lab |
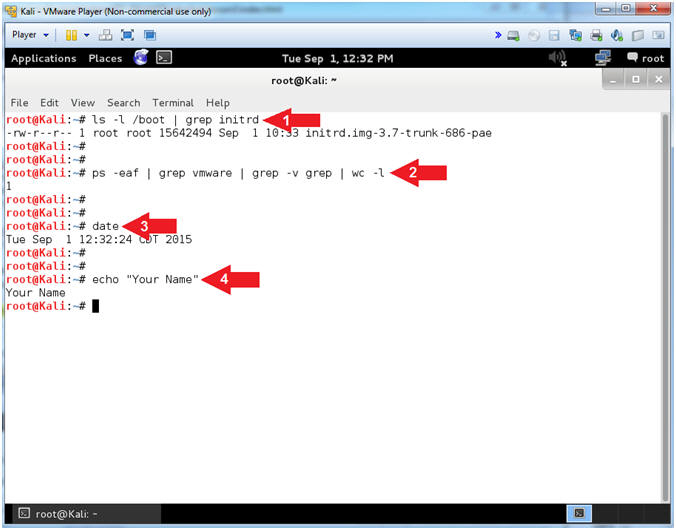
- Proof of Lab
- Note(FYI):
- A new /boot/initrd will be generated. The initrd (initial ramdisk) is a scheme for loading a temporary root file system into memory in the boot process of the Linux kernel.
- You will have to reboot for the VM Tools to take affect.
- Instructions:
- ls -l /boot | grep initrd
- ps -eaf | grep vmware | grep -v grep
- date
- echo "Your Name"
- Replace the string "Your Name" with your actual name.
- e.g., echo "John Gray"
-
Proof of Lab Instructions
- Press both the <Ctrl> and <Alt> keys at the same time.
- Press <PrtScn> Key
- Paste into a word document
- Upload to Moodle
- Note(FYI):