(Damn Vulnerable Windows XP: Lesson 3)
{ Rearm or Extend Trial Period }
| Section 0. Background Information |
- What is Damn Vulnerable Windows XP?
- This is a Windows XP Virtual Machine that provides a practice environment to conduct ethical penetration testing, vulnerability assessment, exploitation and forensics investigation.
- The Microsoft Software License Terms for the IE VMs are included in the release notes.
- By downloading and using this software, you agree to these license terms.
- How Rearm or
Extend the Windows XP Trial Period
Before expiration?
- Rearming or extending the Windows XP Trail
period before the expiration is fairly simply and only requires the
following:
- Login as Administrator or with an account that has Administrative Privileges.
- Open up a command prompt
- Type C:\windows\system32\rundll32.exe syssetup,SetupOobeBnk
- Note(FYI):
- You are allowed to rearm 4 times (120 days), if you do not let each trial period expire.
- Rearming or extending the Windows XP Trail
period before the expiration is fairly simply and only requires the
following:
- How to Rearm or Extend the Windows XP Trial
Period After expiration?
- Rearming or extending the Windows XP Trail
period after the expiration is not difficult, but there are two
drawbacks:
- You must boot the machine into safe mode, and
- You can rearm it 2 more times
- Note(FYI):
- This lab will teach you how to rearm after the expiration period has occurred.
- Rearming or extending the Windows XP Trail
period after the expiration is not difficult, but there are two
drawbacks:
- Pre-Requisite
-
Lab Notes
- In this lab we will do the following:
- Increase VMware Player Bios Boot Delay
- Boot into Safe Mode
- Rearm Trial Period
- Reboot Machine
- Verify Machine is Rearmed
- In this lab we will do the following:
- Legal Disclaimer
- As a condition of your use of this Web site, you warrant to computersecuritystudent.com that you will not use this Web site for any purpose that is unlawful or that is prohibited by these terms, conditions, and notices.
- In accordance with UCC § 2-316, this product is provided with "no warranties, either express or implied." The information contained is provided "as-is", with "no guarantee of merchantability."
- In addition, this is a teaching website that does not condone malicious behavior of any kind.
- You are on notice, that continuing and/or using this lab outside your "own" test environment is considered malicious and is against the law.
- © 2015 No content replication of any kind is allowed without express written permission.
| Section 1. Log into Damn Vulnerable WXP-SP2 |
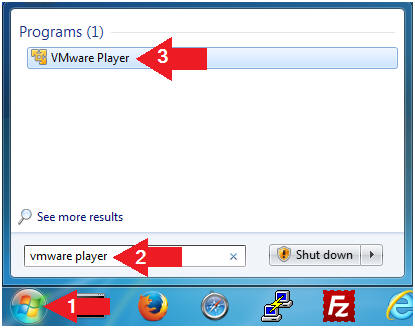
- Open VMware Player on your windows machine.
- Instructions:
- Click the Start Button
- Type "vmware player" in the search box
- Click on VMware Player
- Instructions:
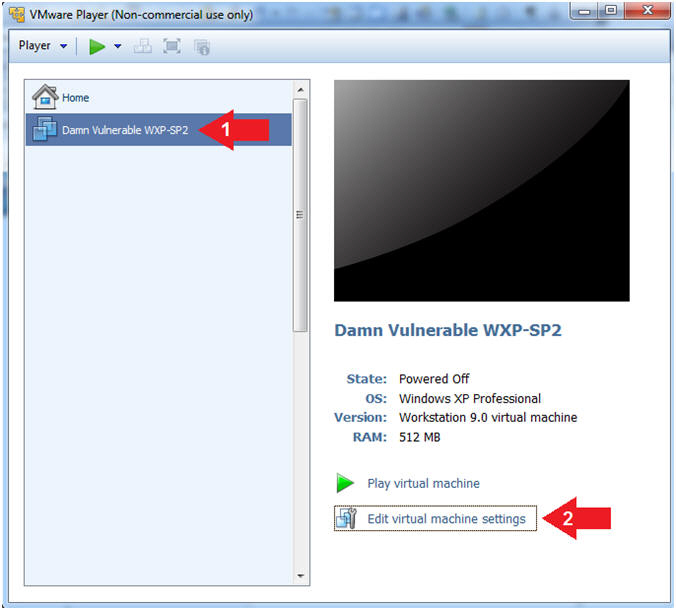
- Edit Virtual Machine Settings
- Instructions:
- Click on Damn Vulnerable WXP-SP2
- Edit Virtual Machine Settings
- Note:
- Before beginning a lesson it is necessary to check the following VM settings.
- Instructions:
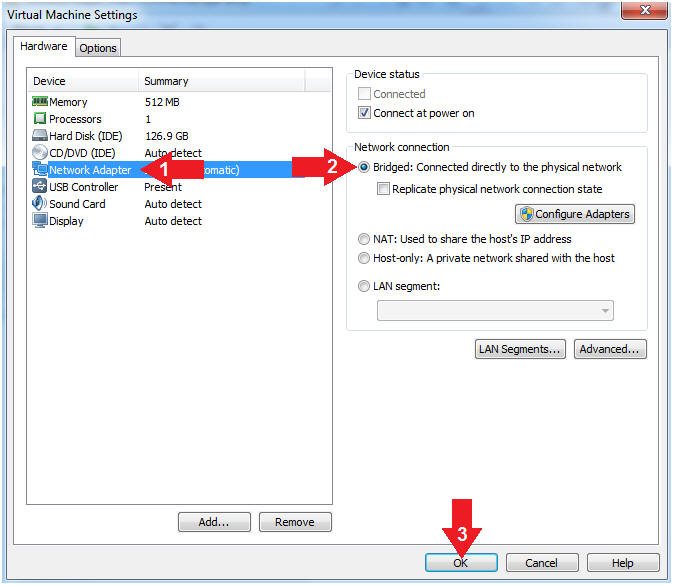
- Set Network Adapter
- Instructions:
- Click on Network Adapter
- Click on the radio button "Bridged: Connected directly to the physical network".
- Click the OK Button
- Instructions:
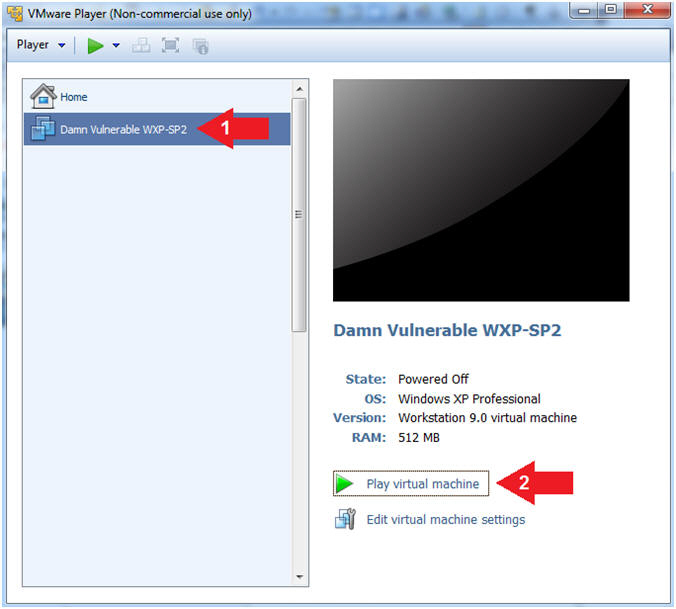
- Start Up Damn Vulnerable WXP-SP2.
- Instructions:
- Start Up your VMware Player
- Play virtual machine
- Instructions:
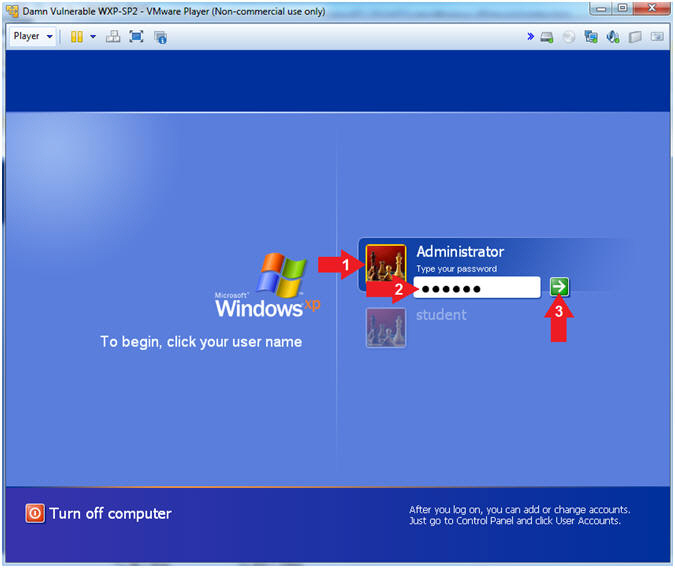
- Logging into Damn Vulnerable WXP-SP2.
- Instructions:
- Click on Administrator
- Password: Supply Password
- (See Note)
- Press <Enter> or Click the Arrow
- Note(FYI):
- Password was created in (Lab 1, Section 1, Step 8)
- Instructions:
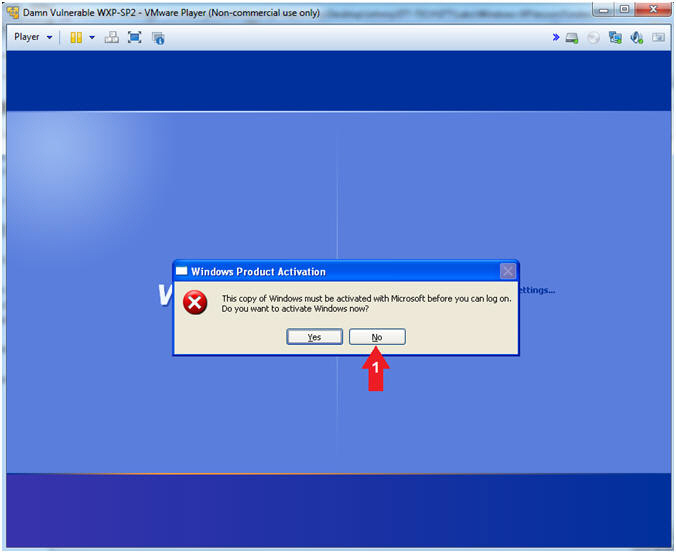
- Windows Product Activation
- Instructions:
- Click the No Button
- Note(FYI):
- If you click the Yes Button, then you will need a license key which you do not have, hence you must click the No Button.
- Instructions:
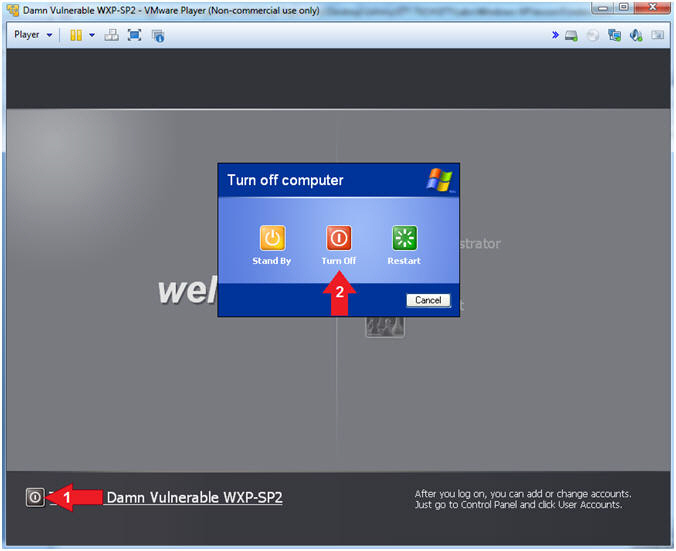
- Turn off computer
- Instructions:
- Click the Turn Off button in the lower left window
- Click the Turn Off button in the pop up window.
- Instructions:
| Section 2. Increase VMware Player Bios Boot Delay |
- Open VMware Player on your windows machine.
- Instructions:
- Click the Start Button
- Type "vmware player" in the search box
- Click on VMware Player
- Instructions:
- Edit Virtual Machine Settings
- Instructions:
- Click on Damn Vulnerable WXP-SP2
- Edit Virtual Machine Settings
- Note:
- Before beginning a lesson it is necessary to check the following VM settings.
- Instructions:
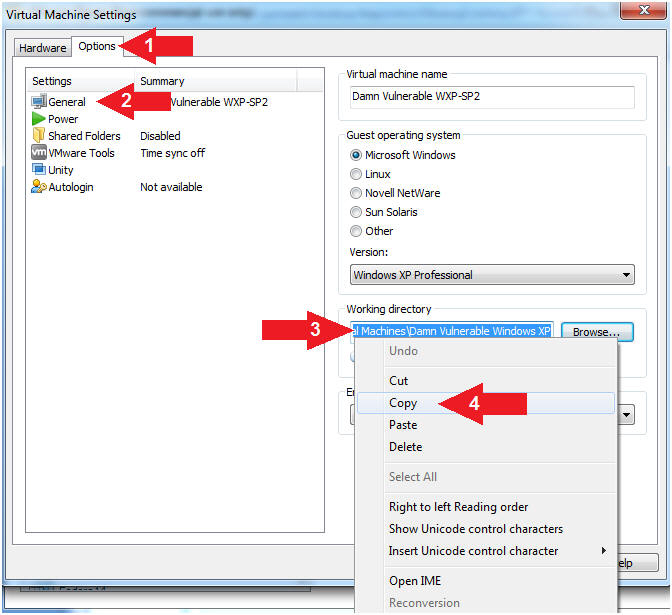
- Copy VM Path Directory
- Instructions:
- Click on Options Tab
- Click the General Setting
- Highlight and Right Click on the Working directory path
- Click Copy
- Instructions:
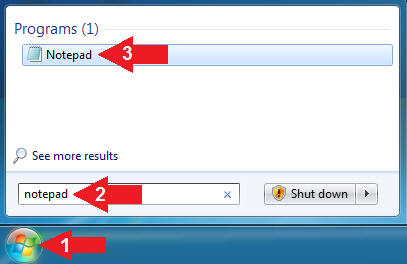
- Open Notepad (On
Host Computer)
- Instructions:
- Click the Start Button
- Type "notepad" in the search box
- Click on Notepad
- Instructions:
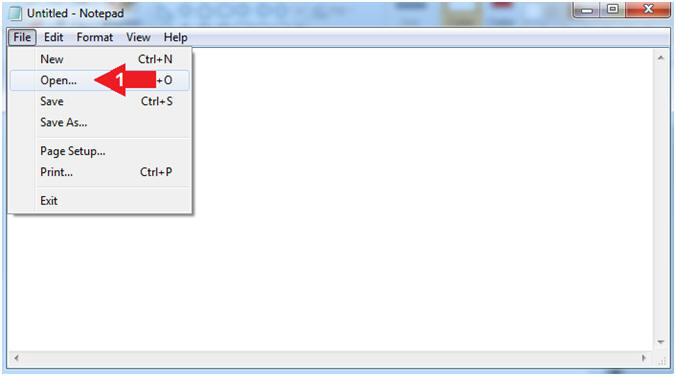
- Open File (Part 1)
- Instructions:
- File --> Open
- Instructions:
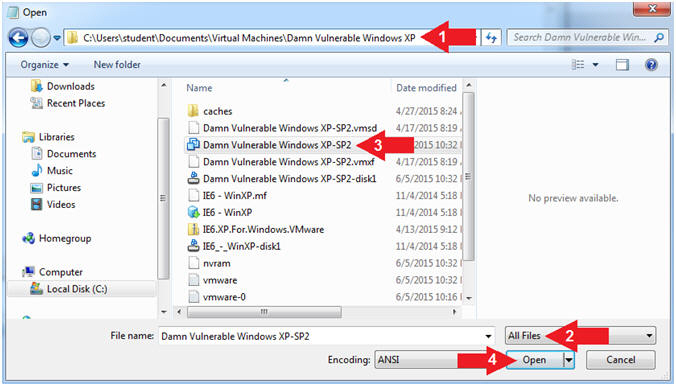
- Open File (Part 2)
- Instructions:
- Paste VM Path in Navigation Bar (See Picture)
- Select All Files
- Click on Damn Vulnerable Windows XP-SP2
- Click Open
- Instructions:
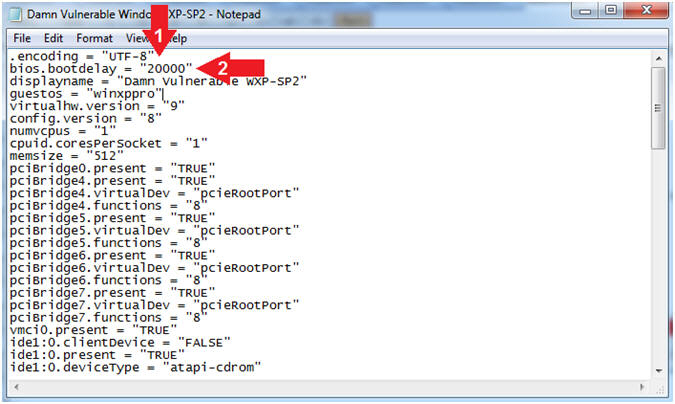
- Edit File and Add Delay
- Instructions:
- Press <Enter> after the first list .encoding = "UTF-8"
- Add the below text on the second line
- bios.bootdelay = "20000"
- Note:
- This will introduce a 20 second delay when the virtual machine loads up, giving you plenty of time to press the <F2> to enter Maintenance Mode or to <Esc> and access the boot menu.
- Instructions:
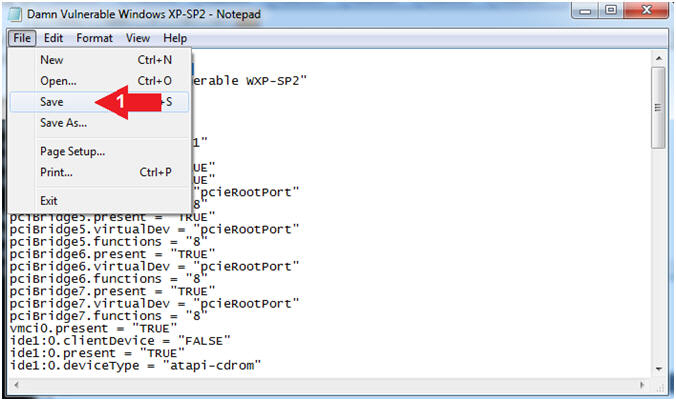
- Save File
- Instructions:
- File --> Save
- Instructions:
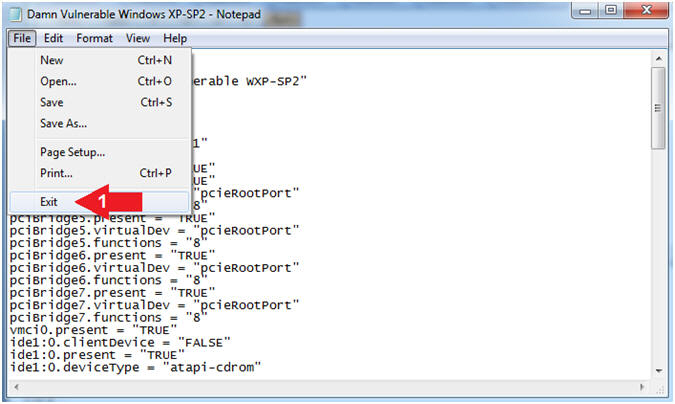
- Exit Notepad
- Instructions:
- File --> Exit
- Instructions:
| Section 3. Boot Windows XP into Safe Mode |
- Open VMware Player on your windows machine.
- Instructions:
- Click the Start Button
- Type "vmware player" in the search box
- Click on VMware Player
- Instructions:
- Start Up Damn Vulnerable WXP-SP2.
- Instructions:
- Start Up your VMware Player
- Play virtual machine
- Instructions:
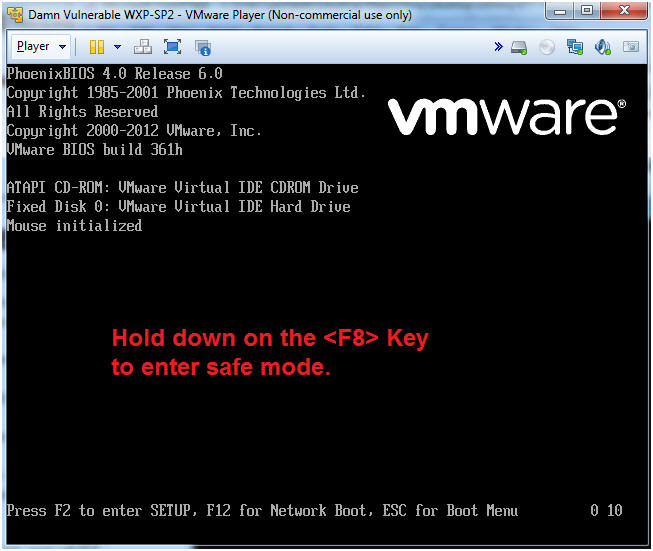
- Enter Safe Mode
- Instructions:
- Hold down the <F8> key.
- Note(FYI):
- Just pressing <F8> is not enough, you must hold down the <F8> key until you see the Safe Mode Boot Option Menu in the following step.
- Instructions:
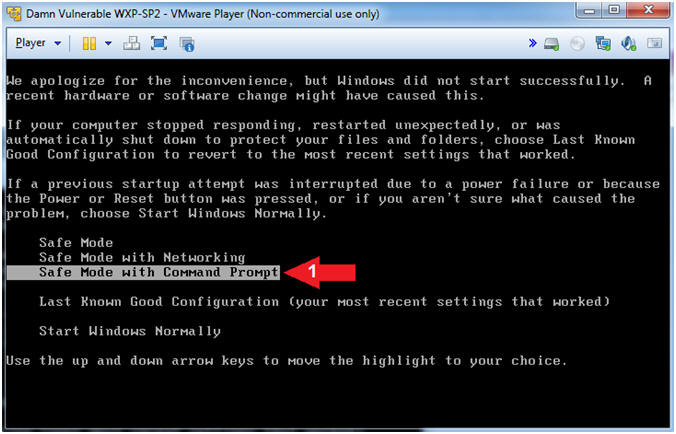
- Safe Mode Menu Selection
- Instructions:
- Arrow Down to Safe Mode with Command Prompt, and press <Enter>
- Instructions:
- Logging into Damn Vulnerable WXP-SP2.
- Instructions:
- Click on Administrator
- Password: Supply Password
- (See Note)
- Press <Enter> or Click the Arrow
- Note(FYI):
- Password was created in (Lab 1, Section 1, Step 8)
- Instructions:
| Section 4. Extend Windows XP Trail Period - "Rearm" |
- Windows XP Extend Trial Period - "Rearm"
- Instructions:
- cd C:\WINDOWS\system32
- rundll32.exe syssetup,SetupOobeBnk
- shutdown -r -t 3
- Note(FYI):
- Uppercase "O" after the word Setup, and followed by lowercase "o".
- Wait a minute before rebooting to make sure the process completes.
- If your XP was expired, and you've rearmed it, then you can rearm it 2 more times with this command.

- Instructions:
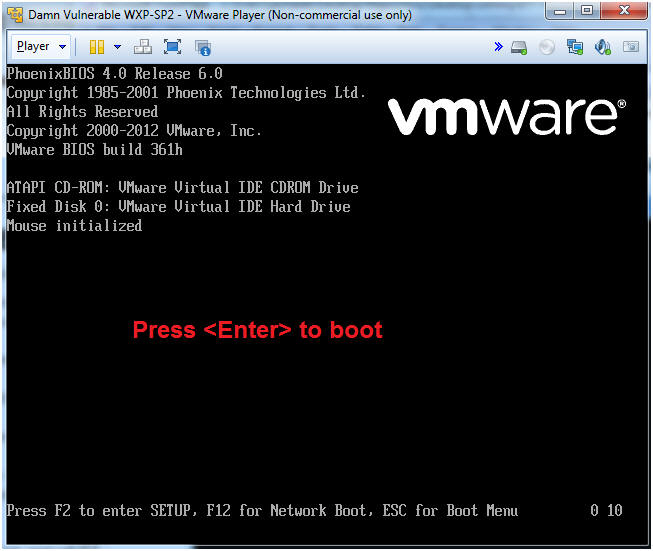
- Boot Machine
- Instructions:
- Press <Enter> to bypass the Bios Boot Delay
- Instructions:
| Section 5. Proof of Lab |
- Logging into Damn Vulnerable WXP-SP2.
- Instructions:
- Click on Administrator
- Password: Supply Password
- (See Note)
- Press <Enter> or Click the Arrow
- Note(FYI):
- Password was created in (Lab 1, Section 1, Step 8)
- Instructions:
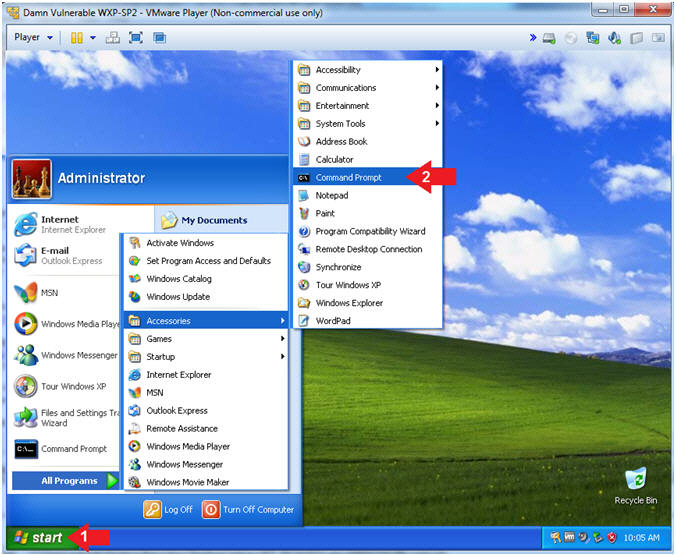
- Open the Command Prompt
- Instructions:
- Click the Start Button
- All Programs --> Accessories --> Command Prompt
- Instructions:
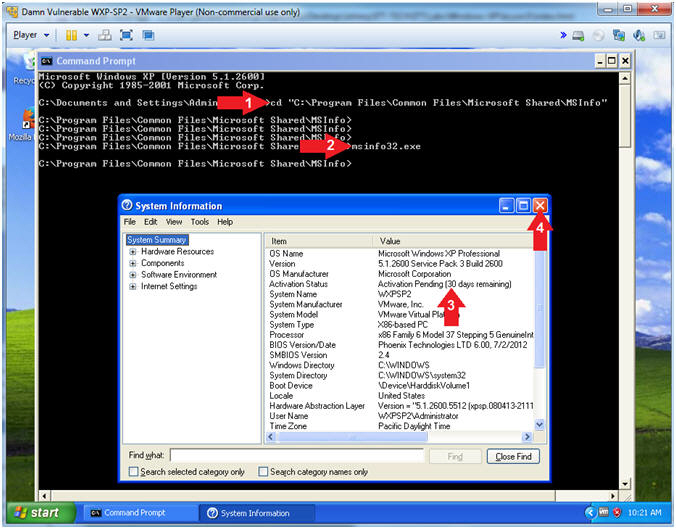
- System Information
- Instructions:
- cd "C:\Program Files\Common Files\Microsoft Shared\MSInfo"
- msinfo32.exe
- Notice the Activation Status says 30 days remain
- Click X to Close
- Instructions:
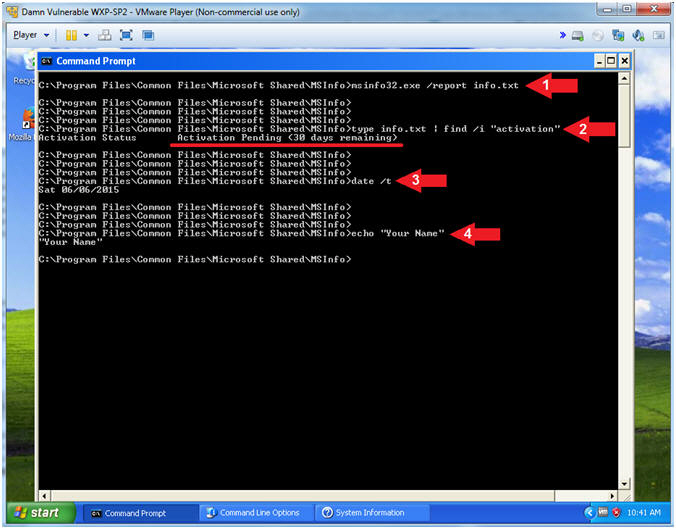
- Proof of Lab (System Information Report)
- Instructions:
- msinfo32.exe /report info.txt
- type info.txt | find /i "activation"
- date /t
- echo "Your Name"
- Put in your actual name in place of "Your Name"
- e.g., echo "John Gray"
-
Proof of Lab
Instructions
- Press the <Ctrl> and <Alt> key at the same time.
- Press the <PrtScn> key.
- Paste into a word document
- Upload to Moodle
- Instructions: