(Recuva File Recovery: Lesson 2)
{ How to retrieve files deleted from the recycle bin }
| Section 0. Background Information |
- What is Recuva?
- Is free software that allows you to recover deleted files even when they have been deleted from the recycle bin.
- After personally testing over 20+ file recovery tools, only Autopsy and Recuva have been able to retrieve deleted files from not only physical machines, but also VMware platforms.
- Prerequisite
- Overview
- In this lab, we will show you how to do the
following:
- Recover and restore files that were deleted from the recycle bin.
- In this lab, we will show you how to do the
following:
| Section 1. Login to your Windows XP Server |
- Booting up WindowsVulerable01
-
Instructions:
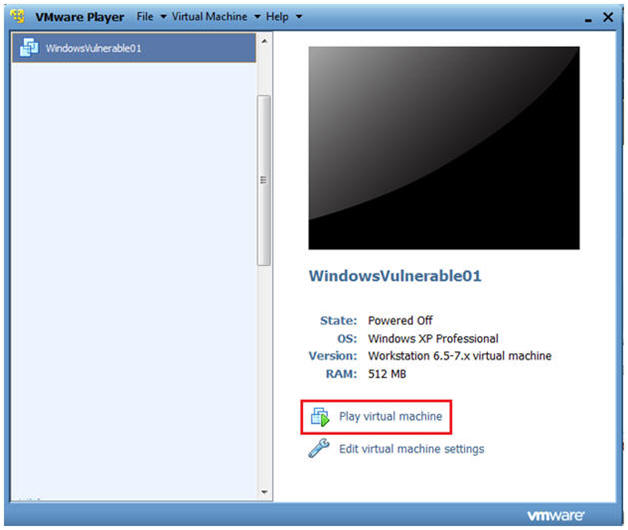
- Start up VMware Player
- Select WindowsVulerable01
- Play Virtual Machine
- Note:
- WindowsVulerable01 is a Windows XP machine running SP2.
-
-
Instructions:
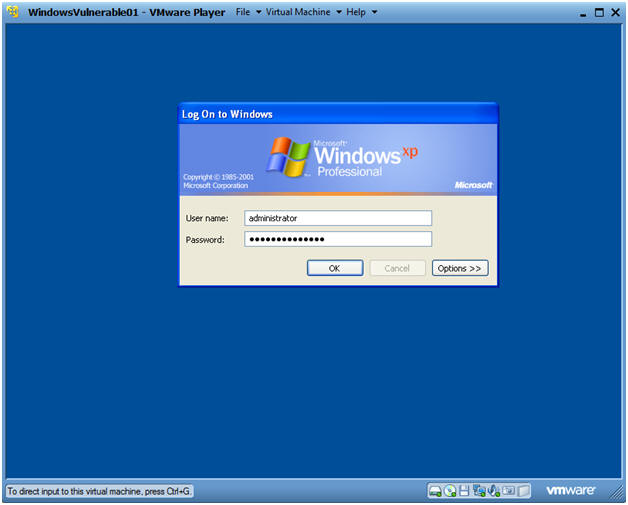
- WindowsVulerable01 Authentication
-
Instructions:
- Login as administrator
-
Instructions:
| Section 2. Let's create some files |
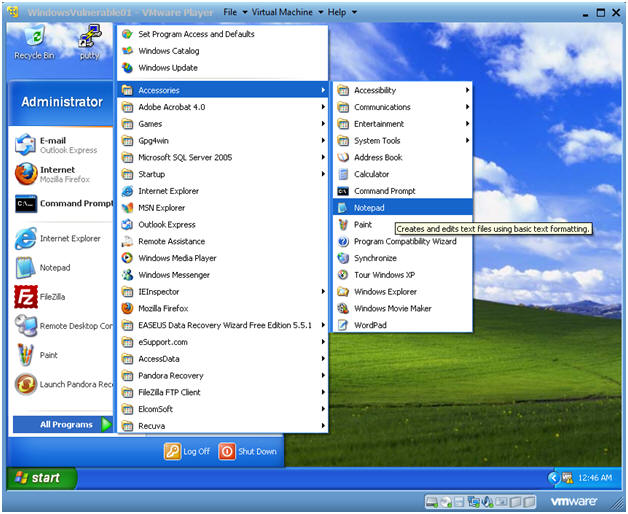
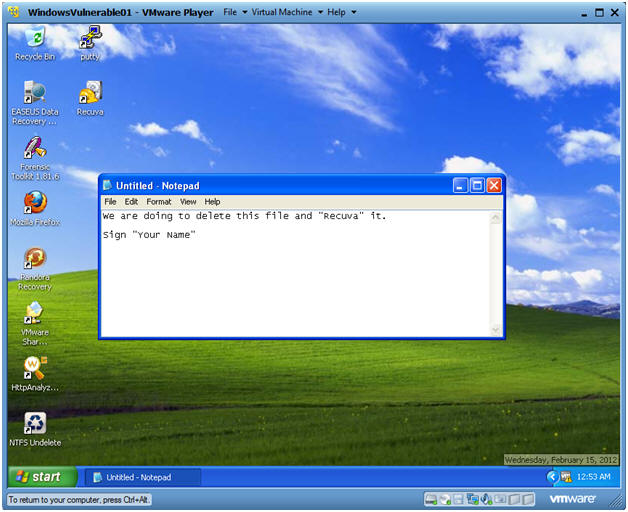
- Open Up Notepad
- Instructions:
- Start --> All Programs --> Accessories --> Notepad
- Instructions:
- Notepad Document Contents
- Instructions:
- Type whatever you want on the first line.
- On the second line, replace the
string "Your Name" with your actually name.
- E.g., Sign "John Gray"
- This will be used for the Proof of Lab
- Instructions:
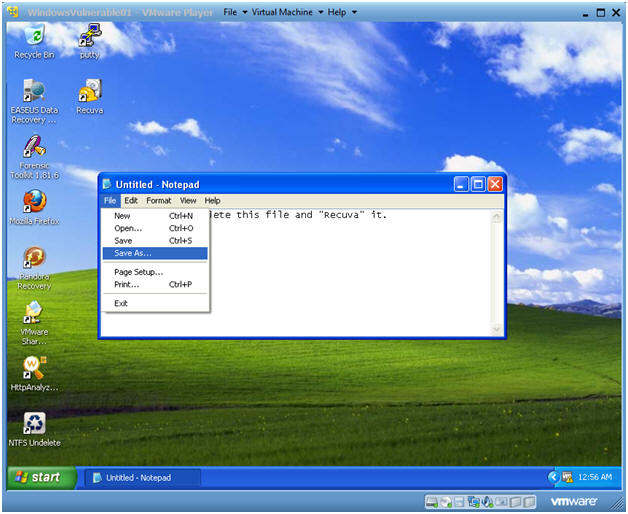
- Save As
- Instructions:
- File --> Save As...
- Instructions:
- Save
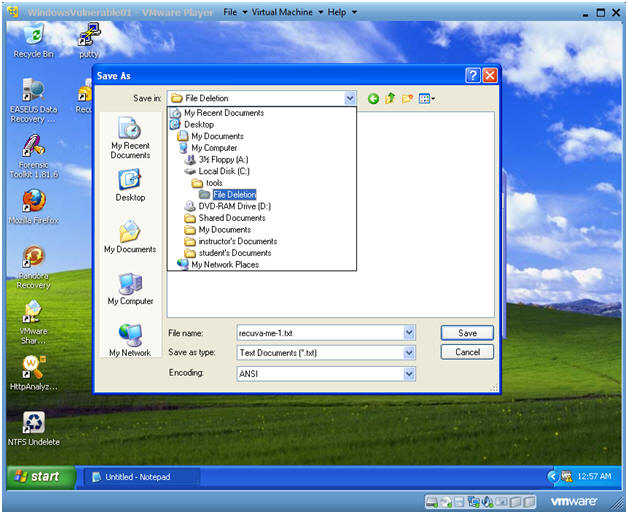
- Instructions:
- Navigate to C:\tools\File
Deletion
- Create this directory if it does not exist.
- Name the file recuva-me-1.txt
- Click on Save.
- Navigate to C:\tools\File
Deletion
- Instructions:
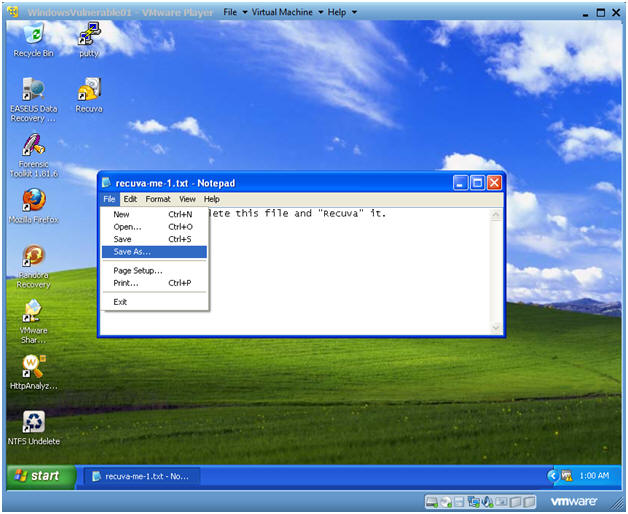
- Let's Save Another Copy of this file
- Instructions:
- File --> Save As...
- Instructions:
- Save As
- Instructions:
- Navigate to C:\tools\File Deletion
- This time name the file
recuva-me-2.txt
- This will give you two recuva-me-*.txt files.
- Click on Save.
- Instructions:

| Section 3. Let's delete the files you just created |
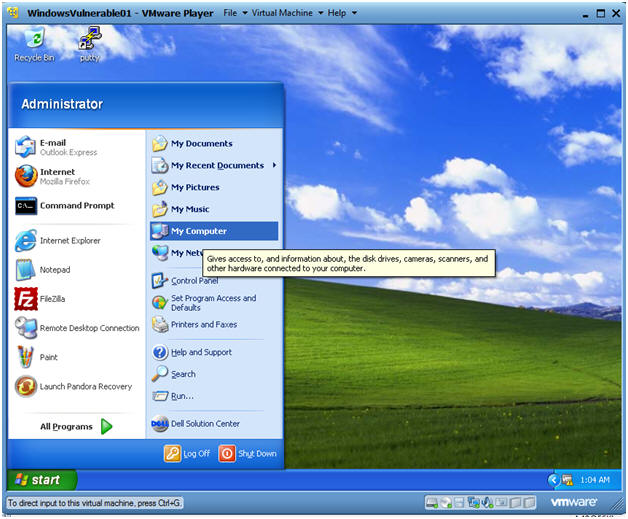
- Open My Computer
- Instructions:
- Start --> My Computer
- Instructions:
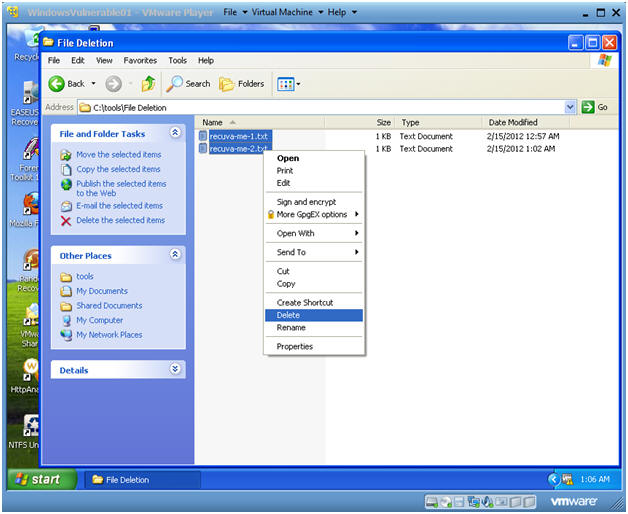
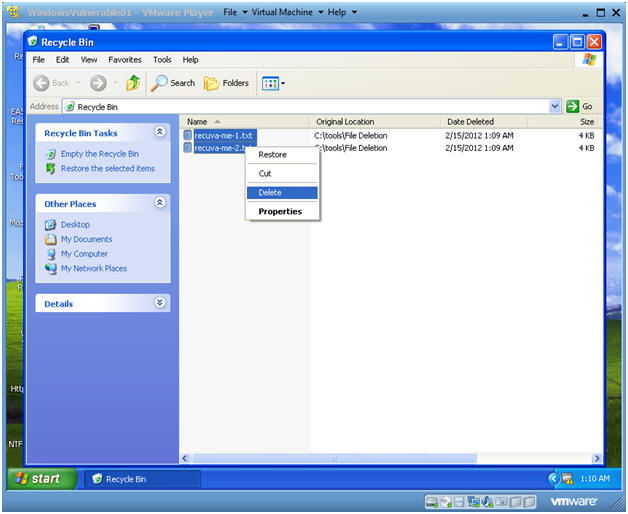
- Delete both recuva-me-*-.txt files
- Instructions:
- Navigate to C:\tools\File Deletion
- Highlight both files
- Right Click
- Click Delete
- Instructions:
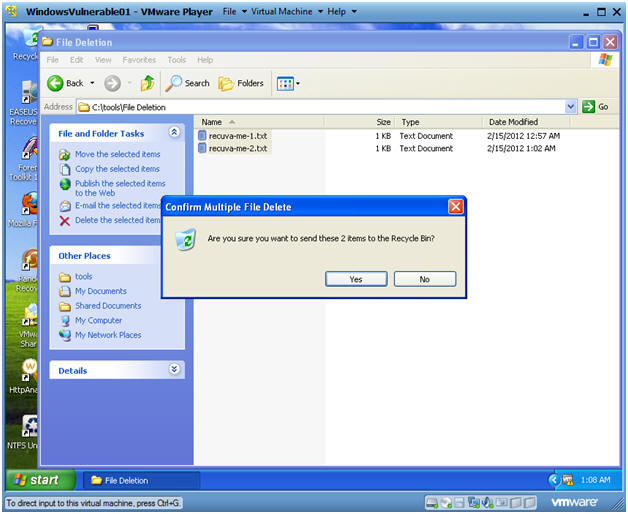
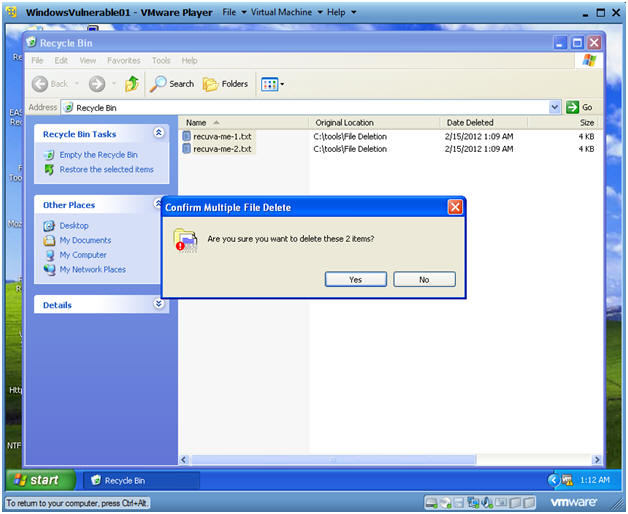
- Confirm Multiple File Deletion
- Instructions:
- Click Yes
- Instructions:
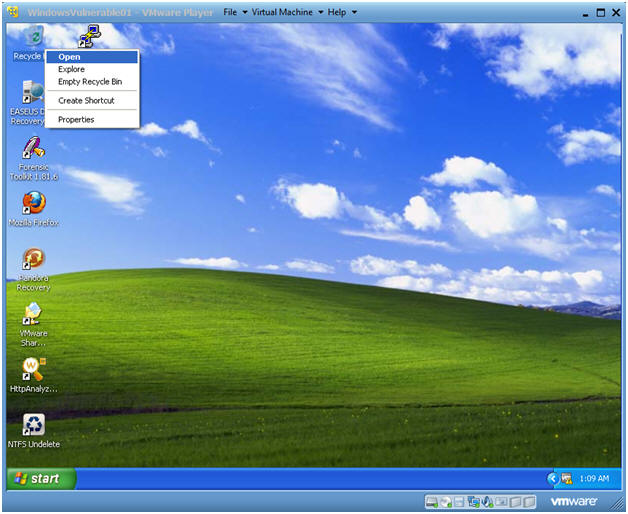
- Open Recycle Bin
- Instructions:
- Right Click on Recycle Bin
- Click Open
- Instructions:
- Delete Files From Recycle Bin
- Instructions:
- Highlight Both Files
- Right Click
- Click Delete
- Instructions:
- Confirm Multiple File Deletion
- Instructions:
- Click Yes.
- Instructions:
| Section 4. Let's Recuva the files you just deleted |
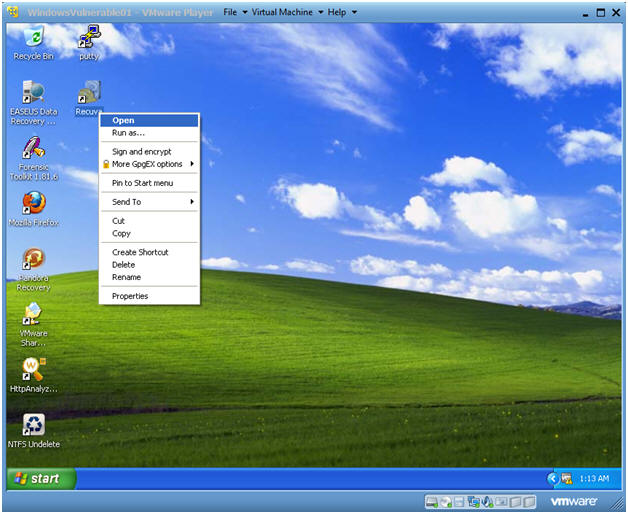
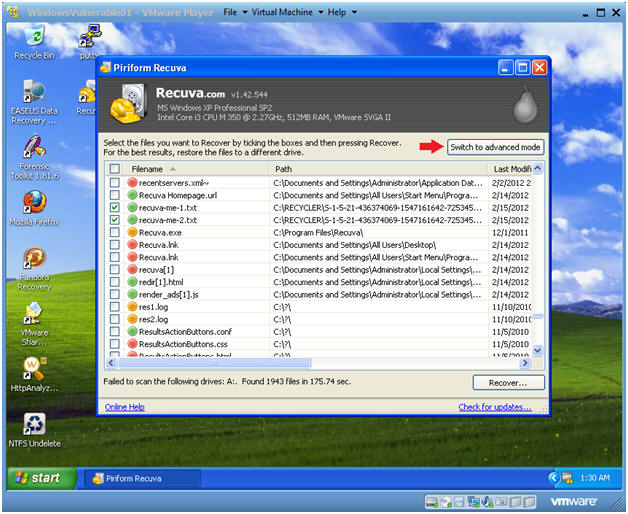
- Run Recuva
- Instructions:
- Right Click on Recuva
- Click Open.
- Instructions:
- Recuva Wizard
- Instructions:
- Click Next
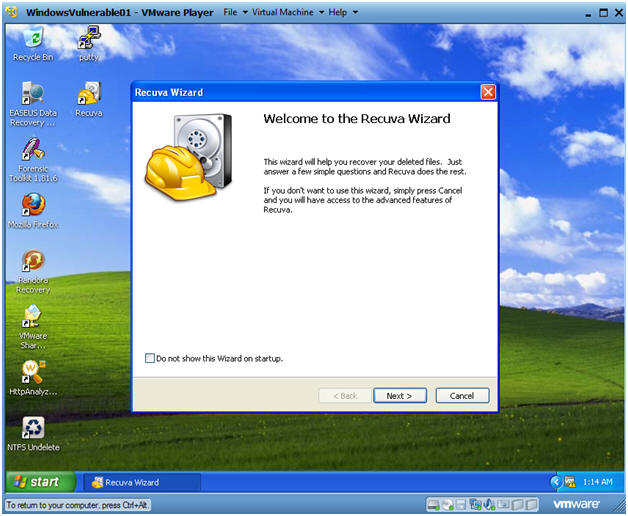 .
.
- Instructions:
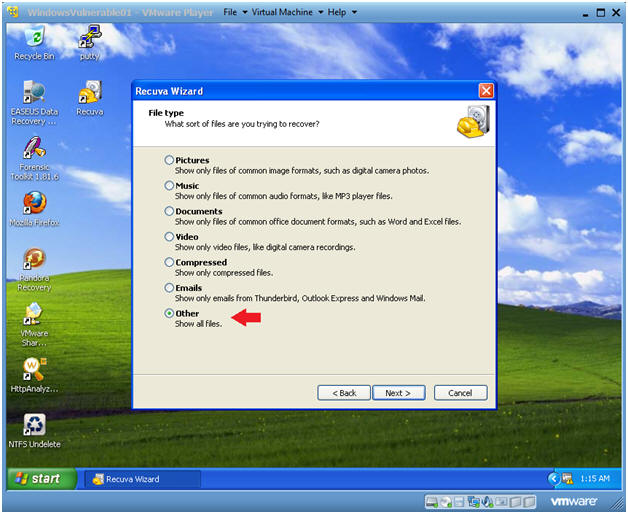
- Recuva Wizard
- Instructions:
- Select the radio button "Other"
- Click Next
- Instructions:
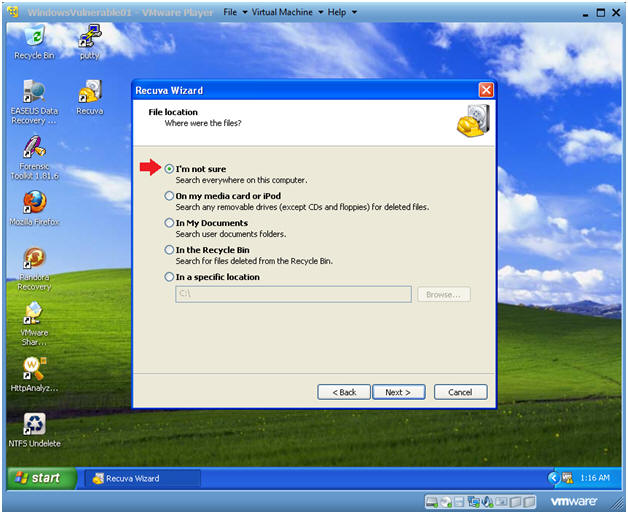
- Recuva Wizard
- Instructions:
- Click the radio button "I'm not sure"
- Click Next
- Instructions:
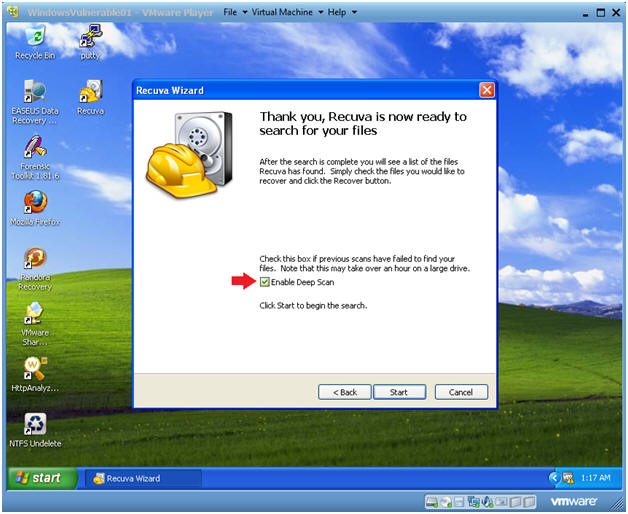
- Recuva Wizard
- Instructions:
- Check "Enable Deep Scan"
- Click Start
- Instructions:
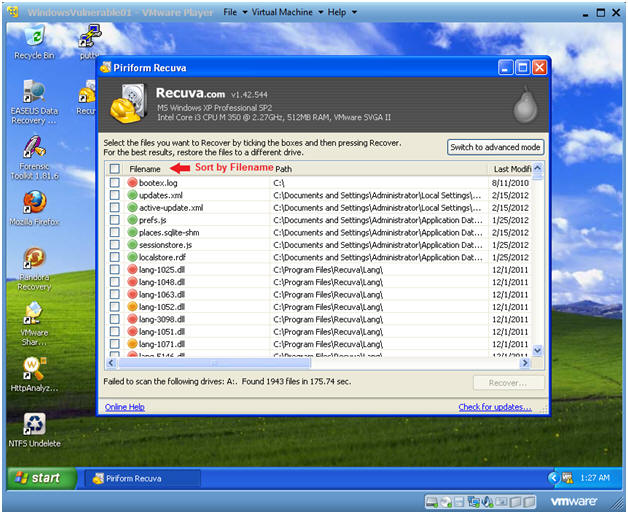
- Sort the files
- Instructions:
- Click on the Filename Column to sort alphabetically by filename.
- Instructions:
- Recover the Files
- Instructions:
- Check both recuva-me-1.txt and recuva-me-2.txt
- Click the Recover.. button.
- Instructions:
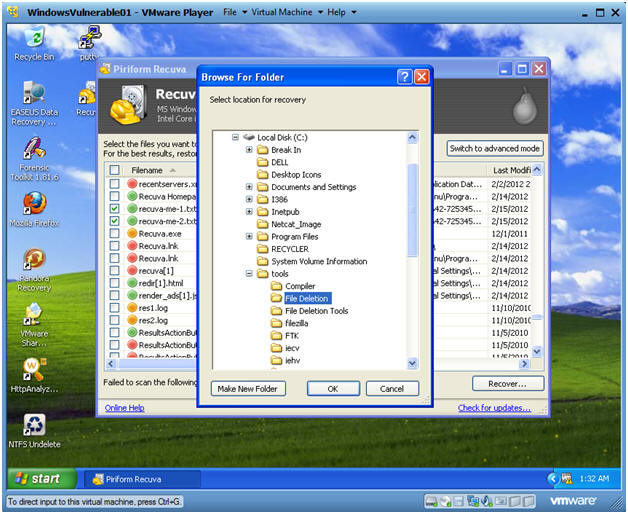
- Browse For Folder
- Instructions:
- Navigate to C:\tools\File Deletion
- Click OK.
- Instructions:
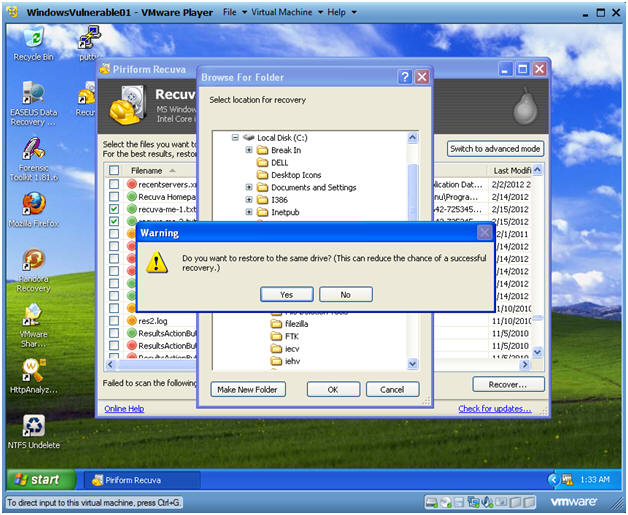
- Restore Warning Message
- Instructions:
- Select Yes
- Instructions:
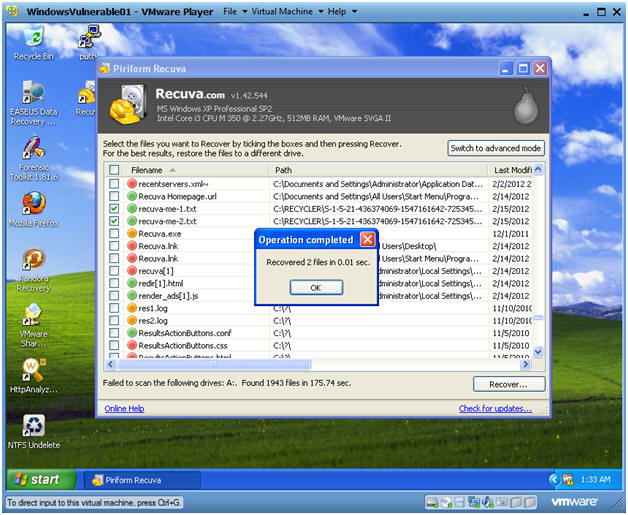
- Operation Completed
- Instructions:
- Click OK
- Instructions:
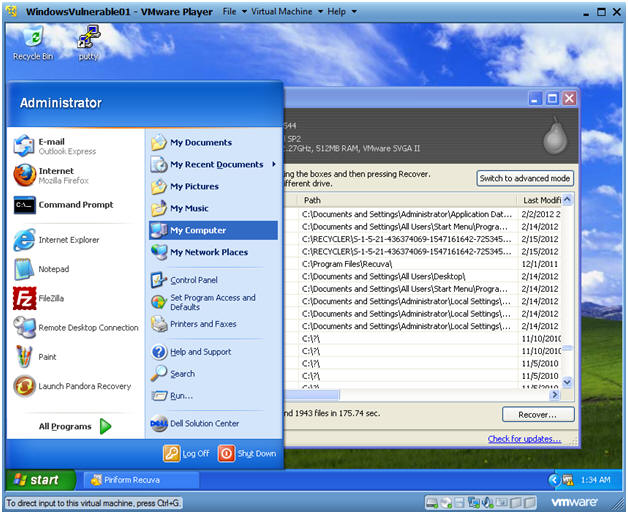
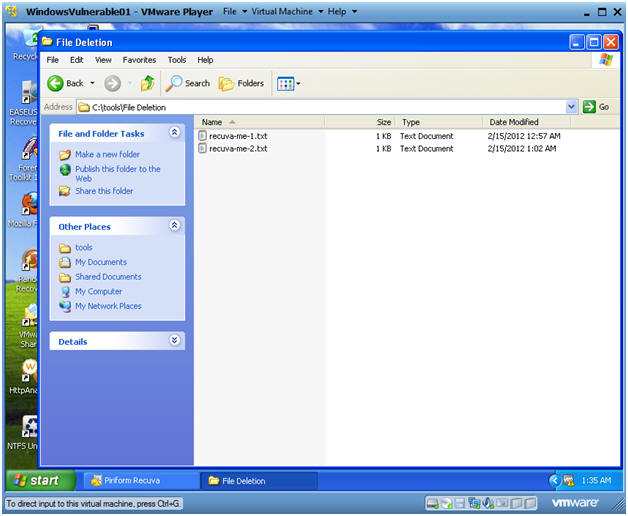
- Open My Computer
- Instructions:
- Start --> My Computer
- Instructions:
- View Files
- Instructions:
- Navigate to C:\tools\File Deletion
- Instructions:

| Section 5. Let's take a look at the "Advanced mode" |
- View Advanced Mode
- Instructions:
- Click the Switch to advanced mode button
- Instructions:
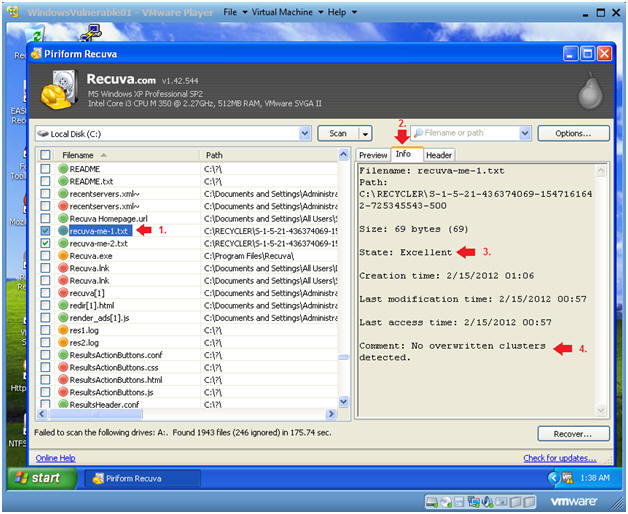
- File Information
- Instructions:
- Check and highlight recover-me-1.txt
- Click the Info Tab
- Notice the state of the file is excellent.
- Notice the comment that no overwritten clusters detected.
- Instructions:
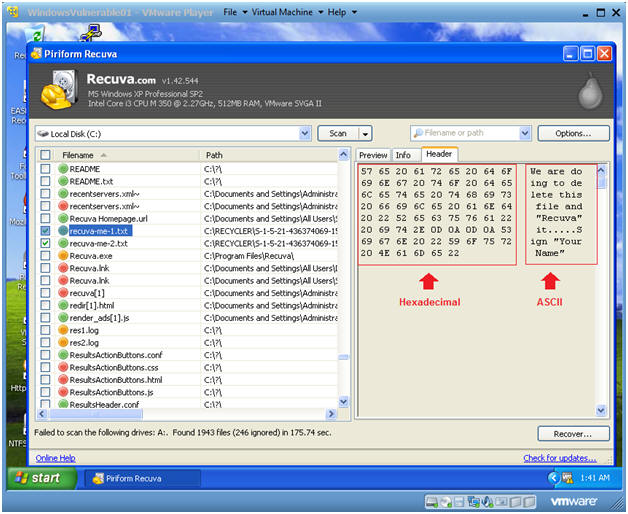
- Header Information
- Instructions:
- Check and highlight recover-me-1.txt
- Click the Header Tab
- Notice that there is both Hexadecimal and ASCII representation for the file contents.
- Instructions:
| Section 6. Proof of Lab |
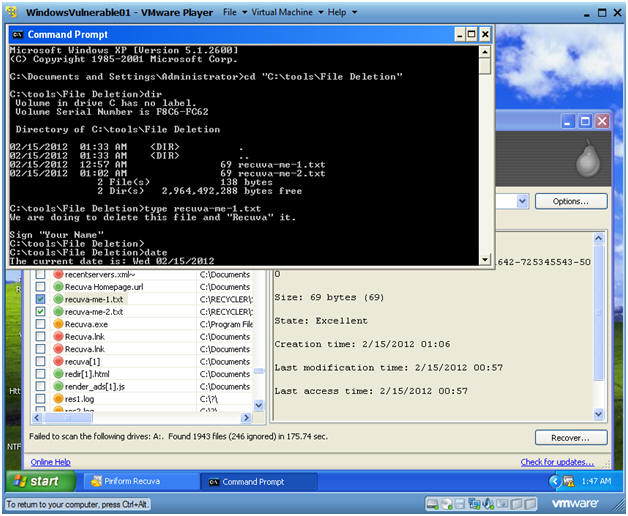
- Open a Command Prompt
-
Instructions:
- Start --> All Programs --> Accessories --> Command Prompt
- dir "C:\tools\File Deletion"
- dir
- type recuva-me-1.txt
- date
- Press <Enter> Twice
-
Proof of Lab
Instructions:
- Do a PrtScn
- Paste into a word document.
- Upload to Moodle.
-
Instructions: